One of the Joys of Maturity |
|
| Affiliated Advertisers |
Clicking through one of our banner ads or some of our text links and making a purchase will produce a small commission for us from the sale. The Old Guy's Garden Record The idea for Senior Gardening came about from frequent postings I made about our garden on another web site I maintain. The idea was to create a place where folks could share garden lore via blogs and forums. While I'm still struggling a bit with the software that will eventually make that possible on senior-gardening.com, I thought I'd at least put up a record of our 2008 garden in part from those postings, loosely edited, from the other site.
The Japanese Long Pickling variety of cucumbers produces abundant crops of long, thin and often straight fruit when trellised. The fruit easily grow to 16-20" long while remaining thin and tender enough for slicing for pickles or table use. There's a story on another page here on Senior Gardening with my Japanese Long Pickling cucumber story.
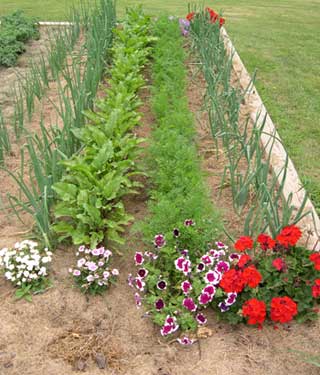
Our sweet onions, Walla Walla's, are about all gone, other than the ones I chopped and froze. They just don't keep very well, but we love the flavor of them, so I grow a row or two each year. Our first harvest of storage onions, this year Pulsar and Milestone, have dried on the porch, been sorted and bagged, and have gone to a cool, dark room in the basement. We have a second planting of them just getting going. I don't really know if they'll beat the frost or not. If they mature in time, they should store well into the winter for us.
I also started some cauliflower and broccoli, although I've not had much luck with fall plantings of either. Maybe starting the plants under the lights in our cool basement will help this time around. It was also time to start my all time favorite pot plant, gloxinias. I started one pot of saved seed that my students had produced by hand pollinating the gloxinia plants in our science classroom years ago. I also started a pot some commercial seed of the Empress variety. I was really happy to see that there is finally a US supplier for the Double Brocade variety of gloxinias again, Pase Seeds. It's my favorite variety of gloxinia to grow under plant lights, but Park Seed quit carrying the variety several years ago.
Getting back to succession in the garden, I find it a bit sad when I clear garden sections, renovate the soil, and then begin replanting.
While the garden takes a good bit of time, it's a satisfying feeling to look out the office window and see the garden and the cornfield next door.
Thermal Shock for Tomatoes!
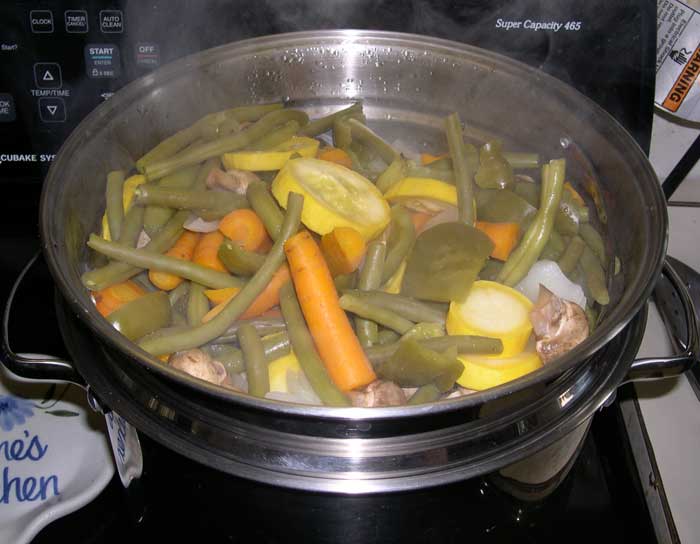
With one of those "Ah hah" smacks to the head, I realized that the fruit was quite warm coming in from the garden and the cold rinse water had thermal shocked it, just like glass will do. Since then I've been careful to let the grape tomatoes sit a bit and cool off before rinsing them. Doing so has reduced split fruit to almost zero. And if you were wondering, yes, the green beans, sugar snap peas, peppers, onions, and carrots from the garden are in the steamer right now, along with some yellow squash and mushrooms from the grocery.
August 20, 2008 - A Very Busy Time (for some...) School is starting around the country, so even though I do substitute teach a day here and there, I'm pretty happy to be retired and have time to putter around our garden (and write about it here). Even so, I've been busy.
The winesap came labeled as a semi-dwarf apple tree. It apparently grew right through its grafts and you can see that I really was brutal pruning it down in height this year. To its right is our third dwarf Granny Smith apple tree. Our first got cut off by a piece of farm equipment. Our second produced fruit its first year...and then languished for three more years before dying. I picked all the blooms off of the new tree this year, but it's still making slow growth.
Our asparagus obviously has responded well to its manuring and mulch. I can't wait until next spring when we'll take our first pickings.
I guess I'm just bragging, but maybe I can get away with saying I'm thankful for the time and the bountiful harvest this year. Our extra garden area in the field next to us is showing good fruit. Now, it's a race to see if there's enough rain and growing season left to ripen the fruit and if we beat the squash vine borers. A friend last week wrote that her zucchini had all wilted overnight. She wondered what had caused it. My guess would be the squash vine borer, which can devastate a plant rather quickly, got her zucchini. Crop rotation helps ward off the pest, but the only sure way is lots of toxic sprays. Having said that, I'm not sprayed our vine crops yet, but watch carefully for the telltale sign of sawdust-like shavings around the stems of the plants. Of course, when you see the shavings, you're already in trouble and need to slit the stem from the hole where the shavings are towards the base of the plant until you find the borer. Removing it and burying the slit stem may save the plant. The best description I've seen for organic control of the pest is on Tom Clothier's Garden Walk and Talk site, Squash Vine Borer Control.
August 21, 2008 - A Few Words About Vining Crops While our Japanese Long Pickling cucumbers on are a trellis in the main garden, crops such as melons and squash can easily take over a garden without careful training of the vines and some occasional pruning. Pruning also leaves open wounds in the vines that allow easy entry for insects and disease, so it's best to just stick with the training, or, if you're lucky, pick a large area for these items.
Since the farmer who rents the ground around us decided to leave the small field east of us fallow last year and this year, he was kind enough to let us have use of part of it for our vining crops. Originally, I'd planned to plant it to sweet corn, but didn't get it in soon enough. I'd also been cautioned by the farmer that the ground was pretty burnt up. Since I'd mowed a section of the field, I decided to put it to melons and such. I just tilled a strip about five feet wide and added copious amounts of lime and fertilizer. Since I hadn't grown any transplants for such crops, I made a quick trip to our garden store and picked up a peat pot of watermelon, two of cantaloupe, and a butternut squash. Each large peat pot had about three plants in it. I added a bit more lime and triple 12 fertilizer in a large hole I dug for each plant, poured in a five gallon bucket of water with some starter liquid fertilizer, and set the plants in. I immediately added some dried grass clippings around each plant. Each time I mowed I'd enlarge the area of grass clippings to hold down weeds. I also cheated a bit and sprayed some of the surrounding area with Roundup Once the plants became established, it's been a race to keep the mowed area mulched with grass clippings to stay ahead of the ever expanding vines. I left about ten feet between each of the plants, but you can see that they've easily filled the area and are now overlapping. All of this tender, loving care for this plot may seem a bit excessive, but I plan to use the area next year for sweet corn (if they let it lie fallow again). We are finally getting some much needed rain on the senior garden today. I hurried out onto our porches early this morning to take down some of our hanging plants that are sheltered from the rain and set them on the steps to soak up the precious water.
Gloxinias are related to african violets and are just as easy to grow. I've started my gloxinias for years in the old bottoms of soft drink bottles. Bottlers don't use the reinforcing bottoms anymore, but I've saved several just for this purpose. I use sterilized potting soil with a dusting of peat moss across the top of the "pot." Before seeding, I set the pot in a dish and add very hot water and let the soil soak it up.
It will be a seven months or longer before the plants flower, but the payoff is well worth the effort. Below is a collection of gloxinias that I took into my classroom (in 1996!).
We had BLTs for supper last night, our first with real tomatoes from the garden. I really think my wife and I could have gotten by with BLTs, holding the bacon and lettuce. There's nothing quite like fresh tomatoes from the garden.
We usually plant some determinate varieties (Rutgers, Moira) as bedding tomatoes and have some Better Boy or similar varieties caged. I had germination problems this year with some old seed I thought I'd kept frozen properly, so we ended up going with what we had plus one purchased Better Boy plant that is caged in our melon area in a separate garden section.
Years ago, I came across something about using concrete reinforcing wire to make large, tall tomato cages. Once I tried it, I never went back to any other way of caging my tomatoes. The wire usually comes in either 25 or 50 foot rolls, and for most gardeners, the 25' roll will make enough cages. If you shop for this item, be sure to get it with 6"x6" openings so that you can reach through to harvest your fruit. I'm on my third set of cages made from the wire (called welded wire in some stores), as they do rust. This time around, I also picked up a few cans of rustoleum paint and painted the cages green when I was putting them together. It does seem to make them last a bit longer, although the welds eventually break. The cages are tall enough to support indeterminate varieties, although from the photos below you can see that the plants eventually swallow up the cages and have to be pruned a bit.
The drawbacks to cages made from concrete reinforcing wire are that they take up a lot of room to store over the winter, and they do rust out after several seasons. I can't help you with the storage issue, but a bit of Rust-Oleum
From the
at Senior Gardening |


 We have great green peppers and onions this year that go great in those steamed or grilled vegetables. I planted a mix of green, yellow, and red peppers, but we really haven't had any turn color this year. I guess we pick and eat them up a bit too soon before the yellow and red ones fully ripen!
 Oh, yeah, I titled this section succession. Succession in the garden is one of those things I really have trouble doing. I get busy (and lazy) taking care of things outside and forget to get plants started inside for fall harvest. This year I was late again, but was gratified this morning to see that some of our lettuce had germinated.


 We have a really nice standard winesap apple tree that produces great amounts of fruit when it's kept sprayed properly. I've done better this year with the spray, but we still have a lot of fruit that shows insect damage. We'll keep the best apples for fresh eating, but will have far more with a bad spot or two that can be cleaned up for applesauce.


 Gloxinia seed is dustlike. The hardest part of seeding them is to try to distribute them evenly across the pot.
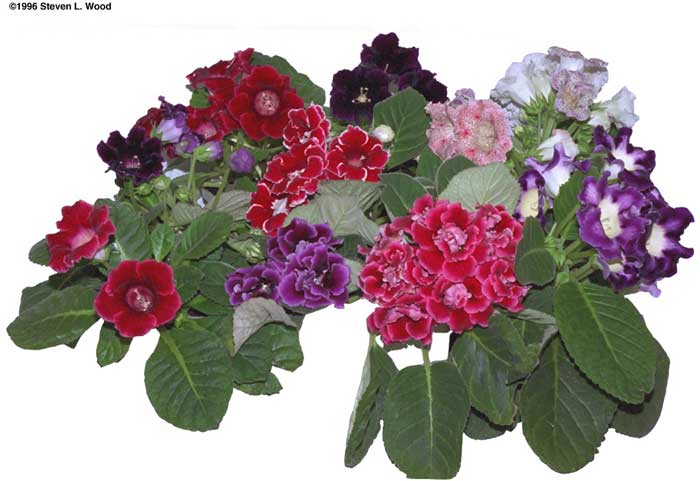
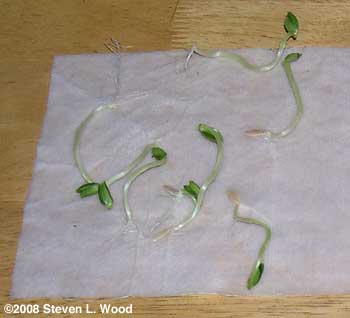 I did a quick germination test on the seed from the first few JLP cucumbers I'd harvested and saved seed from. I'd actually forgotten about the germination test, but was thrilled today to see that I had viable seed. To do the test, I just counted out ten seeds onto a paper towel. I folded the paper towel over the seeds, wet it, and put it in a zip lock freezer bag. Then I set it in a warm space and forgot about it for a week. The warm space was on top of a shoplight, so the seeds picked up some reflected light and show some good green on the shoots. From what I could count, I got eight out of ten seeds to germinate. I'll gladly take 80% germination, especially when this spring I thought I'd lost the variety!


| Affiliated Advertisers |
©2008 Senior-Gardening.com