One of the Joys of Maturity |
|
| Affiliated Advertisers |
Clicking through one of our banner ads or some of our text links and making a purchase will produce a small commission for us from the sale. A Simple Cold Frame A simple cold frame is a great tool to extend the gardening season. In the spring such a frame can give tender young seedlings a head start outdoors until the weather is ready for transplanting into the garden. In the fall a cold frame can protect low-growing plants such as lettuce well beyond the first frost ends the regular gardening season.
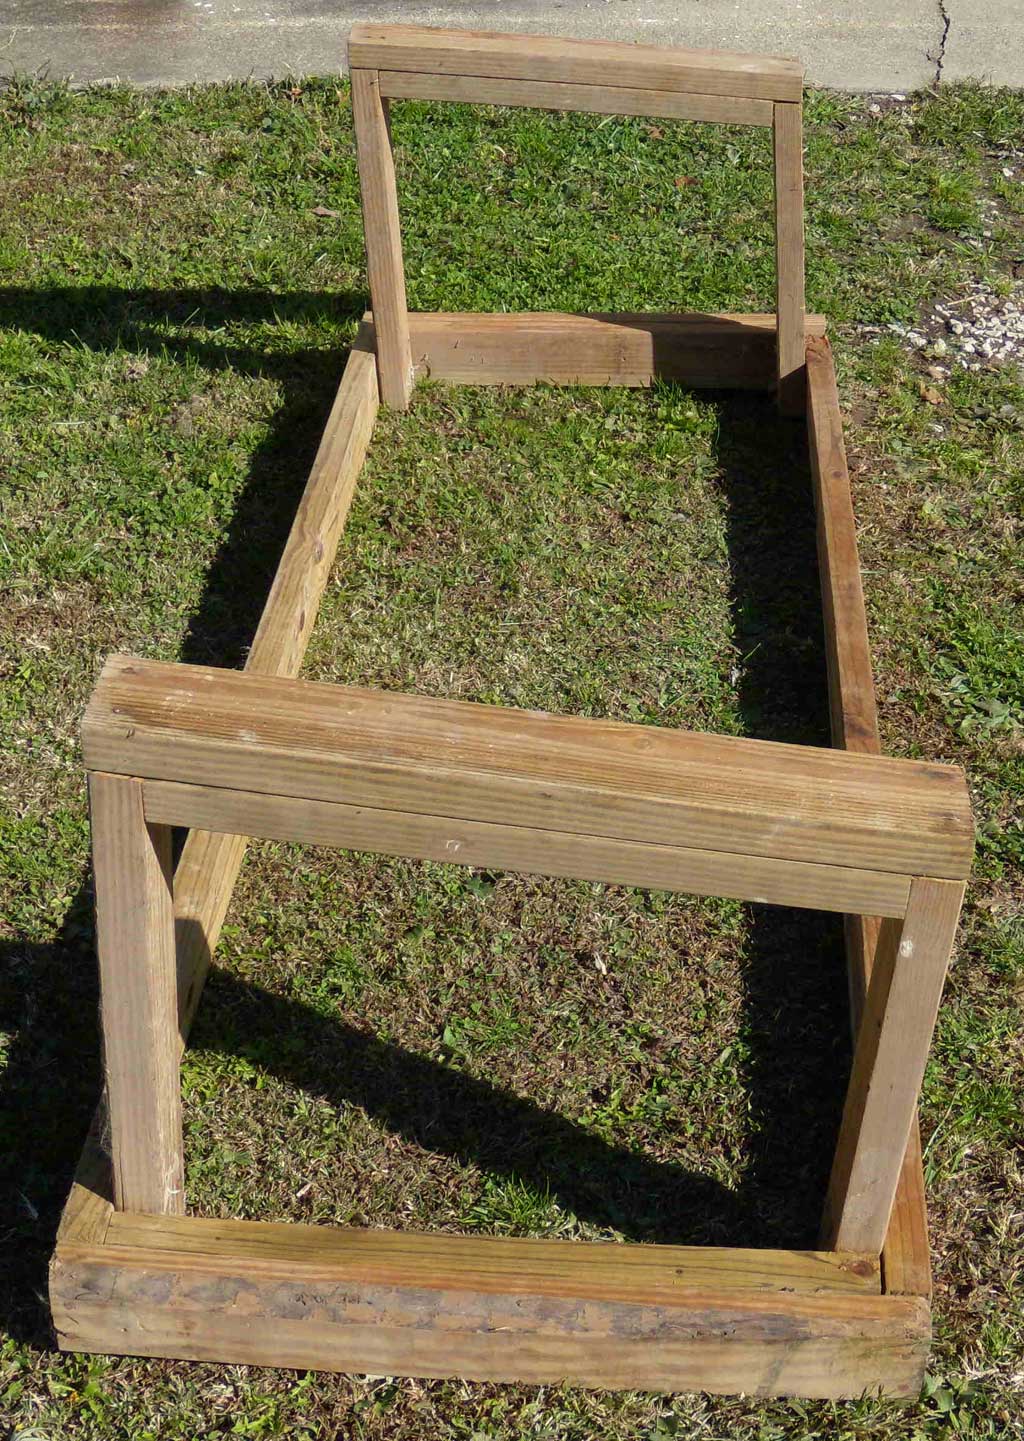
I built my first cold frames years ago when we were farming (and gardening). I built them large and sturdy, but they were almost too heavy to carry from place to place. The cold frame shown above is a smaller one I put together several years ago based on my experiences on the farm. It measures just 3'x6'x24". The ones I made on the farm were 12' long and made with 2x6's instead of 2x4's. But this time around, I did use pressure treated (pt) lumber to control decay. Here are my plans. Admittedly, they are a bit rough, but should give you the idea.
Base - Top View
Side View *Note: I used 24" uprights on one side and 23 1/2" on the other side to give a bit of slope to the top. There's also a slight angle on the cut on the tops. Since the plastic sags under the weight of rain, it really only helps minimally for shedding rain.
End View Wherever I could, I doubled the lumber to reinforce the frame.
Once you have your frame constructed, it's just a matter of stapling heavy (6 mil), clear plastic over it to finish it. You may wish to add carpet scraps at the top corners, as it only takes one sharp edge to tear the plastic.
Having gone through all of this feature, and considering the cost of lumber, you might just want to order a commercial cold frame. From the
at Senior Gardening
|


| Affiliated Advertisers |
©2008 Senior-Gardening.com