![]()
One of the Joys of Maturity
One of the Joys of Maturity |
|
| Affiliated Advertisers |
Clicking through one of our banner ads or some of our text links and making a purchase will produce a small commission for us from the sale. Growing Great Broccoli and Cauliflower Growing great broccoli in our climate region, along with most of the other brassica or cole crops, is just a matter of working with the weather to produce crops before and after the real heat of summer. Here in west central Indiana, we're able to grow great spring and fall crops. Broccoli and cauliflower are heavy feeders, but don't really require ones very best garden soil. While we grow delicious brassicas in our raised beds with their improved soil, we've also grown pretty good broccoli in our East Garden with its heavy clay soil. The trick with brassicas seems to be improving the soil around each broccoli plant a bit, feeding it well, keeping bugs off the plants, and beating hot weather. Transplants
We grow our spring brassicas from transplants that we start in February. Actually, we now grow all of our own transplants. We start more transplants inside during the heat of summer in June or July for our fall crop. While many vendors sell rather expensive plant racks and lights While the photo at right shows a box for a plant and aquarium fluorescent tube, we generally use 5600° K and/or 6500° K fluorescent tubes for our plant lights, as they approximate daylight a bit better and are far cheaper than the plant fluorescent tubes. A major advantage in growing ones own transplants is being able to choose from the many varieties offered by reputable seed houses, rather than just one or two offered by a garden center or other outlet. A second advantage is being able to time ones transplants to be about six to eight weeks old at planting time, an ideal growth stage for transplanting brassicas. One may even save some money by growing their own transplants over purchasing them, although with the cost of seed, potting mix, inserts and trays, and the lighting equipment, I'm not sure. Starting broccoli, cauliflower, cabbage, and in our case, occasionally Brussels sprouts and kohlrabi, is pretty easy. Brassica seed germinates well in the dark without any bottom heat.
I usually use a slotted seed flat for drainage directly under the inserts with a solid flat (no holes in the bottom) underneath the slotted tray to catch runoff. The second flat also adds a little strength to the combined flats, although in recent years I've also begun using a slotted tray with a heavy-duty Perma-Nest We wash and reuse our seed flats and inserts year after year until they split, crack, or get stepped on.
Since brassicas transplant quite well, one could also start their broccoli (cauliflower, etc.) with a dozen or so seeds in a single pot, transplanting the seedlings when they've emerged and put on their first true leaves into larger, individual pots or four- or sixpacks. As long as the plant container has enough room for root growth and good drainage, the plants don't seem to mind what they're in. I fill the inserts with sterile potting mix, often on our back porch on a nice winter day, and firm the soil with my hand. I water the potting mix with warm water, as the peat moss in our starting mix doesn't readily absorb cold water. Sometimes I water the whole flat before seeding and split away the bottom solid tray for a time to let excess water drain. At other times, I seed into dry soil, pull the slotted flat up, and bottom water the trays, later draining any excess water. Either way, I have to warm the water used on our stove, as our hot water is soft water that contains some water softener salt. The small amount of salt in soft water probably wouldn't hurt the plants, but it's one more thing I can do to ensure good germination and growth.
The planted flat of brassicas is covered with a clear humidity dome to hold in moisture and goes over a soil heating mat set to 70-75°F. While light isn't needed to germinate brassicas, I want the plants to begin getting light as soon as they emerge (four to six days, usually). Once our transplants have pretty well all germinated, we remove the humidome and quickly get our plant lights within a few inches of the tops of the plants. Our brassicas are often a bit spindly at first, and sometimes I have to carefully uproot them, moving them deeper into the soil without injuring the plants to correct the initial legginess.
We generally (bottom) water our plants about once a week after they germinate with about a half gallon of water per planted seed flat. In three to four weeks, the plants are big enough to be moved outside under our cold frame. Note that I often start our cauliflower two to three weeks before our broccoli to accommodate its generally longer days-to-maturity. Hardening Off At four to six weeks old, brassicas may appear to be big enough to go into the garden, but they're not quite ready yet. The plants have to gradually become acclimated to the harsher growing conditions of the great outdoors. Putting them under a cold frame keeps the plants a bit warmer (a lot warmer with the top down) and protects them from the full sun, UV radiation, and wind. Opening the cold frame for gradually longer periods each day allows the plants to toughen their stems. Gardeners lacking a cold frame can harden off plants in sheltered areas of a porch or similar area.
After a week to ten days, if I'm not ready to transplant our brassicas, they go on the edge of our back porch, fully exposed to the sun, wind, and rain...and do just fine there. I do have to remember to water them regularly. Warning: Leaving plants under a closed cold frame on bright sunny days can cook ones transplants. A good cold frame will trap enough heat to shoot interior temperatures well over a hundred degrees on such days. Been there, done that, and I didn't even get a T-shirt, but I did kill a lot of transplants! Preparing the Bed
An inexpensive soil test meter We save ourselves a lot of grief by fall tilling our garden plots, especially those that will be used early in the spring for early peas and brassicas. We still find spring tilling necessary some years, but get away with just a good hoeing and raking other times. Transplanting Broccoli and cauliflower get bitter and go to seed in the heat of summer here, so our brassicas are always the first plants we move into our garden. Since brassicas can withstand a light frost, we usually get our broccoli, cauliflower, and cabbage transplanted in early April, although they've gone in as early as March 24 and as late as May 25 in the spring. But over the last few years, we've found planting during the first week of April to be about the right time to transplant in our area.
When I grow broccoli in our East Garden plot, I use a shovel to make planting holes. I mix in compost, peat moss, fertilizer, and lime. Doing so creates one foot wide and deep areas of good soil in the lousy soil of that plot.
Once the starter solution has soaked into the soil a bit, I backfill the hole with the soil I dug earlier and plop a cutworm collar into the soil and water the cup. Since we have problems with cutworms in our garden plots, I use old, waxed paper coffee cups with the bottoms cut out as cutworm collars. Left in place for a week to ten days at about an inch above the soil line, the cups prevent cutworms from attacking the still tender brassica stems. Then I squish my transplant into the cup, backfilling with a bit more soil around the base of the broccoli stem. I use my fingers to firm up the soil and again water generously with starter solution.
When I can, I try to space our cauliflower and cabbage a little more in the row, as those plants tend to spread more than broccoli. But more often than not, I'm cramped for space and space them about the same as the broccoli. An optional, but for us, sometimes necessary, step in the planting is to spread some homemade smelly, nasty tasting stuff Care Through the Growing Season
If I haven't already, I begin mulching our brassicas with grass clipping mulch. It holds in soil moisture and mostly prevents weeds from germinating under the plants and in the rows between them. The mulch breaks down in time and has to be replenished at least once before harvest. But as the mulch breaks down, it also adds nutrients to the soil. With mulch, we don't have to water our brassicas once they get established. Depending on how fertile ones soil is, you might be able to get away without any additional fertilizer until harvest. But brassicas are heavy feeders, so pulling back the mulch and working in a bit of balanced fertilizer and/or compost around the base of the plants can give them a boost. Insect Problems Once you get past the danger of cutworms at planting, there is another major insect problem with growing brassicas. The worms from cabbage loopers or small white cabbage moths can make brassica leaves look like someone blasted them with a shotgun while also seriously damaging the heads. The moths lay their eggs on brassicas and when they hatch out, the worms have a ravenous appetite. The safest, best prevention for such insects are products such as Thuricide We spray with Thuricide throughout the gardening season to keep our broccoli, cauliflower, cabbage, and kale fairly worm free. BT is considered safe to people and nontarget species such as wildlife. And it can be used on a variety of food and other crops. We've had some success using Thuricide to prevent bag worms from attacking our Blue Spruce trees. As with all controls, BT sometimes fails. When that happens, usually about once a growing season with our kale, I have to break out some stronger stuff to vanquish the nasty worms. Critter Damage Both rabbits and deer can devastate a planting of brassicas. Rabbits will eat new transplants right off to the ground. Deer wait a little longer, biting the tops off of broccoli plants when the plants are about a foot tall. As mentioned earlier, smelly, bad tasting stuff is often enough to discourage critters. Even with the best preventions, though, you sometimes lose. Several years ago, rabbits ate every one of our fall brassica transplants right off to the ground. Only a couple of the plants recovered and regrew from the roots, although we still got a small crop of broccoli by direct seeding. Buttoning is the failure of broccoli plants to produce heads or producing small heads prematurely. We'd seen a bit of buttoning every now and then in a plant or two in our garden. In the spring of 2016, seven of the ten broccoli transplants I'd set out buttoned! Stress is listed as the cause of buttoning on most sites, with cold temperatures, poor soil fertility, root bound transplants, dry soil conditions, and excessive salt in the soil all being mentioned. Plants that have buttoned can be left in the ground to possibly produce sideshoots later on and may even put on some small but usable heads. |
Harvest
We cut our broccoli when the heads are still tight and a nice blue-green color. Waiting until the buds begin to open into yellow flowers or the head browns a bit ruins the broccoli. We take our cauliflower heads when they're just a little bigger than a softball. Once the leaf wrap around the cauliflower begins to spread, it's time to cut it, as sunlight will cause the heads to yellow and turn bitter. Since we grow varieties that have been standardized for a concentrated commercial harvest, our broccoli tends to come in all at one time. Since broccoli freezes well, that's not a real problem.
Varieties
We're not exactly on a hot streak with our brassica varieties, as several of our favorites have disappeared from the market in the last few years. Having said that, our longtime favorite broccoli was Premium Crop. I still have a precious packet of seed of the variety in the freezer. We also have had good luck with the Castle Dome variety. The open pollinated Goliath variety from Stokes Seeds also produced large heads for us, again with a concentrated set, something not always wanted by home gardeners. Stokes dropped the variety, so I began trying to save seed from it in 2019. Our first try was a bust, but we got a nice crop of Goliath seed in 2020. Other seed houses carry broccoli seed named Goliath or Green Goliath, but they never did as well for us as the Stoke's strain of Goliath. Some heirloom varieties such as De Cicco produce smaller main heads spread over a longer period of time, followed by many sideshoots. We've not had much luck growing De Cicco, though. Our favorite cauliflower is an open pollinated variety, Amazing, that self-wraps its leaves to keep heads from yellowing. Dedicated seed savers should keep that variety around forever. Fremont is a good producing hybrid if you can find seed for it. It has been replaced in some seed catalogs by the Bishop variety. And we "discovered" the old Violet of Sicily variety years ago that we really like. It produces medium sized heads that turn reddish at maturity. Note that Violet of Sicily seems to be available from some vendors under similar names (Purple of Sicily), but you'll know it by its appearance in pictures in seed catalogs. Some cauliflower varieties aren't self-wrapping or self-blanching. To keep heads from yellowing, one needs to wrap leaves over the head of the cauliflower fairly early on (when the head measures about 2-3 inches across). One can hold the leaves in place with a clothes pin, rubber band, twist tie, or what have you. I've tried such varieties a few times and would definitely recommend using a self-blanching variety! Other Brassicas We don't grow a lot of cabbage in the Senior Garden, but what we do grow is usually Alcosa savoy, Super Red 80, Tendersweet, and on occasion, the tried and true open pollinated Early Jersey Wakefield Our favorite kale is Vates Possibly because it's not one of my favorite vegetables, we don't grow a lot of Brussels sprouts. Our current seeds are the Dagan and Hestia varieties. Fall Brassicas Other than the timing, we grow our fall brassicas just as we do our spring broccoli and cauliflower. We start our transplants inside in late June while we're still feasting on spring broccoli and cauliflower. After hardening off, the plants go into the garden in late July or early August. (Note that I do rototill the bed before transplanting, adding a good bit of compost and/or fertilizer.) We experience a lot more rabbit damage with our fall brassicas just after transplanting, though.
We also have to water our fall transplants a few times to get them established mid-summer, as the soil in our raised beds gets pretty dry by July. Getting grass clipping mulch around the transplants as soon as possible reduces the need for watering. When mulching right after transplanting, care must be taken to not let the mulch form a ramp up to the tops of the cutworm collar cups, as cutworms will gladly march up it and consume your precious transplants. With fall cauliflower, it's especially important to allow at least two to three weeks more than its days-to-maturity before the first expected frost. Fall planted crops grow more slowly in the shorter days of fall. We've flat out missed on this one several times, getting good fall broccoli, only to lose our fall cauliflower to a hard freeze a week or so later.
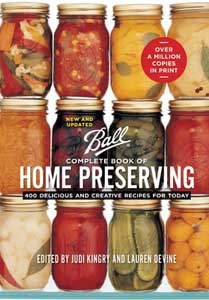
With the cover of our old Blue Book tattered and falling off, my lovely wife got me the new Ball Complete Book of Home Preserving for Christmas 2021. After cutting broccoli or cauliflower and washing and stripping off the leaves, we soak it in salt water for half an hour to kill off any worms that have survived our efforts with BT. Then we cut the broccoli or cauliflower into florets or individual mini-heads, leaving a bit of head with several inches of stem to be frozen. Even with our best efforts at insect control, we often find a dead worm or two to be disposed of hidden in the florets.
Once the broccoli or cauliflower has frozen on the cookie sheet, I put the florets into gallon Ziplock Freezer Bags Most of our kale gets used fresh or in our Portuguese Kale Soup. When we're able to freeze some, it gets soaked, stemmed, inspected for worms, boiled, and frozen with liquid in pint freezer bags.
Having written all this stuff about freezing, I need to add that frozen brassicas are a poor second best to fresh. We love steamed broccoli, cauliflower, and carrots with garlic, seasoned salt, and lots of butter. But there's nothing quite like fresh broccoli, cauliflower, or kale. (Note that I'm writing this update in the dead of winter, just after we used up the last of our frozen kale!) Help with Timing Crops Several years ago, the folks at Johnny's Selected Seeds began publishing a page of Interactive [Garden] Tools. I find their online Seed Starting Date Calculator and their Fall Harvest Planting Calculator spreadsheet (589K download) especially helpful in timing planting or starting transplants. They're free and easy to use. Final Thoughts Broccoli may have been the first garden crop I really mastered growing well. It's either that easy, or I just got very lucky over forty years ago. I didn't grow good cauliflower until about ten years ago, helped along greatly by the advent of self-wrapping varieties. And "mastered" may be a relative term, especially when you see an open garden plot where rabbits have eaten every transplant you painstakingly put out. Or, when you get greedy and decide to let a gorgeous row of broccoli plants go a few more days to reach soccer ball sized heads...and it all goes to seed the next day. Gardening for me has been a lifelong learning process. It began as a five-year-old following my grandfather around his one acre garden in then rural Indianapolis (really in Nora, for folks familiar with Indy). I began my own garden plots in our back yard before my teenage years, growing strawberries and sweet corn. When we had our first house with a yard, our landlord and my former foreman on the loading docks loaned me his rototiller and his Burpee Seed Catalog. I've been lost forever after in the wonder of gardening. Having said all of that, just because a retired, old guy has a web site on gardening doesn't mean he knows jack about it. I have absolutely no degrees in agriculture or horticulture or any other special training. At 75 years old, I'm still happily learning, so there could be tragic errors in the information above. It's just what has worked for us.
From Steve Wood, the at Senior Gardening |
| Affiliated Advertisers |
last updated 2/22/2024
©2015 Senior-gardening.com


 Let me insert a commercial note here. I use a