![]()
One of the Joys of Maturity
One of the Joys of Maturity |
|
| Affiliated Advertisers |
Clicking through one of our banner ads or some of our text links and making a purchase will produce a small commission for us from the sale. Another Garden Delicacy: Homegrown Peas
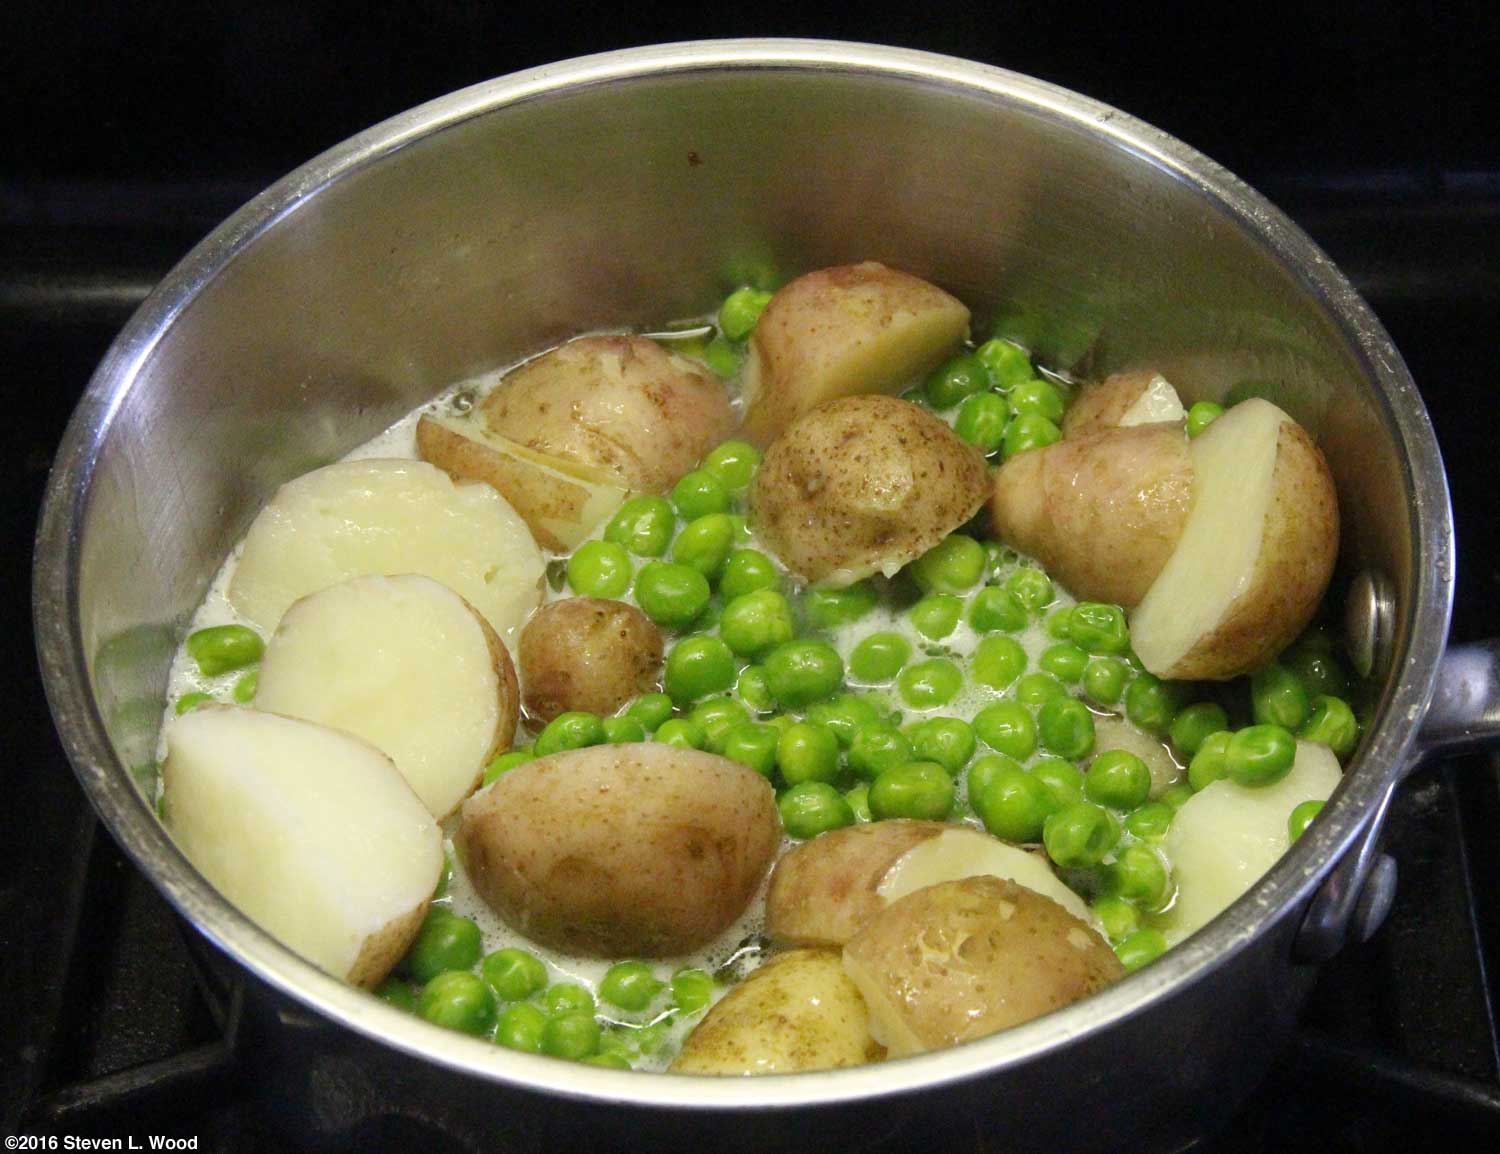
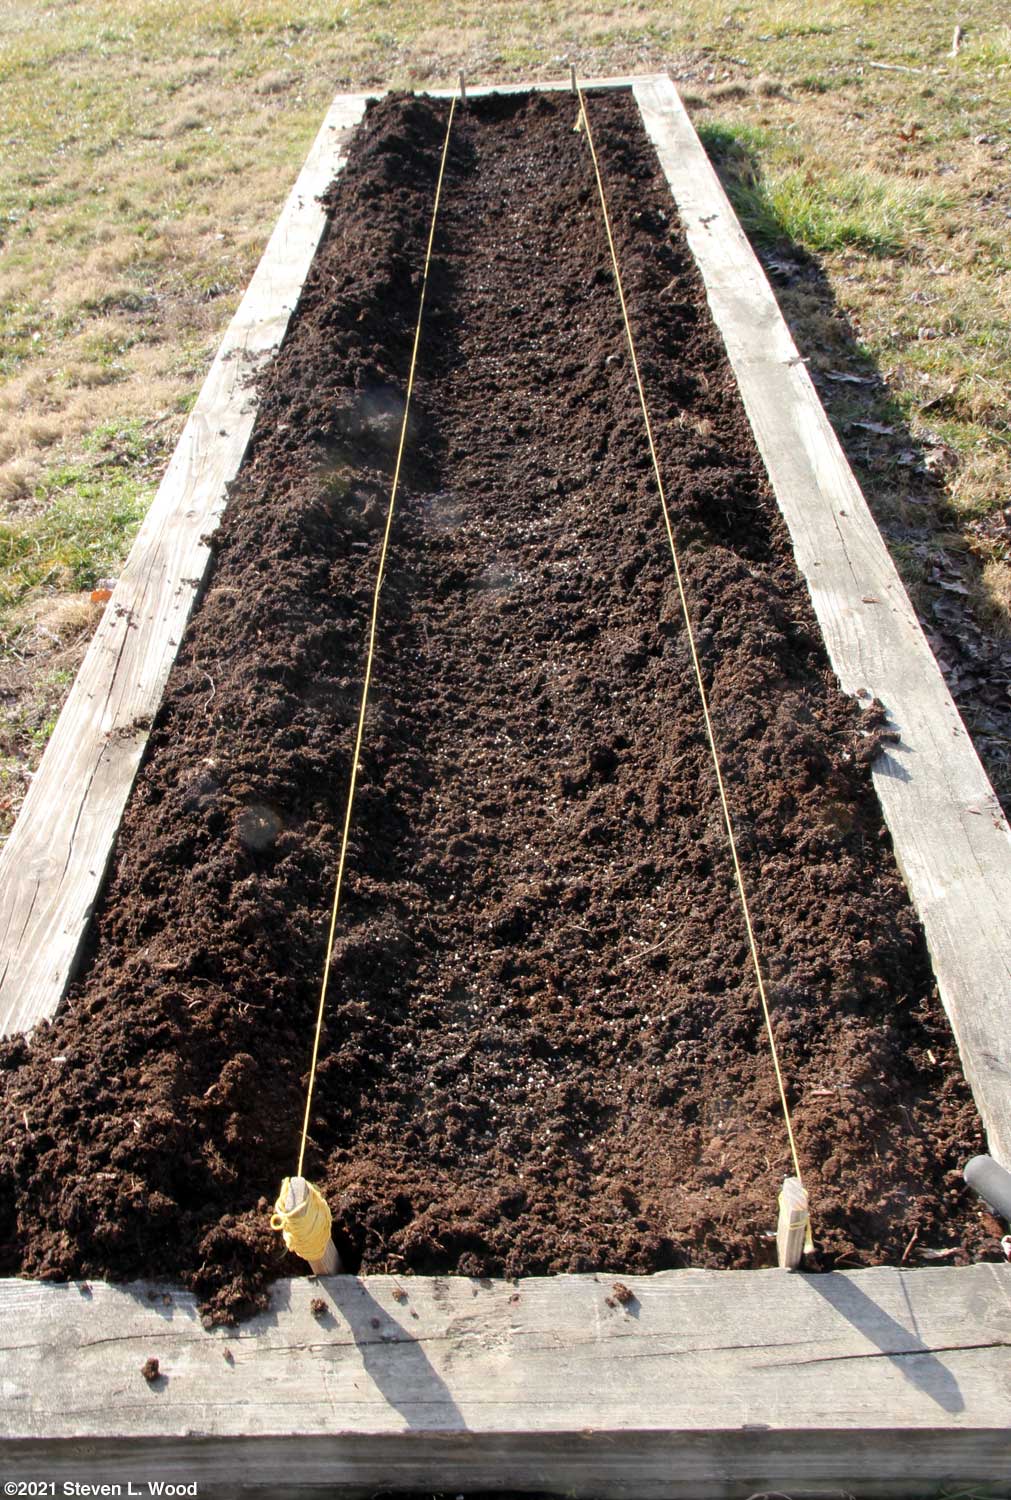
Growing peas is a labor of love. If you don't crave the slight improvement in flavor of homegrown peas over what are really pretty good name brand grocery store frozen peas, growing and preserving peas probably isn't worth the effort involved. We happen to love the superior flavor of our freshly picked homegrown peas, especially when they're gently steamed with a bit of butter and salt. My wife and I also enjoy sitting on the back porch on pleasant early June evenings shelling peas. Peas are a cool weather crop. In our region (zone 6a), we can grow good, sweet peas only in the spring and fall. Our hot, dry summers simply aren't conducive to producing peas that are sweet. Even so, we usually grow two good plantings of peas each spring, and occasionally, another in the fall. Peas require good soil and full sunlight. You can cheat on those things, as we have in occasionally growing peas in the heavy clay soil of our large, partially shaded East Garden plot, but it makes things a whole lot tougher than they need to be. Peas also require soil close to a fairly neutral soil pH of 6.5-7.0. I think we grow our peas a bit differently than most folks, so this how-to is more of a How We Grow Our Peas thing than a tutorial on growing good peas. We divide our pea plantings into tall, early peas that germinate well in cool soil and short, supersweet pea varieties that need a bit warmer soil to come up well. There are, however, some great short pea varieties that germinate well in cool soil. Our first direct seeded crop each gardening season is of cold hardy peas. Planting peas in early to mid-March requires preparing a bed for the peas the previous fall. I rototill the proposed pea area in October or November, adding compost and/or peat moss, lime, and commercial fertilizer. Then the pea bed is covered with several inches of grass clipping mulch. In early to mid-March, I pull back the mulch a bit to allow the soil down the proposed pea row to thaw, warm, and dry out a bit. I leave the pulled back mulch in place for weed control. About a week later, I seed our peas. Since our March Indiana weather may not be conducive to direct seeding, there are a several options for getting the job done.
If the soil has thawed and dried enough to allow it, I use a garden hoe or rake to make a furrow about 14 inches wide down the row and about two inches deep for the pea seed. I spread a little lime, fertilizer, and granular soil inoculant
Sometimes at pea planting time, our garden plots are still frozen solid. In this situation, I spread the treated pea seed down the row and cover it with a couple of inches of compost, potting mix, commercial bagged garden or top soil, or whatever I have on hand to cover the seed. With this planting method, I may have to go back and fertilize the peas a bit after they come up. Peas seem to respond well to compost pushed up around the plants. If the soil is just barely thawed, I spread my treated pea seed down the row. Then I poke the seed into the ground one at a time. This process seems to take forever, and the two times I've done it, I thought my index finger was frostbitten by the time I got done. It did produce good results, though, but this is obviously my least preferred method of planting peas. Short Peas The gardening world has moved to short, 2-3 foot, pea varieties over the last twenty years or so. I think the breeding for these short varieties was done for commercial growers and mechanical harvesting, but for most gardeners, that's a good thing, as the plants are compact and don't require a lot of support. The amount of good, short pea varieties available is amazing. Some excellent old varieties remain available, while plant breeders come out every few years with some new variety. Planting technique for short peas is about the same as one would do for tall peas, although ours get planted a bit later than our tall peas. Because of the later planting in warmer soil, I usually omit treating the seed, but I do soak the seed in water for 30 minutes to an hour before planting. Some sources suggest soaking pea seed overnight, but I find that our seed is only good for split pea soup when soaked that long. I fell in love with a couple of short, supersweet pea varieties years ago, Eclipse and Encore. After I somewhat foolishly went on a mission to preserve the varieties several years ago after they disappeared from seed catalogs, I found that both were patented varieties. That meant that I could grow the peas for our own table and freezing use and save enough seed to replant, but I couldn't legally share seed with anyone else until the patents expired in 2021. I'd written that I hoped to outlive both patents, and I have. I hope to have Eclipse and Encore pea seed to share with other gardeners in a year or so. Both the Eclipse and Encore pea varieties require fairly warm soil (60-70° F) to germinate well, especially the shrunken seeded Eclipse variety. So we plant these short pea varieties a month or so later than our early peas, usually in April or early May. I've also resorted to growing Eclipse and Encore transplants to get around the varieties' poor, cool soil germination. As I mentioned, we soak our pea seed for up to an hour in lukewarm water before planting. I also tend to plant our short peas in a single row, spacing the seeds an inch apart in the row. A wide row will work for short pea varieties, but it probably will require some support and may be difficult to pick. Since we plan to save seed from our short peas, I still trellis them with a single, short trellis. Keeping the pea pods up off the ground helps prevent seed rot, which is a good thing whether you're going to save seed or not. Short peas can be supported with short (3') twigs and branches stuck in the ground down the row. They really don't require much support, but a little will increase ones harvest of good peas. If you're growing multiple rows of short peas, be sure to space the rows about 3' apart. Some online sources suggest just an 18-24" spacing between rows, but unless you've trellised those rows, that's just not enough space to allow one to go down the rows for cultivation, weeding, and picking. The wider row spacing also allows more sunlight to reach the pea plants and allows for better air circulation, which is a big plus in preventing powdery mildew and letting pea pods dry on the vine for seed saving. Wait
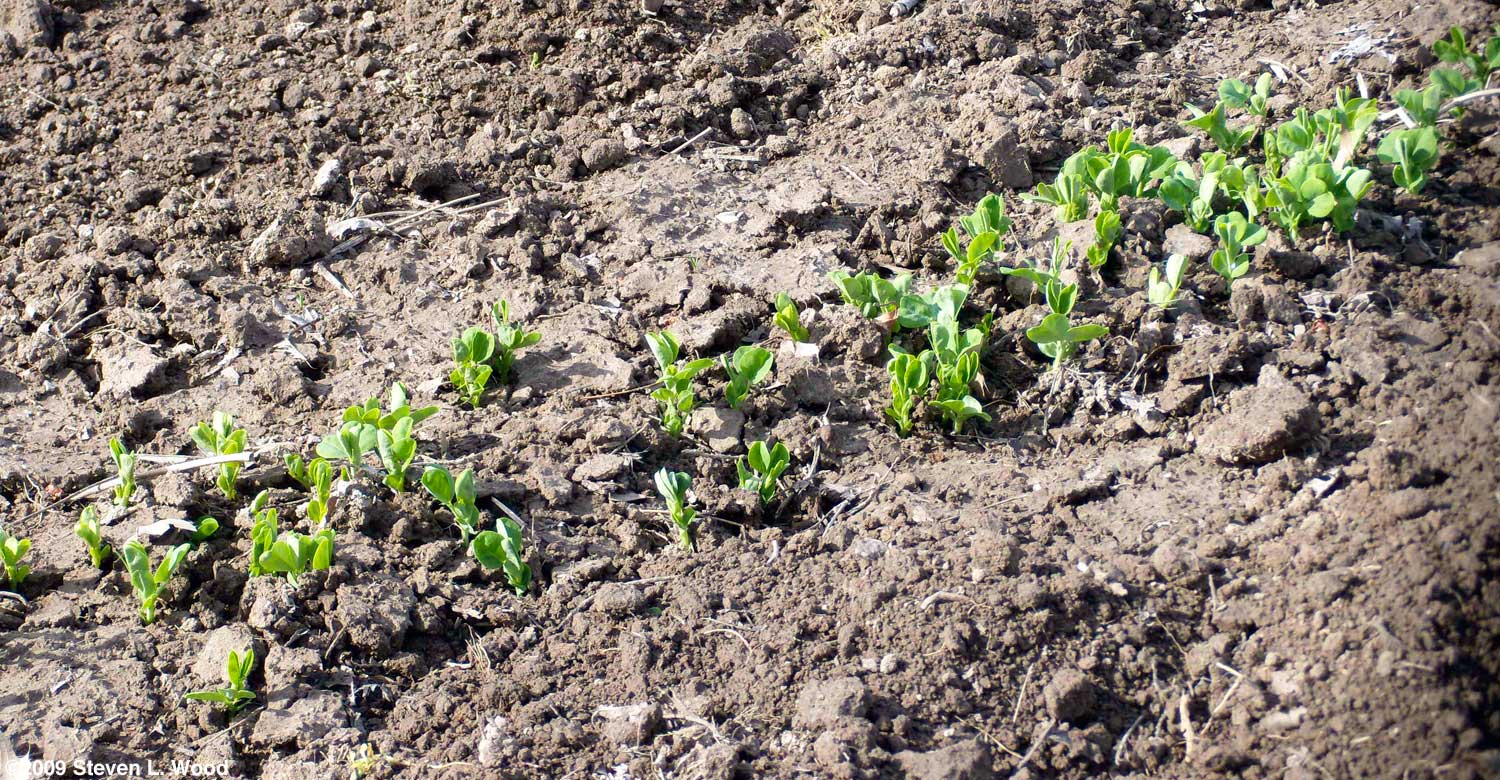
Our later planted short peas may require watering before they emerge if we have a dry April. When watering, one has to be careful not to flood the planting or wash up the pea seed. Our Eclipse and Encore pea varieties take one to two weeks to emerge. Trellising Peas
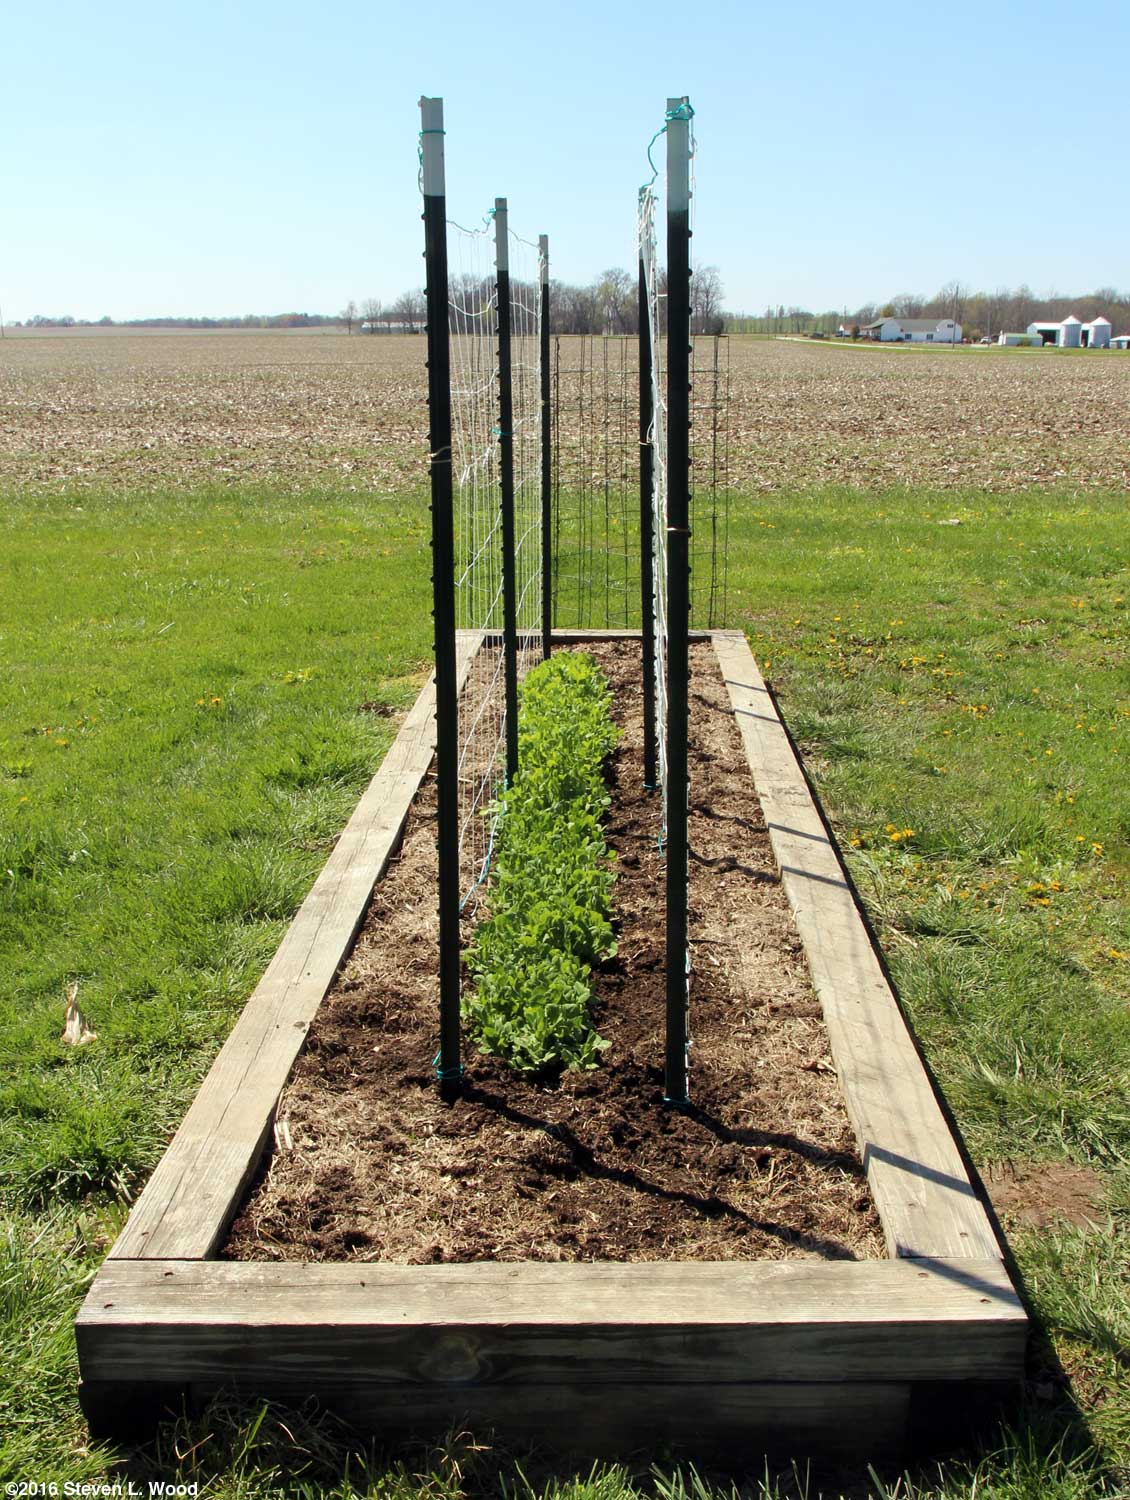
We trellis all of our peas. For years, I'd use several T-posts to support a nylon string trellis netting strung on plastic coated clothesline wire. And in most years, I'd be frustrated when part of our peas blew off the trellis in the high winds we frequently experience here. A single trellis should suffice for most folks who don't live in the equivalent of a wind tunnel. Being frustrated with losing part of our harvest, as the bent pea vines would begin to die and not mature the pea pods on them, I began experimenting. Our eventual answer to the strong winds was to grow our wide row of early peas between two trellises set about sixteen inches apart. It's not a perfect answer, but we now have far fewer vines blowing off the trellis, and of course, we're now getting lots more delicious peas from our plantings. Our short peas get a single nylon string trellis supported on clothesline wire between T-posts. Since I only need a trellis about three feet tall, I often cut down old trellis netting that is too ratty to use for our tall peas to about three feet and patch the good sections together for the netting.
Treating Pea Seed You may have noticed that I specified "treated pea seed" for our early plantings. Pea seed is prone to rot in cold, wet ground. Since all of our pea seed, saved and commercial, is untreated, I treat the early pea seed myself with Captan Care Since we mulch along our pea plantings with grass clippings, we don't have to do a lot of weeding in our pea rows. Early on, we have to pull a few weeds in the row, but that's about it. (Do remember that I'm a passionate gardener who walks his garden plots every morning in the spring, pulling weeds and seeing what else needs to be done.) When growing our first seed crop of Eclipse peas in our East Garden, I found when weeding that the young pea vines were incredibly brittle. I was able to correct that problem by spreading and pushing damp compost around the young vines. For the most part, peas are usually a disease and insect free crop. Occasionally, an insect invasion will require a spray of Pyrethrin or Neem Oil. In damp seasons or in a somewhat shaded growing area, spraying with a fungicide may be necessary to prevent powdery mildew. Since our raised beds have pretty good soil, a bit of compost or a very light sidedressing of 12-12-12 commercial fertilizer is about all the help our peas get through the season. Fall Peas We've had mixed luck with growing peas in the fall. Getting the plants up out of the ground early enough for them to mature before our first frost is a real problem. It's usually quite dry here in late July and early August. Mid-summer plantings require lots of watering to get the seed to germinate. But once the plants are up out of the ground, it's pretty smooth sailing, other than a few bugs and powdery mildew problems. I've included a couple of links at the end of this article to excellent web pages that give a lot more information about growing fall peas. Edible Pod Peas
Sadly, our last fall planting of Sugar Snaps didn't make it. I foolishly planted them in an area that became progressively more shaded as the sun dropped in the late summer sky. Just as the pods began to mature, the vines developed powdery mildew. While a fungicide can sometimes hold back powdery mildew, black mold began to appear on the pea pods. I had to pull and trash the entire planting, but I'd learned a valuable lesson about cheating and planting peas in a shaded area. Picking Peas
We usually get a two to three week picking period for each of our pea varieties. If two or more varieties are planted in a row, they'll often mature several days apart. Splitting open a pea pod in the garden and tasting the peas will usually tell you if they're ready to be picked. Picking a little early is far better than waiting for peas to get huge in their pods. Saving Pea Seed
Saving pea seed from open pollinated varieties is really pretty easy. The plants need to have been separated from other pea varieties by a good distance (a hundred yards or so) to ensure purity of the variety. We don't have a problem with our early peas crossing with our short peas, as the early peas are done blooming (and often out of the ground) by the time the short peas begin to bloom. Since the Eclipse and Encore pea varieties are related (Encore is one of the parent varieties of Eclipse), I don't worry much about isolating the varieties from each other.
I spread out the picked, brown (and a few green ones) pea pods on an old cookie sheet and let them dry on a shelf inside for a week or so. Once I'm sure they're dry, I shell the peas and spread the seed out on a cookie sheet to dry for several more weeks (inside, where our air conditioning reduces moisture in the air) before germination testing, bagging, and freezing them. One can also store pea seed in jars in a dark, cool area. We store some of ours on a dark shelf in our basement. Pea Varieties
We've messed around with newer, short and tall snap pea varieties, but always seem to come back to the original Sugar Snap The last Sugar Snaps we grew, as I mentioned earlier, fell victim to powdery mildew and black mold. Before they did, I sampled a few pods and found them to be delicious, as usual. But the bag of seed we bought also produced some very un-Sugar Snap red blooms. Sugar Snaps bloom white, but the lovely red blooms also produced our best garden photo of 2015.
Edible Pod Peas I only briefly mentioned growing edible pod or snow peas, as we haven't grown them in years. The culture for growing them is the same as the descriptions above. With snow peas, you pick them when the peas are just tiny bumps in the pea pod. Soup Peas I also haven't mentioned soup peas so far. You grow them like you would any other pea and harvest them dried in the pod like one would for seed saving or dry beans. We don't grow a lot of soup peas, although I currently have a nice row of the heirloom Granny's Little Brown Crowder Peas drying down in one of our raised beds. Winding Up That's how we grow our peas. While writing parts of this how-to, often late at night, I found myself craving peas! I began writing this article in early 2016, but didn't get it done until October (2016). Often, when one is gardening, there's not much time to write. That can make illustrating the article an adventure in hunting through old photos. I ended up going all the way back to 2009 in my files for one photo. That's about the time when I finally upgraded my photo gear to a quality, digital SLR. Other Information on Growing Peas Our way of growing peas and this article may not fit your situation, so I've included a number of links on the subject. I've also embedded an excellent video
I'll add a couple of links from "across the pond." After all, shelling peas are also known as English Peas, so the Brits must know something about growing good peas.
From Steve Wood, the at Senior Gardening |
| Affiliated Advertisers |
Last updated 2/23/2024
©2016 Senior-gardening.com