Senior Gardening

One of the Joys of Maturity


Affiliated Advertisers


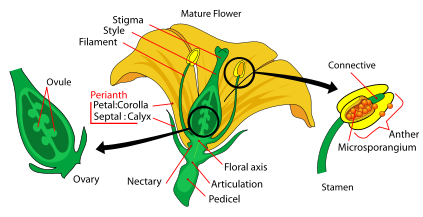
Saving Gloxinia Seed
October 10, 2009

Gloxinia bloomI got into saving seed from gloxinia plants in a bit of an unusual way. I had lots of gloxinias in my classroom, and our science curriculum had a section on pollination. Since the parts of a gloxinia bloom are large and easily accessed, we ended up having students use Q-tips to hand pollinate the gloxinia blooms. We saved and grew out the seed, using the resulting plants for some wonderful Mother's Day gifts.

As with any seed saving endeavour, you want to use only open pollinated varieties of gloxinias for best results. Some hybrids are sterile and others, if hand pollinated, may produce undesirable offspring. Having said that, our kids at school didn't always collect their pollen from open pollinated blooms. And yes, we did get some unusual results at times!

Flower diagramWithout getting too heavily into a science lesson on flower parts (more info on flower parts here and here), pollinating gloxinias is accomplished by collecting yellow pollen grains from the flower's anther (part of the stamen) and transferring it to the stigma (part of the pistil). You may see the flower parts referred to as just the stamen and pistil elsewhere. A gloxinia bloom is a "perfect flower" in that it has both the male (stamen) and female (pistil) parts in its flower. While one can transfer pollen within the same flower, it's best to transfer pollen to another flower, preferably on another gloxinia plant. (Plant diagram courtesy of LadyofHats via Wikipedia)

Okay, now that our mini-science lesson is over, let's get to pollinating gloxinia blooms.

Collecting pollenpollen on flower petalGloxinias shed their pollen...well, when they're ready to do so. I find that mid-morning to early afternoon is the best time for me to collect pollen. I do so with a clean Q-tip by rotating it along the anther of a bloom that appears ready to shed its pollen. The pollen will cling to the fibers of the Q-tip. You may actually be able to see the pollen grains. Darker flowers make the job easier, as you can see pollen you dislodge from the anther on the flower petal. I go back with my Q-tip and sweep up the pollen for transfer to another flower bloom.

Pollen on Q-tip

Pollen to stigmaStigmaRubbing the Q-tip across the stigma of another flower will transfer the pollen to it, as the stigma is said to be sticky when it's ready to receive pollen.

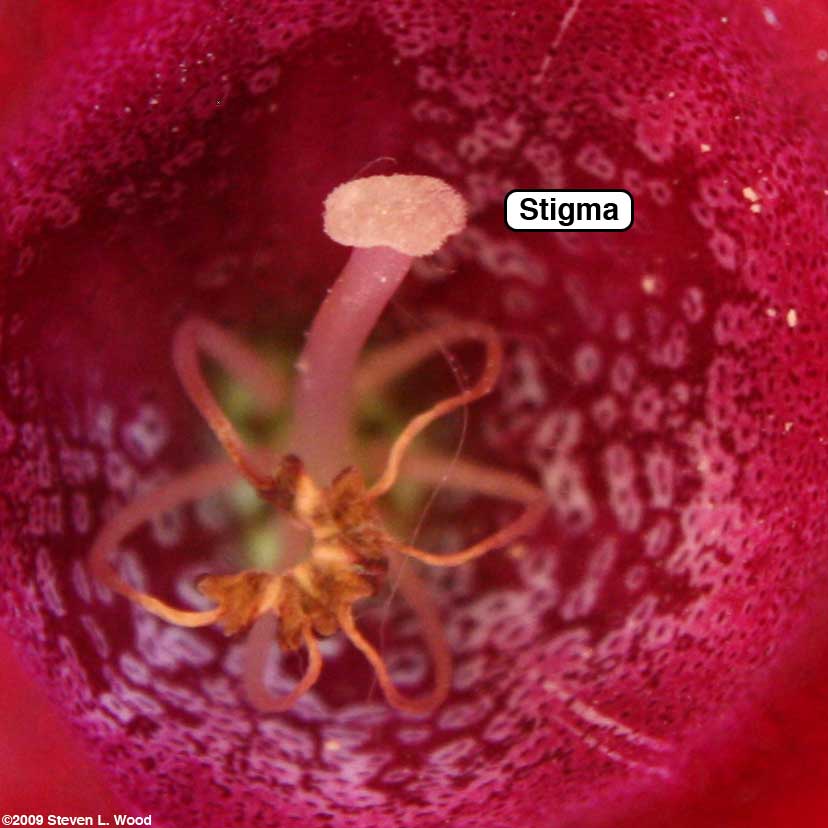
The whole process goes a lot easier if you have several gloxinia plants in bloom to collect pollen from and transfer pollen to. And you have to be persistent with this process, as sometimes you'll find your gloxinias just aren't ready to shed their pollen freely.

Twist tie marking pollinated bloomOvaryNote that you may or may not be able to see the pollen adhere to the stigma. I sometimes try to "mark" my pollinated flowers by loosely attaching a twist tie to the stem.

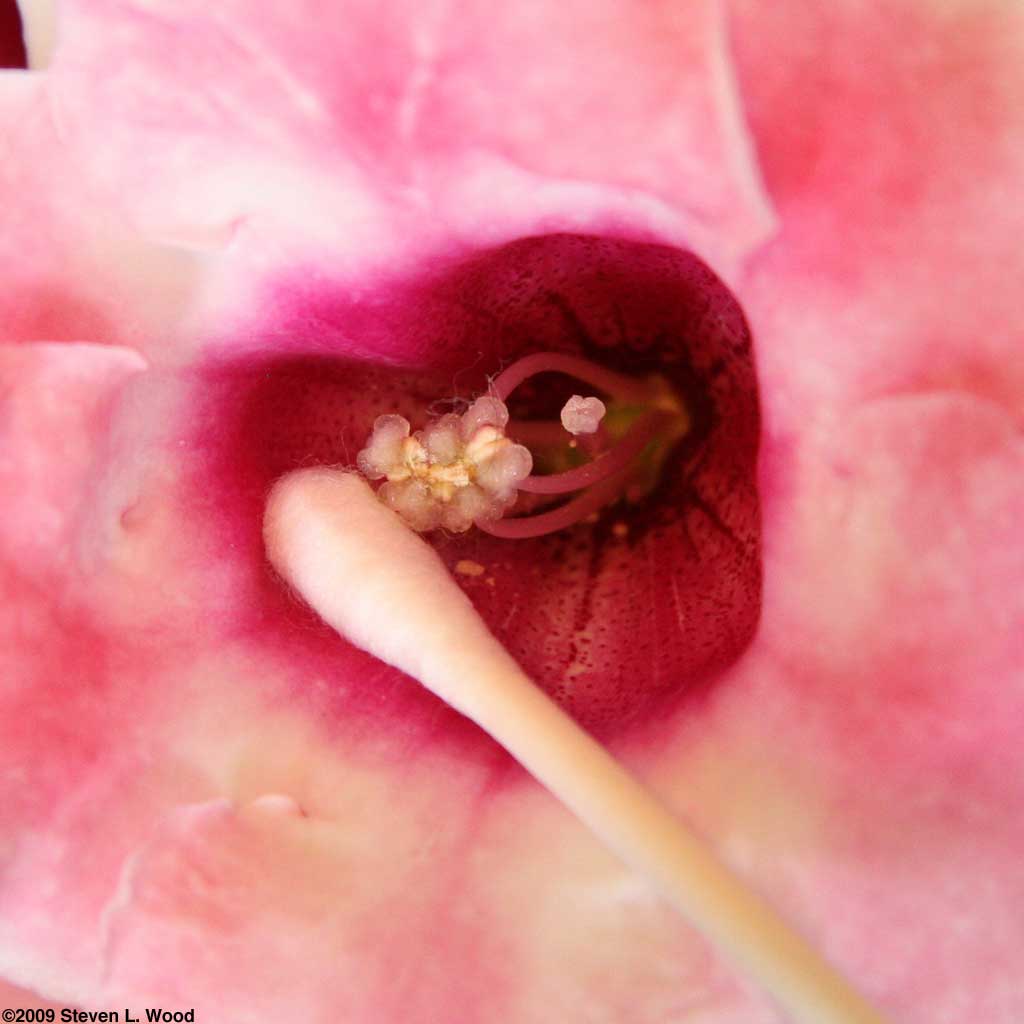
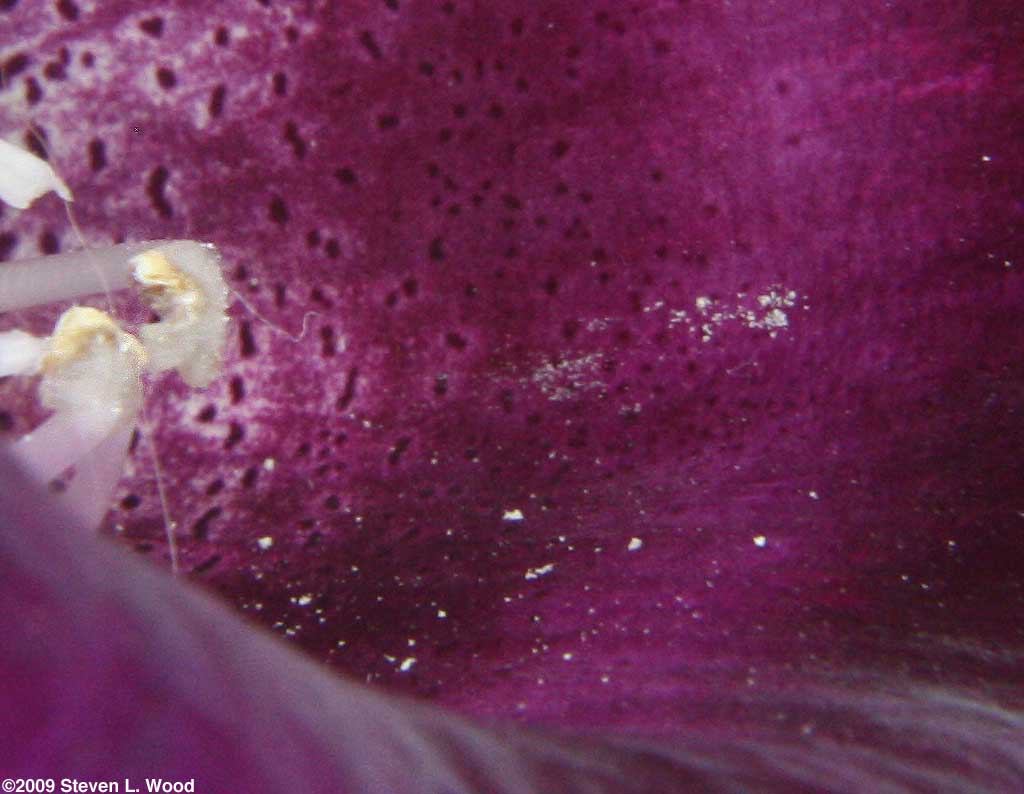
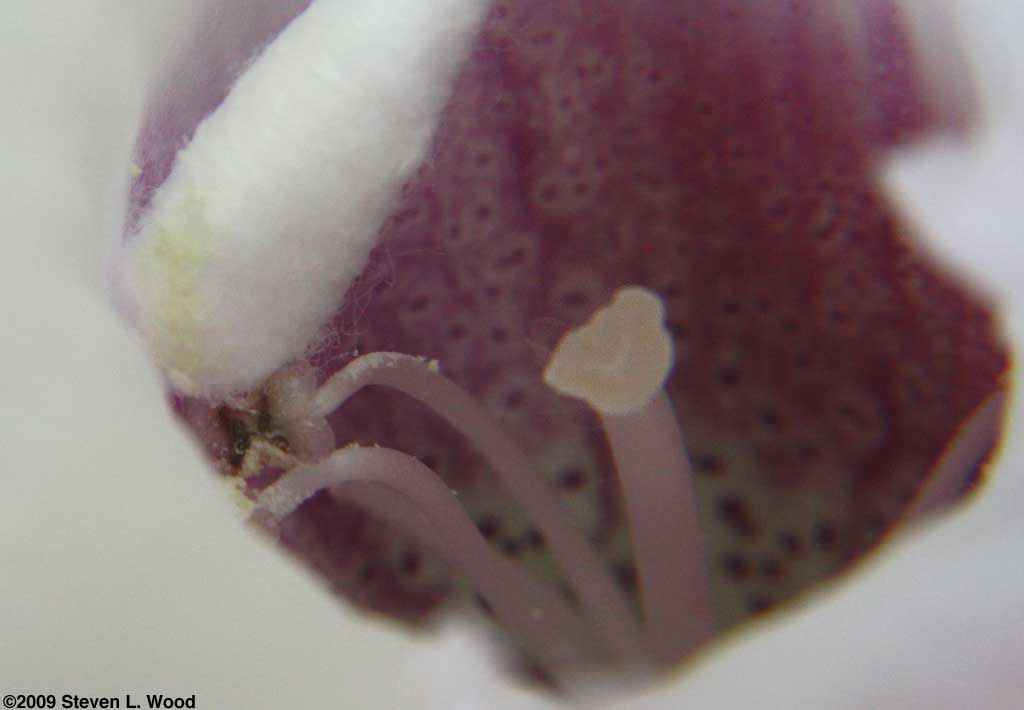
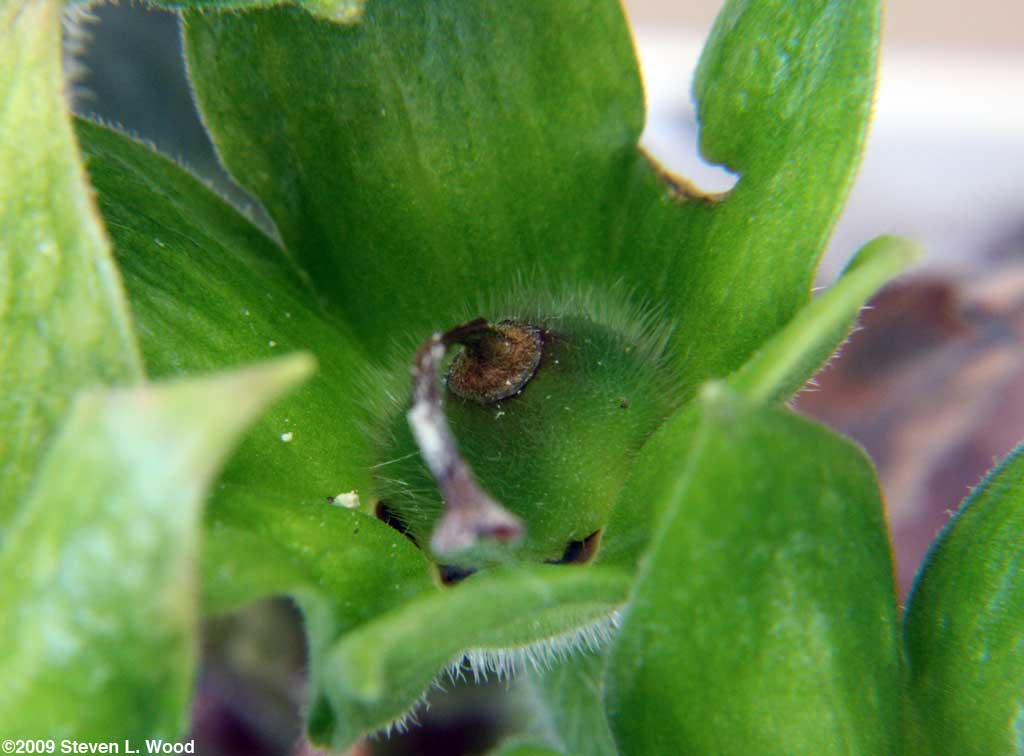
If your attempts at pollination don't take, the flower will wilt and wither. But if you are successful, the flower stem will usually remain erect as it nourishes the developing seed. The ovary of the flower will swell to about a quarter to a half inch across. The flower petals may or may not drop away in time. It's okay to gently pull at the top of them to remove them when they begin to wither.

Ovary breaking openGloxinia bloom and seedIn several weeks the seed will begin to ripen and the top of the ovary will turn brown and begin splitting open. At that point, you'll want to carefully snip the stem to harvest the gloxinia seed. If you let it go too long, you'll end up with something like the photo at right with the bloom shedding its seed all over my plant area! You can also cut the bloom stems a bit earlier and let them sit and dry before squeezing out the seed.

I shake my cut blooms out over a paper plate or paper bowl. A single bloom will produce hundreds of seeds. I can sometimes get a few more seeds per bloom by letting the bloom sit and dry for a day or two and then squeezing it gently to make it release the last of its seeds.

Gloxinia seed

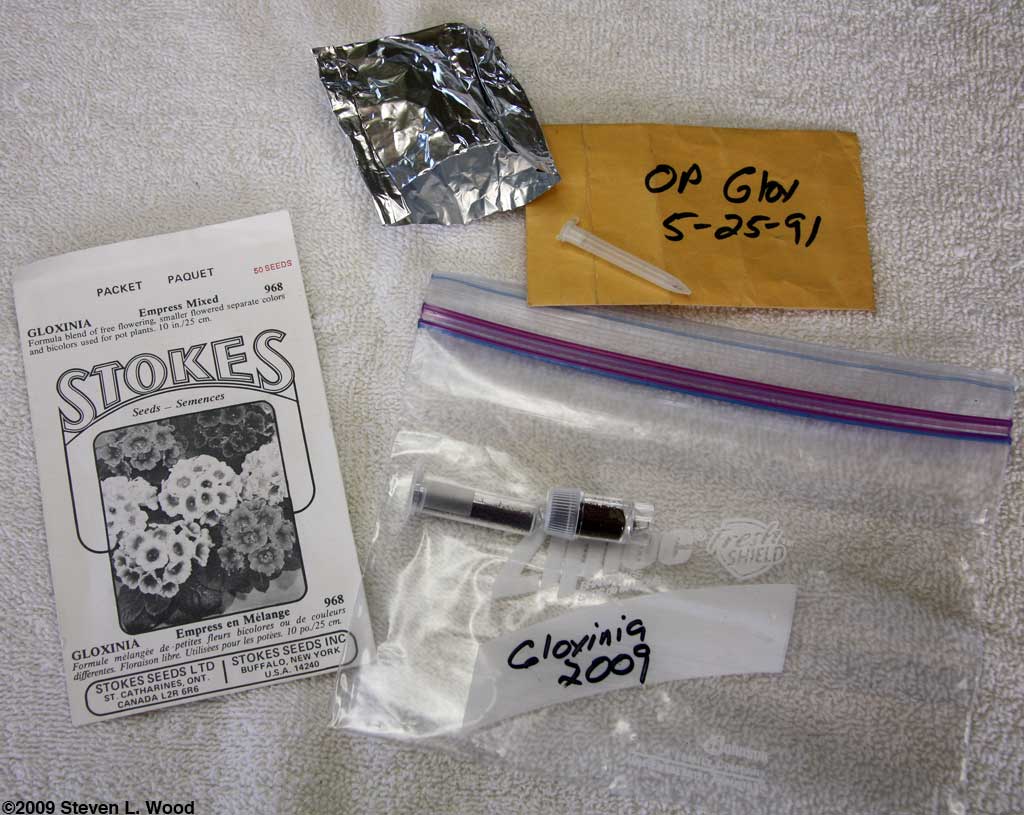
After letting the seed sit in a dry area for several days, I package it for long-term storage in the freezer. I've successfully used both homemade aluminum foil packages and used, commercial seed vials (glass or plastic) to store my gloxinia seed.

Packaging

Gloxinia envelope 1 Gloxinia envelope 2

Shown above are a variety of packages that may be used, including an old, commercial seed envelope, a homemade foil package, and several used, commercial seed vials. And yes, the date on the brown envelope is accurate. The envelope held the vial sitting on it along with a foil package of seed collected in 1991. I used up almost all of the 1991 seed this year...with excellent germination still! Do note that beyond the packages shown, everything goes into a good freezer bag as well and is kept in a manual defrost chest freezer. (Well, right now they go back into our freezer over the fridge, but will go back out to the chest freezer soon.)

Avoid putting gloxinia seed directly into plastic bags. I bought some seed from a new vendor this year and received two plastic bags with about ten seeds in each. It was extremely difficult to get the seed unstuck from the plastic bag. Glassine envelopes do work well for seed storage, but should also go into a freezer bag as well.

In recent years, we've shared gloxinia seed in commercial seed envelopes with a bit of info and a photo printed on them.

Update (4/12/2012)

Thanks to reader, Mike Bryce, for a great tip on getting tiny seeds out of the bag that cling to the sides of foil, or worse yet, tiny zip lock bags, due to static electricity. He rubs the outside of such seed packets with a fabric softener sheet (Bounce, Downy, etc.) to neutralize the static electricity and make the seeds easily flow out of the packet! It works like magic. Thanks, Mike!

All from the same cormWith all this saved seed, you might wonder if I still buy gloxinia seed. And the answer, of course, is yes, I do. I try to bring in fresh seed (and plants from it) every few years. I also try other varieties of gloxinias at times. While the Empress variety remains my favorite variety of gloxinia, we got an interesting surprise this year from one of the new hybrids we tried. It has what appear to be different flowers from the same corm. Actually, the colors are the same, but reversed in position on some flowers (red throat-white tips, white throat-red tips). The flowers are considerably smaller than the blooms on our Empress gloxinias, but are profuse. I'll probably take leaf cuttings from the plant and see if the offspring reproduce the unusual variation. Do note that the seed was terribly expensive and germinated poorly, so I'm not going to share the distributor here.

I think that's about all there is to it. So, go for it and give it a try!

Enjoy the content on Senior Gardening?

If so, why not come back to our Senior Gardening Advertisers page the next time you plan to purchase something online and click through one of our ads. We'll get a small commission from the sale, and you won't pay any more than you would have by directly going to the vendor's site.

Odds 'n' Ends

This feature article is an extension of the ongoing feature, Gloxinias, that appears elsewhere on this site. Like the gloxinia feature, this one gets updated irregularly as I gather better images and/or new information.

I'd started this feature article a long time ago, but quickly found that I didn't have the proper photo equipment to document what I was doing. The article sat for a long time until I acquired the necessary equipment to finish things up.

Here's a current (3/2012) image of two gloxinias grown from seed that are currently starring on our kitchen counter.

Avanti and Cranberry Tiger gloxinias

One last thing I should mention is that you really won't have to start gloxinias from seed very often, unless you just want to. We had a bit of a disaster and lost all of our gloxinia plants several years ago. I did, of course, still have lots of viable seed stored in the freezer to begin once again. With proper care, gloxinias can grow, go through dormancy, and grow again, repeating the process for years and years.


Gloxinia Photos (10/12/2012)

I added a page of Gloxinia Photos to the site today. As we progress into plants that have been through several years growth and periods of dormancy, we're getting a lot more plants that produce 10-20 blooms at a time.

From Steve, the at Senior Gardening

Ads shown on this site do not represent an endorsement or warranty of any kind of products or companies shown.


Affiliated Advertisers

Updated 9/7/2016
©2009 Senior-Gardening.com