One of the Joys of Maturity |
|
| Affiliated Advertisers |
Clicking through one of our banner ads or some of our text links and making a purchase will produce a small commission for us from the sale. The Old Guy's Garden Record
We have asparagus, garlic, brassicas, and peas up in the garden. They'll have to weather the cold without any extra protection...and should do so.
April 8, 2009 - Apple Blossoms
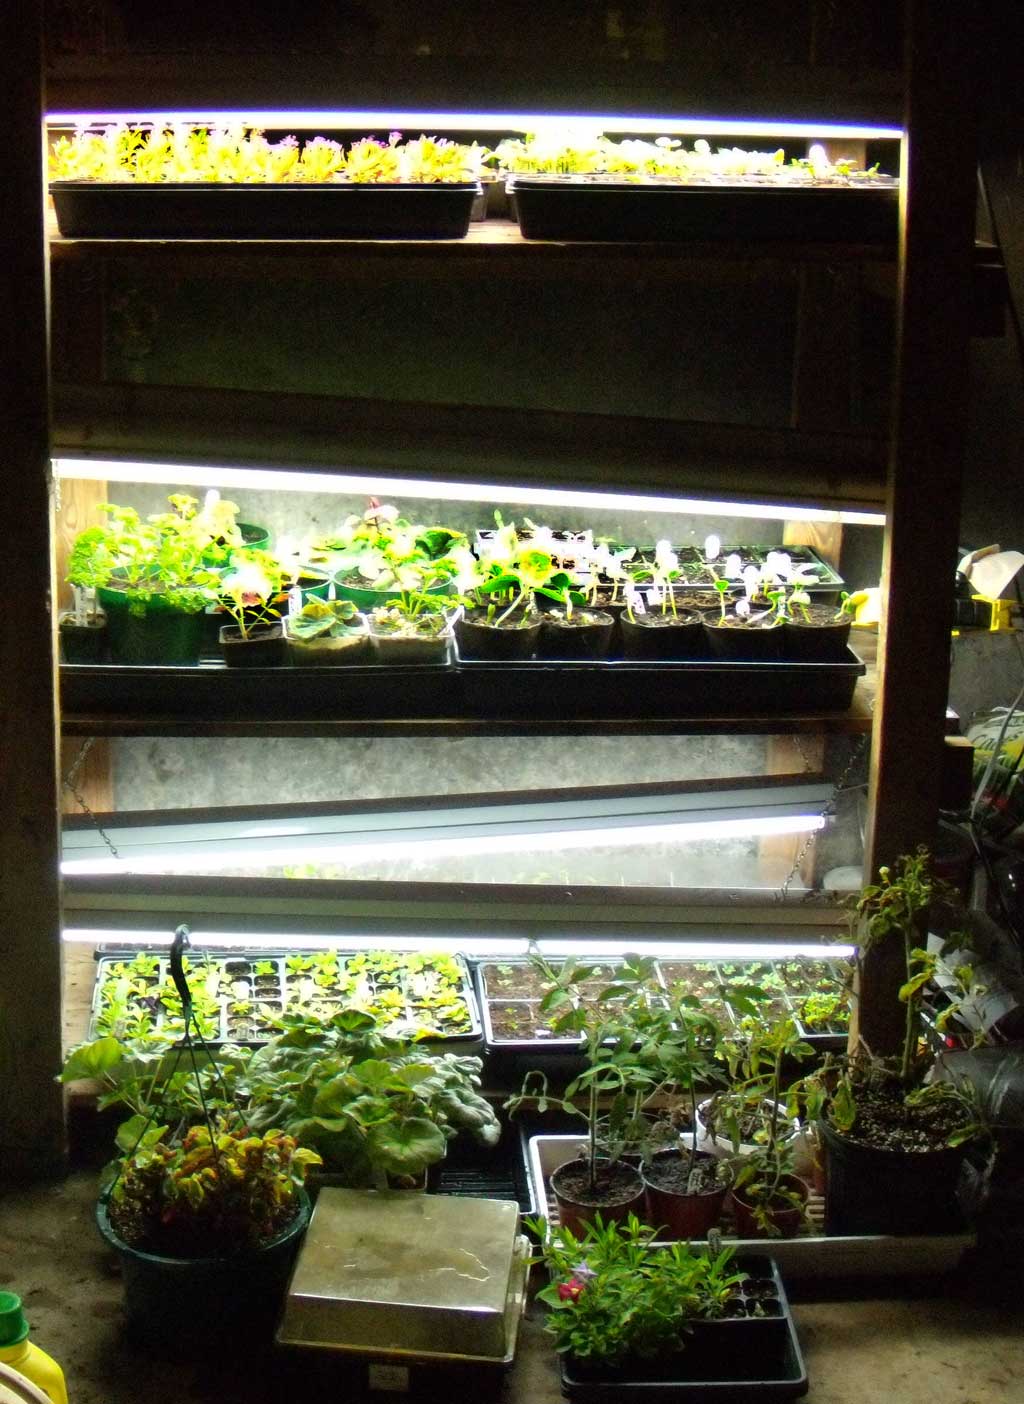
With our cold weather abating just a bit, I began bringing some of my transplants back upstairs from our downstairs plantlights and back out under the cold frame. I'm going a bit slow on it, as we still have some near freezing temperatures in the forecast.
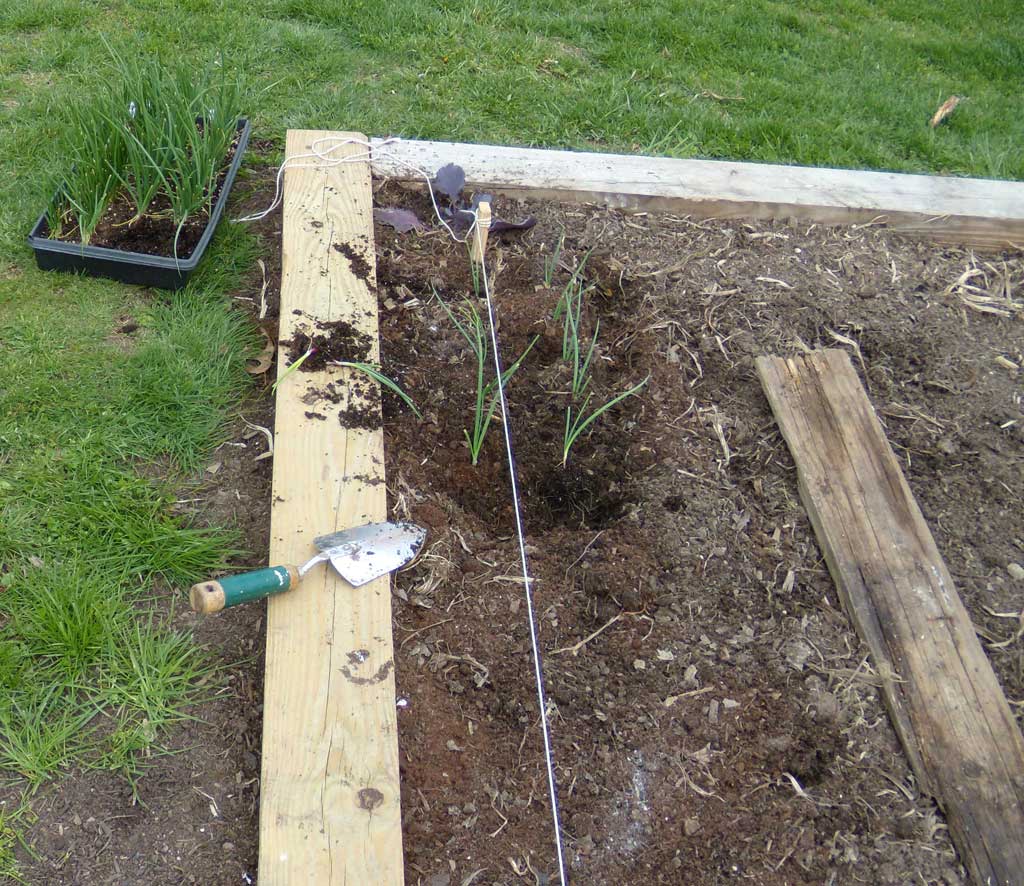
I also had enough time to get in a double row, half and half, of Red Zeppelin and Walla Walla onions. I plugged in a Super Red cabbage on each end of the onion row. The onions pull apart pretty easily once out of the flat. I just put them in with as much soil sticking to their roots as possible, which often ends up pretty much bare root. Before transplanting, I did work in about an inch of peat moss and a sprinkle of bone meal and lime. After they were in, I watered them with some weak starter fertilizer. Our first really heavy rain of the season arrived with a vengeance last night. Looking out our upstairs window at our garden plots, I could immediately see some of the benefits of my earlier raised bed efforts. Our original garden patch had lots of standing water around the raised rows I'd created for our tomatoes (not transplanted yet), brassicas, and peas.
Our main, large raised bed had no standing water, due to the raised bed construction and the dry sump drain near its center.
I'd originally ordered some high priced, pelletized impatiens seed from a couple of my usual seed suppliers. The plantings failed completely, and considerably upset, I just bought a couple of packets of Ferry-Morris impatiens seed at a discount store. I liberally spread the seed over the same flat and cells that the high priced seed had failed to germinate in. I was rewarded with many cells with three or four plants competing for space. I moved outside to the back porch to save a bit on cleanup, and split up the tender plants in the same cells to some new fourpacks I picked up at the local garden store. The job took well over an hour, but I guess that's my reward for spreading so much seed.
Getting the alyssum, dusty miller, and impatiens spread out into individual cells, and getting lots of plants for my trouble, were really important to me. I'd planned on planting our small flower beds at the front of our house with a mix of the three plants. The area is shaded most of the day, making it an ideal spot for such shade loving plants. I'd planned to spray the apple trees this morning, but it turned out to be windy all day. So, I decided to work on our garlic planting. I hadn't cultivated around the garlic this spring, only gently raking away the winter leaf cover a month or so ago.
Since one corner of the raised bed where the garlic is growing is a bit low, I decided to work in a little peat moss while I cultivated. I didn't add any lime to counteract the acidic peat this time, as this area was heavily limed last fall. I did sprinkle a bit of 5-10-5 fertilizer around each garlic plant. I used my old, nearly rotten walking board to access the inside of the garlic to avoid stepping in the bed too much. The organic matter you see above near the garlic is mostly nasturtium vines from last year. I'd put them into the compost heap last fall, hoping they'd decompose over the winter. They didn't. So I decided just to spread and work in the remains of our rather large compost heap over our raised bed. Now that the weather is warming a bit, the vines finally are breaking down a bit. And, our level of organic matter in the raised bed is excellent. As long as I'm just putting transplants into the area, I don't think the surface litter will be much of a problem. But when I get ready to direct seed carrots and beets, I suspect I'll have a fine time of trying to get the decaying vines out of the way.
At that point, I had to break off gardening for the day and get in some mowing. It's supposed to rain for the next couple of days here, and I really don't want our grass getting away from me, especially this early in the season. As I write this posting (at around 9 pm on Sunday evening), I can already hear thunder in the distance. It's always a bit dicey as to whether I can make a posting in such weather or not, as we use satellite internet and are subject to rain fade outages.
I've been moving our gloxinias to steadily larger pots for some time now. There are plantings from August and again in January, so the plants are a variety of sizes. I generally move the gloxinias from the seeding pot to fourpacks, and from there into four inch square pots. For years I just left the gloxinias in the four inch pots, but this year have been moving the larger specimens to six inch rounds. I noticed that while I'd kept up with the repotting, I'd neglected to update the Gloxinia feature. I corrected that omission today.
Our first planting of brassicas is still doing well, despite the occasional flooding around them. The hilled rows I transplanted our broccoli, cabbage, cauliflower, and kohlrabi into are eroding away a bit with the heavy rains, but they probably have saved the plants from damage. And of course, our peas are doing splendidly. I still need to drive in my T-posts and string the trellis material for them to climb. I like to trellis even the short varieties of peas, as they're easier to pick that way. Change in Senior Gardening Search I changed the Google search box at the top of each page on Senior Gardening to now search this site first. So if you're looking for something on this site, the search box on the page is your best way to go. The search results page gives the option of searching just senior-gardening.com or the entire web.
I sat down on our back porch with a glass of iced tea this afternoon thinking I was done with my gardening chores for the day. I'd added some bagged cow manure and peat moss to one area of the garden to raise its level a bit. I also put a geranium and some petunias in a large, outdoor planter, along with plopping a couple other geraniums at the corners of our raised bed, and added some dianthus at the ends of two rows of brassicas to replace my row marker planting stakes. While working near the brassicas, I noticed some seedling weeds beginning to grow, so I got out my trusty scuffle hoe That should have pretty well done it for the day, other than making sure to sprinkle our growing collection of transplants on the back porch and under the cold frame.
So out came the sprayer and the biological, Thuricide (BT - bacillus thuringiensis). If you can get a good coating of Thuricide on your brassicas and stay ahead of the cabbage loopers and small white cabbage moths, you can keep your crops of brassicas pretty clean. When I finished spraying in the garden, I turned my attention to our evergreen trees in the yard. When the systemic, Cygon, was taken off the market, I wondered what I would use to keep the bag worms from damaging the trees. Then I read that BT or Thuricide was effective for controlling bag worms, too. Last year was our first try at using Thuricide for bag worm control on our evergreens, but it seemed quite effective. I ended up emptying the sprayer tank and mixing another tankful to take care of our first treatment of the trees.
I transplanted a row of 9 lettuce plants today, using 7 different varieties. I'd dug into my old seed and planted a fourpack of everything I had, so we should have a nice variety this year of lettuce. Our new varieties this year are a small crisp, Barbados, a Boston butterhead, Nancy, and a new romaine/cos, Defender. All come from Johnny's Selected Seeds. We also planted some Winter Density romaine/cos, a couple of Red Lollos, and one each of Summertime, Crispino, and Baby Star.
When I transplant lettuce, I use a garden trowel to dig a bit deeper than needed, say a four inch deep and wide hole, and then fill it with dilute transplanting solution. Then I fill in the hole a bit, put in the transplant, add more fertilizer solution if the other has soaked in (which it had today) and fill in around the new plant. Once done, I pull my stakes and string and replace the stake row markers with a flower to serve as the row end marker. For the lettuce, I put in marigolds at the ends of the row. And for the sharp-eyed readers, yes, I'm using a different camera for this site right now. My Nikon Coolpix P60 developed a serious problem last month, vignetting the right side of each photo. I've dropped back to my old Coolpix 4300 until I get the camera back from Nikon.
As I walked downstairs after making the posting above, I heard the rumble of thunder. So much for for the nice, five-day forecast, mowing and gardening today.
Where's my fishing pole? I can fish in the rain, can't I? Late Update (9:08 P.M. EDT) I fished in the rain, caught nothing, but enjoyed being outside a bit more. The thunderstorms returned this evening, but before they got going in earnest, I got outside and snapped the sunset below.
<
I'd really not planned to add a lot more peat to the area, but ran into a half price, busted bale deal last week on peat moss at our local Rural King that I couldn't pass up. I did not add any lime to counteract the acidity of the peat, as this area test pretty "sweet" the last time I checked it (around 6.9). We're supposed to have rain tomorrow and Tuesday. Once the peat get wet, I'll get the pH tester out again before I plant or transplant anything into the area. As you might have noticed in the background of the shot above, I finally got my trellis netting up for our spring peas. I'd come up empty on finding any netting locally and ordered some from a vendor on Amazon. It came in on Saturday, so I planned to get it up first today. Of course, then I realized that I needed to scuffle hoe the seedling weeds around the peas...and the brassicas, and so on. But eventually, I got around to hammering in the T-posts and stringing the netting on some plastic covered wire.
In the image at left, the far left rows of barely visible onions are our storage onions, Pulsars and Milestones, that were planted first in a mix including Baccto brand potting soil. The onions in the right rows, Walla Wallas and Red Zeppelin, were started a month later in our usual potting mix that includes Miracle-Gro Our usual potting mix for starting seed includes potting soil and peat moss in nearly equal amounts by volume (not by weight), with a sprinkle of lime, a bit of perlite if it appears to be lacking in the commercial mix, and occasionally a dusting of bone meal. For seed starting, we always wet the mix, move it into a big stainless steel pot, and heat it at 400o F for at least an hour in the oven to kill any damping off fungus that might have been present in the mix. While I'm on a mini-rant here about gardening products, let me warn you off of the humus and cow manure sold at Wal-Mart. I bought ten bags of it and dumped it into my raised bed, only to realize that it was filled with tiny stones. I don't know how stones can be called either humus or cow manure, but I guess you get what you pay for.
While I've been cutting down our main gardening area the last few years, the opportunity to play around with part of an old farm field was more than I could resist last year. I jumped at the opportunity to use the land while I'm still agile enough to do so. Our long-term gardening plans actually include the option of cutting our big raised bed into two, long, narrow raised beds at some point. I really hope that I can manhandle a tiller over large plots into my eighties, but...
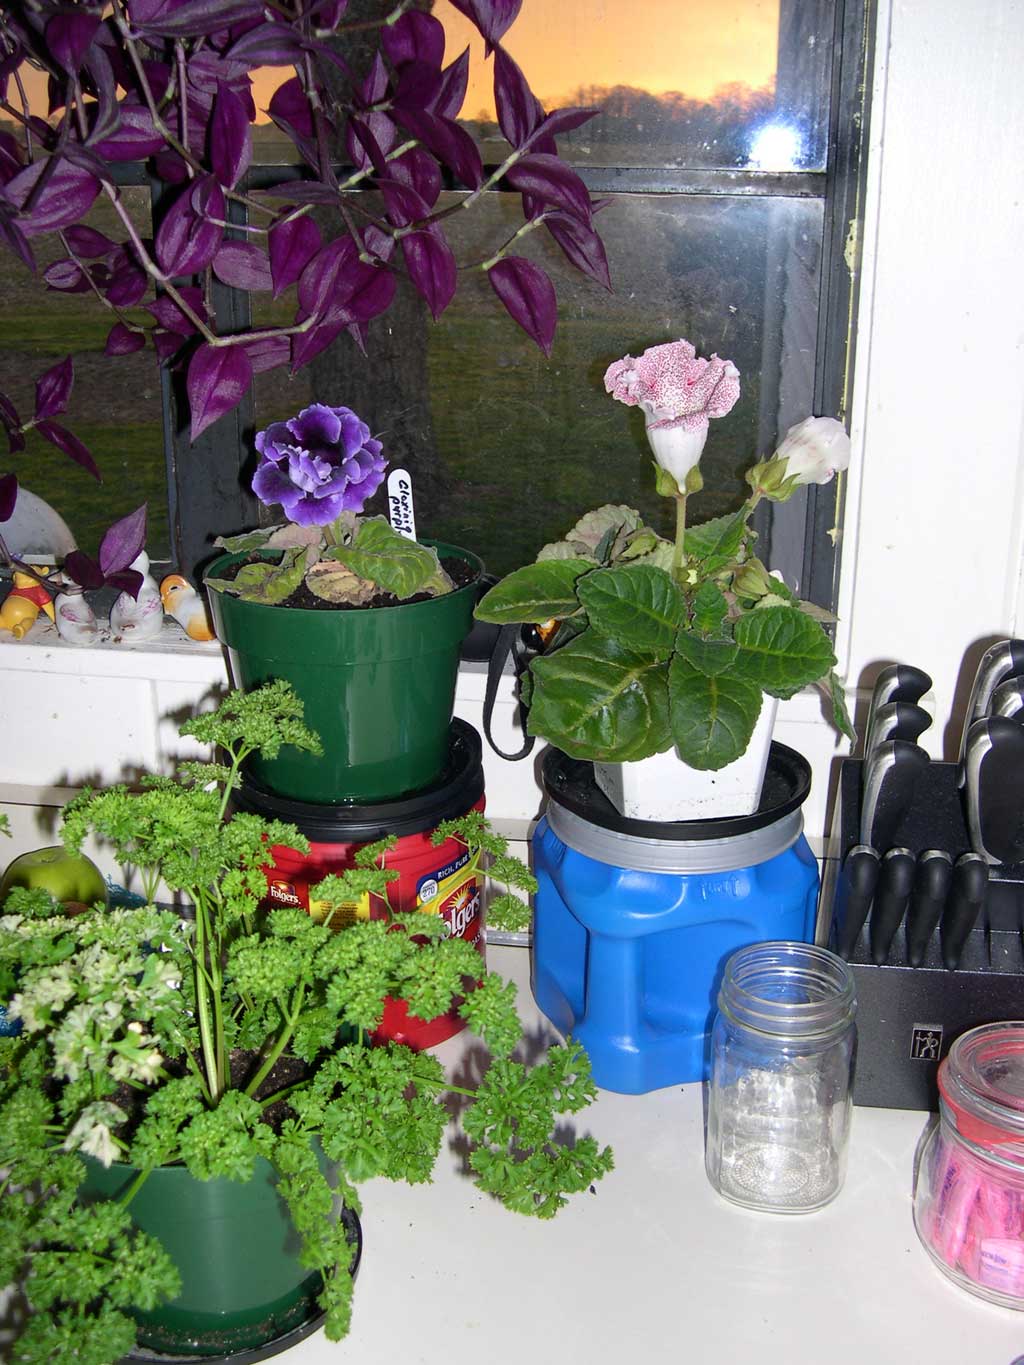
The purple blooming gloxinia is the Double Brocade variety. It has a more compact growth habit than many of the non-double varieties. Also pictured is part of my wife's wandering jew vine and a parsley plant that went last week to a friend at school. Our second apparent big success is with our raised bed for our asparagus plants. I installed the raised bed around our existing asparagus bed this spring. I'd really worried a bit, as I got into the roots of the asparagus a bit when I dug the trenches for the treated timbers. But the bed is now filling in nicely with healthy, heavy asparagus shoots. We snapped a couple early on for a snack, but are allowing the bed one more year to mature before really harvesting from it in earnest.
I mentioned in the last posting that I'd soon need to turn my attention to the garden plot we started using last year in the farm field east of us. "Soon" turned out to be yesterday, as I was caught up on our main garden and knew I had just the one day to work the field, as we have several days of rain predicted. (It's pouring outside now as I'm composing this posting.)
With a month for weeds to grow until the second tilling yesterday, I still didn't get very deep in most areas of the plot. But for the squash and melon crops, I went back and made repeated passes with the tiller until I had worked a number of 5' wide rows about 6" deep. I didn't have to mess with liming the plot, as I'd limed it when I tilled in March. Once I got the plot worked up, I went ahead and planted a single hill of Waltham Butternut squash, two of yellow squash, two rows of cantaloupe (five hills), and one row of watermelon (two hills). I'd planned on another row of watermelon, but my seedless variety plants were just too spindly to put out.
Since I hadn't been able to till as deeply as I wanted, I dug a hole about a foot and a half deep for each hill, backfilling with soil mixed with a shovelful of peat moss, a handful of 5-10-5 solid fertilizer, and a bit of lime. I drenched each hole with transplanting fertilizer before gently tucking each peat pot into place and drawing the soil around it. The water-filled hills sort of look like miniature volcanoes with lakes in the craters!
Our squash varieties planted are Waltham Butternut and Slick Pik YS 26 hybrid. Our cantaloupe are Athena Hybrid, Amish, and Roadside Hybrid. The watermelon varieties are Kleckley Sweets (also called Monte Cristo) and Crimson Sweet. Kleckley's are the sweetest watermelon I've ever grown or eaten. Since the rind is tender, they're not a big variety for commercial growers, as they don't ship well (if at all). And Crimson Sweet is a variety we've had lots of success with in the past. With a week or so of on and off again rain predicted, we won't get our sweet corn in until the first or second week of May. That's okay, as I grow all SH2 super sweet corn that requires fairly warm soil for germination. Once that's done, I'll have to decide what to do with all the extra ground I tilled up! I hate to end such a busy gardening month without a posting for today. Since it's raining bucketfuls outside today, let me offer an interesting article from The New York Times, Envisioning the End of ‘Don’t Cluck, Don’t Tell’. Peter Applebome relates that New Haven is considering changing its zoning code to "allow residents to raise up to six hens" within the city limits. Most municipalities have codes prohibiting the raising of livestock within city limits, but New Haven has practiced a humorously named informal enforcement program, “don’t cluck, don’t tell,” that mostly looks the other way when folks keep hens for eggs. Applebome writes:
The article has some good links for city dwellers considering raising poultry within the city limits. When we had a farm, we generally kept a flock of around 25 hens for egg production. Chickens aren't terribly difficult to keep, and fresh eggs are great. Home raised poultry has a much better flavor than store-bought chicken, if you have the grit to get past slaughtering 14 week old chicks. We used to put up about 50 chickens in a day our the farming years. Afterward, I couldn't eat chicken for a few weeks! We have an old shed on our property here that has nearly fallen down. I haven't done much to save it, as it's well past its useful life, and I'd really like to put up a chicken coop in that area. But that project is pretty far down on my "to do" list. If you're considering getting into raising chickens, you might want to first check your local zoning codes. Of course, if you're out in the country like we are, your next step is to find some good information on raising chickens. When we were raising chickens, our best two sources of information were a book edited by Lee Schwanz, the Family Poultry Flock
From the
at Senior Gardening |


| Affiliated Advertisers |
©2009 Senior-Gardening.com