One of the Joys of Maturity |
|
| Affiliated Advertisers |
Clicking through one of our banner ads or some of our text links and making a purchase will produce a small commission for us from the sale. The Old Guy's Garden Record
The plant holes received a bit of peat moss, lime to counteract the acidity of the peat and to add some calcium that is critical for good tomatoes, a half a handful of commercial 5-10-5 fertilizer, and a bit of bone meal just because it was in the tub with the lime. I watered each hole with a coffee can full of dilute, liquid starter fertilizer before putting the plants in. I planted the rootball of each plant fairly deep, as the buried stem will sprout roots once in the soil. I mulch a little with grass clipping before adding our tomato cages, as it's a bit hard to get the clippings around the base of the plants once the cage is in place. Then I step the cages into the ground, going all the way around each one to anchor it as well as possible. We had two of our cages get top heavy last year and topple over! Once the cages are in place, I bring on lots of grass clippings to hold back weeds and and hold in moisture. Mulched tomatoes are much less prone to moisture stress that can produce cracked fruit.
Our tomato varieties in the main garden this year are Tami G, a grape tomato, Moira, a blood red determinate tomato, our old standby beefsteak, Better Boy, and one I tried for the first time last year and liked, Bella Rosa, another determinate. We'll also be planting lots more Moiras in the field east of us for seed production. While tomatoes generally self-pollinate, I really prefer to have some separation of the seed plants from other varieties to protect against the enthusiastic bee that visits several varieties that are side-by-side. Do note that I did cage our determinate Bella Rosa and Moira plants. Our Bella Rosa's last year grew to the top and over the top of their cages! I wrote about our tomato cages last August and really need to do a "how-to" feature on building them. Since I already have plenty of cages and the concrete reinforcing wire from which they're made is really expensive, I guess my previous comments will have to do for now. Just let me add that if you give the cages a layer of Rustoleum, they last for years and are worth the investment.
We have a nice mix of pepper varieties this year, including an old favorite, Earliest Red Sweet (ERS), that I found on Seeds Trust. Our yellow peppers are Labrador, Sunray, and Gloria. Our reds other than the ERS are Red Knight and Red Ace. I also put out a Staddon's Select, an heirloom variety that was a freebie from my Seed Savers Exchange order. I'm still trying to get our Paprika Select plants up to size before transplanting them. This one is a new variety for me, but we use lots of paprika when we cook lemon-garlic chicken. We've experienced really poor seed germination on this variety, followed by poor seedling vigor after a very few germinated. If I ever get any useable plants, they'll have to go into the east field where we're growing our melons, sweet corn (if it ever dries out enough to get it planted), and tomatoes for seed.
When gloxinias grown from seed finally get to their full blooms stage (7-9 months after seeding), they put on a spectacular show. This gloxinia has seven blooms open with many more buds pushing up from its base. I currently have about a dozen or so gloxinias at various stages of growth, but really would like to get back to where I was a few years ago, with dozens of plants in full bloom at one time (See Gloxinias, a continuing feature on Senior Gardening). Gloxinas put on quite a display with very little effort on the part of the gardener. And I seem to "lose" the plants easily, as visitors to our house rave about them and often end up taking one or more home with them.
I put the pots in an old half flat covered with a clear dome. They then went under the plant lights. Bottom heat isn't necessary or recommended for gloxinia seed. They'll likely germinate irregularly over the next few weeks and months, so if you try growing the plants from seed, do be patient.
As I walked down the row, the answer became quickly obvious as I saw other pepper plants cut off, but with leaves lying around them. I should have realized the problem days ago, as I noticed some row marker marigolds missing their leaves earlier in the week. We had cutworms! After surveying the damage, I saw that while some of the plants might recover, I probably would be better off just replacing the damaged pepper plants. I also began to wonder what to use for cutworm control. In the past I might have dug out the diazinon and drenched the row. Diazinon was taken off the market years ago, and with the small size of our garden, chemical control really wasn't necessary. A cutworm collar around each plant should keep them safe. Since we buy paper coffee cups in bulk, I had a good supply of them to employ as cutworm collars. Some folks use toilet paper rolls, paper or cardboard mats around plants, wax milk cartons, and all sorts of other things that create a barrier the cutworms cannot easily cross. Since I had Dixie Cups on hand, that was my choice. I cut the bottoms out of nine or ten cups and headed for the garden with my collars, pepper plants, trowel, and transplant solution.
I put the new plant in the hole and watered it well with transplanting fertilizer. Then the Dixie cup went over and down around it before I replaced the mulch. The paper cups did seem to force the plants up a bit, so I had to carefully push them back down a bit and even added a bit more soil inside the cup on some of them. The whole process took less than an hour. My main garden does look a bit strange...like I'm growing Dixie Cups or something, but that should take care of the cutworms in our peppers.
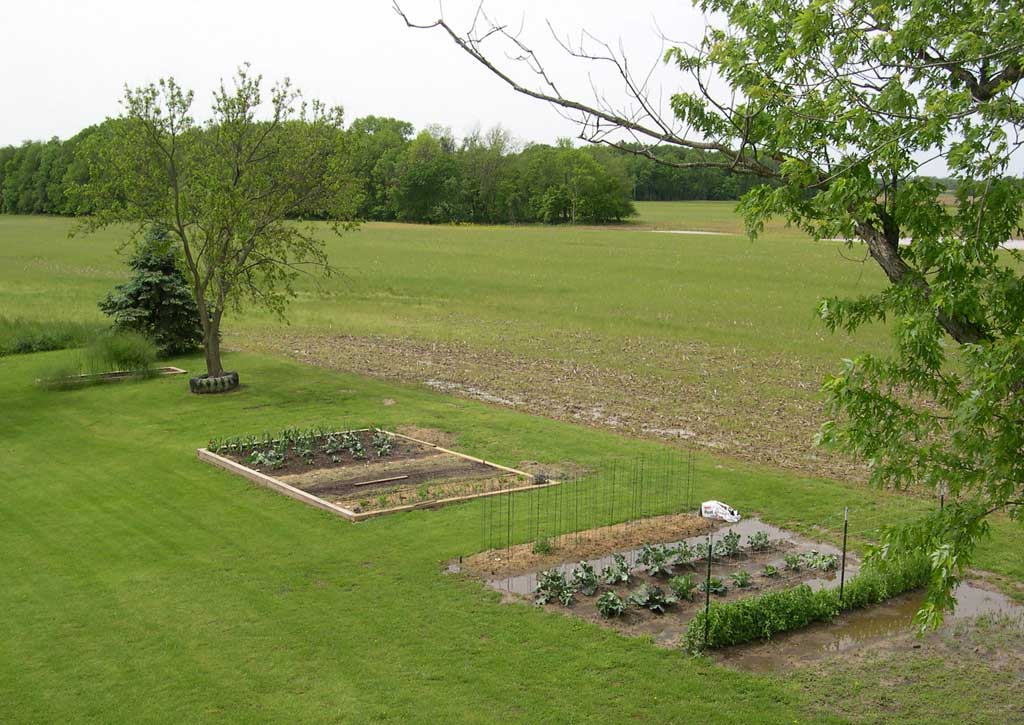
Since I already had my trowel and transplanting solution out by the garden, I went ahead and plugged in a few more lettuce plants before calling it a day. Today started out with heavy fog, and it's supposed to rain again this afternoon and evening. While I'm chomping at the bit to get started planting our sweet corn, I'll just have to wait until things dry out enough to work the soil. I really feel for the farmers in our area who haven't been able to get into the field for weeks. The field shown below just beyond our garden will probably be rotated to beans this year, so they still have time to get it planted in time for a good crop. But that field is typical of most of the fields in our area. Only a few have been worked and even less have been planted.
I finished the initial planting of our raised garden bed today. Actually, I didn't finish. I just used up the last of the available space. I still had several things I wanted to grow in the plot, but my planning wasn't all that good. I'll have to squeeze them in somewhere else or plant them after something comes out of the plot. Even after the scourge of the cutworms, I still had a lot of pepper plants left, so I decided to put in another row of peppers. I checked my copy of Small Plot and Intensive Gardening (60K PDF document) from the Purdue Cooperative Extension Service to see just how closely peppers could be placed in an intensive garden. Their chart suggested 4 plants per square foot! I'm not sure how one could manage such a close planting, but maybe their peppers don't grow as lushly as ours. Encouraged by the recommendation from the Extension document, I decided to space my second row of peppers just a foot from the original row. I also pulled out some old tomato cages the previous owner of our property had left us. They're the short ones that tomato plants always grow too large for. Our peppers were fantastic last year, but they also became a bit brittle as the growing season wore on. I hope the short cages might add some support to our pepper plants if they grow as large as last season's plants.
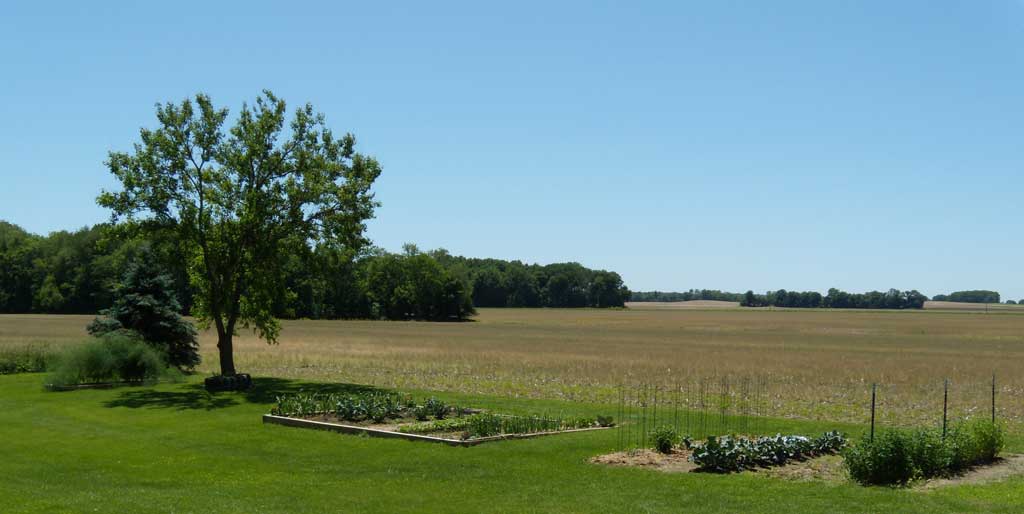
As you can see above, today was an absolutely gorgeous day for gardening. I used Dixie Cups again as cutworm collars, and although not shown above, mulched in the new planting with grass clippings for moisture retention and weed control. Note that I didn't rototill the area today before planting. I used a scuffle hoe
I again scuffle hoed the area before stringing a line to mark the row. Then I used a traditional hoe to work the soil several inches deep and about a foot or so wide. I used the hoe to make a flat-bottomed trench about 3" deep and 6" wide and worked in a bit of 5-10-5 fertilizer and some granular soil inoculant Soil inoculant contains rhizobia, nitrogen-fixing bacteria, that help legumes such as beans or peas fix nitrogen from the air into nodules on their roots. Unfortunately, the chemicals used to treat seeds to protect them from rot may also destroy the rhizobia. Since a good bit of our bean seed is treated seed, I'm not sure the inoculant will do all that much good. The chemicals used to treat seed can also kill the rhizobia. But since I had the inoculant on hand and not all of my bean seed was treated seed, I decided to go ahead and use the inoculant on the bean row. If my inoculant had been the powdered kind that you mix with the seed (It sticks to the seed.), it would have been a no go. Planting green beans is something of an art or personal preference among gardeners. Some folks like to plant a narrow row of beans. Others make a foot-wide trench for their been seed. My 6" wide row was a compromise between the two. The amount of seed spread is also something different gardeners do differently. Some space a single row with seeds one or two inches apart. In wide rows, the seed is rather densely scattered across the width of the row. I chose the latter method this year, although there certainly isn't a "right way" to do it. It's more of a preference and what works for you. Even though I just planted one row of beans, I used four different varieties in the row. I marked off the row into fourths and planted Strike, Jade, Stringless Green Pod, and Bush Blue Lake. I always like to have more than one variety when we can beans, as I think you get a better flavor in the canned product. All four varieties are ones we've grown successfully in the past. After covering the bean trench with soil, I somewhat gently firm the soil over the planting with my foot or tamp it down with a hoe or rake. You want to make sure your bean seed has good contact with the soil around it. With rain predicted for tomorrow, we should have beans up by this time next week. I mentioned earlier that my garden planning was a little weak this year. I'd hoped to plant spinach and kale in the main garden area. I missed getting the spinach in during cool weather due to all the rain we've had. The kale got bumped at the last minute. I'd started a small flat of beets and leek which I'd almost decided not to use. But I finally chose to put in a couple more intensive rows instead of the kale. It can go in a bit later as a succession planting, probably when our garlic is harvested. One double row planted consisted of a few beet plants (Red Ace, Burpee's Golden, and Chioggia) with the rest of the row seeded to Baby Sweet carrots. I seed radish seed in the row with the pelleted carrot seed, as the quick-growing radishes break up the soil surface for the slower germinating carrots. By the time the carrots need the space, the radishes are ready to come out. I also cover my carrot seeding with an old board to help hold in moisture until the radishes begin to sprout.
Part of the reason for my last minute change in gardening plans was my wife commenting on how good the leftover onion transplants looked. They were still growing in flats on the back porch. I'd pretty well decided that since I'm the only one in our household who likes beets, and nobody else really cares whether our carrots are storebought or homegrown, I'd skip them this year. But my wife's comment made me rethink my plan. There was room for either a row of kale or intensive rows of beets, carrots, leek, and onions. I put our few leek plants (Blue Solaize variety) out in the onion row and then used our leftover Red Zeppelin, Walla Walla, Milestone, and Pulsar onions to fill out the rest of the row in a 5" double row. It's been a long time since I tried to grow leeks in the garden, so I wonder how they'll do. The extra onions will be welcome, as we used the last of our storage onions just a few weeks ago. Pulsar is our long storage variety. It keeps well in old potato bags (the string mesh kind) in our basement.
I ended up with a clump of seed in one spot in one pot. I was tapping the seed out of a vial used to store it and a bunch came out at once. In the shot at right, you can see bunches of the reddish-brown seeds clustered together. The seed and the tiny gloxinia plants are way too close to each other. I'll have to watch closely and transplant the seedlings just as soon as I can to keep them from crowding out each other. We had one of the hardest rains I can remember in our fifteen years at this property the night before last. We didn't have any serious damage to our home or garden, but you can see the water standing in low spots of the garden and the adjacent field.
We're still hoping to plant sweet corn in the field, but the wet weather pattern has put off tilling the ground. We still have plenty of time to get it in, although the weed growth since our last tilling will require at least two separate rounds with the rototiller to get it planting ready. We haven't grown sweet corn in our garden for several years, as we got into a rut with corn smut. Even the field corn in the field next to our main garden was infected, so we just gave up on it and decided to let time clean up our ground from the corn smut spores. With the opportunity last year to use the fallow farm field east of us, trying corn again became an option. We missed planting last year because I had elbow surgery at planting time and wasn't able to do any heavy work until late June. I'm really excited about the possibility of growing sweet corn again, as it is one of our family favorites. If you're growing sweet corn and are unfamiliar with corn smut, here's a good link to photos of the infection. I really, really hope that I won't be able to show you pictures of corn smut from our planting later on this year. Control of corn smut is simply walking your planting daily and cutting out the smut and burying it (not in your garden!) or burning it. And even with that, once it gets started, it's a devil to control.
And of course, for every downside in gardening, there often is an upside. Our lettuce is absolutely loving this weather and should be ready for a light picking in a week or so. Our planting of beets and onions appear to have survived the recent storm. And I was especially pleased not to see bean seed washed up from our sowing (from the last posting). In wet weather such as we're having this year, you don't want your seed too deep, as it will rot out easier. But, if you get it too shallow and have a heavy rain such as we just had, it can be exposed as the rain washes the topsoil away and the seed floats to the top. Of course, I also hope our seed isn't in too deep! May 17, 2009 - A Rant About Nikon Cameras and Service I stopped along the road this afternoon to snap a few shots of the unplanted fields full of wild mustard. I used both my backup Nikon Coolpix 4300 and my iPhone 3G, as my "new" Nikon Coolpix P60 has now been in for warranty service for one month!
Nikon Service has twice promised me a time estimate of when the camera will be repaired and returned to me. And twice they've lied. I've now owned two Nikon cameras. The first was the 4300, which was a pretty pricey point-and-shoot camera at the time. The second was the relatively cheap P60. The 4300 developed a "System Error" in its second year, necessitating an expensive, out-of-warranty repair that I believe was a design flaw inherent in many of the Coolpix series. The P60 started vignetting photos after just four months of use. While the repair, if ever completed, will be warranty service, this is way too early for a new camera to start having problems. I'd written some nice things about the Coolpix P60 in the review, A Day Off & A New Camera, but have since amended the column to include Nikon's terrible repair service. It's slow and the people working there are unresponsive. I purchased the P60 after I'd knocked the old 4300 down our stairs. I needed a quick replacement camera and didn't want to mess with learning a whole new camera system of a differing brand. Silly me. I guess I should have listened to Once Bitten, Twice Shy The Nikon Coolpix P60 is capable of taking some very good pictures. But if a camera breaks down as easily and early as mine did and then sits at the repair facility for 30 days waiting for a part, it's not much good to me. Nikon needs to realize that they are destroying their previously good name with customers by producing cheap cameras that fail within a couple of years and offering terrible customer service. I'll eventually move up to a digital SLR. My bad experiences with Nikon digital cameras and their incredibly inept service department pretty well guarantee that my next camera won't be a Nikon. May 21, 2009 - Planting our Flowerbeds
I'd spent a lot of time preparing for this planting, as the area is on the north side of our house and is almost totally shaded most of the summer. Just the front strip of the flowerbeds gets any direct sunlight, and not much at that. I'd started lots of alyssum, dusty miller, and impatiens for the bed, as they all either love or just tolerate shade well. The alyssum and dusty miller also have the nice habit of spreading a bit to fill in open space in the bed. Since one dianthus had overwintered from last year in the bed, I decided to use the rest of our dianthus starts along the front of the bed as well.
Our grass clippings from the lawn get used up as garden mulch, so I bought a couple of bags of hardwood mulch from Lowes for weed control. I'm not really sure if the mulch will make things too acid for the plants, but it sure made the beds look nice when I got done. With frequent breaks, the planting took about six hours! My Brinno GardenWatchCam Note that I reuse my plant packs from year to year. After putting away all my "toys," hosing out the individual plastic plant packs and trays took a good bit of time. Other Stuff As I walked around the garden this morning, I noticed that the cutworms had gotten one more of our peppers! So much for 100% protection from my Dixie Cup cutworm collars! The good news is that the cutworms only got one, which I can easily replace, so they're doing some good. Our peas are a riot of blooms and thin pods. Planted in early March, they got off to a great start and should produce lots of pods for freezing and fresh use. Our broccoli is ready for a heavy picking, and we have cabbage just about ready. There's even a kohlrabi that I planted just because I like the way they look. Even our gloxinias, both under the plantlights in the basement and up in the kitchen, are doing well.
Now if I can just get the sweet corn in this week... May 23, 2009 - Planting Sweet Corn I planted our first sweet corn since 2005 yesterday. As I'd written previously, we got into a real mess with corn smut and had to just give up on sweet corn until the ground cleaned itself up. The opportunity to use the fallow farm field next to us allowed me to plant on uninfected ground and to plant far more than I would have in our regular garden. Relatively large plantings of sweet corn aren't new to me, as I usually planted a couple of acres of sweet corn each year for roadside sales when we had a farm. Of course, I had a 65 horsepower Case tractor, an 8' disc, a four-row planter, and a cultivator for those plantings. Putting in ten, 30' rows with a tiller, hoe, and rake just about did me in!
On Friday, I just tilled the rows to be planted. I also sprinkled some 32-3-10 lawn fertilizer along each row before tilling to give the corn a quick jumpstart (I hope.). That formulation is pretty close to some of the starter fertilizer I used to use when growing field corn. While it may seem like a lot of fertilizer, the farmer who rents this ground (and chooses to leave this little field fallow) commented last year that the soil was pretty well "burnt up." It certainly gave both my 15 year old tiller and me all we could take trying to work up a decent seed bed. I planted two varieties I've used before, Summer Sweet 7640R and Summer Sweet 6800R from Otis Twilley seed. Both are SH2 super sweet varieties that we like. One is an early variety and the other is a full season variety. With lots of room, I spaced my rows 36" apart and planted the seed about 2-3" deep spaced 12" apart in the row. The 12" seed spacing is pretty generous, but it may allow the corn to put on some large ears and will also facilitate good sun penetration and air circulation. The seed went in just like lots of other garden crops with a quick raking of the row to remove clods of grass and roots, hoeing a trench, seeding, and then raking to cover the seed. A friend of mine who raises draft horses told me once that the old standard 36" row spacing came from that being the narrowest width a draft horse could pull a cultivator through a cornfield! I guess their rear end width is a bit under 36"! I think most field corn today is planted in 30" rows. Camera Update I pulled the counter from last Sunday's posting about poor service from Nikon. My repaired camera finally arrived yesterday. Total elapsed time since Nikon received the camera for warranty service: 32 days, 4 hours. That's not exactly an endorsement for prompt warranty service. After a holiday weekend that included preparing for guests, hosting a houseful on Sunday, and resting up from the guests, our garden is a bit neglected. We did pick lots of broccoli and cauliflower for fresh eating and to send home with family. But no garden chores got done, although it was nice when the family admired the garden.
Since I'd worked up a row last week in our "extra garden" (a fallow field a farmer lets us use), I put in one more row of melons. This time I transplanted an old favorite, Moon & Stars watermelon, a couple of seedless varieties that have been very slow growers, Everglade from Park Seed and Ssupersweet (not a typo-"Ssupersweet" ??) #5244 from Twilley Seed, and Passport Honeydew melon. I just don't have much luck with the triploid seedless varieties of watermelon for some reason. Of course, the contents of the seed packet from Twilley resembled seed trash more than a packet of seeds.
Our peas should be ready for a first picking tomorrow! One variety, Maxigolt, has stopped blooming, as it is loaded with ripening pods. It should resume blooming with a good picking. The other two varieties, Eclipse and Encore, are just a few days behind the first one. One final joy of cloudy/rainy day gardening is that I can cheat a bit and work in just a T-shirt, rather than my full sun protection gear. While I'm thrilled to currently be free of any skin cancers, wearing one of my long-sleeved Coolibar shirts Even though it had rained overnight, I was able to get out yesterday and "renovate" our broccoli. We've picked all the main heads from the plants, but there's still a great secondary harvest of side shoots to come. I hand weeded under each plant, removing any dead leaves or leaves damaged by the harvesting knife. Then I spread a handful of 12-12-12 fertilizer around the base of each plant and worked it into the ground with a my standard garden hoe
Of course, when I got to working, I saw that I had lots of weeding to do. I used the standard hoe to clean up as much as possible, but noticed this morning that I still have lots of weeding yet to do. An overnight rain of an inch and a half helped some of the weeds survive.
Our peppers are doing nicely now that the cutworms are being held at bay with Dixie Cup cutworm collars. Our planting of green beans is up and doing fairly well, also. I did notice some insect damage on the leaves, so I'll have to break out the sprayer soon.
Grass clipping mulch is great for holding back weeds, but care does need to be exercised not to get any of the fresh, green clippings on existing plants. The natural heating and decay of the clippings can damage the plants mulched. I let clippings sit a day or two and brown out when I have to put them right up against the base of plants. In this case since each plant already was mulched, it was just a matter of filling in thin spots in the previous mulch and then adding a ring of clippings for the plants to grow over.
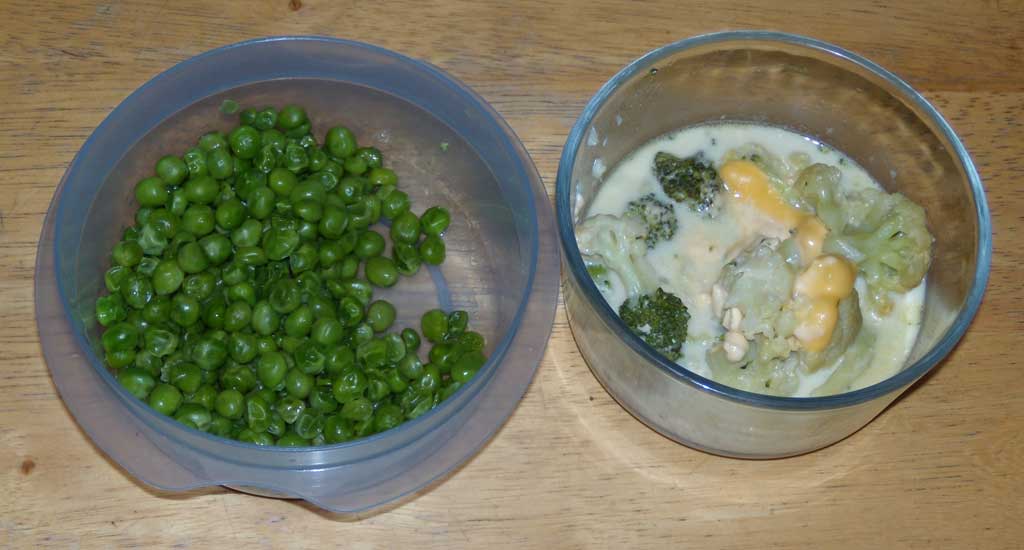
I couldn't wait and picked a few peas for supper a couple of days ago. Annie and I each had about a tablespoon and a half of fresh peas! This morning I did a more thorough picking of our first variety of peas to ripen (Maxigolt). There were less peas ready than I thought, and I had to wade a bit to do the picking. But then, no matter how many peas there are, it always seems there's not enough of the fresh eating delight.
We do try to freeze peas each year, but the five or six quarts we put up are quickly consumed. While I could grow more rows of peas each year, they're a vegetable whose return on time and investment really isn't as great as a lot of other things we grow in our garden. (Wow! Did I almost use a business acronym, ROI, in a hobby garden blog?) And, I guess the relative scarcity of the item makes us appreciate fresh peas in the spring all that much more. I always trellis my peas, as I get a enough bending-over work later on in the summer picking green beans! The Maxigolt variety of peas I picked this morning started carrying pods at about 18" high and up. The variety description in the Johnny's seed catalog says that "the vines average 3 1/2-4' (5' in fertile soil)." Carrying their fruit higher than other varieties is a definite plus for senior backs! And while the peas aren't quite as sweet as our favorite variety, Eclipse, their excellent germination, growth habit, and early production will probably ensure that we'll add them to our "grow list" for the future.
Leaving the seed spikes will allow the the garlic to devote its energy to producing a seed head above the plant. Snapping off each seed spike takes care of them and directs the plant's energy to maturing a good cluster of garlic cloves underground.
Peeking out from the left edge of the compost heap photo is a bit of cantaloupe rind. I bought a couple of Athena melons at the grocery, as they were on sale and are also a variety I have growing in our melon patch. I was thrilled that the melons had an excellent flavor and can hardly wait for ours to begin setting on fruit.
Our sweet corn is beginning to emerge, but it's a bit too early to tell if we're going to get a good stand. Some areas in the corn rows are still very wet, and I fear that some of the seed may rot. One of the drawbacks of growing SH2 super sweet varieties is that they need warm soil, sufficient, but not excessive moisture, and good soil fertility. I guess I'm saying that the SH2's are a bit touchy to get started. I've had years where I've had to replant twice to get a good stand! In a day or so, I'll examine the sweet corn again and decide whether to till over and replant or to just fill in the bare patches with some short season SH2 seed that I have on hand. Watering Hanging Baskets
I just leave an old canner lid whose base long since developed a leak on the back porch for bottom watering our hanging plants. Our begonia that starred in the hummingbird photo at right is getting a drink here. (Photo is available on my Desktop Photos page for free use as a desktop image or wallpaper.) I picked up the begonia plant at a discount store several years ago. While it was our main attractor for hummingbirds in 2007, I've found that our petunias and even the impatiens seem even more to the small birds' liking.
Lunch
Sometimes it's easy to forget how blessed we are in the United States with enough to eat for most of us at every meal. And while home gardens can cut ones food bill a bit, I think eating better is even more of an inducement for keeping a home garden than the savings on food. And while our health plan provides a "free" membership at a local gym, I'd much rather get my exercise in the garden doing something useful. New Affiliate Advertiser...and a Senior Moment Confession Last Christmas I decided to send my Dad a popcorn and sweets collection from The Popcorn Factory Fortunately, the recipient told UPS the errant shipment wasn't theirs. The Popcorn Factory's customer service called me, got the correct shipping address, and reshipped the order to my father at no extra charge! At that point I was really impressed with the folks there.
So...I guess that's a long promo and endorsement for our new affiliate advertiser, The Popcorn Factory I may just send Dad some more popcorn and goodies for Father's Day, but I'll make sure to double check the address before I hit the order button!
From the
at Senior Gardening |


| Affiliated Advertisers |
©2009 Senior-Gardening.com