![]()
One of the Joys of Maturity
One of the Joys of Maturity |
|
| Affiliated Advertisers |
Clicking through one of our banner ads or some of our text links and making a purchase will produce a small commission for us from the sale. Growing Beans
Beans are a warm weather crop, so they don't have to be started in the early spring. Most bush green beans have a rather short days-to-maturity figure, around 50-60 days, so they can be easily grown in northern regions with short growing seasons. Even beans for drying with their longer days-to-maturity have plenty of time to mature from a June planting in most of the United States. While we've grown pole beans and various beans for drying, most of the beans we now grow in our Senior Garden plots are green beans, kidney beans, and lima beans. But the culture for each is about the same. Planting Green Beans Beans should be planted in fertile, well-drained soil in an area with at least six hours of full sunlight each day. Yeah, right. They'll actually grow fairly well in pretty lousy soil, as evidenced by our bumper crops of kidney beans grown in the poor clay soil of our East Garden plot. But your beans really will grow better in good soil and definitely need as much sunlight as they can get.
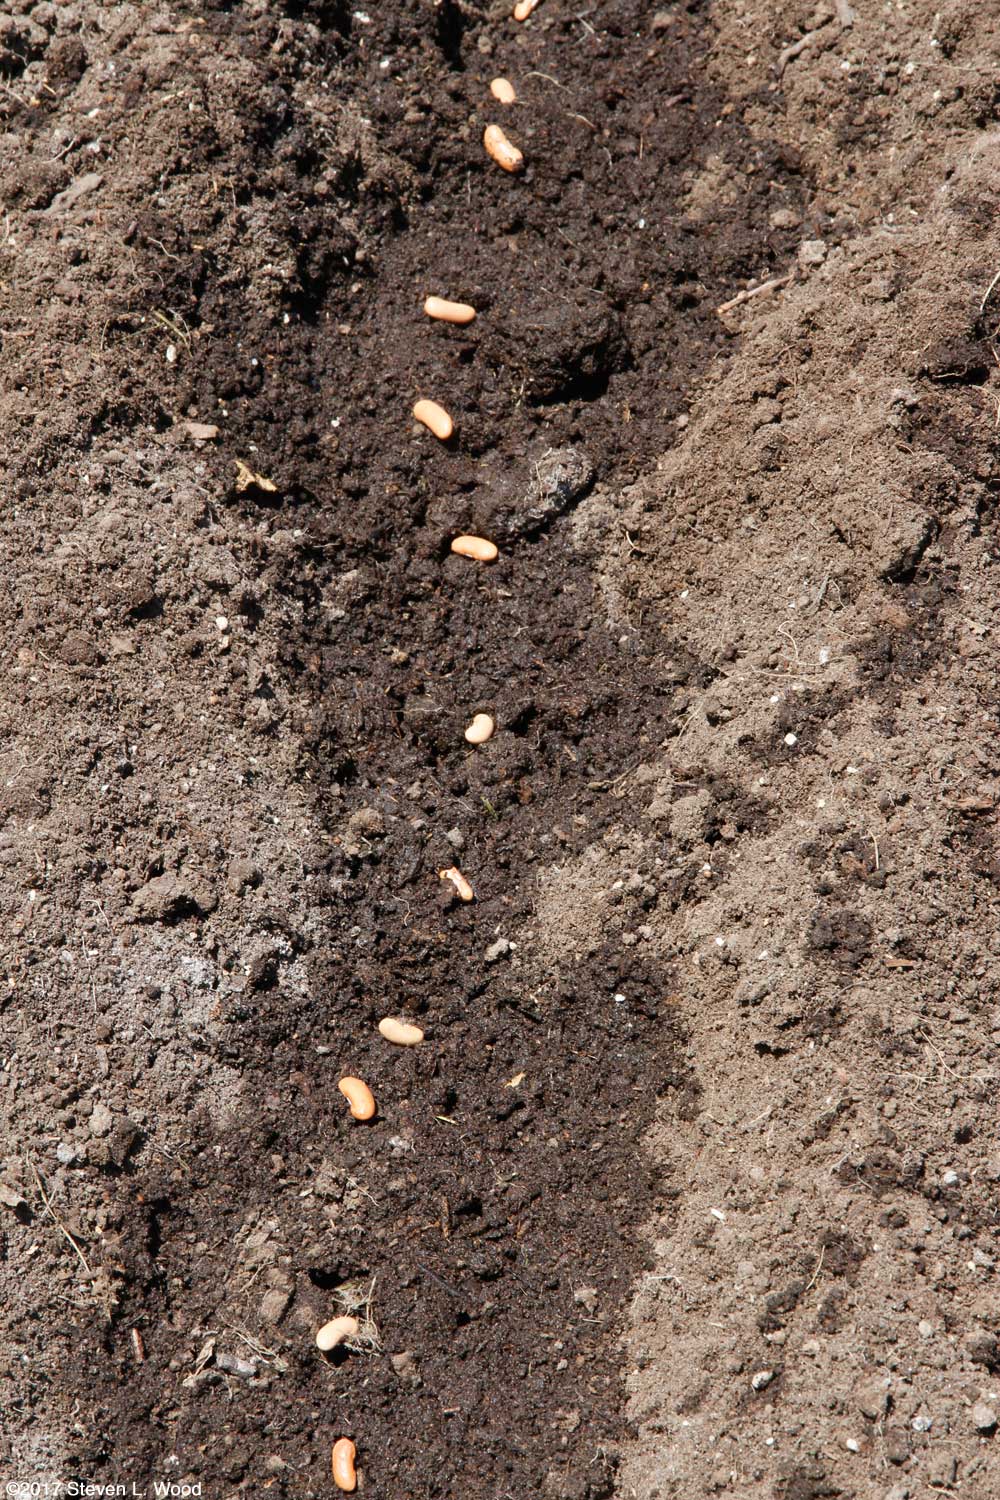
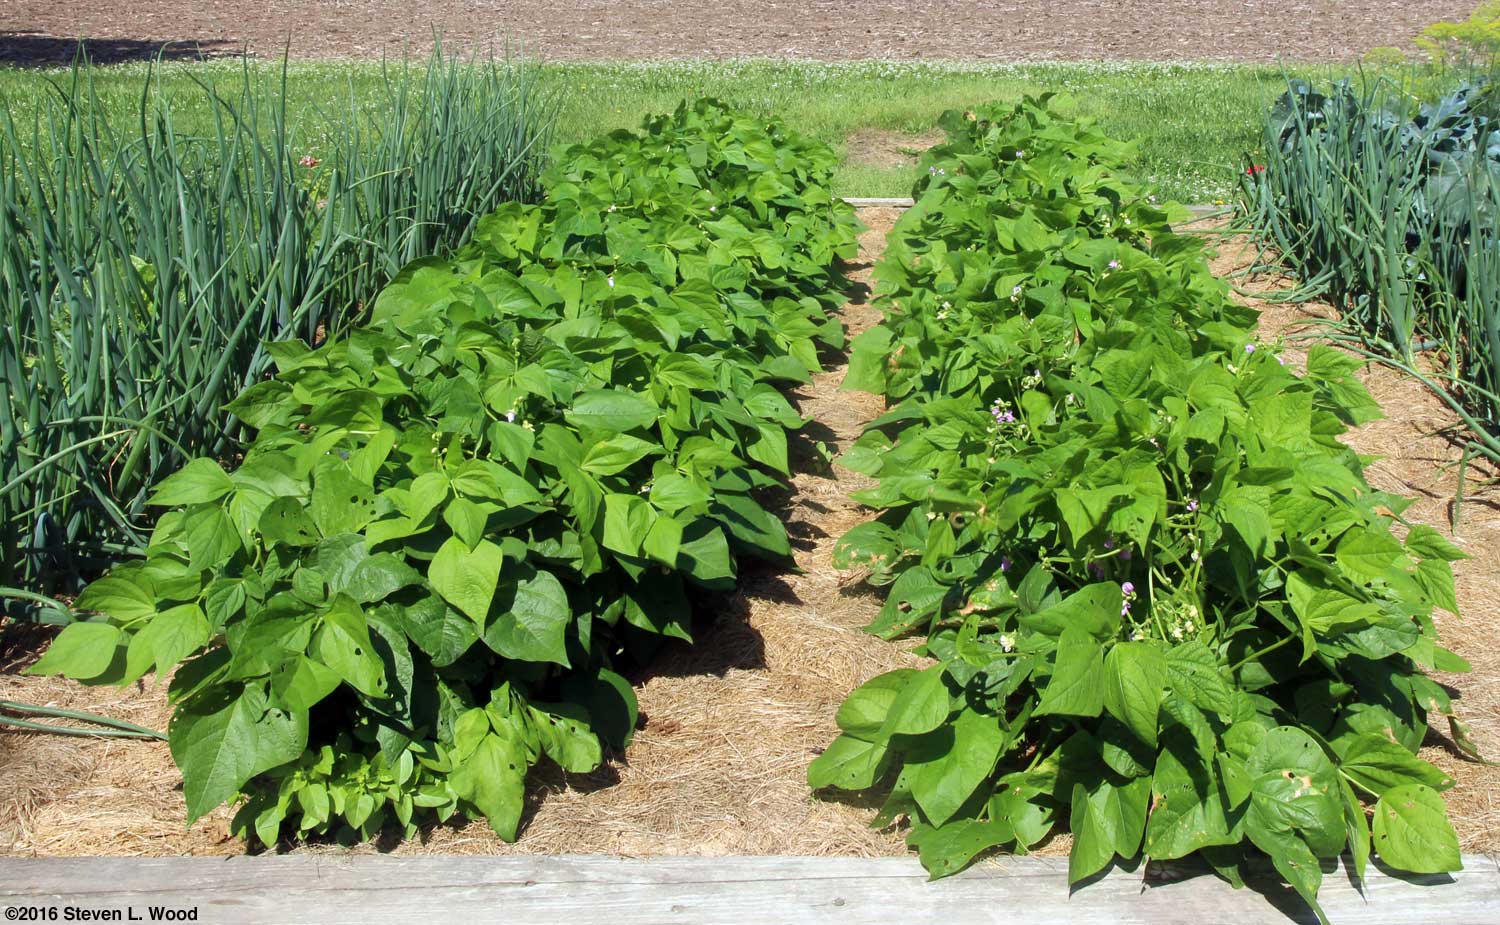
Bush green beans can be planted in a single narrow row or in a wide row. Plants in a narrow row will fill out and produce a nice crop, with more beans per plant than those in a wide row. Rows planted with a single row of beans down the row seem to me to be a bit easier to keep weed free. Planting green beans in a 6-8" wide row will produce fewer beans per plant, but far more beans overall than a narrow row. Wide rows require a bit of weeding between the bean plants until they canopy. We've grown our green beans both ways. As I've aged and find picking beans a rather onerous chore, I've moved towards narrow rows of beans which are easier to pick. Either planting method should provide one with lots of beans for fresh use, canning, and/or freezing. With the wide row method, one needs to use a garden hoe or rake to open up a furrow 4-8" inches wide and a couple of inches deep. I like to spread a little 12-12-12 fertilizer and some granular soil inoculant down the row and work them into the soil with a hoe. The inoculant may get zapped by treated seed, but stands a chance of inducing the beans to add nitrogen nodules to their roots. As the beans mature, the plants use some of the stored nitrogen to fill out the beans. Any leftover nodules simply enrich ones soil. In planting a wide row, one may break a gardening rule or two. Sprinkle the seed liberally down the row. If you have the time, try to keep seeds at least an inch apart. If you're not so inclined, the beans will still grow well, although some plants will get crowded out (rule breaker). Then pull an inch or two of soil back over the bean seed and firm the soil. I like to use the head of a rake or hoe to gently tamp the soil over the planted bean seed. For a narrow row of beans, use a hoe to open a two inch deep furrow. Working in some balanced fertilizer and inoculant is recommended, but be sure to go easy on the fertilizer. Spread the seed down the row, trying to space the seeds one to two inches apart. Then cover and tamp the soil to ensure good soil to seed contact. In dry planting conditions, one can enhance seed germination by watering the furrow before seeding. That gives the seed some soil moisture to germinate. One can also briefly soak seed before sowing (30 minutes or so) to improve germination. But soaking the furrow or soaking seed are tricks really not necessary unless ones soil is really dry and likely to remain so for a time due to lack of rain. Also, once you soak your bean seed or water the furrow, you must keep the soil moist until the bean plants emerge. Despite some drawbacks to the process, we like to mulch right up to the edge of our green bean rows at planting. Doing so holds in soil moisture and prevents weed growth. The drawbacks are grass blades that get into ones pickings of beans and any weed seed that might be present in the grass clipping mulch. Planting requirements for kidney beans or other dry beans or pole beans are the same as for green beans. With dry beans, one has to be sure there are enough growing days for the beans to mature before a frost. Our kidney beans are rated at about a hundred days-to-maturity, but generally are ready to be picked at around 90 days. In most regions, a June planting of dry beans has plenty of time to mature before a first frost. For pole beans, we plant ours along a five foot high nylon trellis held up with clothesline wire attached to T-posts. According to a Cornell Vegetable Growing Guide, "Pole beans yield two to three times more than bush beans from the same space, are easier to harvest, and many gardeners believe they are better tasting." I'd disagree with the flavor evaluation of Cornell, but we've only grown one or two varieties of pole beans, and those, only occasionally. Planting culture is the same as for a narrow row of bush green beans.
A Word or Two about Bean Varieties
In years where we have room for two rows of green beans, we plant three different varieties in each row, made up of our current favorites: While most of the links above are to Burpee (one of our affiliated advertisers), we now get a lot of our bean seed from Fedco Seeds (of which we're a consumer member).
Harvesting Beans
We just go down our rows, pulling through the bean foliage to pick our beans. We're as gentle as possible with the bean plants during our first and second pickings. During our third and final picking, we usually pull the plants and strip off the good beans. Dry beans need to be left on the plant until the pods turn tan or brown. Bean pods splitting open and shedding beans are a sign it's time, possibly past time, to pick the beans. Once the brownish pods are picked, they should be spread out on a flat surface to further dry before shelling the beans. Shelling can be accomplished by hand as one would do with peas or by banging the plants around in a bag in a trash can to split open the pods. We have better results hand shelling our beans than trying to thresh them out by banging them around. Disease and Insect Problems Other than bean rust, I can't remember experiencing any serious disease problems in our beans over the years. But there are a host of viral, bacterial, and fungal diseases that can attack or even ruin ones bean crop. Rather than write about something I know little about, I'll share some good links I found on bean diseases. I do know, however, to avoid working ones beans when the plants are wet. Doing so can spread any diseases that might be present.
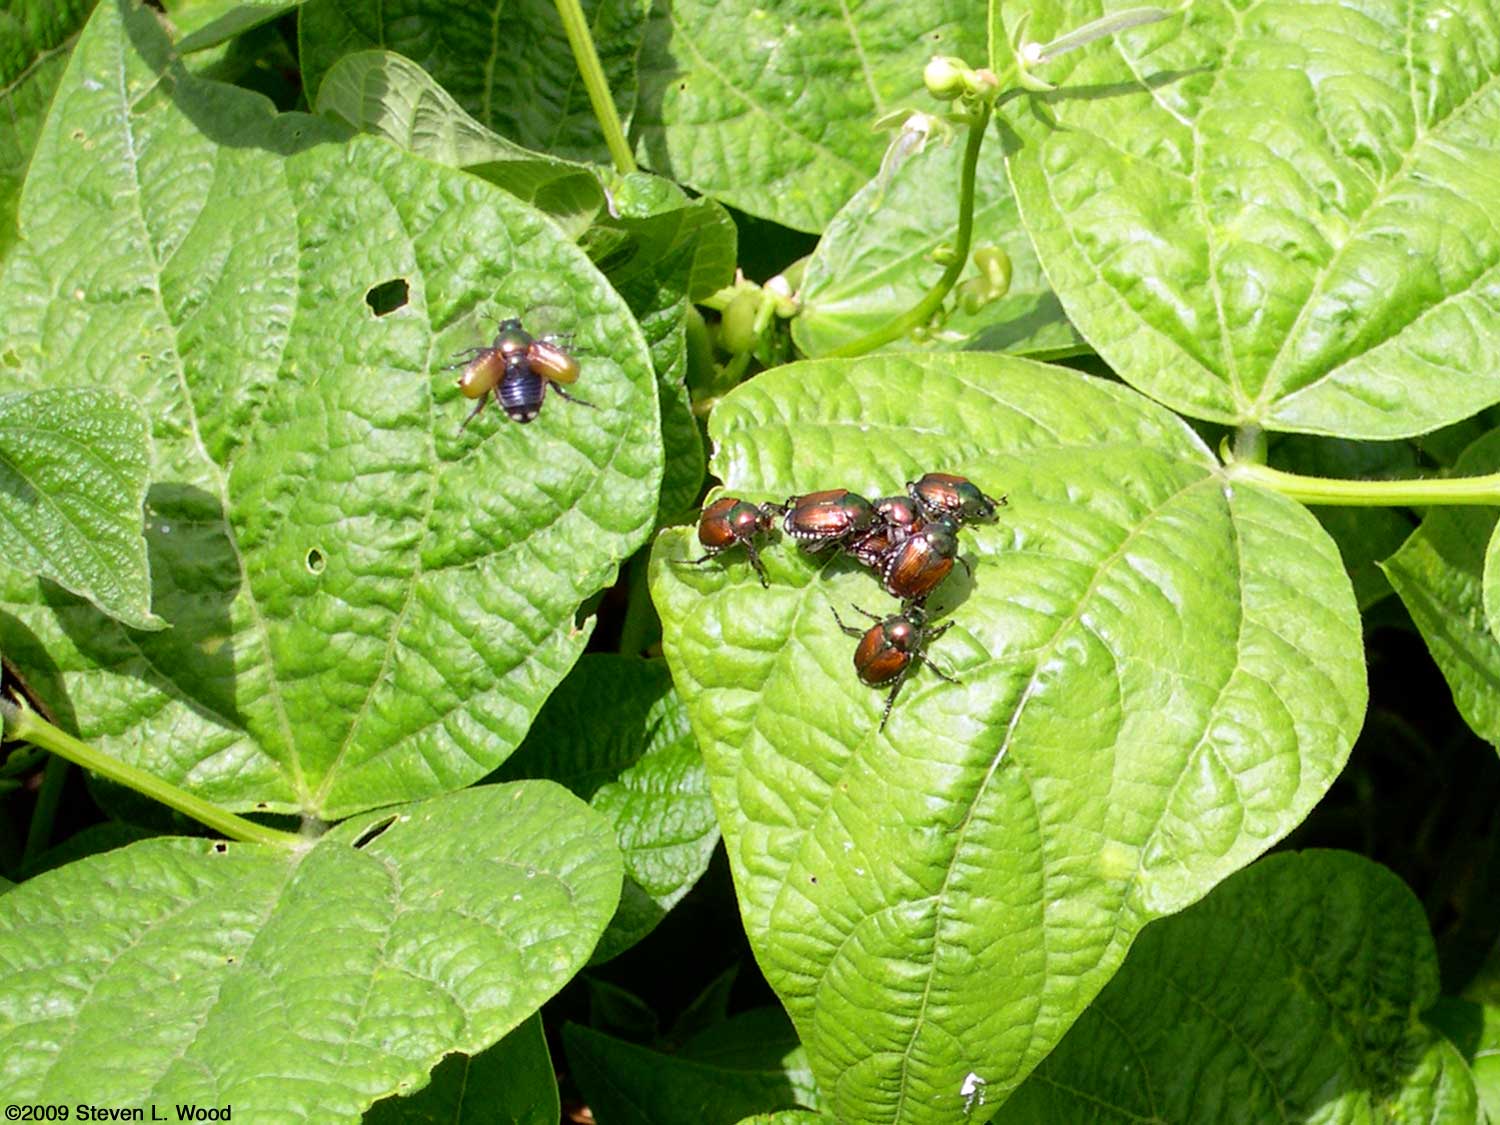
Our most serious insect problem in our beans are Japanese Beetles. As mentioned above, in years when the farm field near our garden is planted to soybeans, we grow our beans early in the season to avoid the influx of Japanese Beetles the soybeans seem to generate as they mature. But even with early growing, chemical control is often necessary. We usually resort to using Sevin In recent years, we've begun to see some stink bugs on our beans and other crops. Stink bugs look a lot like squash bugs, but are different. A University of Maryland page shows the differences. We find that Neem Oil discourages stink bugs on our tomato plants and beans, but only for a day or two. Cutworms can create havoc in newly planted beans. They cut off plants at their base. Proper cleanup of vegetative trash from previous years, good tillage before planting, and Milky Spore protect our beans from the pests. Preparing Green Beans for the Table, Canning, and Freezing
We don't often cook fresh green beans for meals, as they take a long time to get tender. The one exception is when we steam long, straight gourmet beans with tender young carrots in chicken broth with lots of garlic. Snapping green beans, removing the ends, bad spots, and snapping them to 2" lengths, is a really time consuming job. Doing so on a breezy back porch with a loved one on a summer's evening makes the job much easier. When canning green beans, I don't add any meat to the mix. Adding meat pushes canning times for quarts from 25 to 90 minutes. I do, however, freeze leftover fatty ham and drippings when we cook a ham to save for seasoning our green beans. Bacon and onions, of course, are excellent flavor additions to beans. We usually can our beans with lots of onion, especially sweet onions, when we have them on hand at canning time. At times when we're lacking saved ham, a strip of bacon cut into small pieces nicely seasons a quart of canned green beans. We do freeze a few green beans each year. We cut the beans into 2" pieces with ends removed and blanch them for several minutes. After drying the beans on a kitchen towel (for us, cheap bar mops from Sam's Club), we spread the beans over a cookie sheet to freeze. Doing so allows us to pull out just a few green beans for various recipes.
From Steve Wood, the at Senior Gardening Ads shown on this site do not represent an endorsement or warranty of any kind of products or companies shown. |
| Affiliated Advertisers |
©2018 Senior-gardening.com