One of the Joys of Maturity |
|
| Affiliated Advertisers |
Clicking through one of our banner ads or some of our text links and making a purchase will produce a small commission for us from the sale. The Old Guy's Garden Record
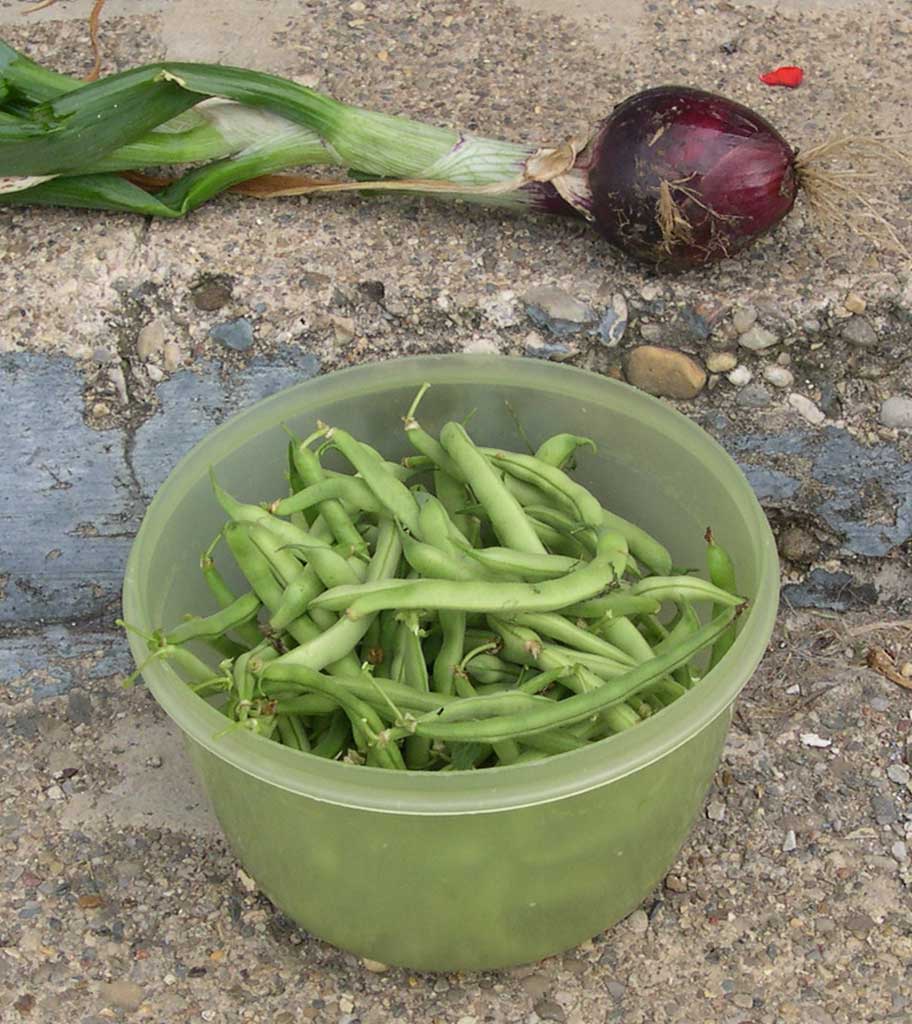
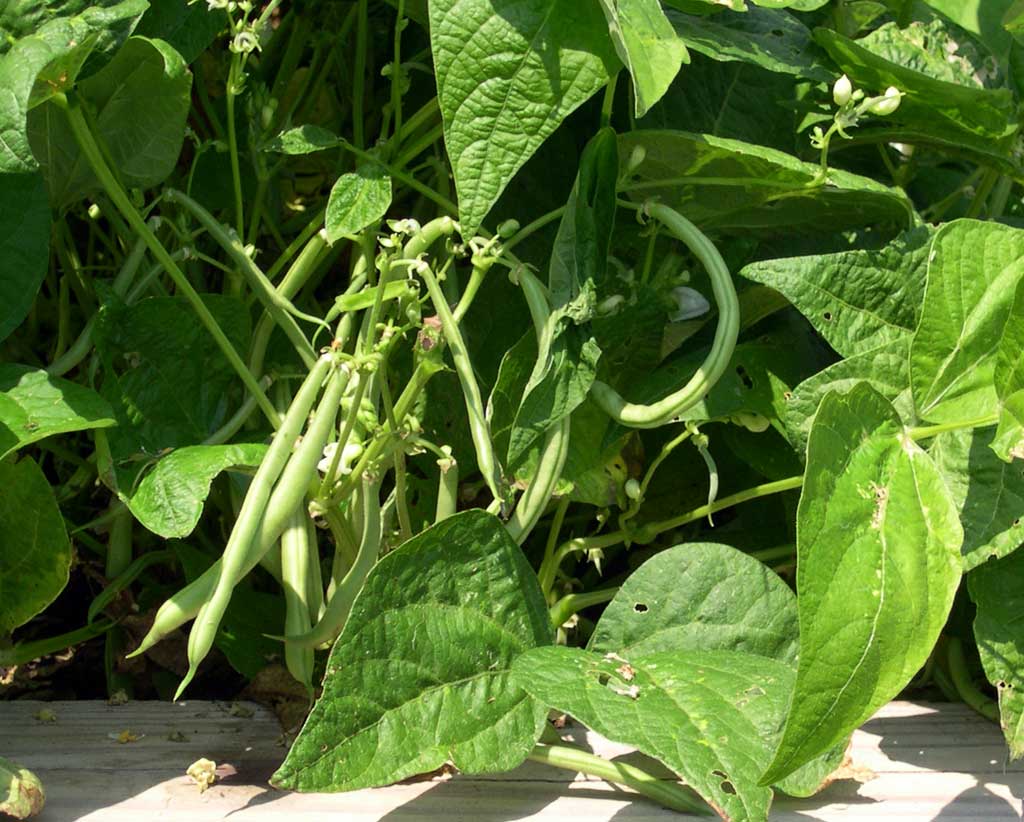
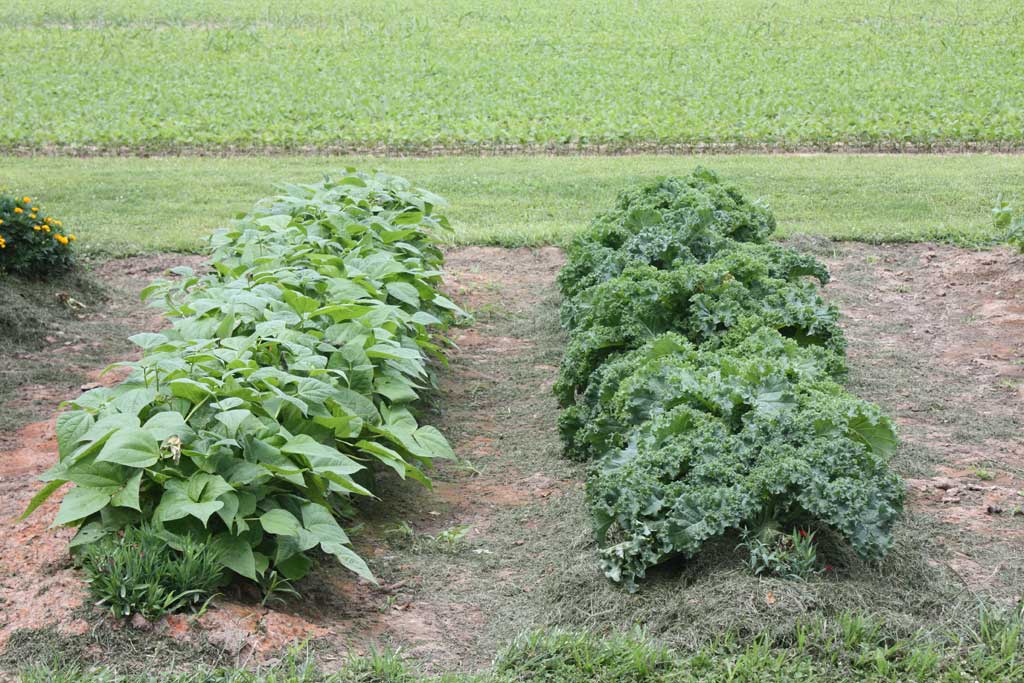
Our house today was filled with the smell of green beans cooking! I was able to take a light picking of beans from our May 12 planting. If my math is right, that comes out to 50 days for varieties that are rated at around 54-55 days from planting to maturity. I'd guess that in just a few days we'll be taking a heavy picking from the row. Some of the green beans were a bit lumpy in this picking (the Jade and Stringless Green Pod varieties). My guess is that they weren't as fleshy as I like due to insufficient moisture (at times). This is our first crop of green beans in the raised bed, which dries out fairly quickly. I generally don't mulch green beans with grass clippings, as it makes a real mess cleaning all the grass off of the ones touching the ground.
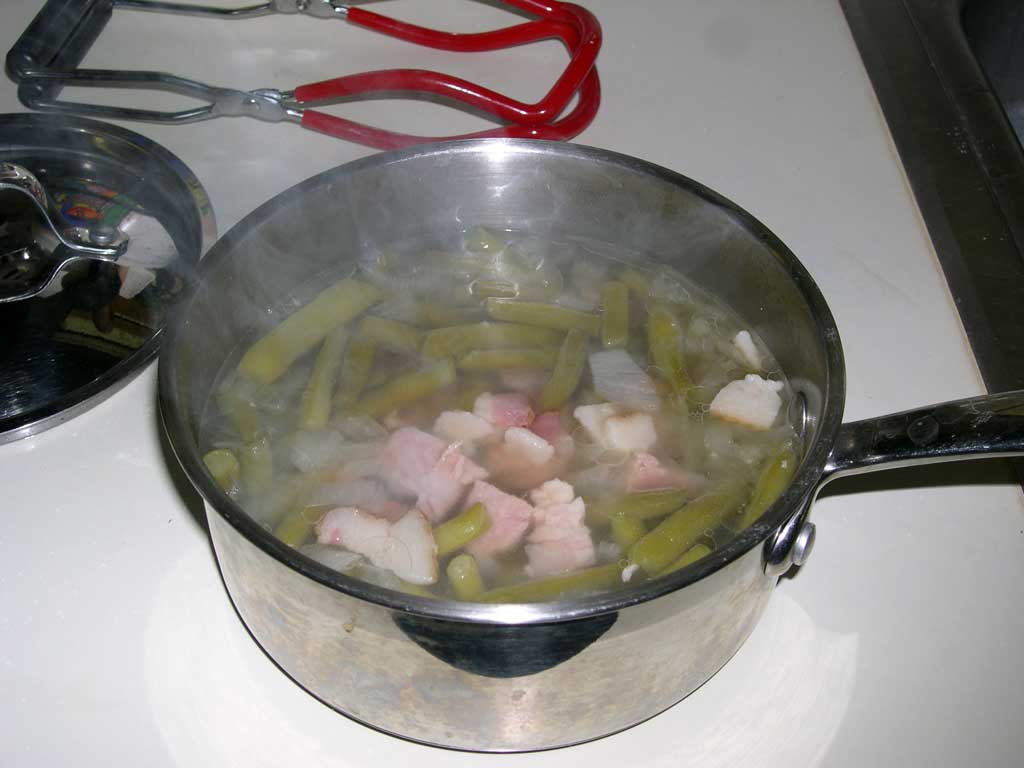
I specifically mentioned not mulching green beans above, as I sorta messed up this week...and mulched our beans. My wife, Annie, and I were outside last night enjoying the cool, early evening air. There was a nice pile of grass clippings by the garden that I hadn't used as yet, and I decided to add some mulch along our pepper planting while we talked. Then I added a bit beside our onions. And of course, the beans are in between the peppers and onions. While I tried to be careful to just bring the mulch up to the edge of the beans, I got it too close. Grass clippings on green beans make them very hard to clean and snap...unless you like a bit of hay in your green beans! But back to the pot of beans...with a red zeppelin onion and some bacon for seasoning, they were great! I also planted another row and a half of beans in vacant areas that have opened up in the garden.
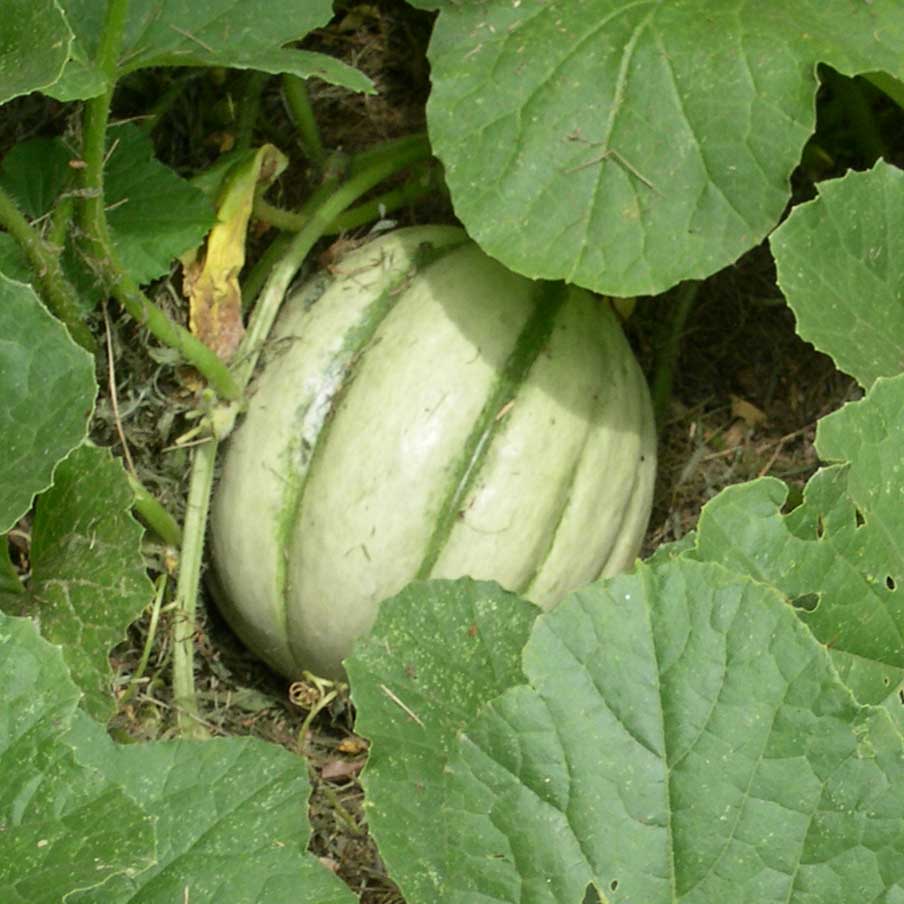
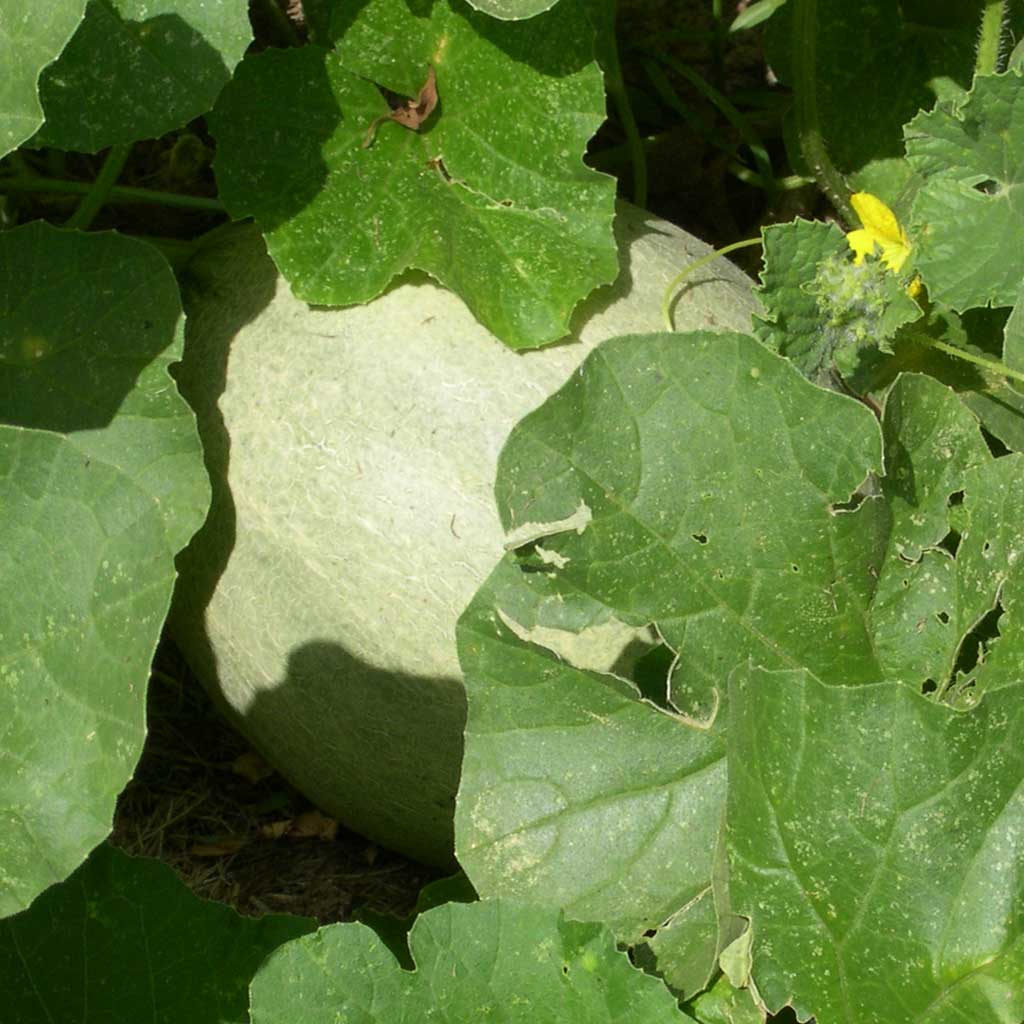
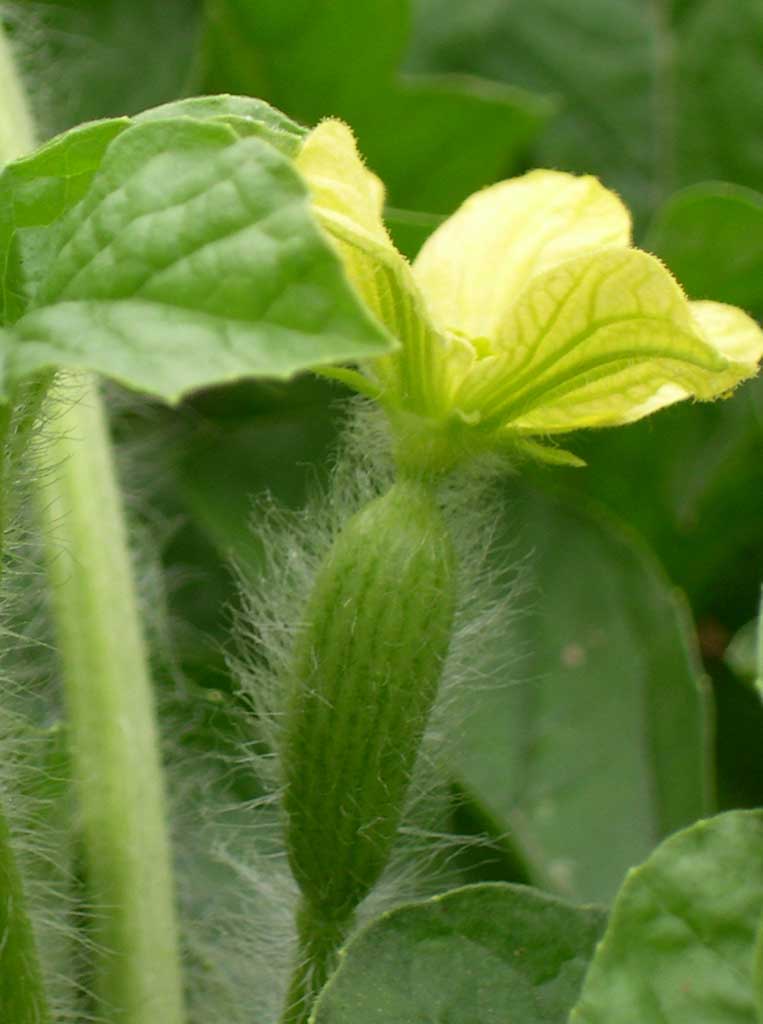
Don't rush out to the grocery or farmers market looking for Kleckleys (also known as Monte Cristo melons). You probably won't find any. The rind of the Kleckley Sweet variety is too fragile for shipping. I've even broken a Kleckley melon by hitting a bump with my garden cart from the garden to the house! Most of our melons were planted at the end of April, so we may have cantaloupe and possibly even a few watermelon this month. Our melons are at the shaded end of our East Garden, so that may delay their ripening a bit, but may also help with moisture. Melons do need good, regular rainfall.
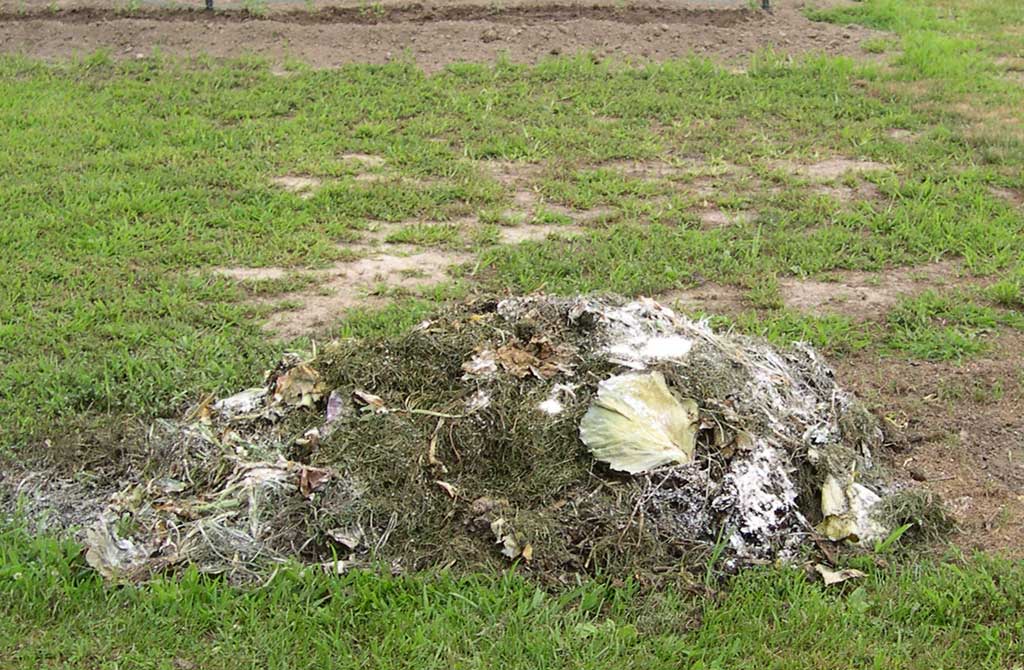
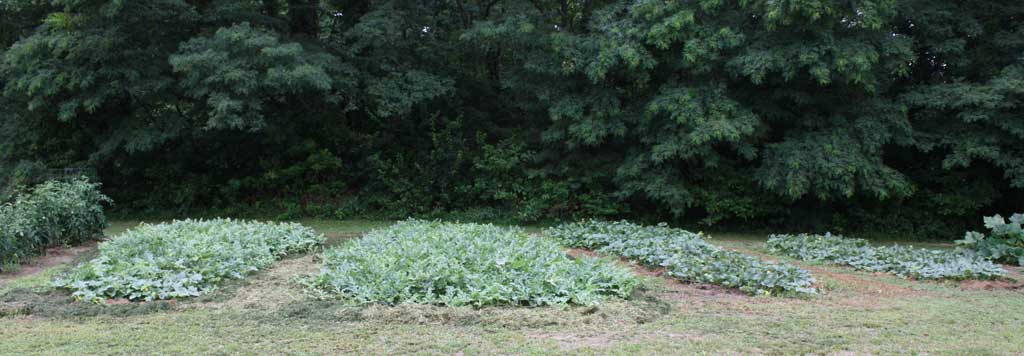
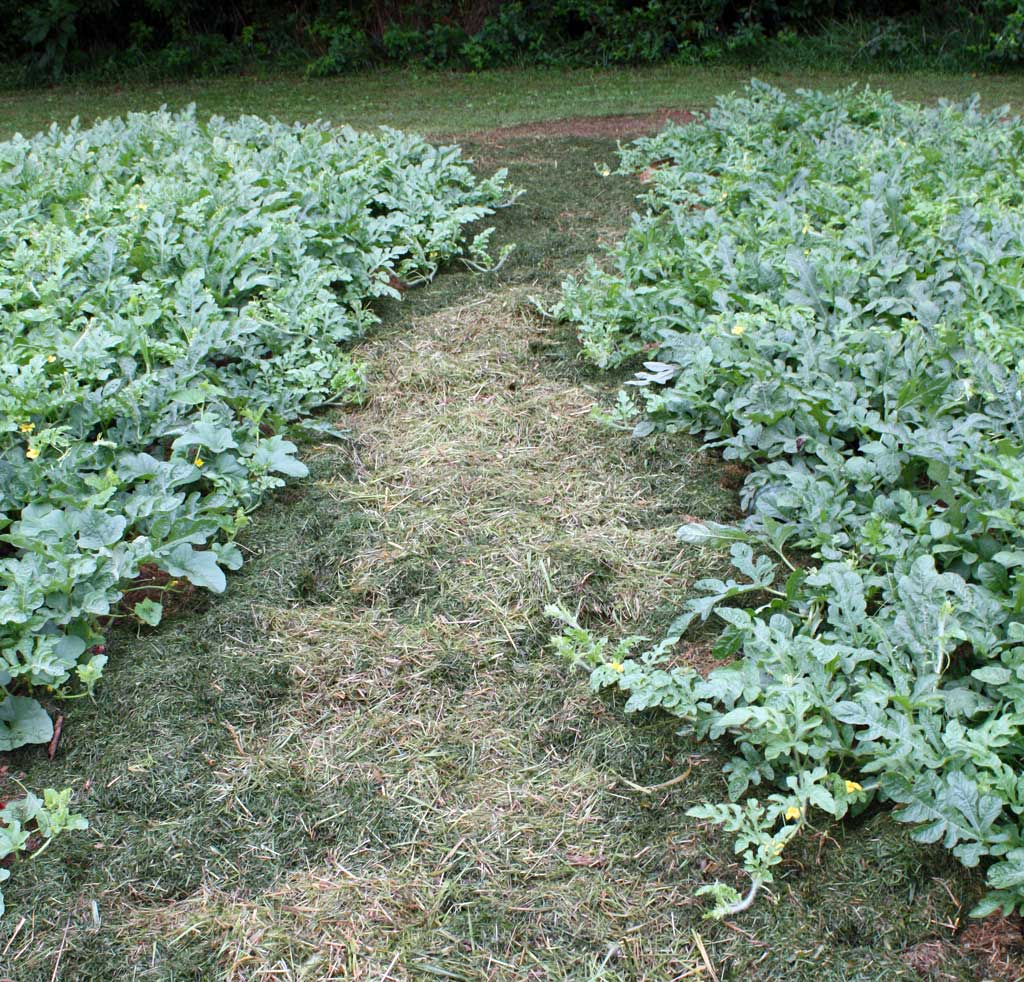
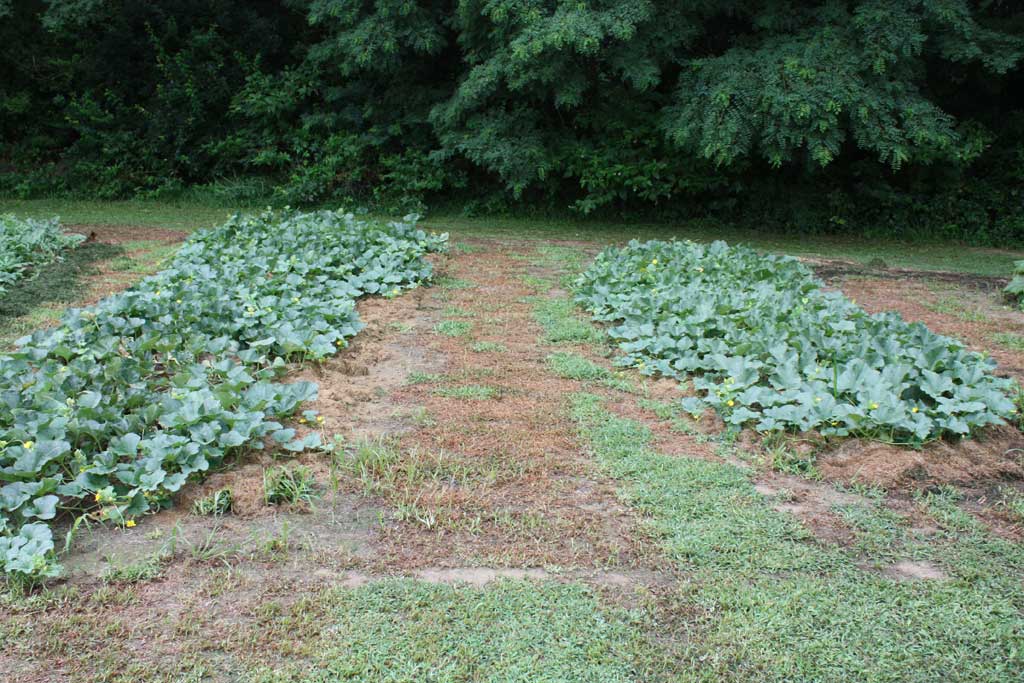
All of our melons are mulched with grass clippings for moisture retention and weed control. The whole area was tilled before planting, but I allow grassy strips to grow back between the rows of melons and just mow them for weed control. I try to stay ahead of the vine growth by mulching just a bit beyond the vines, but often just don't have enough mulch. On mornings when the wind is dead calm, I do cheat a bit when necessary and knock down the weeds (and some of the grassy strips) around the vines with Roundup. Eventually, the vines may cover part or all of the grassy strips. One last continuing chore I did again today was to spray our brassicas (currently broccoli, cabbage, and kale) with the biological, Thuricide (BT - bacillus thuringiensis). I'd noticed a few white cabbage moths fluttering around the plants the last few days. It's especially important to control cabbage moths and cabbage loopers in the kale, as once they get started, they're hard to eliminate, even with strong insecticides. Freezing Garden Seed When I got inside, I took time to gather all of my leftover bean, pea, and sweet corn seed. We're done planting them for this year. Each went into its own freezer bag and those will go into a jumbo freezer bag tomorrow and into our big freezer. We keep our extra seed frozen from year-to-year in a non-self defrosting, chest type freezer to preserve it. Some seed doesn't preserve well even with freezing (onion seed). But I also have had seed labeled with dates in the early to mid-90's germinate in the last year or so (Moira tomatoes, Japanese Long Pickling cucumbers, saved gloxinia seed).
Friday, July 3, 2009 - About Garden Seed
The renewed interest in gardening appears to have had an effect on seed suppliers around the country beyond giving some their best sales in years. I've noticed a slight, but overall decline in the quality of seed supplied this year. Reputable seedsmen all pride themselves in exceeding federal seed germination standards, but those standards are really not all that high. For example, sweet peppers and carrots must germinate at 55% and green beans and sweet corn at 75% in controlled tests to meet the standard. Some seedsmen stamp their test germination percentage on each packet of seeds. Others don't. And of course, your results in the field or greenhouse are almost always going to be at least a bit lower than the test results due to growning conditions that aren't ideal. Our list of trusted seed suppliers has shrunk considerably this year as a result of the diminished quality of some of the seed we've received.
It's always a bit tough to know if your seed didn't grow properly from something you did or some other variable. Unfortunately, I had some experiences this year that clearly demonstrated inferior seed causing me to remove Twilley Seed, Mountain Meadow Seed, and Thompson & Morgan from the list above. I recently wrote Twilley Seed a letter about their seed and quality control, asking among other things how I could receive a packet of expensive seedless watermelon seed that contained cracked and crushed seeds with the enclosed glassine of pollinator seed in perfect shape. Twilley responded with a refund check and the usual customer service response of an insincere apology, no acceptance of responsibility, and laid the blame for the seed failures at my feet. I returned the check with the suggestion that they learn something more about customer service. One curiosity variety I tried this year was Paprika Supreme peppers. I originally ordered some from Johnny's, but they cancelled the order as they were out of stock. I finally found some from Mountain Meadow seed, but only got one viable plant after repeated tries. I finally did a seed germination test with the last ten or twelve seeds on a paper towel. None germinated! A packet of their Heat Wave variety of Vinca also proved difficult to germinate. Thompson & Morgan bit the dust on our list when their Worlds Top 6 Mix of 30 geranium seeds produced only one viable plant. I may yet try them again for the same assortment, as I wonder if this seed failure was part of my greater seed geranium disaster last winter. Saving Seed This year we'll be saving seed from just two vegetable varieties, Moira tomatoes and Earliest Red Sweet peppers. Saving seed requires strict isolation to prevent cross-pollination from other varieties. Our Moira for seed and the ERS pepper are planted in our East Garden, over a hundred yards from any other tomato or pepper plants. We also have some Moira and ERS in our main garden, but won't save any seed from them as they grow beside other varieties. Tomatoes generally self-pollinate, but that one odd honeybee can introduce a cross that can spoil your saved seed! I'm also growing out a couple of Japanese Long Pickling cucumber plants this year to make sure our seed saved last year is true to type before offering them through the Seed Savers Exchange. If we save seed from them, I guess that will make three varieties. And of course, we're working on hand pollinating our gloxinias for seed production. Color in the Garden One disappointment with what so far has been a really good gardening year is the lack of color (besides green) in our vegetable garden. It's there if you look for it, but I didn't plan a full flower bed this year in our main garden. I guess I thought that the reds of our tomatoes and the reds, yellows, and oranges of our peppers would satisfy my lust for color, but all have yet to put on much color in their fruit.
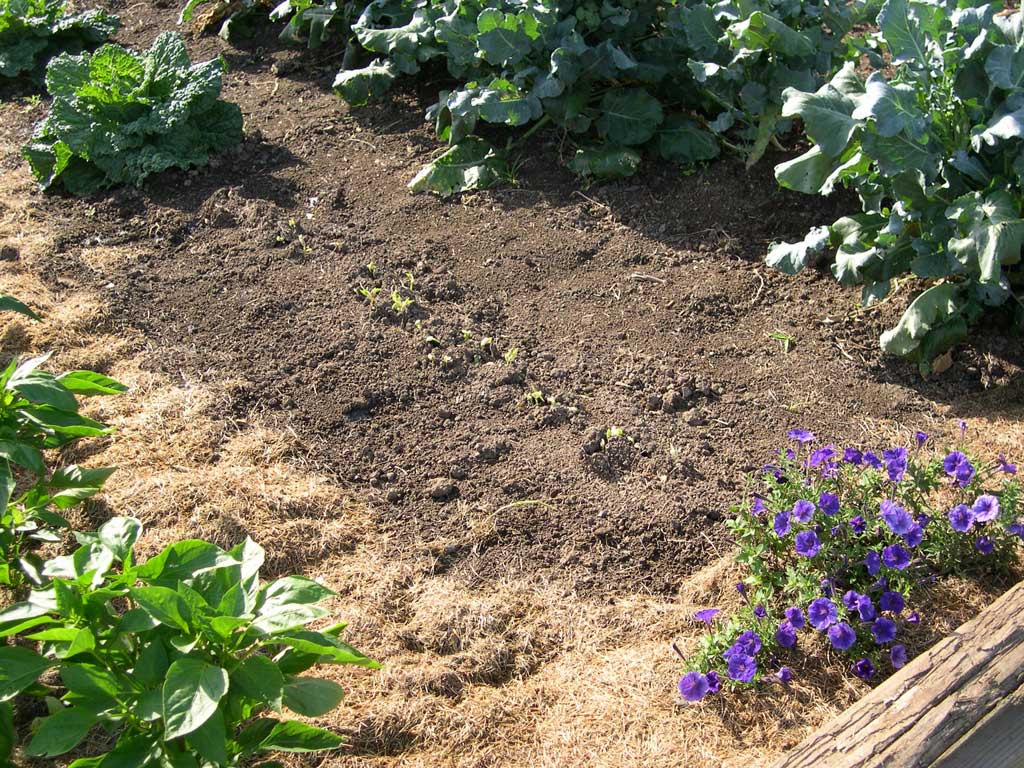
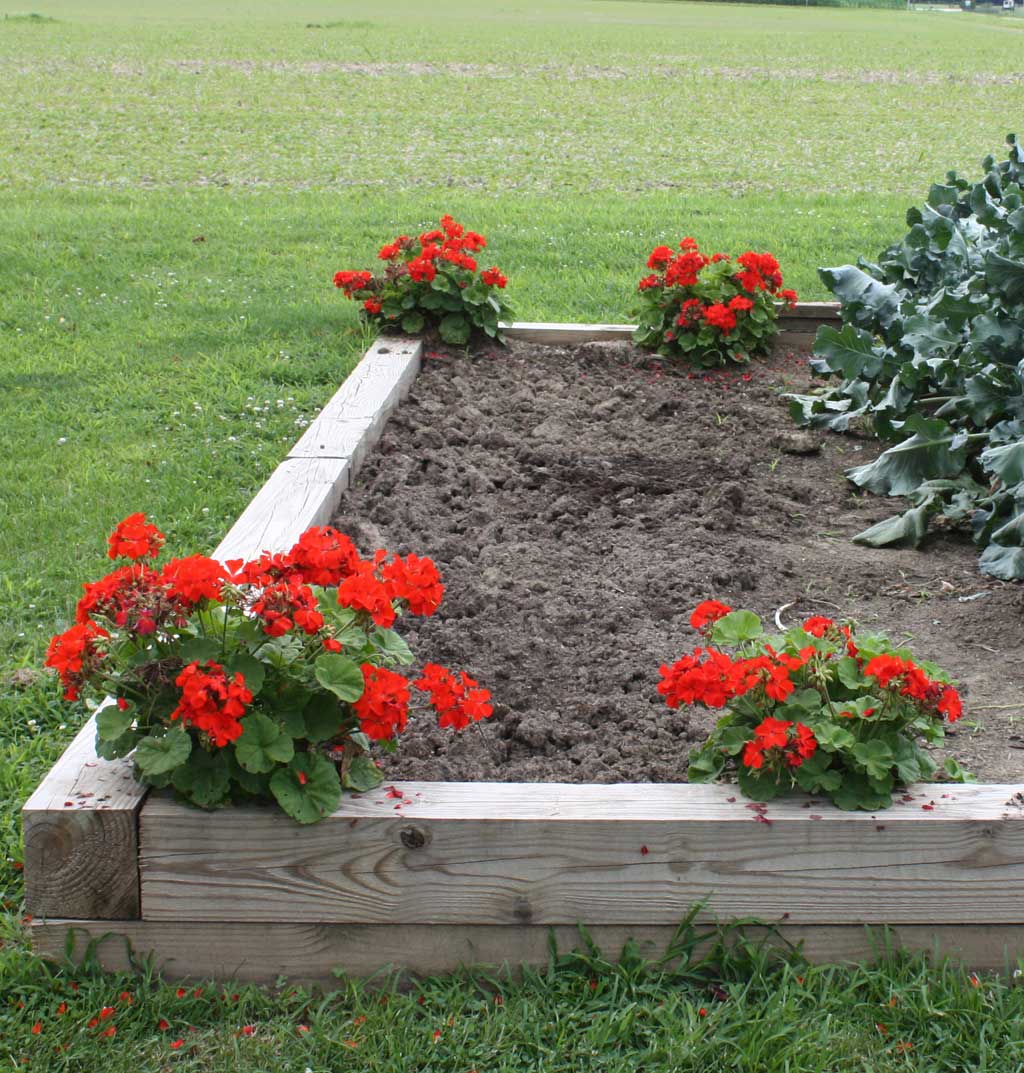
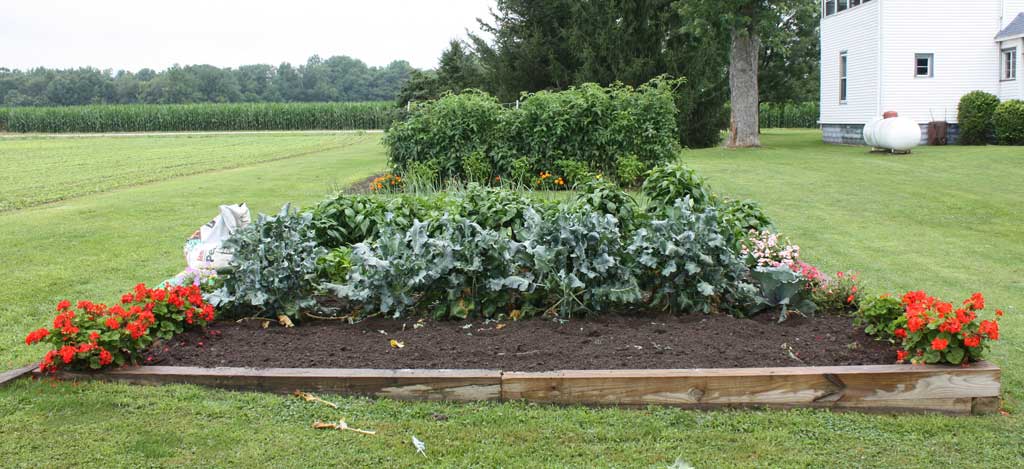
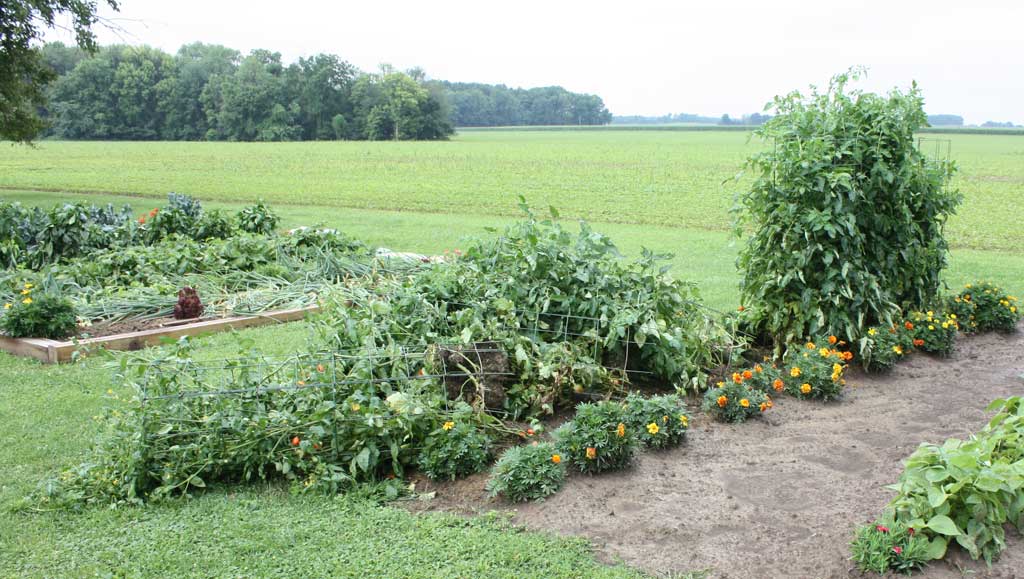
I spent some time Wednesday adding a few more flower plants around the edge of the raised bed garden plot and also replacing some row marker plants in the East Garden that had failed to grow. I did notice that some of our zinnias in the East Garden were just beginning to bloom. I hope the deer don't eat them! Next year I think I'll have to devote a section of our main garden to flowers to satisfy my need for color in the vegetable garden. Insect Control I should probably put something on the About Senior Gardening page about our insect control plan...if you could call it that. The Senior Garden isn't an organic garden, but we certainly lean that way. I try to control insects via crop rotation, avoiding planting concentrated areas of similar vegetables, and hand picking bugs when necessary. I use lots of the biological, Thuricide, to control pests on our brassicas and our evergreen trees. When the spray seems ineffective, I go to Dipel dust (same active ingredient) for control before resorting to something stronger. When cutworms threatened to ruin our pepper planting this year, we used paper coffee cups as cutworm collars. However, I was ready to douse the soil with something considerably stronger had the collars proved ineffective. I guess what got me started on this topic were the japanese beetles I saw (and squished) Wednesday while picking green beans. Since we're close to our first heavy picking of green beans and the bugs haven't done too much damage as yet, I'll probably wait until after that picking to begin spraying for insect control. Our first chemical line of defense is the plant-derived insecticide, rotenone, usually in a rotenone-pyretherin mix. It only stays active for about a day, but is great for knocking down infestations. Note that pyretherin can be absorbed directly through the skin, so even though this product is considered one of the tamer insecticides, caution is indicated. Later on and especially in years where the farm field next to us is planted to soybeans, I fall back on stronger products such as sevin.
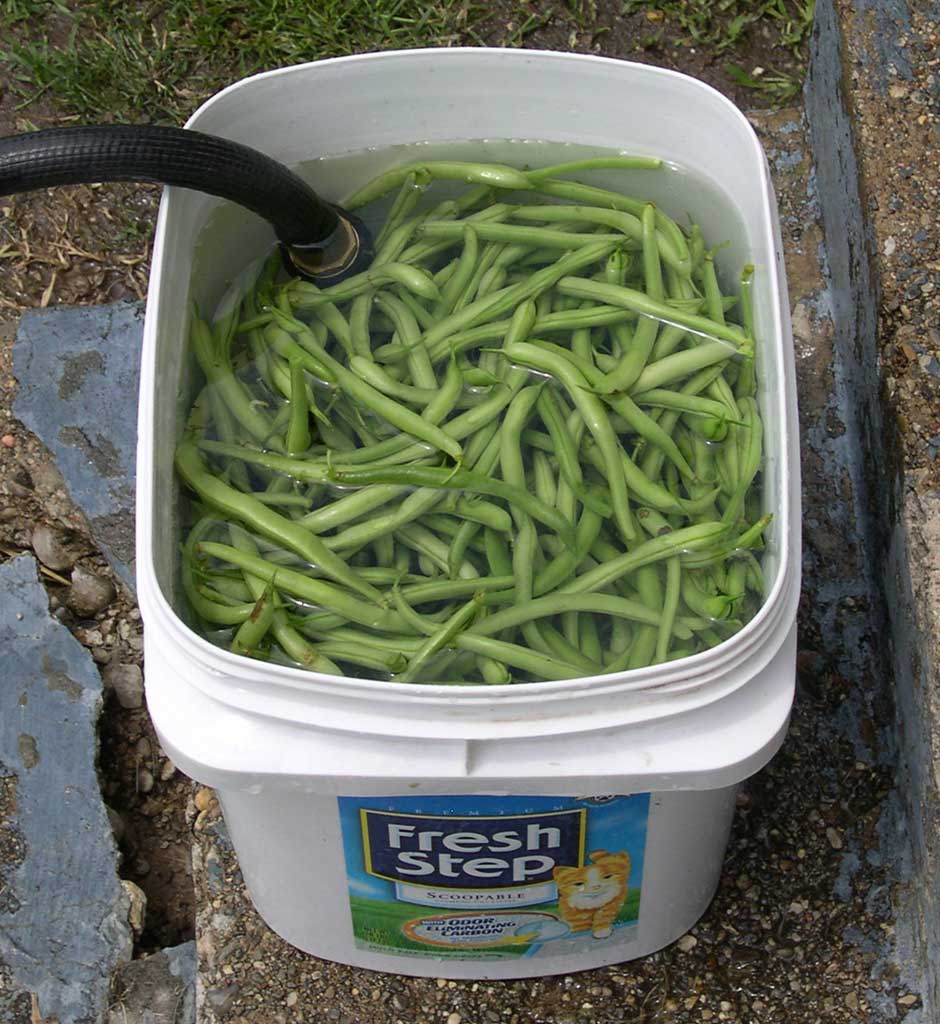
Most of this posting was written on Thursday. When I checked our green beans today, it looked like a Japanese Beetle convention on one of the plants. Apparently, the beetles flew in from the field west of us that was being tilled. So...the beans got sprayed today (Friday), and I'll wait until Sunday to do our first heavy picking! BTW: I have a great shot of a Japanese Beetle on a sweet corn tassel on my Desktop Photos page. Even when we grew commercial sweet corn, I was able to get by many years by spraying mineral oil on the corn silks to prevent earworms from destroying the tip of the ear and more. But when the bugs begin to bore in through the side of the ear of corn, it's definitely time to spray something stronger. So, no, we're definitely not an organic garden. But for first-time gardeners reading this page, I'd add the caution that you really want to think about what you spray on what you're going to eat. I'd rather lose a few lettuce plants or kale leaves than hurt someone with spray residue remaining on or absorbed into a leafy vegetable. Our Main Garden Looks a Bit Better
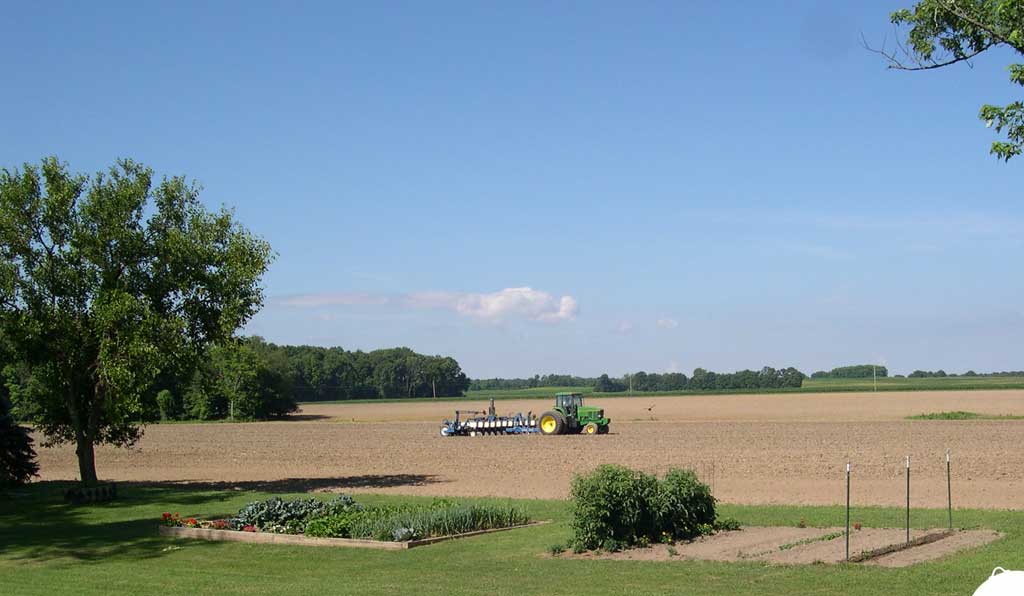
The guys who farm the field west of us, Wayne and Todd, and some neighbors who were already finished with spring planting put in a couple of long days getting the field worked up and planted to soybeans. While we don't have any commercial interest in the field or farming operation, it sure makes the Senior Garden look a lot nicer with the weeds gone from the field. After a rainy Fourth of July weekend that washed out countless ball games, cookouts, and fireworks displays, Monday was a gorgeous, sunny day. Our garden patches absolutely loved the rain, as we'd had about ten days without a good rain.
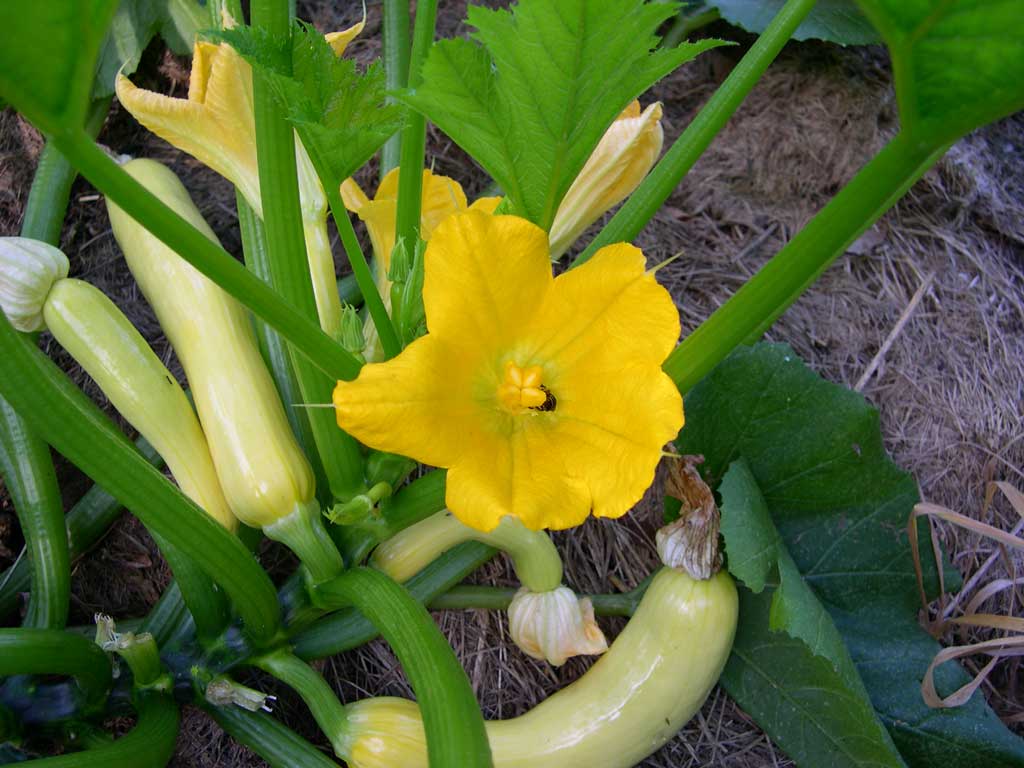
Our yellow squash continue to put out a bountiful harvest. My wife, Annie, fries them up with broccoli and cauliflower (and whatever else she throws in) in olive oil to make a healthy, tasty vegetable dish. I think the large, yellow blossoms of squash against their vivid green foliage is one of the prettiest sights to be seen in a garden.
The shot above was taken with my not-so-gracefully aging Nikon Coolpix 4300. It's been a good camera, although it required an expensive repair just out of warranty (that I believe Nikon should have covered as a known defect). But it's retractable lens labors to extend and retract and the battery door has been held shut for several years by electrician's tape, so we're now seriously camera shopping. The camera I bought in October as a short term replacement for the 4300 turned out to be very short term. It failed after five months of use, and has returned from each of two trips to Nikon service in worse shape than before. Nikon is currently ignoring my emails, phone messages, and letters. Needless to say, none of our leading candidates for the next Senior Garden Camera are Nikons.
I'd planted four varieties of green beans in the row, as I think canned green beans (and many other vegetables) taste a bit better with a mix of flavors. The prettiest of the beans were the Strike variety, which really were at the nice, straight stage where I might have steamed them as gourmet beans. But with time constraints, I just threw them in with the other three varieties, Bush Blue Lake, Stringless Green Pod, and Jade. All four varieties produced well and seem to have no disease problems so far.
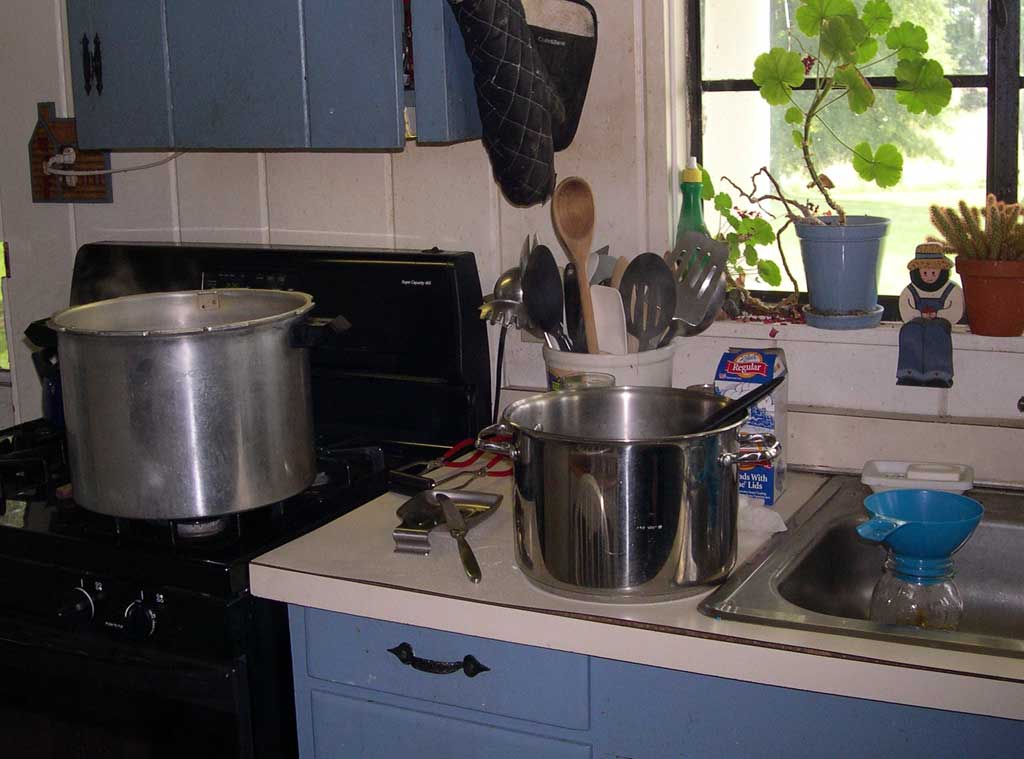
One of the things I really have to be careful about in canning is watching the pressure on our pressure canner. Even at the lowest setting of our range, the pressure wants to climb right past the recommended 10 PSI to around 15 PSI. Rather than go on to other chores while the canning was going on today, I just stayed in the kitchen to monitor and adjust the pressure. At one point, I turned off the stove when the pressure had reached 11 pounds and waited for it to drop before re-lighting the stove.
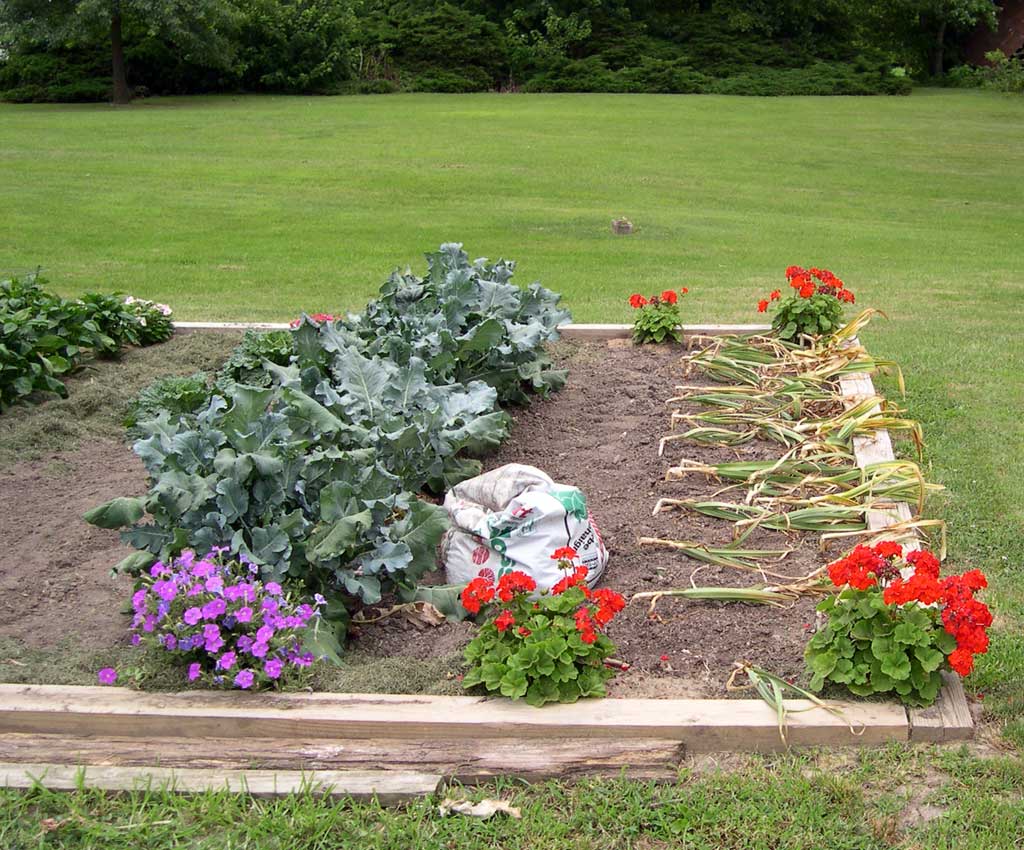
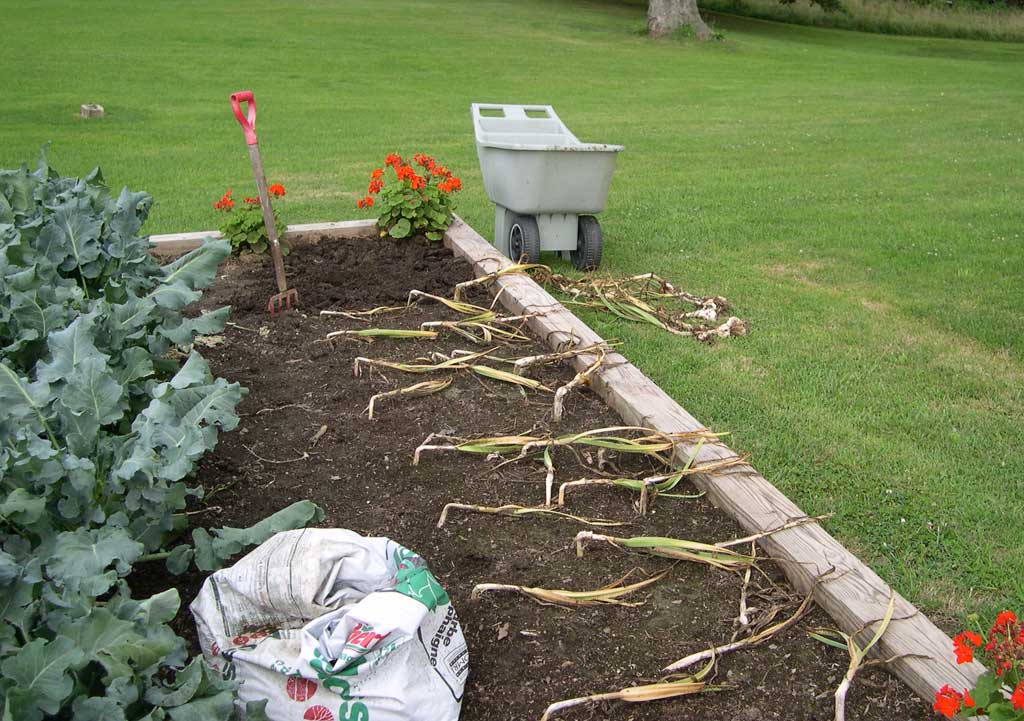
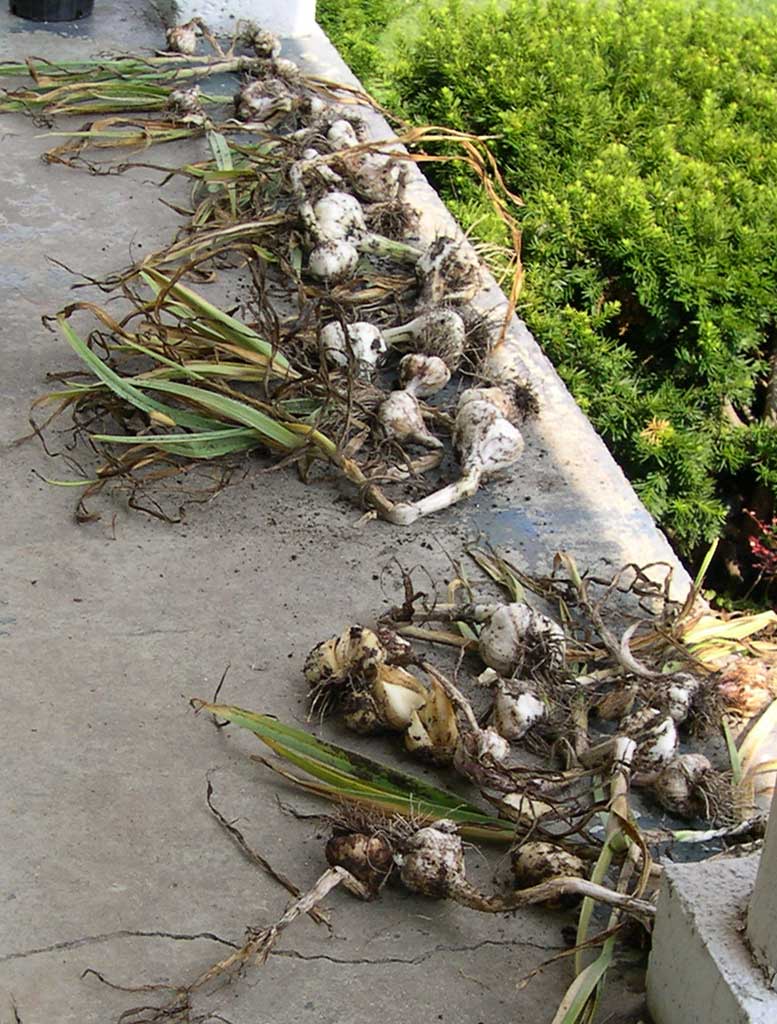
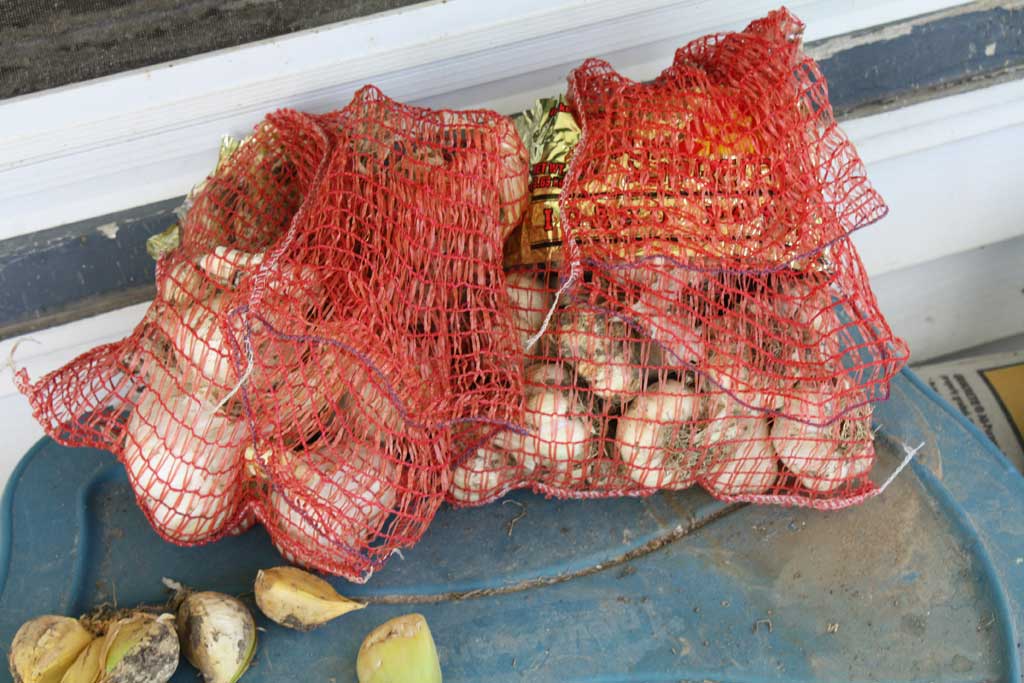
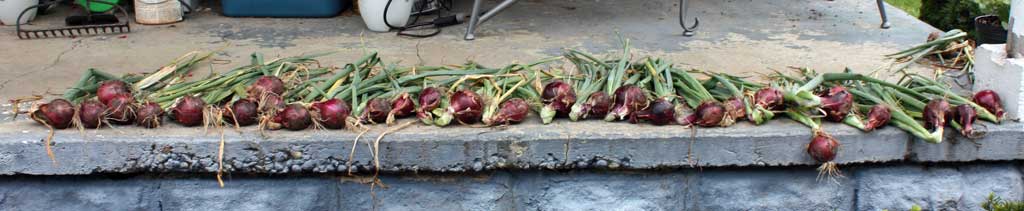
While garlic takes a lot of time to grow, it's a relatively easy and trouble free crop. Our harvest will keep us in garlic all year and also provide sets to plant in October. (Yeah, I got our garlic in really late last fall.) After gently lifting the garlic out of the bed with a heavy garden fork, I shook as much dirt from the roots as possible. I let the garlic sit out a bit in the sun and breeze before shaking dirt from it again and loading it into our garden cart. I cure our garlic (and onions) on our back porch. It's shaded part of the day and also receives a good breeze when there is one.
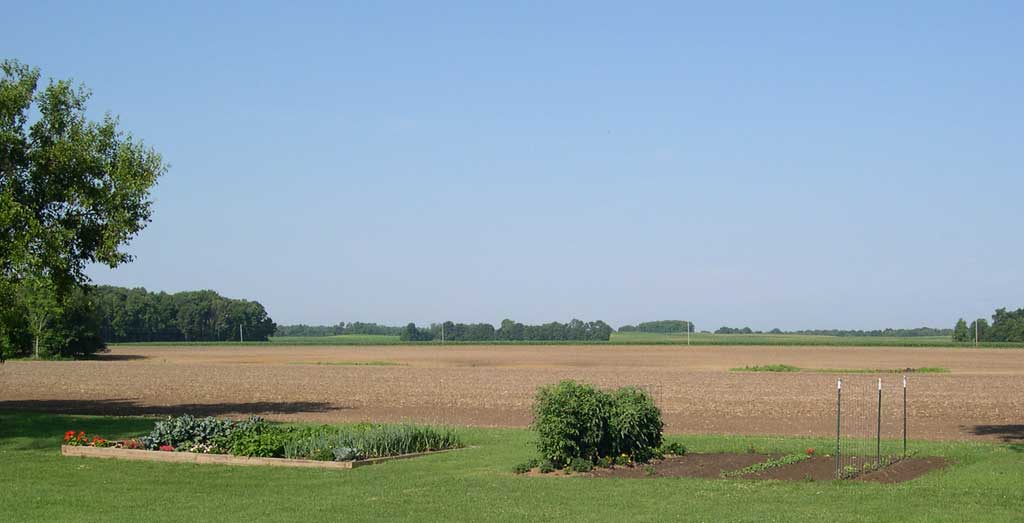
The XSi, or EOS 450D, is actually one step behind Canon's latest entry-level digital SLR, the T1i I'm now working to learn how to use some of the many features of the new camera and put it to work on Senior Gardening. Compared to my 30+ year old 35mm Canon AE-1, the XSi is a little overwhelming. And as yet, I haven't taken any real "keepers" with the new camera. I did, however, use the XSi to take the main garden shot that appears at the top of this blog. Until today, I hadn't as yet replaced the original shot that has headed this page since we started in August, 2008. And of course, the best way to learn how to use a new camera, after some consultation of the manual, is to get out and take lots of pictures. I'm having a ball doing just that.
And in an incredible stroke of good timing, the camera came in the same day our most recent granddaughter was born. Grandma proudly holds Penelope (Penny) Lane in the hospital the next day. Grandpa also eagerly took several turns at holding Penny. Obviously, we didn't do a lot of gardening over the last few days. Friday, July 17, 2009 - Color in the Garden
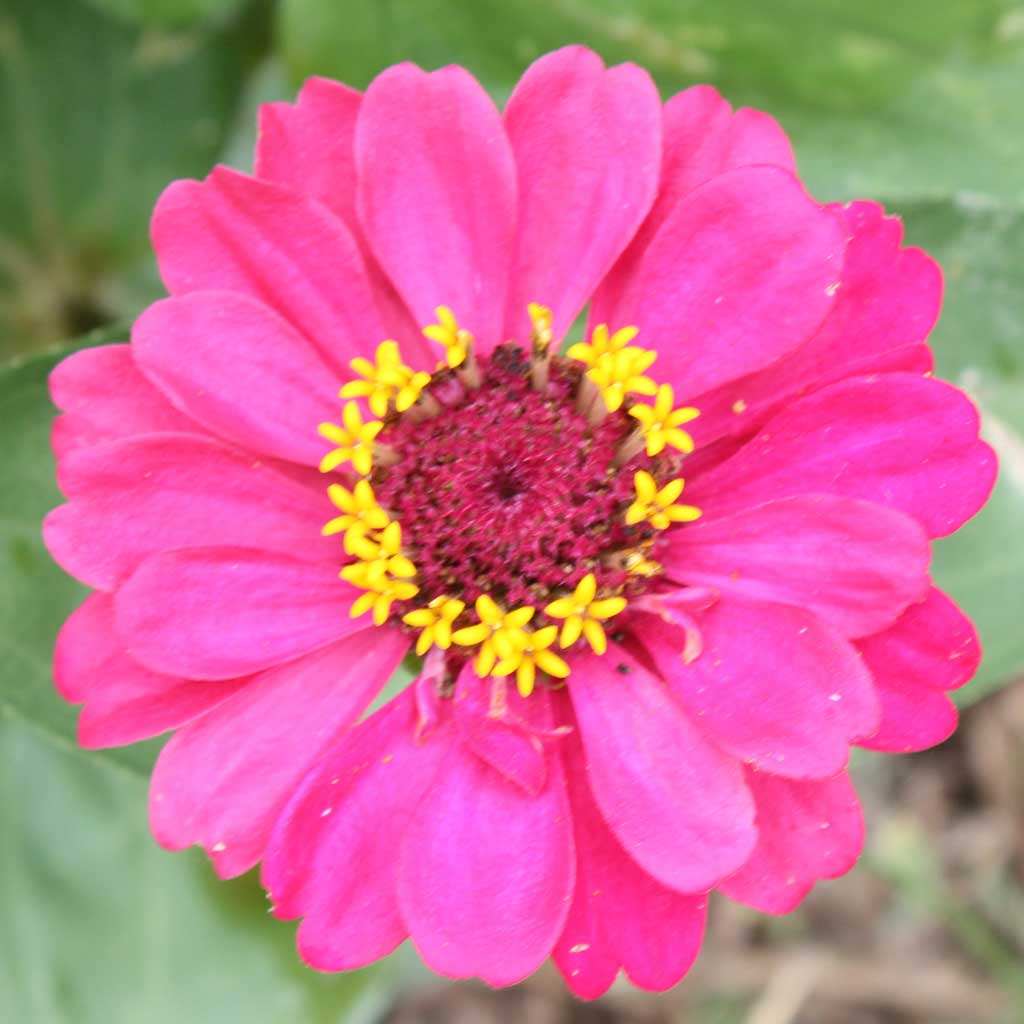
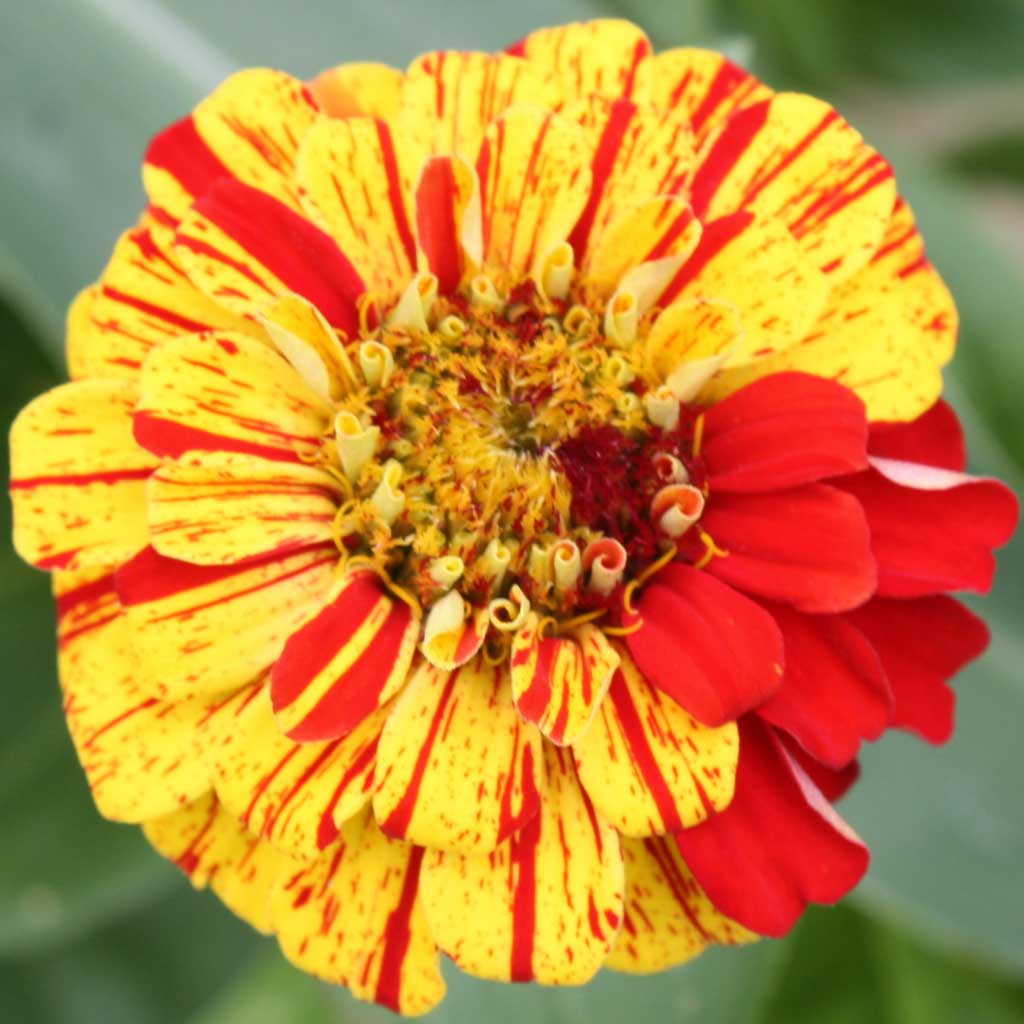
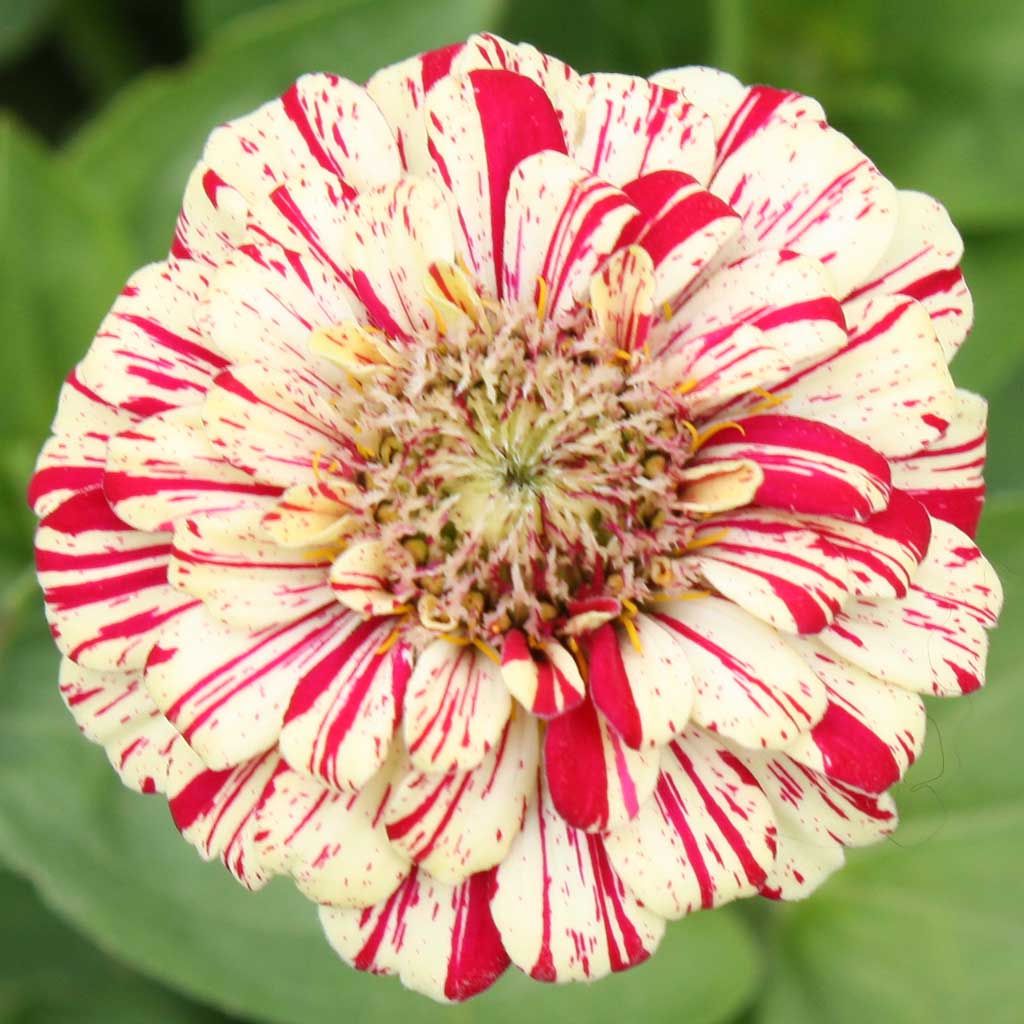
While we had a flower bed in the main garden last year, this year most of the flowers in our gardens are serving as row markers. Rather than leave planting stakes in the ground at the end of a row where I've sown seed, I pull the stakes and transplant a flower right into the stake hole. This system usually works well unless something cuts off or eats the flower! I think the first flowers I used for row markers were zinnias. I started using them to mark the rows of our sweet corn years ago and still use them now. I usually use the old State Fair variety, but tried Peppermint Stick this year and was rewarded with some interesting blooms.
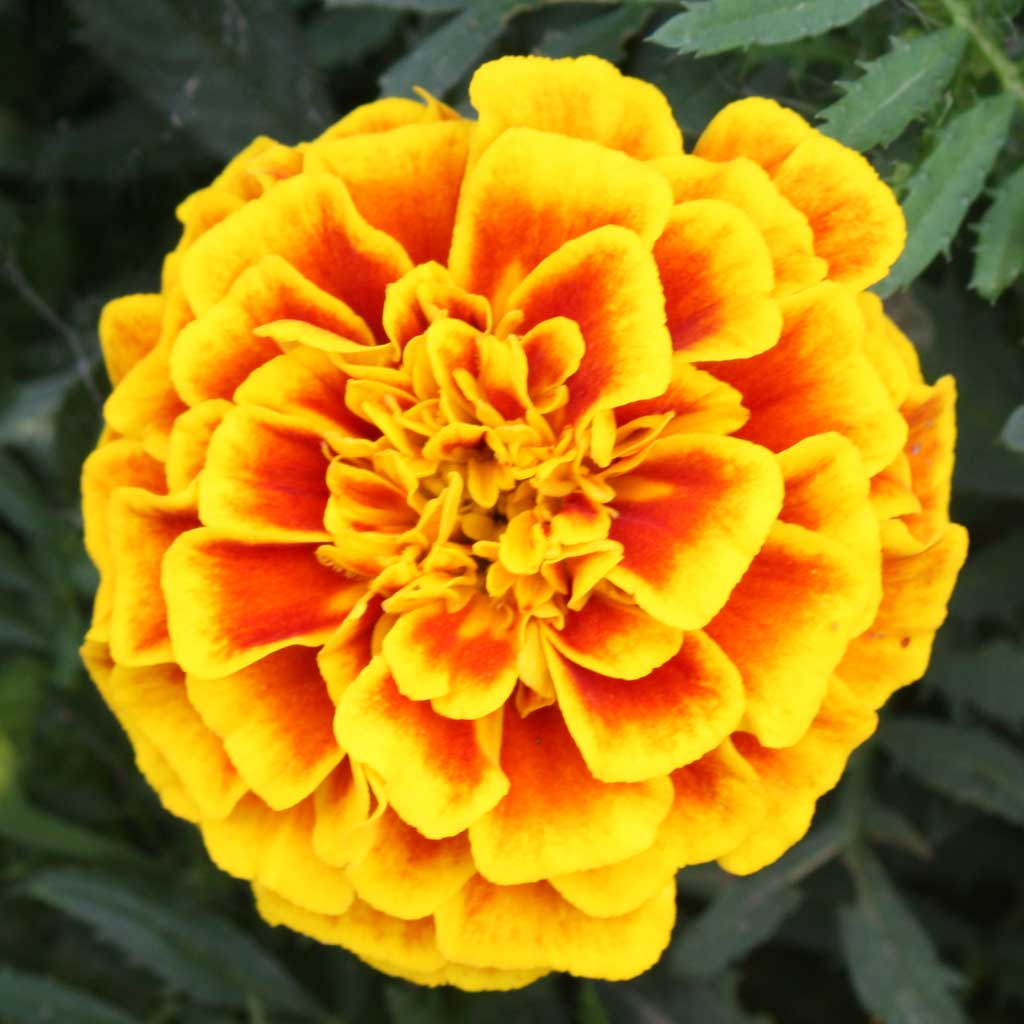
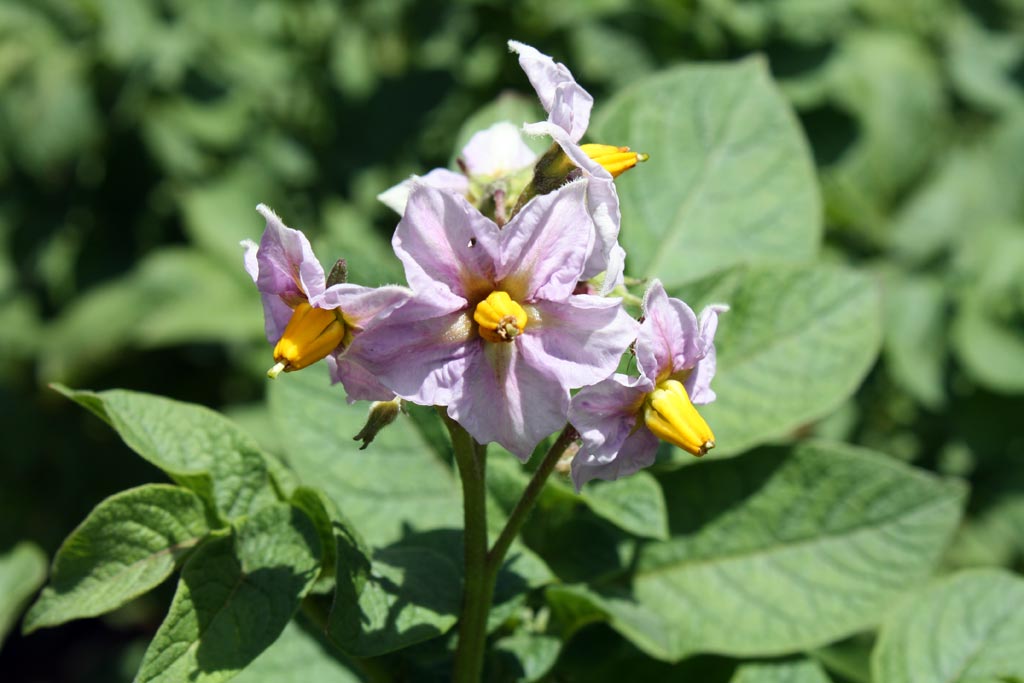
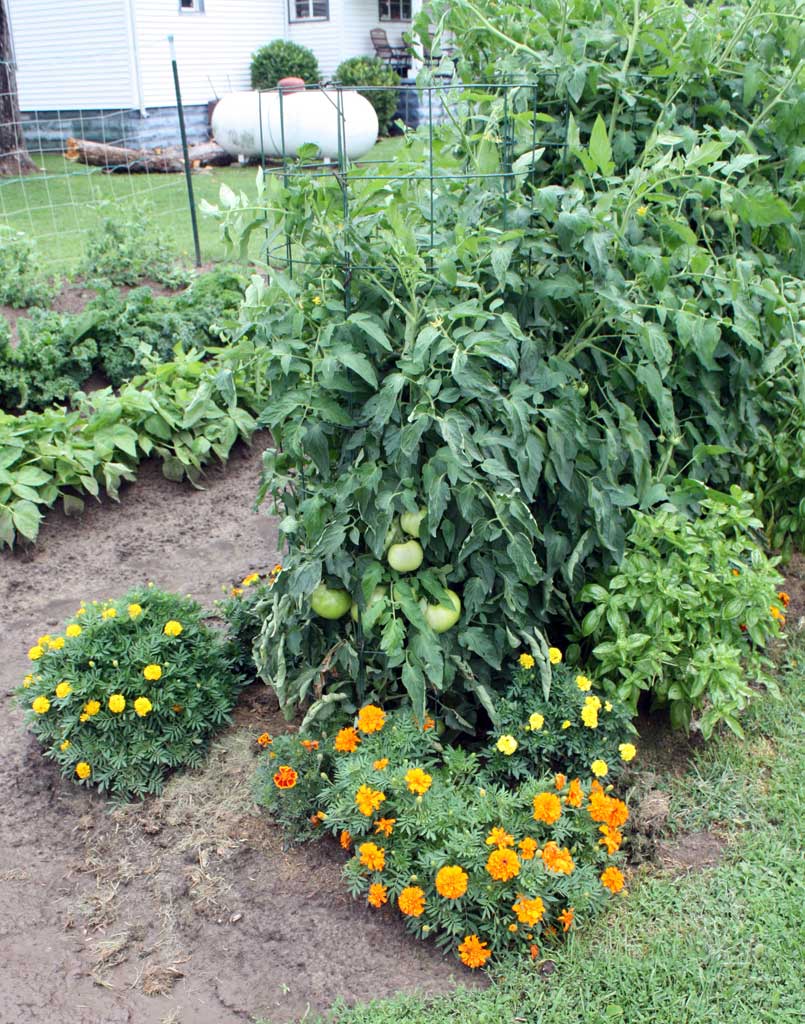
I'm really not too picky about marigold varieties, leaning more to the smelly, cheapy varieties than some of the fancier and more expensive ones often featured in seed catalogs. We had trouble getting our marigolds going this spring, so I dug into my seed stores and replanted our flats with whatever varieties I found! You may notice that our caged tomatoes have gotten away from me with many shoots outside the cages. I'll have to prune them back to prevent the vines being weighted down and broken from the fruit. Even our potatoes are beginning to produce lovely purple blooms.
Veggies
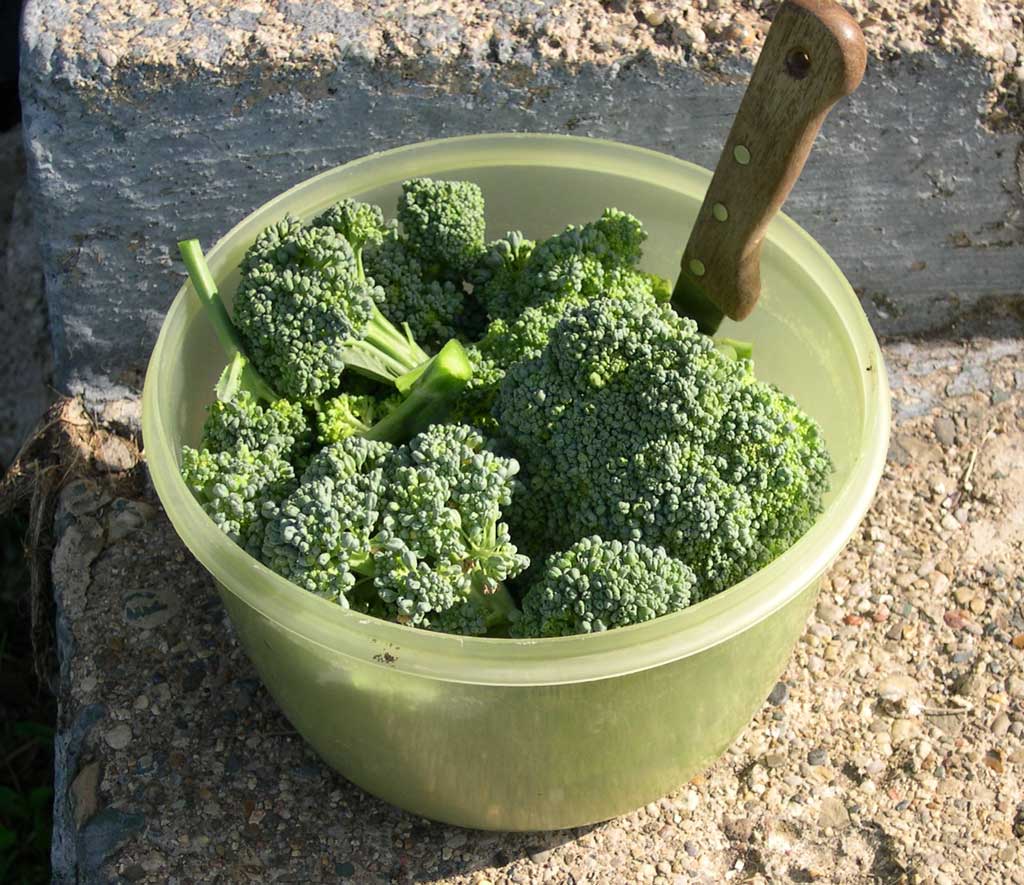
We have just one head of savoy cabbage left in the garden, but I have transplants started for the fall. I've also seeded lettuce, broccoli, and cauliflower in fourpacks for the fall. We had green beans from the garden with our supper this evening that were picked this morning. And I also froze a quart of broccoli florets from a picking of sideshoots.
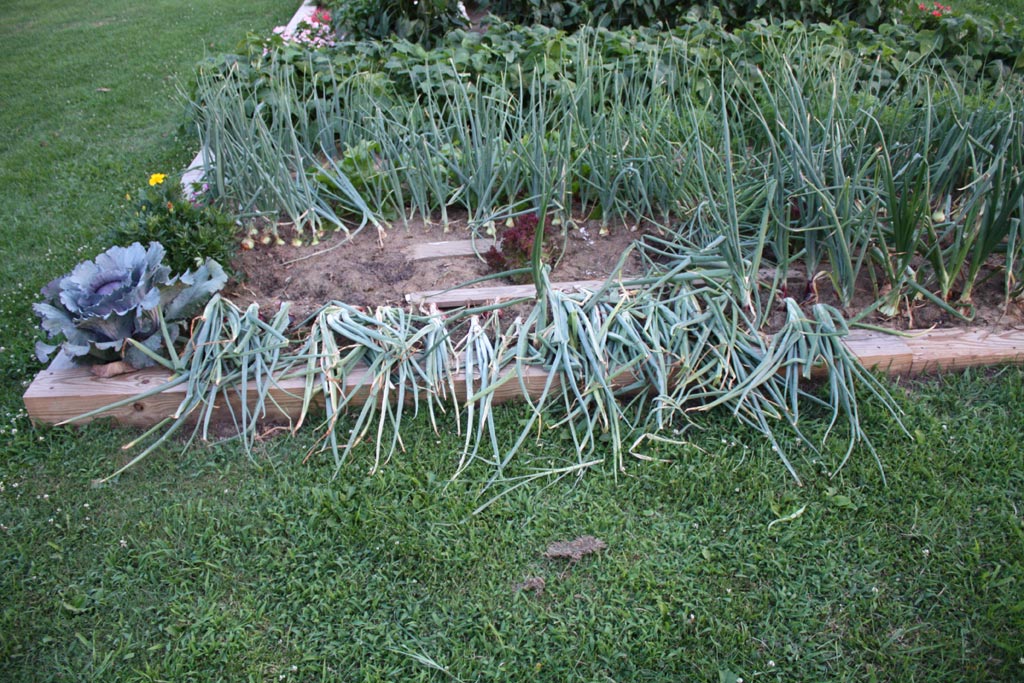
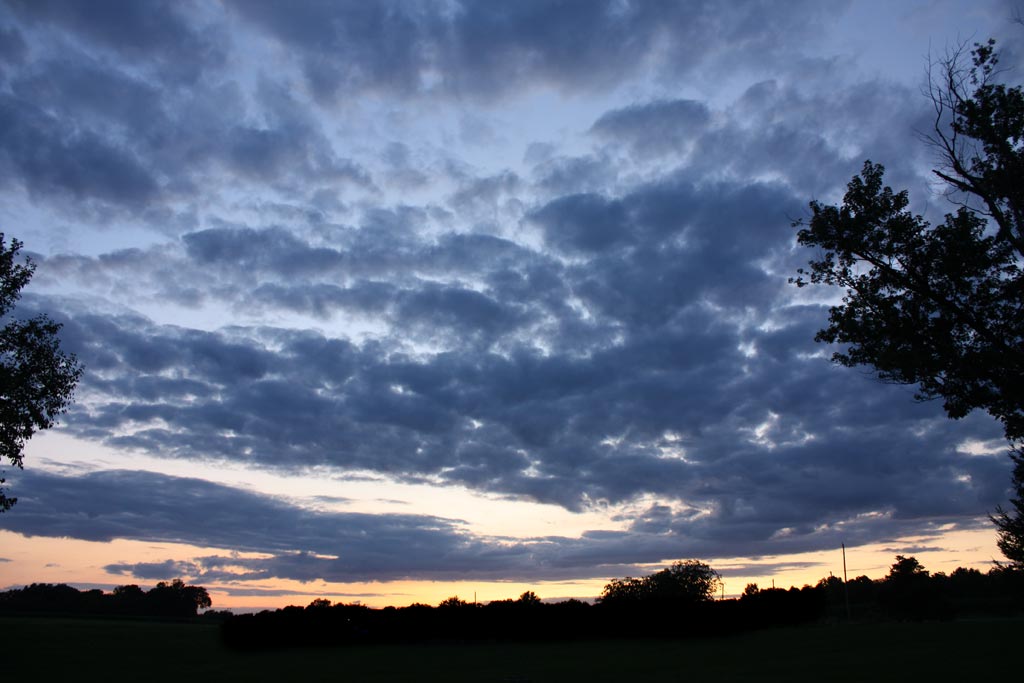
As I wrote the paragraph above, I looked at the photo I had of the onions bent over and decided that I really didn't like it all that much. Since there appeared to be a nice sunset beginning, I grabbed my new Canon Digital Rebel XSi
I've taken over 500 shots in just a week with the new camera and have lots of under and overexposed shots on manual, blurry images where I didn't handle the auto-focus correctly, and lots of other issues. But the issues are mine, not the camera's. One of the glories of digital photography is that it only costs you time to learn by shooting lots of shots. So, I'm still pretty happy with the new camera. Let me leave you with the sunset Shep and I watched.
Have a great weekend! I often spend hours reading up on vegetable varieties before deciding on which ones best meet our needs and suit our growing conditions. And other times, I may just order something that strikes me as sorta cool.
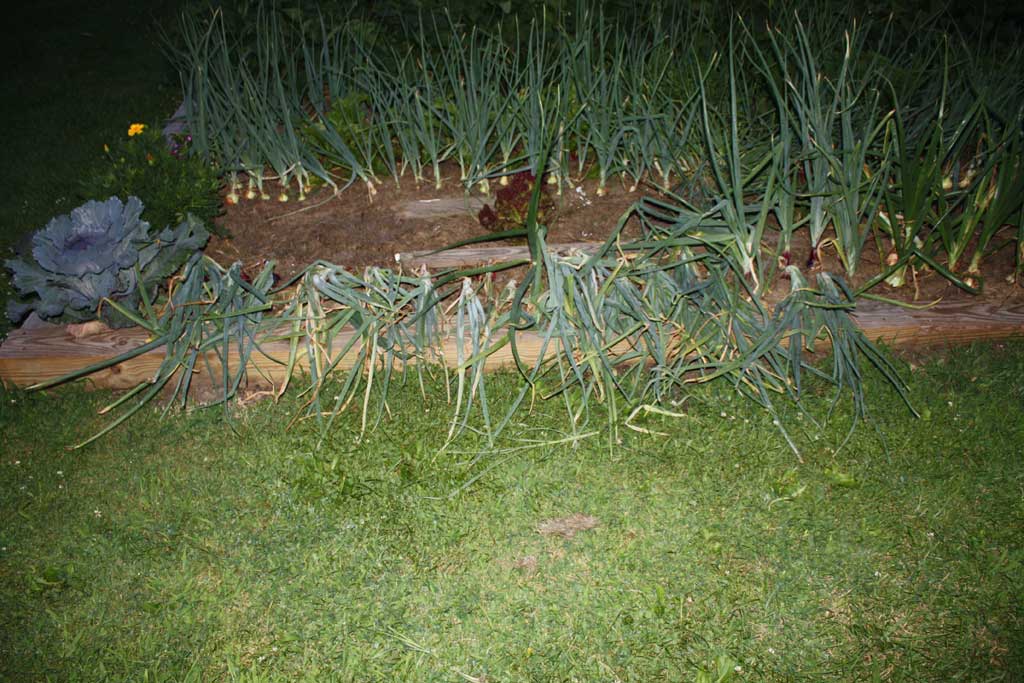
I'll be interested to see how well our Red Zeppelin onions store, but having harvested them this early in the summer, won't count it against them much if they don't store well into the winter. Late harvested onions usually store better. We'll grow Red Zeppelins again next year, as they appear to be an excellent variety for the home garden. They produced an excellent crop of medium to large, dark red onions that have a good flavor. Our Walla Walla sweet onions are just beginning to fall over, so I helped a few by bending their tops down. That allows them to finish bulbing and begin the drying process. Our main storage onions, Milestones and Pulsars, are just at golf ball size, so it will be another month or so before they're ready to harvest.
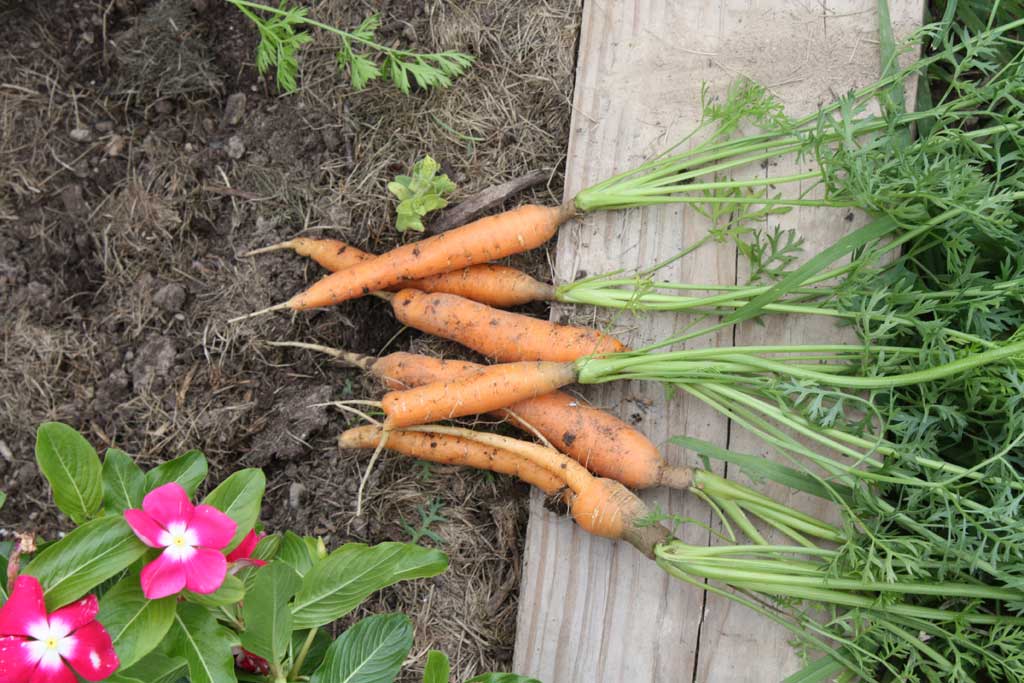
We grew only one variety of carrot this year, Baby Sweet from Stokes Seeds. This is a variety I've grown before and like, and they're not too expensive ($2.19/pkt). I pulled a few several days ago, and yesterday Katherine, my granddaughter, and I pulled, washed, and ate a few more.
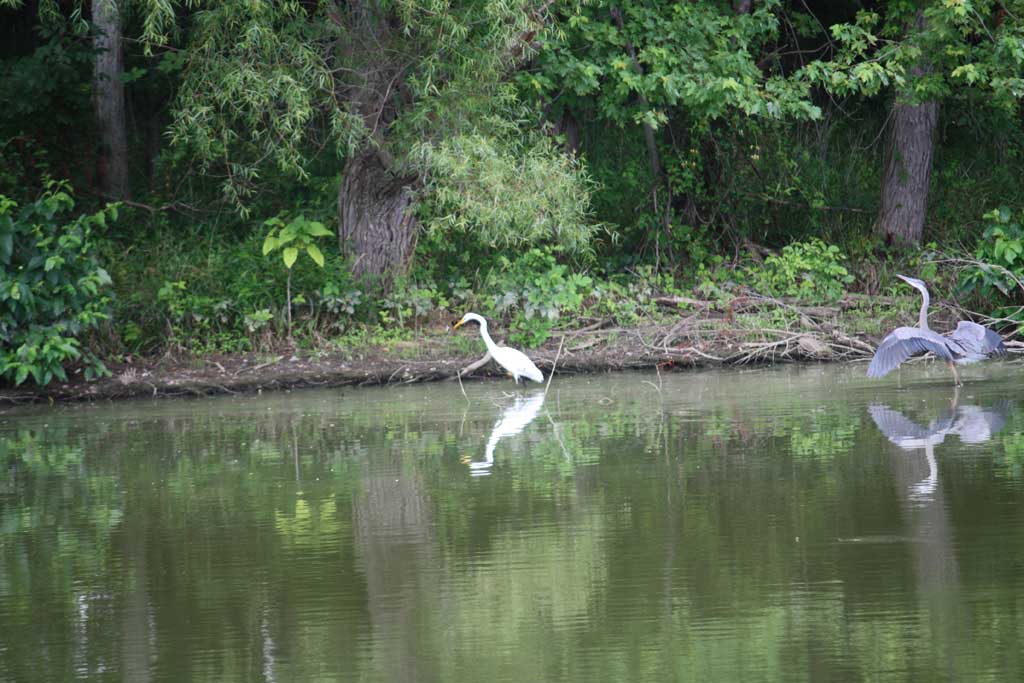
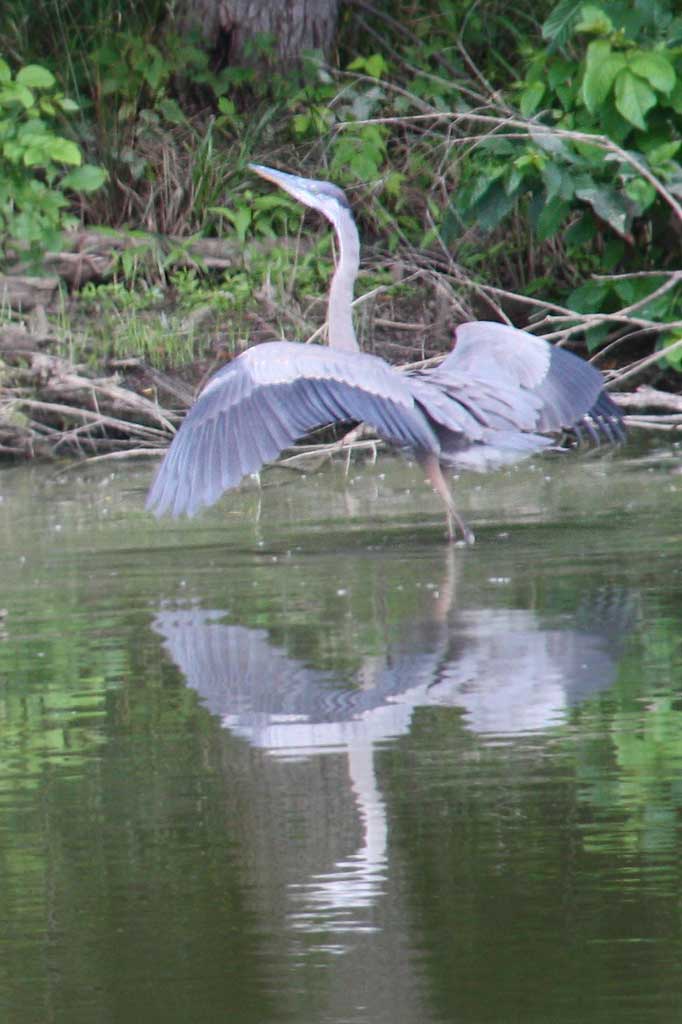
I was delighted to see a great white heron (great egret) along the bank of the reservoir. Unfortunately, the light reflected off the water overexposing the white heron in most of my shots. As I snapped away, a blue heron flew into view, and I caught it with its wings spread before it landed. Wednesday, July 22, 2009 - Our Melon Patch It's raining today and probably will be all day. While that makes outdoor gardening a bit tough, the rain coming in produced a near perfect gardening day yesterday with clouds, moderate temperatures, and a refreshing breeze all day. And we really do need the rain!
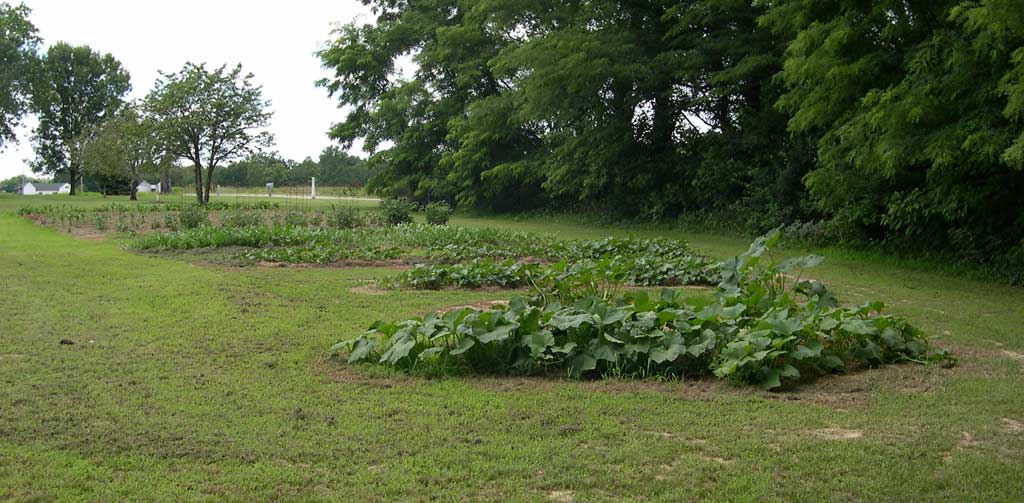
Our melon culture is something I stumbled upon last year. The whole area for our melons was tilled in March and again in April (and a bit more in May). I plant our melons in north-south rows in very shallow hills, two or three plants to a hill. I mulch around each hill with all the grass clippings I can afford at the time.
For insect control, I try to plant on clean ground, keep the vines in good health, and hope for the best. Melons can wilt overnight from an invasion of squash vine borers, or striped cucumber beetles, so I do keep on the lookout for them. Bacterial wilt can cause the same thing to happen. Unfortunately, if your vines wilt, it's pretty much too late to do anything then. But if you lose one vine and find the telltale "sawdust" around the entry hole of the pest, then a general insecticide can protect the rest of your crop. Splitting the vine with a knife from the invasion site towards the base may reveal the pest. If so, destroy it and bury the split vine, but...generally you're going to lose at least that vine, if not the whole plant. We didn't have to use any insecticides on our melons and squash last year, and I hope that will be the case again this year. If I do have to spray, my first line of defense is usually a rotenone-pyretherin mix. I'll also go to a longer lasting carbaryl insecticide (Sevin The best description I've seen for organic control of these pests is on Tom Clothier's Garden Walk and Talk site, Squash Vine Borer Control. Main Garden
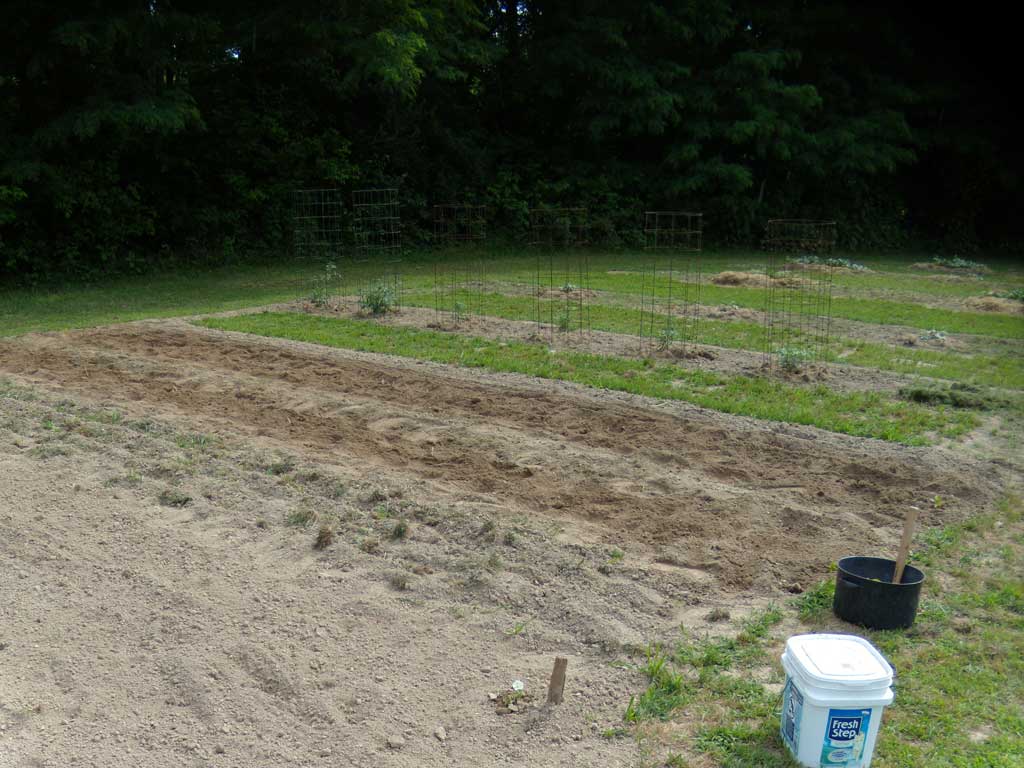
With the tiller out, I also worked the area where the savoy cabbage had come out and planted a half row of green beans in it. The other half of the row was already planted to beans a week or so ago. And I once again renovated a soft bed section of the main garden with peat moss, lime, and fertilizer. When I dug our garlic earlier this month from the area, I turned up some heavy clay that necessitated some soil amendments. I wrote about renovating this area last August in the somewhat whimsical Lazy Summer Days (Daze) feature.
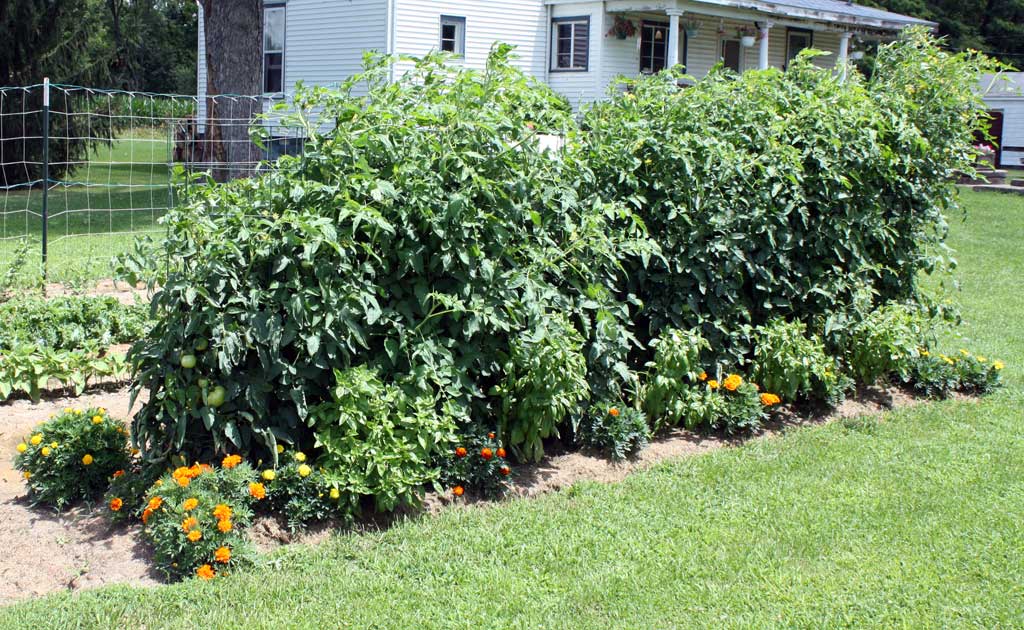
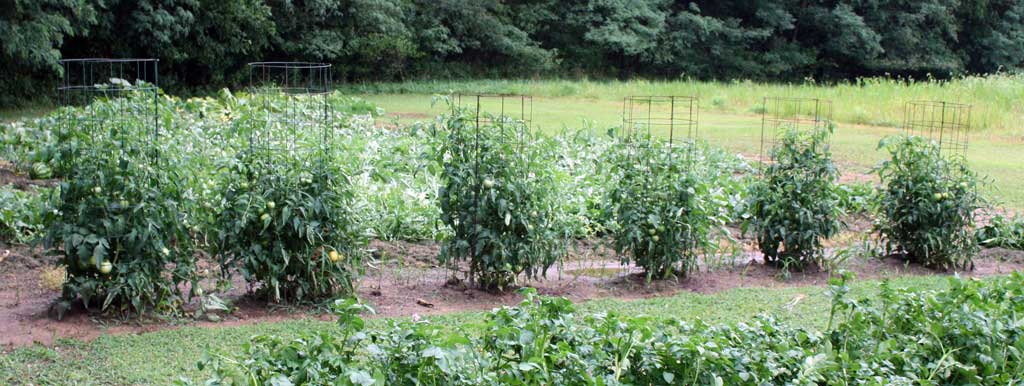
After the showers last night and this morning, the bed looks great. Although the bed is probably the best soil in our garden, I added four 2 cubic foot bags of Miracle-Gro Sphagnum Peat Moss to it to break up the clay I'd turned up. Our local Wal-Mart had cut the price on it from $8.94 a bag to just $3 each. I usually buy our peat moss in the larger compressed bales, but this deal was too good to pass up. This bed probably will hold our fall broccoli and cauliflower, although I'm not really sure as yet. Saturday, July 25, 2009 - About Those Tomato Cages I wrote a bit last August about the tomato cages I use in the Senior Garden. I make them out of concrete reinforcing wire (described as welded wire in some hardware stores). They're the best cages I have found yet, but they do have some problems. The wire rusts over the years and the welds break, necessitating replacing them every six or seven years. I've gotten around this problem a bit by putting a couple of coats of rustoleum on the cages the last time I had to replace my old ones (which are still in use in our large, East Garden). A second problem with the cages is that they are bulky, being about 22" in diameter and around 5' tall. We have a decrepit old shed on our property that is falling down. While it looks terrible, the old shed serves for winter storage of the large cages. Another problem with the cages that I haven't written about here made itself apparent again this morning in our main garden. As the tomato plants grow, they can become top heavy. With the ground softened from heavy rains, the wind was able to topple over three of our cages this morning. This problem has occurred in the past, so it appears that I need to find a way to anchor the cages a bit better. Do note that we are subject to some pretty fierce winds where we live.
The cages stood back up fairly easily, and I stepped them back into the ground. Since the plants weren't uprooted in their fall, they should continue to produce as long as we don't get another storm with similar winds. Our tomato cages in our East Garden were planted several weeks after the ones in the main garden. They weren't top heavy and came through the storm just fine. The photo below shows a couple of the newer, painted cages beside four of the older ones. As the older ones rust and break, I just trim off a 6" layer of the wire to continue using them. All of these tomato plants are the Moira variety. I plan to save seed from them. Even though tomatoes are generally self-pollinating, I only planted Moiras in the East Garden to insure isolation and purity of the variety in the saved seed.
Moiras are a determinate variety of tomato often not caged or staked. I've found that I get cleaner fruit by caging our determinates, rather than growing them mulched on the ground. Determinates are also known as "bush" varieties, as they generally are shorter than the vining, indeterminate varieties. Determinates also don't put on "suckers" that have to be pruned when staking indeterminate varieties. The Garden Web has a good description of determinate and indeterminate tomatoes.
As I came in from taking the pictures above, I noticed our Bella Rosa tomato plant on the end of the row that didn't get toppled over filled with ripening tomatoes.
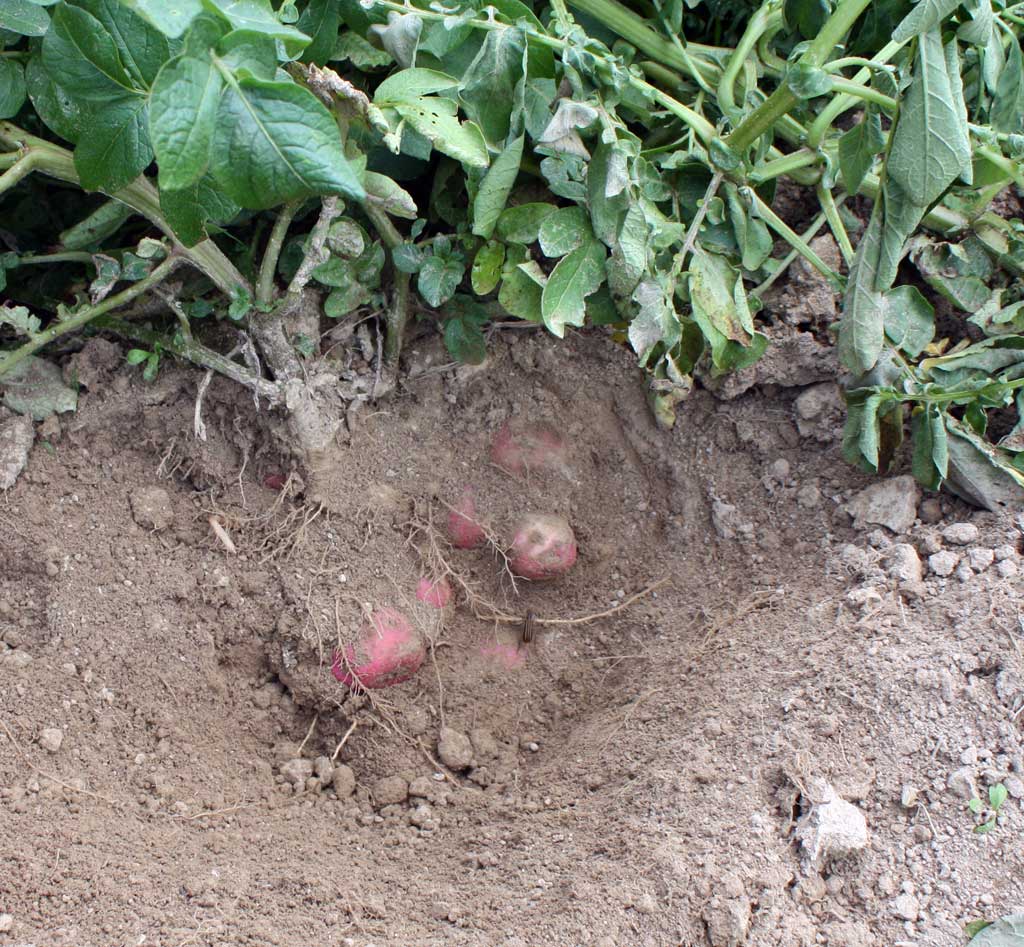
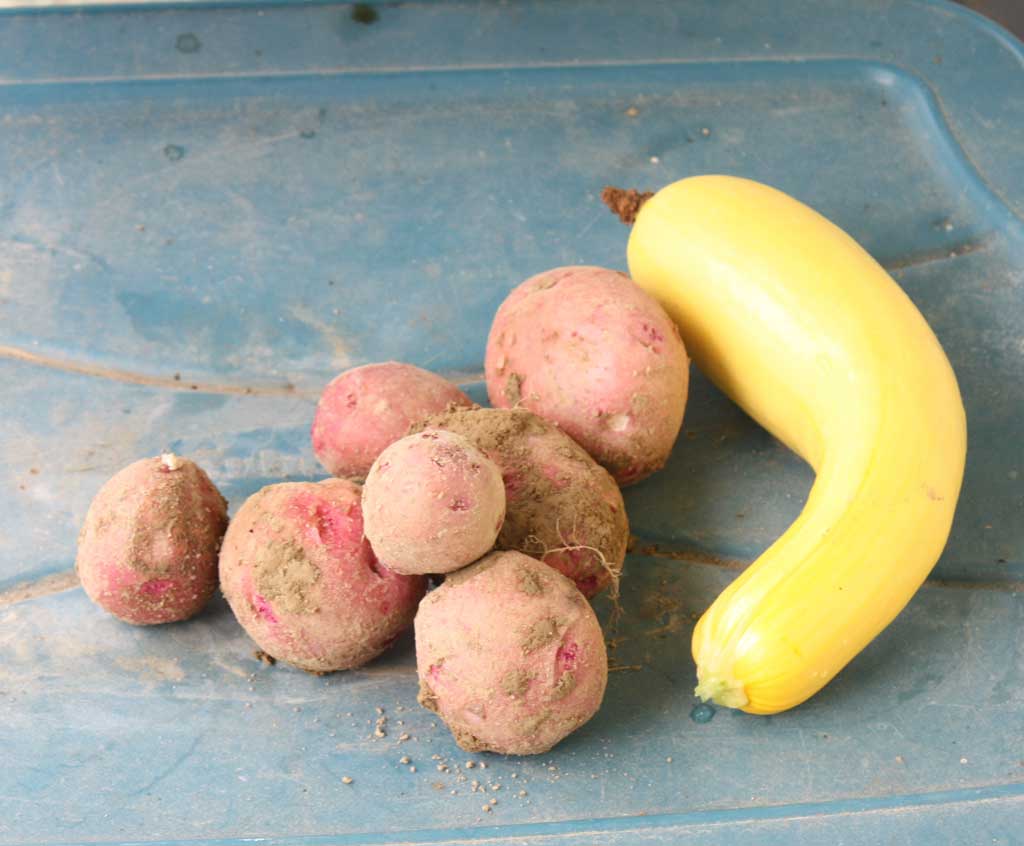
I really wasn't counting on planting potatoes this year, but had picked up a 5# bag each of red and white seed potatoes from the garden store just in case. I turned so much ground this spring in the fallow field east of us (our East Garden) that I did have space for potatoes. They were the last things planted in the area, going in on June 8 between a row of tomatoes and our sweet corn.
We've grown our potatoes in the past in our main garden which has much more fertile soil than the East Garden. Often, the potatoes would put on lots of top growth but succumb to insects. When we did have adequate insect control, we often got more top than anything underneath. Maybe I've been "too nice" to our potatoes in the past. Let me add a photo tip here before I forget. Almost forty years ago in a workshop for wedding photographers, the presenter recommended buying a neutral or UV filter for each new camera lens you buy. He suggested putting the filter on the lens before ever mounting the lens on the camera or taking that first shot. With a filter on an expensive lens, an impact breaks the filter, but hopefully not the lens. And of course, cleaning a filter is far less risky than having to clean the lens itself. While scratching out the potatoes yesterday, I looked down and was aghast to see that I'd flipped dirt on the barrel and end of the lens on my new Canon XSi! The dirt came off the barrel with just a few dusting motions. I used a lens cleaning tissue on the filter, but it took several minutes to remove the dry dirt. I was thankful I heeded the advice of that photographer from years ago. When I bought my new camera and another lens for it, each lens got a UV filter before ever going into service.
It appears that we'll also get at least some sweet corn this year. From our repeated plantings of some inferior seed, we now have the irregular patch above tasseling out. Behind the early corn, the main season variety is a disaster with so many gaps that it probably will not pollinate properly. But we may get lucky and just have a steady, if small, supply of corn for several weeks. We'll see. As July winds down, I'm beginning to get excited about making our first batch of Portuguese Kale Soup. A year ago we made the tasty soup in August, but had to rely on canned tomatoes, store bought potatoes, and a bag of mixed frozen vegetables. We did make another batch in October using more of our own garden produce, but again had to use commercial potatoes.
From the
at Senior Gardening |


| Affiliated Advertisers |
©2009 Senior-Gardening.com