One of the Joys of Maturity |
|
| Affiliated Advertisers |
Clicking through one of our banner ads or some of our text links and making a purchase will produce a small commission for us from the sale. The Old Guy's Garden Record
March 6, 2010 - Garden Planning Today is one of those days where I think my head may just split, as I'm tackling one of the biggest and most important tasks of the year for our garden. I'm working on laying out our main garden for this year...you know...what goes where and when. As I plant each year's garden and various crops in succession, I do try to keep in mind what may follow the next year in the same spot, but often it gets a bit dicey trying to fit everything in without the same type of plant growing in the same spot or nearby.
Our task in rotating crops has become more difficult by our effort to contract our main gardening area into our large raised bed. The good news is that our space hogs, sweet corn, melons, and such, can now go into our East Garden. It's a fairly new patch in a small field (<1 acre) east of our house that the farmer has let go fallow. But even with those crops removed from the planning, it still takes some thought to fit everything in. And we're still using a bit of space outside the raised bed this year for our garlic, planted in November, and possibly a few other things. But the space that once was our main garden, and the garden for the folks who lived here before us, was reduced in half last year and will be even further reduced this year. The original garden space wasn't good soil to begin with, having been gardened for years. It was also a bit damp and had a large tree growing close to it. The tree, after several lightening strikes, had to be cut down last year. It's replacement will go in part of the old garden area where our current compost pile sits.
So I'm trying something I used with my lesson plan book, multiple page masters. It's a trick in the old AppleWorks software where one creates a master page that contains permanent elements and then can add less permanent items to any number of succeeding pages. I tell how to do it in A View from the Classroom column, Teacher Tools: AppleWorks.
And just as architects plan a building and then concrete workers, carpenters, and electricians have to try to make those plans work (often not as easy as it sounds), the garden plan on paper often gets seriously revised once I get my hands dirty in the garden. I've already been out to the garden once this morning, notepad and tape measure in hand, and found I had to completely revise what I thought would work. While this exercise might seem to be a bit premature, if the soil at the north end of our raised bed thaws enough today or tomorrow, I'll be planting our spring peas into it! Geraniums
That flat was filled with a planting of petunias. Since I generally order a new variety or two of petunias each year and freeze leftover seed, I had a number of varieties to choose from this year. I started some Ultra, Fantasy, Supercascade, and Celebrity. I'm also trying to clear space under the lights for all the things we will be seeding in the next few weeks. Our gloxinias, other than one dandy, late bloomer, are all pretty much headed for dormancy. The currently dark bottom shelf of our plant rack has served to hold our dormant corms until now, but will have to be cleared soon to make room for broccoli, cauliflower, cabbage, tomato, and melon plants.
Since both trees were in trouble last year, I sprayed both with a dormant oil and lime-sulfur mix this week. I got a reminder that lime-sulfur can clog a sprayer pretty easily and ended up having to wash out the sprayer with very hot water and strain the mix before finishing the task.
We also have a lot of lichens growing on the tree, a result of not pruning it properly for several years and cutting down the airflow through it. Tadpoles
I mentioned last month that I was trying a new seed supplier and would let you know about my experience with them. My order from GenericSeeds.com arrived properly filled, promptly, and well packed. As long as I'm satisfied with their seed vigor, they'll be added to my list of suppliers. I posted a long list of seed suppliers in January, many of which I hoped to order from. Our final list of suppliers for this year turned out to be a good bit shorter than January's listing. Excessive shipping charges turned us away from several good suppliers. In order of the number of line items ordered, we used:
I also found a supplier for my favorite open pollinated red pepper, Earliest Red Sweet, in the Seed Savers Exchange Annual Yearbook (only available to members). And after years of hunting a good supplier for pots, flats, inserts, and such, I've finally settled on the Greenhouse Megastore. We placed two orders with them this winter. Both arrived promptly, properly filled, and well packed. I still have trouble with their prices for basic (flimsy) 1020 flats, but they're better than most on that count.
March 7, 2010 - Geranium Seed Source for Canadian Growers Canadian reader Angel Kirouac sent along a nice email yesterday that told of her excellent results starting geraniums from seed on their heated garage floor. She started her seed in soilless starting mix and covered the flats with black construction paper to provide the required total darkness to germinate geranium seed. She now is caring for 110 geranium seedlings under plant lights! Angel got her seed from William Dam Seeds. When I checked out the company on the Garden Watchdog section of Dave's Garden, they had twelve positive ratings with no negatives or neutrals! The only comments even close to negative were wistful, previous US buyers who wished they could still order from the company. William Dam Seeds only ships to Canadian buyers because of US import requirements.
I planted half of the row to Tall Telephone (or Alderman), and the other half to original Sugar Snaps. I seem to have better luck harvesting tall varieties of peas, and both of these varieties can vine up to 5-6' tall. We'll also be planting another row of shorter peas later this spring. Varieties such as Encore and Eclipse require a bit warmer soil than we have now for good germination.
When I got inside and began to process photos and write this posting, I noticed that we planted our peas last year on March 7! I really hope that's a good omen, as we had great peas last year. I just opened our last bag of them from the freezer. Let me add that I was really counting on the showers coming. I'd watched the weather forecast that predicted rain and went ahead and sprayed our winesap apple tree with a soap mixture to try and remove some of the sooty mold on its branches. The showers, of course, are the rinse cycle.
If you have a spreadsheet program on your computer, Johnny's Selected Seeds is offering a free download of a spreadsheet (xls format) that will tell you "when to start seeds inside and when to safely set them out." You just enter your spring frost-free date and the spreadsheet calculates the values for a number of crops. I cut down the image at right to make it fit here. Note the safe planting date for peas for our planting zone!
Thomas Watson has a thorough description about hardening off plants on GardenGuides.com.
And after all the problems we've had getting our geraniums started, we finally have a nice stand of them under our plantlights.
I ordered a Red Maple Arbor Day Tree Kit and a Colorado Blue Spruce Tree Kit from GenericSeeds.com to see what I'd get. The kits come as pictured left, right, and above, and do include everything one needs.
Surprisingly (to me, anyway), the red maple seeds haven't yet shown any sign of germination! It will be interesting to see how the blue spruce grow, and how quickly they may be ready to set in the ground outside. Full disclosure: GenericSeeds.com is a Senior Gardening affiliated advertiser. The Jonsteen Company is not. After posting yesterday's update to Senior Gardening, I got outside to enjoy a gorgeous day. Since we had to have our two main shade trees cut down last year, replacements need to be planted this spring. I haven't purchased any tree seedlings as yet, but I went ahead yesterday and prepared the hole for one of them. I always follow the old Dig a ten dollar hole for a five dollar tree adage when planting trees. And I had a special plan for this hole.
So I dug my hole for the tree beside the nasty smelling compost heap. The hole was around five feet in diameter and I got down about three and a half feet. Then I brought out the post hole digger and made a smaller hole in the center of the hole around two feet deeper. I quit when the gray clay began to wear me out and ground water began rapidly seeping into the hole.
By the time I was done, I was feeling every year of my 60+ years. But having practiced good digging habits of digging and leaning on the shovel handle equal amounts of time, I was only sore for the evening. Now I get to move on to clearing out the mulch left from the stump grinding of the old tree. March 18, 2010 - Creative Pinching
Years ago, you used to be able to send gloxinia plants from local florists. The plants delivered often had masses of six to ten blooms in the center. It made for a fantastic gift. One of our last gloxinias to come into bloom this blooming period had a number of buds trapped under its leaves. There really was no way to gently guide the buds past some new leaves in the center of the plant, so I just pinched off the leaves, leaving an outer ring of older leaves with the buds and blooms in the center unimpeded in their upward growth. I think the florist gloxinias of old were probably second year plants, but I'm hoping to achieve the same effect with my first year plants with the creative pinching. Tomatoes
I usually start tomatoes in fourpacks, but since this seed germinated at less than 10% last year, I just spread all the seed left in a four inch square plastic pot. By starting the tomatoes in a single pot, I've created an extra step in the growing process. I'll have to move what plants I get into fourpacks or some other larger pots in a few weeks. The advantage of planting to a single pot in this instance is that I won't have lots of empty cells as I would have if I'd planted just a seed or two in each cell of a fourpack.
The trick with all of this is the watering. Dry peat moss won't absorb cold water. I placed the pot in a bowl and added nearly boiling water to bottom water it. After a couple of hours, I could tell by touch that the potting mix had absorbed about all the water it was going to, but the peat moss was still dry. I then dribbled very warm water across the top directly from the teapot I'd heated it in. Soft Water We don't water any of our plants with warm water from the tap, as we have a water softener that, of course, adds salt to the water. While it's just a small amount of salt, I'm sure it doesn't help plants any. Our kitchen cold water bypasses the water softener, so when I want warm water for the plants, I heat it in the teapot that's always on our range. For watering our plants in the kitchen, we just keep a full watering pot of water drawn from the cold water tap on hand. When either Annie or I finish watering, we fill the watering pot, and it gradually warms to room temperature. Lots of Lettuce
Since I frequently mention planting to fourpacks, I thought I should throw in a photo here of a planted flat of fourpacks. The fourpacks come in a sheet of eight fourpacks to fit a standard planting flat. I used two flats to hold the fourpack sheet. Just under the fourpack is a flat with holes in it and under that is a flat with no holes. That allows the flats to hold a bit more water, and the double flat also compensates for the flimsiness of the flats sold today. Note that I clean and reuse both flats and fourpacks year after year. I had to restock with flats this year, as I'd torn holes in many of my old flats from rough spots on my plant rack. I'd also split and generally worn out most of my old fourpacks. I ended up planting eight different varieties of lettuce. I planted some iceberg lettuce, some red lollo, and a loosehead variety, and several kinds of romaine cos. I'd gotten a freebie packet of colored romaine with one order, so I'll be interested to see what we get from it. And for those new to the Senior Gardening site, only three of the varieties planted were from new packets of seed purchased this year. The rest were from older seed that I keep frozen between planting times.
Inside, I've finally opened up the bottom shelf of our plant rack. During most of the year, the bottom shelf is a clutter of stored items, but as planting season approaches, I need every square inch possible under the plantlights to accommodate our growing seedlings.
Our Senior Gardening feature, A Simple Cold Frame, gives directions on how to build one. Each year as I move the unwieldy thing from the garage to the porch area, I wonder if I couldn't have included some kind of handle on it, or at least made it a bit lighter! The photo below was taken on March 4, 2009. Either we got a good head start last year, or we're way behind this year!
Most seed companies send out some kind of monthly newsletter. Occasionally, I find a tip in one, such as the free planting guide spreadsheet from Johnny's Selected Seeds mentioned earlier this month. More often, the newsletters are pretty advertising oriented and don't impart a lot of tips for gardeners. A recent newsletter pointed me to a relatively new blog from the folks at Harris Seeds. It's written by Richard Chamberlin, President of Harris Seeds. I've found it to be pretty interesting, but it did cost me a few bucks this morning when I read the A Very Special Seed Corn Program posting about Dr. David McKenzie's Mirai sweet corn variety. Harris offers the Mr. Mini Mirai variety for home growers and several other Mirai strains for commercial growers (in quantities too great for small growers). I'm going to plant a few rows of the Mr. Mini Mirai variety a few weeks after I get our regular planting of sweet corn in as a test crop. The variety is said to be incredibly delicious. Update and note (12/13/2011): I no longer do any business with Harris Seeds. In an email exchange with company president Dick Chamberlin, I found that customer views aren't well regarded there. March 22, 2010 - Starting Peppers It's rainy and chilly here today in western Indiana. And as I look at the weather forecast, warm, sunny weather is predicted for the days I'm substitute teaching this week, with rain predicted on my days off!
Besides the ERS red sweet bell variety, I started Red Ace, Red Knight, and Red Dawn. For our yellow-gold peppers, I went with Labrador, Sunray, and Summer Sweet #8610. And of course, any of the reds or yellows can be harvested at their immature green stage as green bell peppers. But I really like the colors.
I had delayed getting our peppers going because our one good heat mat is currently occupied by various herbs and flowers. Not wanting to wait any longer, I'm trying a trick I've used before, both successfully and unsuccessfully. I used one of my heavy Perma-Nest Harris Seeds I mentioned the Harris Seeds blog last week and ordering a packet of their Mr. Mini Mirai sweet corn. I didn't mention that I emailed Harris Seeds on Saturday with a question about isolation required for the variety and another question about why most of their seedless watermelon varieties aren't available in home garden quantities. Bright and early this morning, I received a polite, informative response from Mark Willis, Harris's vegetable seed manager. Mark noted that Mirai "can be planted with other supersweets." On the seedless watermelon variety availability, he wrote:
That's a pretty good turnaround time on questions! Update: Sadly, I no longer do any business with Harris Seeds. The response about seedless watermelons was really pretty insulting. Most of us can maintain proper temperature and humidity to germinate seedless varieties. But in March, 2010, I decided to give them a pass on that one. Today (12/13/2011), I had a bit of an email skirmish with Harris Seeds' President Dick Chamberlin. All I wanted was a Harris catalog now so that I could complete my seed orders. Basically, Dick chose to dump on me and inform me that I would receive their catalog when they were good and ready to send it. From afar, my evaluation is that Harris Seeds doesn't want my business and that Mr. Chamberlin truly is a Dick.
When I checked my handiwork this morning, I was gratified to see a few peas emerging from the soil. It looks as if I got the netting up just in time.
I'm still holding off on planting our second row of peas. Varieties such as Eclipse and Encore need a bit warmer soil than we have now to germinate well. I had become a bit anxious that our elephant garlic hadn't emerged yet. We planted our garlic late in November using all our own saved garlic cloves. After moving some mulch around a bit yesterday, I found that the elephant garlic is now coming up, just a bit behind our regular garlic. The elephant garlic in the photo (below, right) is the paler, thicker stalk.
Elephant garlic is actually part of the leek family. Fully mature elephant garlic bulbs look just like german garlic, only about twice as big. Elephant garlic has a much milder taste than regular garlic. We often use both types in the same dish when cooking.
I ran short of mulch after planting our garlic last fall, so I had an opportunity this spring to evaluate the value of such a mulch. The regular garlic came up well, but just a tad better, in the mulched area. Our elephant garlic is up in the mulched area, but none is showing in the unmulched section.
And while it may sound like we're in full gear for spring gardening, the reality is that we're actually just doing what we can get done at this time. It's still too cool and the ground too wet for us to do any serious gardening as. We have a freeze predicted for Thursday night (around 29o F), so Friday may be our moving day to start bringing plants up from the basement plant rack and putting them under our cold frame. The photo below reveals our garden still in waiting. The heavily mulched raised bed in the foreground is our asparagus patch. At this time last year, I was adding the last two sides of timbers to create our large raised bed, and a bit later, the raised asparagus bed. When I got the job done last spring, I wrote up directions based on my experiences in Building a Raised Garden Bed.
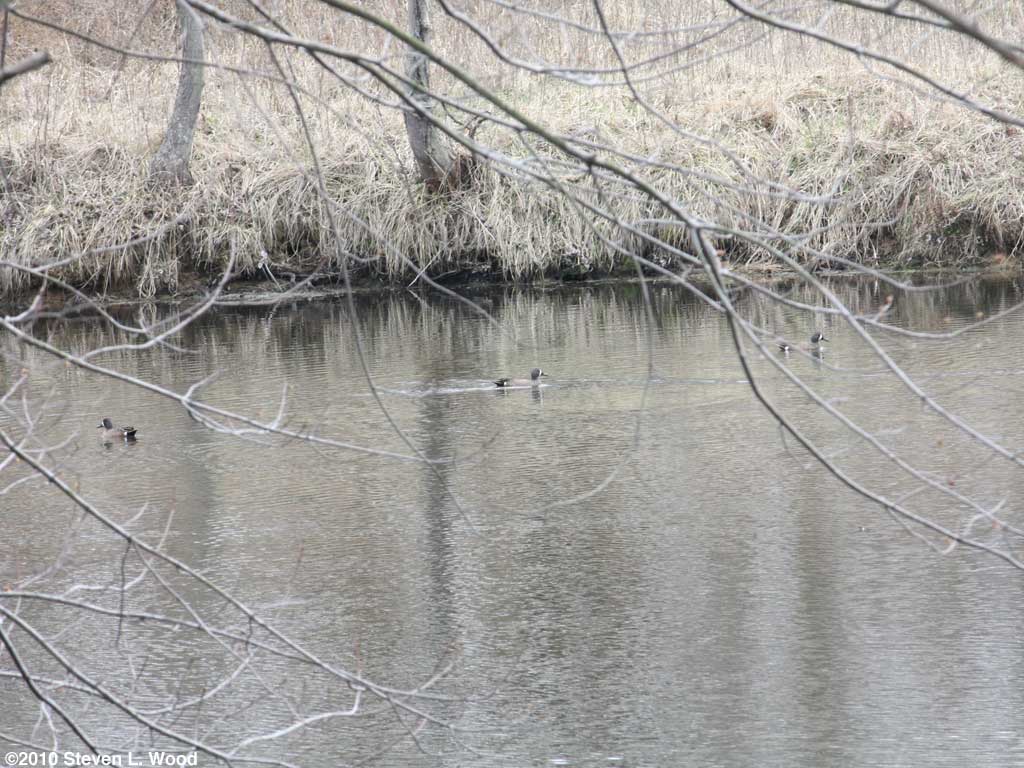
I think what fooled me in identifying the birds, beyond the extreme distance, was the number of birds. I counted at least 21 in one of the photos I took. And while not the best of nature shots, the shot above was the best I could do with my Canon Digital Rebel XSi
And if you hadn't guessed, it was pouring rain all day today, so not much gardening was possible. Our geraniums and some of our brassicas went under the cold frame yesterday. They'll remain there until both they and the weather are ready for them to be transplanted into the garden.
While it's sunny this morning, there's also a pretty stiff wind that could damage both the geraniums and brassicas. I partially opened the cold frame so the plants could get some sun and not cook under the closed cold frame position. The plants will get some sun and a bit of wind as their stems harden to their new outdoor growing conditions. My prop is just an old piece of treated 2x4. We're not much on fancy in the Senior Garden. Functional, I guess, is our watchword.
About Those $10 Tree Holes I did a little tree shopping this week at my local and favorite garden center, Colonial Lawn and Garden in Sullivan, Indiana. While talking to a neighbor who works there, I mentioned moving my compost into the hole where I'll plant one of our replacement trees this spring. I described that process earlier this month. Cindy, the neighbor, was horrified at what I'd done. And I should add that Cindy's family lives "around the corner" only in country terms. By that, I mean down our road a mile or so, a right turn and then another mile and a half. The Dig a ten dollar hole for a five dollar tree adage at one time was the accepted way to plant a tree. If you didn't have any soil amendments on hand, tree experts recommended setting aside the topsoil when you dug your tree hole and moving it to the bottom of the hole before planting a tree and then backfilling with the subsoil around the surface. Cindy's shock at my actions reflects the current thinking that changing the soil structure around the new tree may shock it and lessen its chances of taking hold and growing. When planting trees, I've tried the newer school of thought with some non-essential trees. And, I'll stay with my practice of giving the tree seedling the best hole I can give it. It works for me. As we talked, Cindy mentioned that she had lettuce well along and almost ready to pick in a sheltered bed close to the house. I'm envious. She also put me on to Bonide Fire Blight Spray, a streptomycin product, that I'm going to try on our fruit trees. I'd add a link to the product, but it appears no one wants to sell the stuff online! March 31, 2010 - Tree planting
While the hardware store had some red oaks, they were all older, larger (6') trees. I wanted to go with a smaller tree in hopes that its stem might toughen as it grows to withstand the 25-30 MPH winds we frequently experience. They did have some nice, small Shumard Oaks. I left our garden cart in the photo at right for size comparison. It will be a very long time before the tree shades our house. Planting the tree was pretty easy, since I'd dug the hole for it a few weeks ago, backfilling it from our compost pile. So yesterday, I just dug a hole slightly larger than the pot the tree came in, filled it with water, plopped the tree in, and backfilled around it with a bit of garden soil. Tomatoes
As you can see at left, our germination rate ran around 10-15%. While a terrible rate for fresh seed, I was actually a little surprised at how many plants we got from the seeding from the last of our commercial seed saved since 1987! I also got the rest of our tomatoes started today. I'm trying a new grape variety, Red Cherry, in hopes that its fruit won't split as badly as our previous varieties have. (I think some of that problem may be my growing culture.) For our caged tomatoes, I mainly stuck with tried-and-true varieties for this year's garden. They include Better Boy, Bella Rosa, and Fantastic (which we haven't grown in a few years). Since we only have room in the main garden for five or six tomato cages, that about does it. I did seed a pot of another experimental variety Shumway's included with my seed order, but I'm really not sure where the plants will go in the garden. Starting Vining Crops
Of course, used pots and the plant and soil residue they retain aren't ideal for seed starting. I hosed off the pots outside before bringing them inside for a hot water and bleach bath. Today's effort is just the first round for melons. I try to get my pollinators going a bit earlier than our seedless watermelon varieties. Those include Crimson Sweet, Kleckley Sweet, and Moon & Stars. I'd really like to get to pick one of my favorite watermelons this year, the Kleckley Sweet, instead of finding them torn open by the raccoons a day or so before the melons mature! I also started muskmelons, including Athena, Amish, and an experimental variety (again from Shumway's) along with one pot of yellow squash. Since I may be just a tad early on getting my melons going, I also ordered a package of Hot Kaps® Domes And to close out the month with something pretty, let me share a shot of the gloxinia I pinched back earlier this month.
From the
at Senior Gardening |


 Knowing that we'd have to plant a tree this spring, I kept my compost pile in the general area where I intended to plant the tree. As I turned the pile last summer, it moved around the area, sort of sharing the wealth. It's final position from the last turn was right beside where I wanted to put our new tree.


 I looked out the window this morning and saw a bunch of dark shapes far back in the field behind our house moving across the field. Two of the shapes were considerably larger than the others, but with the naked eye, I couldn't identify what they were. I mentally ticked off and rejected some of the common possibilities of coyotes and canadian geese.


| Affiliated Advertisers |
©2010 Senior-Gardening.com