![]()
One of the Joys of Maturity
One of the Joys of Maturity |
|
| Affiliated Advertisers |
Clicking through one of our banner ads or some of our text links and making a purchase will produce a small commission for us from the sale. How We Grow Our Carrots
We weren't always able to grow good carrots in our garden. Not until we began using softbeds first and raised beds later did we consistently grow good carrots. And until a few years ago when our dogs dug up half of our spring carrots and the onions around them, I'd not grown fall carrots. Now, we consistently grow great crops of both spring and fall carrots. Leave your car unlocked around our house shortly after carrot harvest, and you just might return to it to find a three pound bag of carrots in your passenger seat! The trick to growing good carrots is simple. You need six to eight inches of fairly good, light soil free of rocks, clumps, and pebbles in your garden plot. Improving a whole garden plot to those standards could be exacting. Doing so for just the carrot rows isn't all that much work. Softbeds Before we had our current raised garden beds, we created what we called softbeds for our onions, beets, and carrots. They were narrow areas in our garden where we deeply worked the soil with all the soil amendments we could afford, and then never stepped into them during the growing season to avoid any possibility of soil compaction.
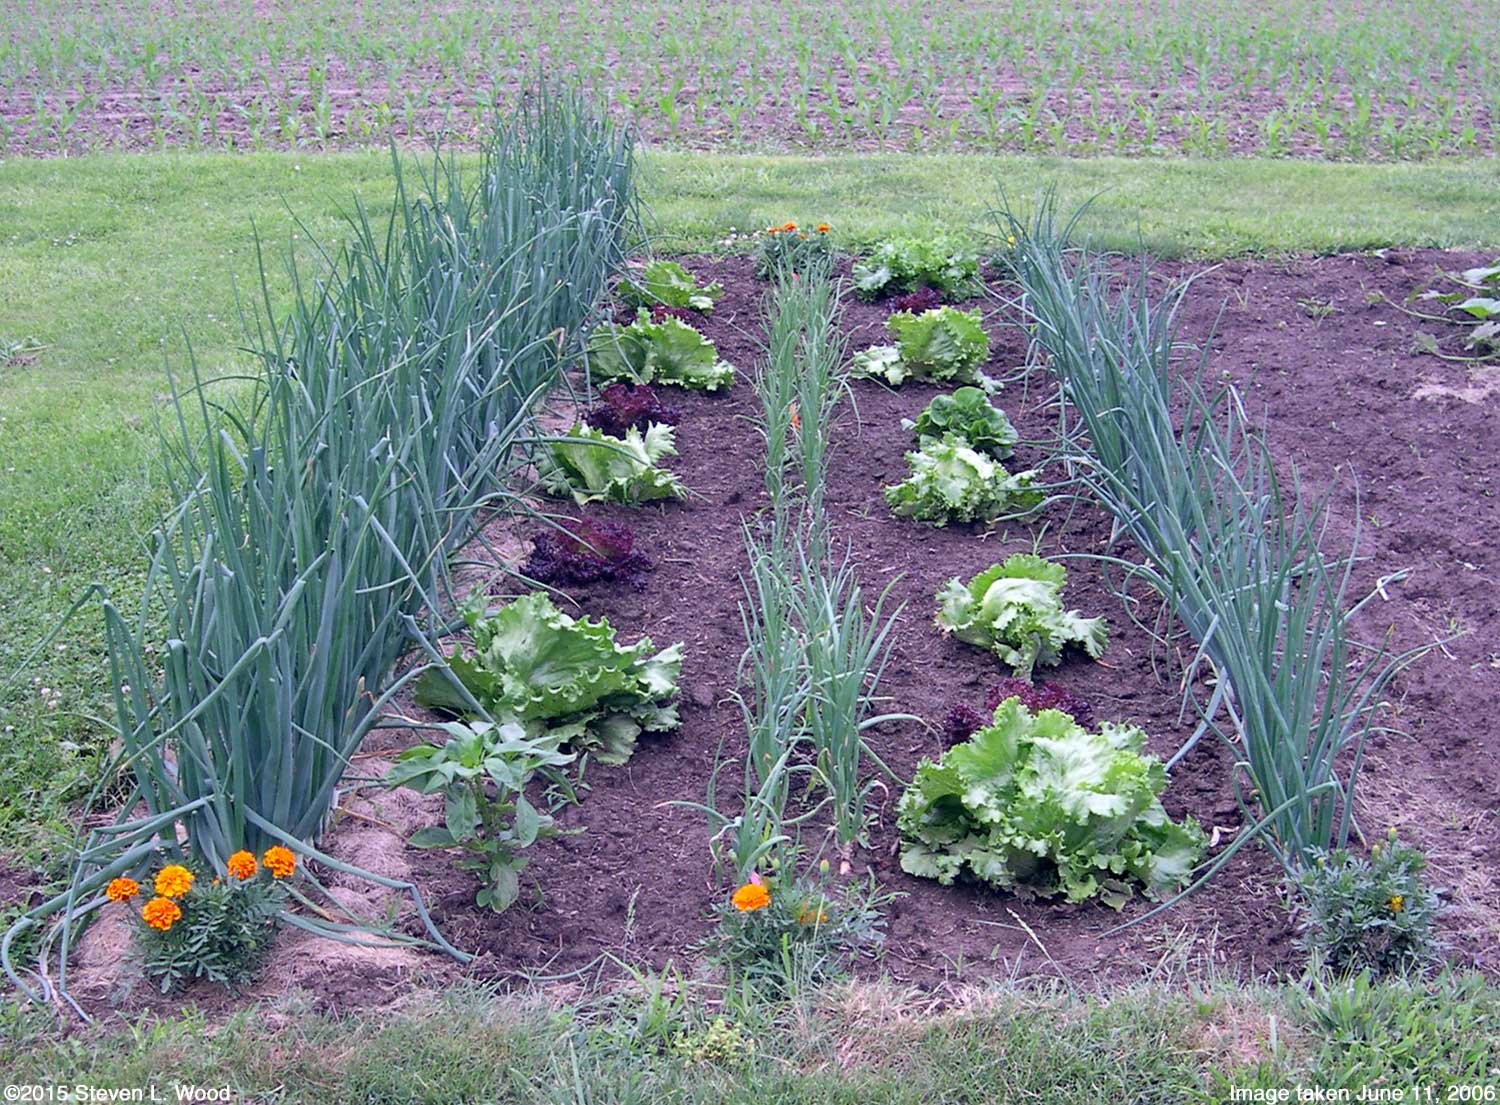
Sadly, I don't have an image of a softbed of carrots, only a slightly too wide one of onions and lettuce from the 2006 growing season. One of the main advantages of a softbed is that one always works it from outside the bed. Getting such a bed too wide makes it tough to reach the center. Depending on ones arm length and willingness to stretch, about three feet wide is just about ideal for a softbed. Note: The discrepancy between the copyright date (2015) and when the image was taken (2006) is due to copyright law requiring using the date an item is first used online or in a publication as the copyright date. The image above left hadn't been used on this or any other site until now. Raised Beds
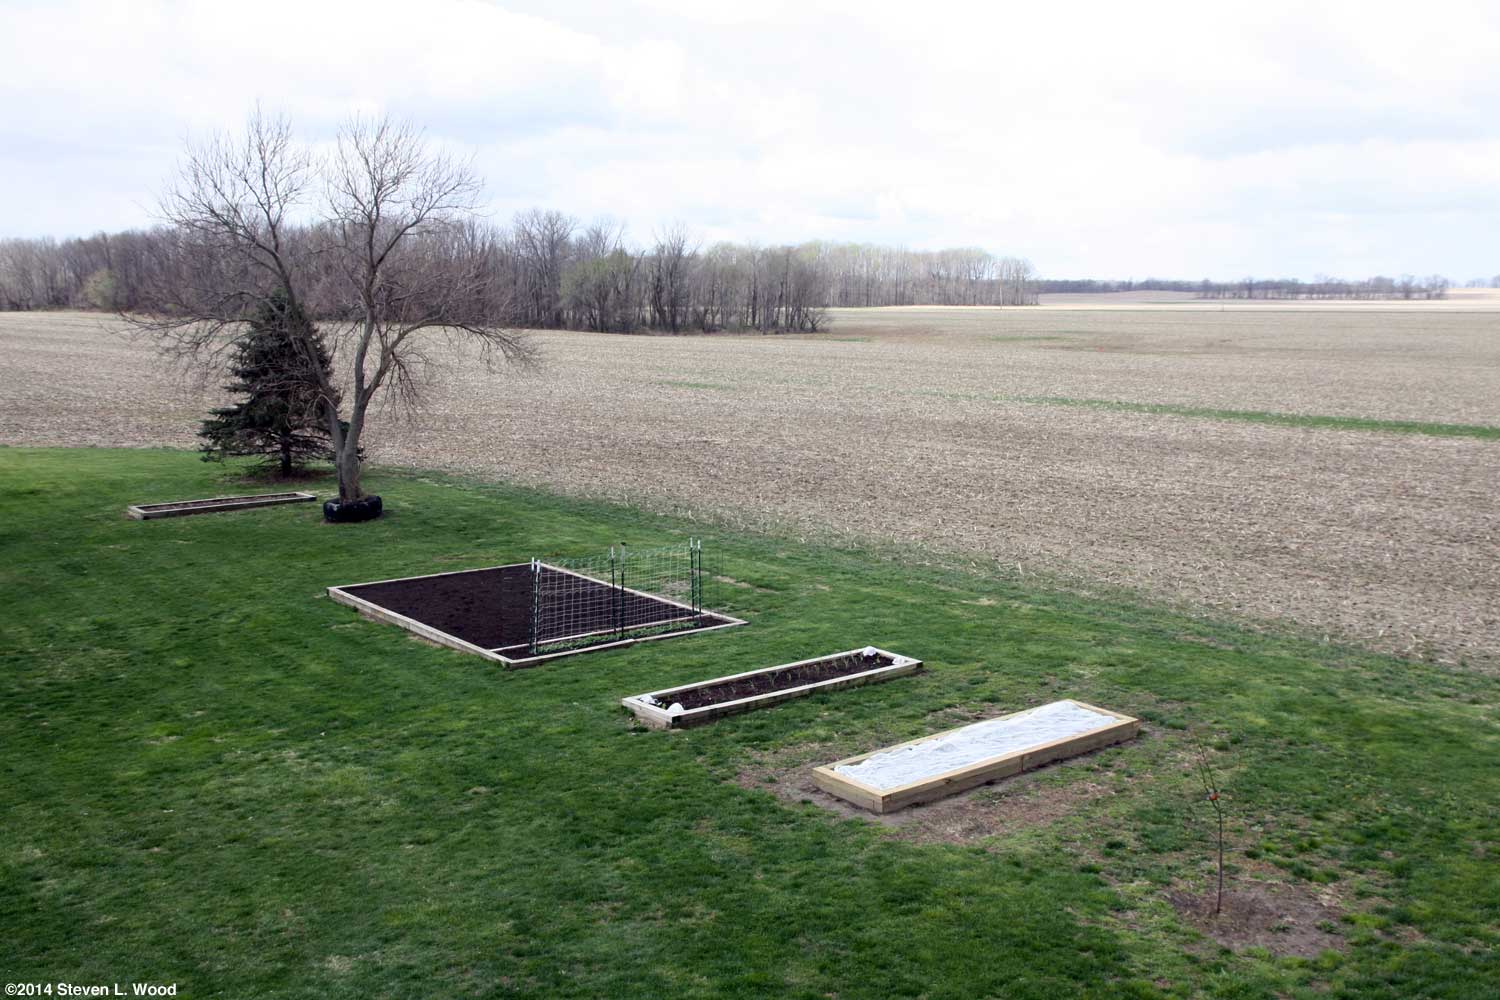
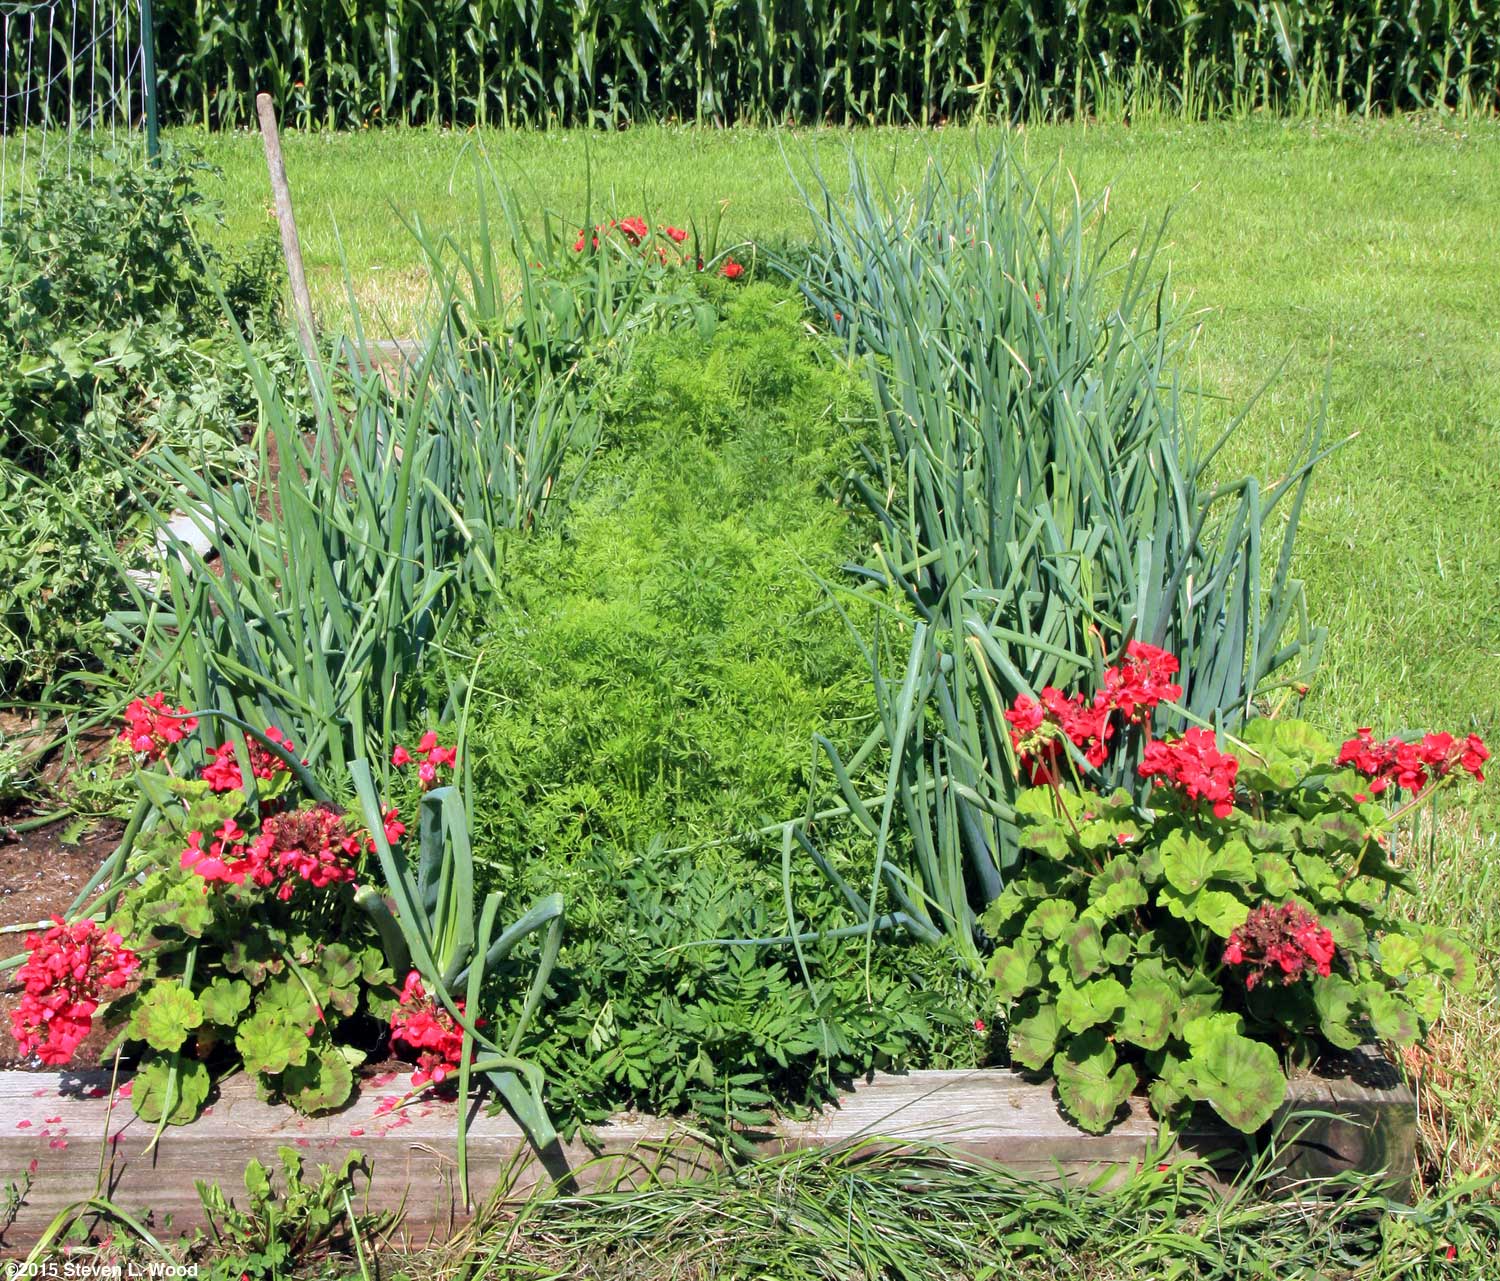
Starting Carrots We currently grow our spring carrots in intensive plantings with close co-plantings of onions, lettuce, and occasionally beets around them. That method, most certainly, isn't the only way to grow good carrots, but it's what currently works best for us in our garden plots. In recent years, we've refined our growing method to a double row of carrots with a double row of onions on either side. That's about all we can squeeze into a three foot wide narrow (soft)bed. Due to necessary crop rotations, we planted our spring carrots in a softbed created in the middle of our large raised garden bed in 2014. In other years, our carrots get planted in one of our 3' x 15' narrow raised beds. Either way, our planting plan works pretty well.
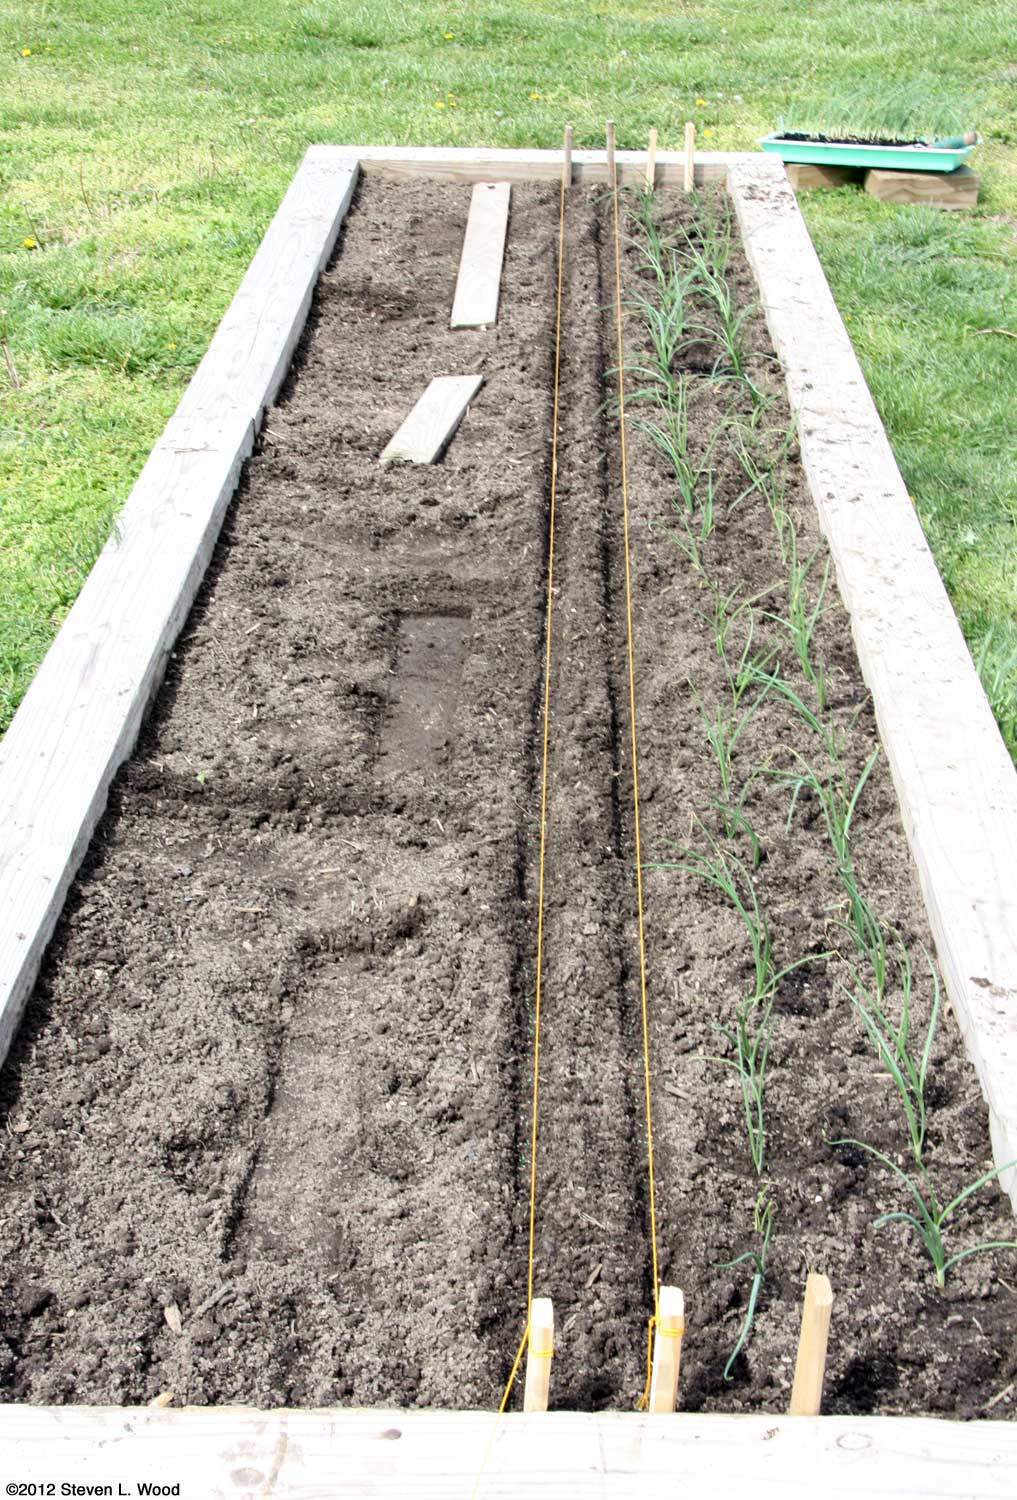
From part of our 2014 garden map shown above, one can see that we leave just four inches between our rows of onion transplants, with a full foot between them and a double row of direct seeded carrots, whose rows are also spaced just four inches apart. Another foot separates the carrots from another double row of onions. Before planting, the soil for the softbed is thoroughly tilled with a rototiller, turning in any lime necessary, peat moss and/or compost when available, and a sparse sprinkling of 12-12-12 commercial fertilizer. Once tilled, the area shouldn't get stepped in until harvest. The planting is accomplished with walking boards and a foam pad to prevent soil compaction (the foam pad more to protect my old knees).
Forgive me, but I've had to rely on using images over the years to fully illustrate this story. Carrots should be seeded a half to an inch apart. With the tiny seed that often sticks to ones fingers, it's tough to do that. Pelletized seed would be easier, but I'm too cheap to spend the extra money for the more expensive pelletized seed. So I do the best I can seeding the carrots and then get to thin them a good bit when they come up. Before covering the carrot seed with soil, I sometimes thinly seed radish seed in the row to help break any soil crusting that might occur and mark the row until the carrots emerge.
After seeding the radishes, I pinch the soil closed over the carrot and radish seed and pat it firm with my hand. Sometimes (almost always in fall plantings made in the dry months of July or August), I lay a walking board over the row to hold in soil moisture and hold back weeds. I didn't in spring, 2014, as I used some freebie, heavy duty plastic row labels I was given at our local garden center as dividers between the carrot varieties. See The Radish Murders and Grass Clipping Mulch for more information about using radishes as a nurse crop for carrots. Whether one covers the carrot row with walking boards or not, some watering will almost always be necessary for 7-10 days as the carrots germinate. Obviously, when either the radishes or carrots begin to emerge, the walking boards have to be removed from the row.
Timing We usually plant our spring carrots in mid-April, weeks before our last frost date of May 1. Our fall carrots go into the ground in late July, timed to beat our first frost which can occur anytime after October 1. For timing of carrot and other plantings, Johnny's Selected Seeds provides some excellent planting calculators on their Tools & Calculators page that give planting recommendations based on ones zip code. If you don't know your frost-free dates, Dave's Garden has a page that should give them to you. Care Through the Growing Season
If you get too many carrots seeded close together, it's necessary to thin them out a bit, so no carrot plant has another right beside it. Seed tapes and pelletized seed can help one space carrot seed properly. I've not had much luck with seed tapes, and my stinginess about pelletized seed makes me thin my carrot rows several times each growing season. If you choose not to mulch your carrots, a bit of work with a scuffle hoe will hold back weeds. Some gentle cultivation with a garden hoe also loosens the soil for the expanding carrot roots, as long as you don't get too close to them. Even with mulch, one can employ a soil scratcher to loosen soil a bit, although you'll have to reapply mulch after doing so. As the season wears on, the foliage of a good stand of carrots will actually canopy. The feathery top growth blocks most light from reaching the ground, helping prevent weed germination. Insect Problems You may notice that I haven't mentioned insect control. That's because we have very few insect problems with our carrots. We do have the occasional root that has been "chewed on" by one kind of worm or another. We had weevil damage to some of our fall carrots one year, reducing the usable crop. Good crop rotation, proper garden cleanup, or possibly just good luck eliminated the weevil problem in seasons following. Such punctures in roots by insects can be an avenue for rot to begin, but we don't see much of it, certainly not enough to break out the insecticides. If you have insect problems, I found three pretty good pages specific to carrots and insects:
|
Harvest
Carrots have their best flavor when harvested on time, so letting the roots become enormous is a false economy. Pulling a little soil back with a finger or garden trowel should reveal how large in diameter the tops of the carrot roots are getting. Also keeping track of planting dates and various varieties' days-to-maturity can help determine when to harvest. But just taking a peek or digging just a few will be your best guide. We use a heavy garden fork to harvest our carrots. If possible, we don't really dig our carrots. We use the garden fork, placed several inches to the side of the carrot row, to lift and loosen the soil around the carrots. Once the soil is loose, one can then lift the carrots by their tops without breaking off the tops or breaking the roots. And yeah, there are years when the soil is bone dry at harvest. Then you have to really dig the carrots with the garden fork.
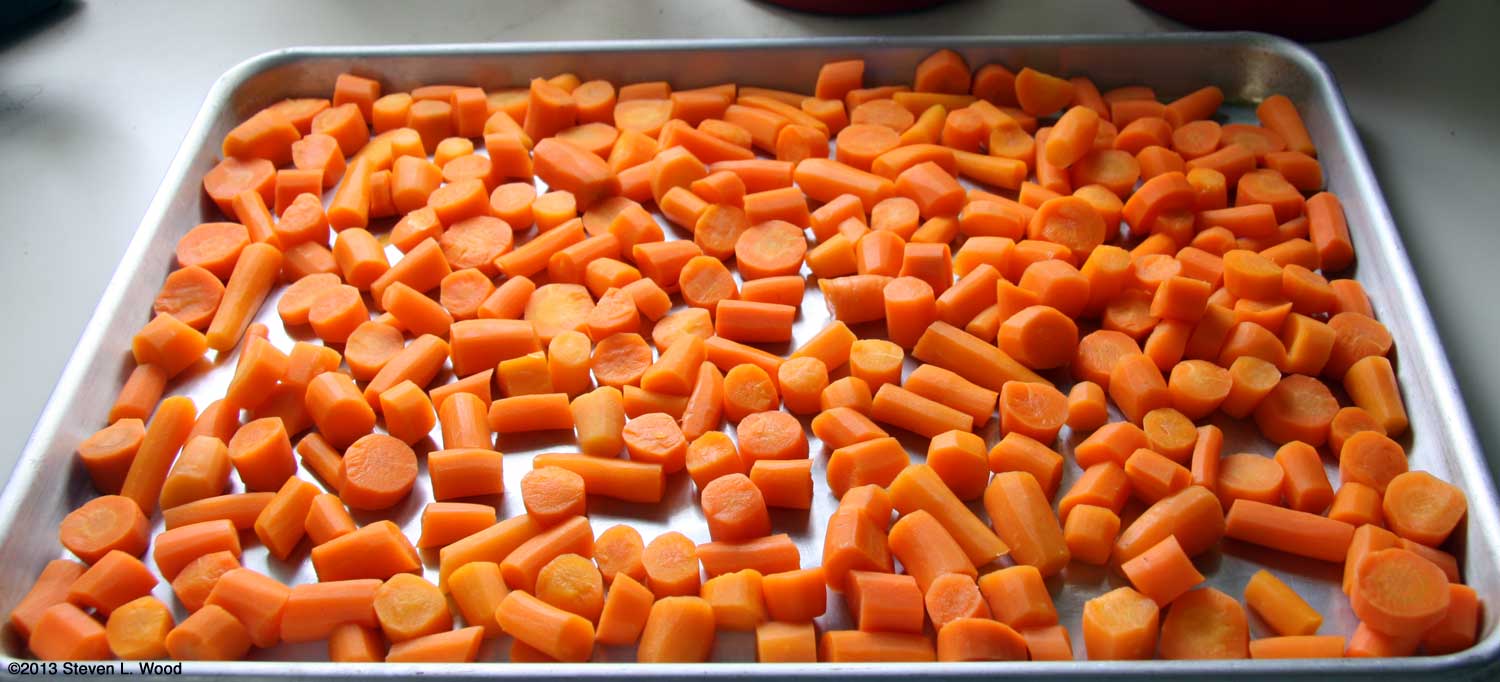
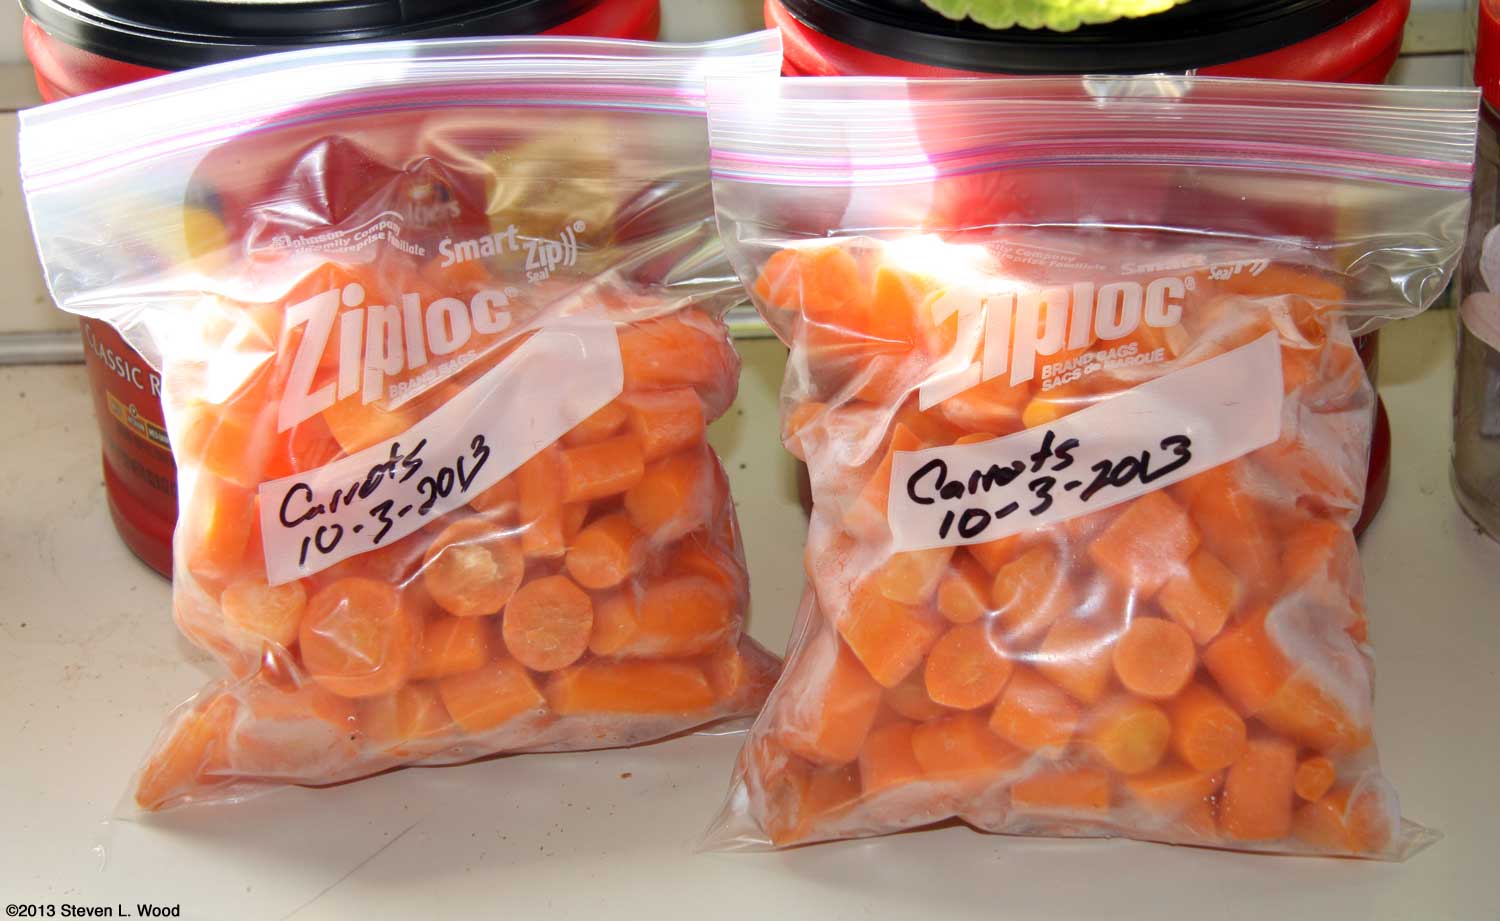
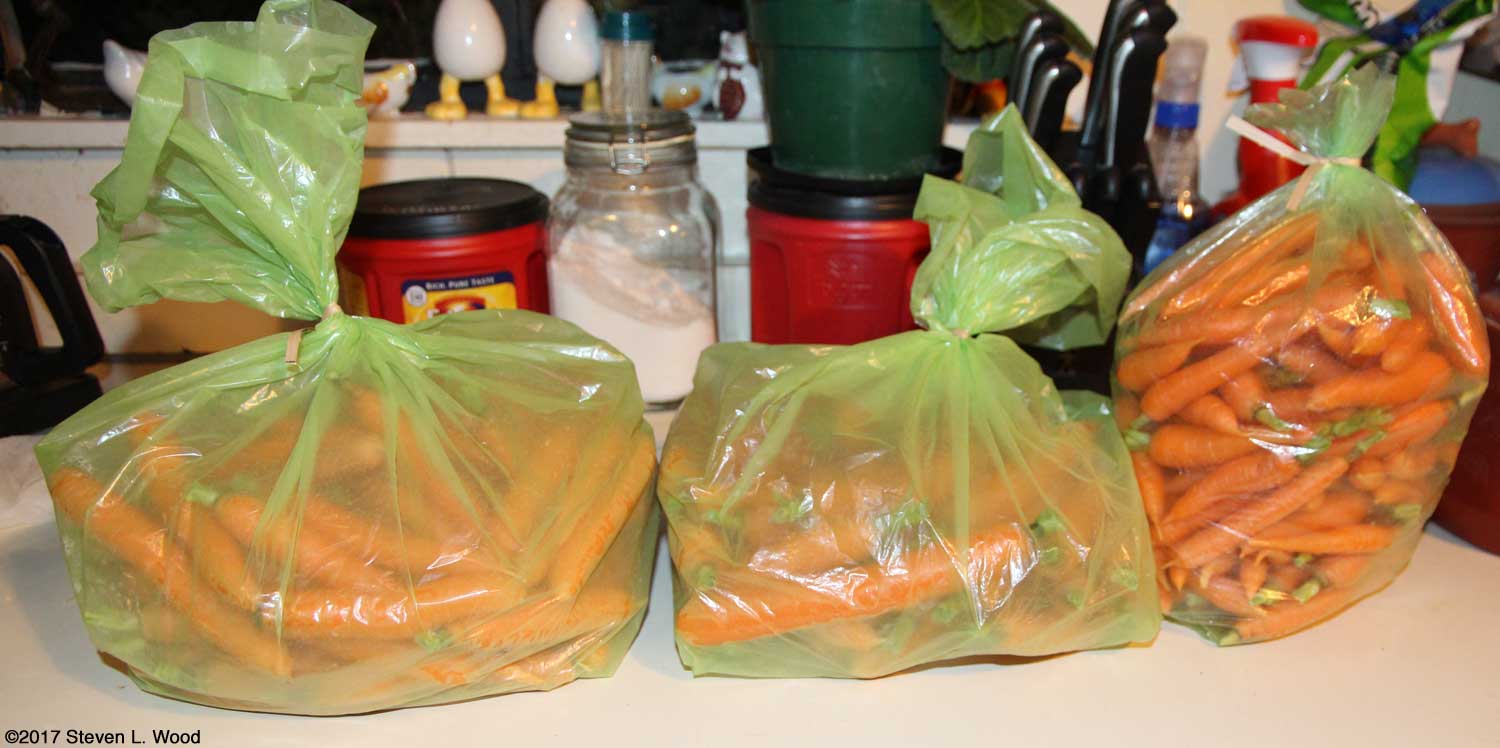
I then trim off the tops of the carrots about a half to a full inch above the carrot root. I also trim off any taproots from the bottom of the carrots. Then they go inside for a scrubbing with a vegetable brush and sorting. Cull carrots, those with blemishes, bug bites, splits, or any other imperfection that may cause them to spoil early in storage get set aside for fresh use or being cut for frozen cut carrots. Carrot tops and root tips trimmed eventually go onto our compost pile. After air drying, our carrots go into large Debbie Meyer Green Bags Most of our carrots go into the vegetable drawers of our refrigerator for long-term storage, but we don't waste the cull carrots. After peeling and chopping the carrots, they get a good rinse before being blanched (or scalded as the Ball Blue Book
Carrot Varieties We've tried a lot of different carrot varieties in our garden plots over the years. Before we had our softbeds and raised beds, chantenays, danvers half longs, and other short varieties produced the best for us. Ones soil type and climate zone will influence how different carrot varieties produce for you. Having said that, the carrot varieties we currently use include Mokum (36 baby, 54 full size), Laguna (65), Nelson (56), Naval (72), Yaya (56), and Scarlet Nantes The Sugarsnax we planted at the end of our spring, 2014, double rows just about killed me getting them out of the ground. They grew to up to fifteen inches long, well into the native clay soil that underlies our main raised bed. While I usually loosen the soil around carrots with a garden fork and then pull them out by their tops, the Sugarsnax had to be completely dug to remove them without breaking the roots.
A 14-15 foot double row of carrots can produce 10-15 pounds of good carrots for us, with lots of culls (splits, carrots with insect damage, carrots broken during harvest) for immediate fresh use and freezing. Once you begin to bring in massive carrot harvests, you find yourself sneaking carrots into all sorts of dishes. Spaghetti sauce, Texas Nachos, Asiago Cheese & Tortellini Soup, and of course, our favorite Portuguese Kale Soup all have carrots in them. Fall Carrots
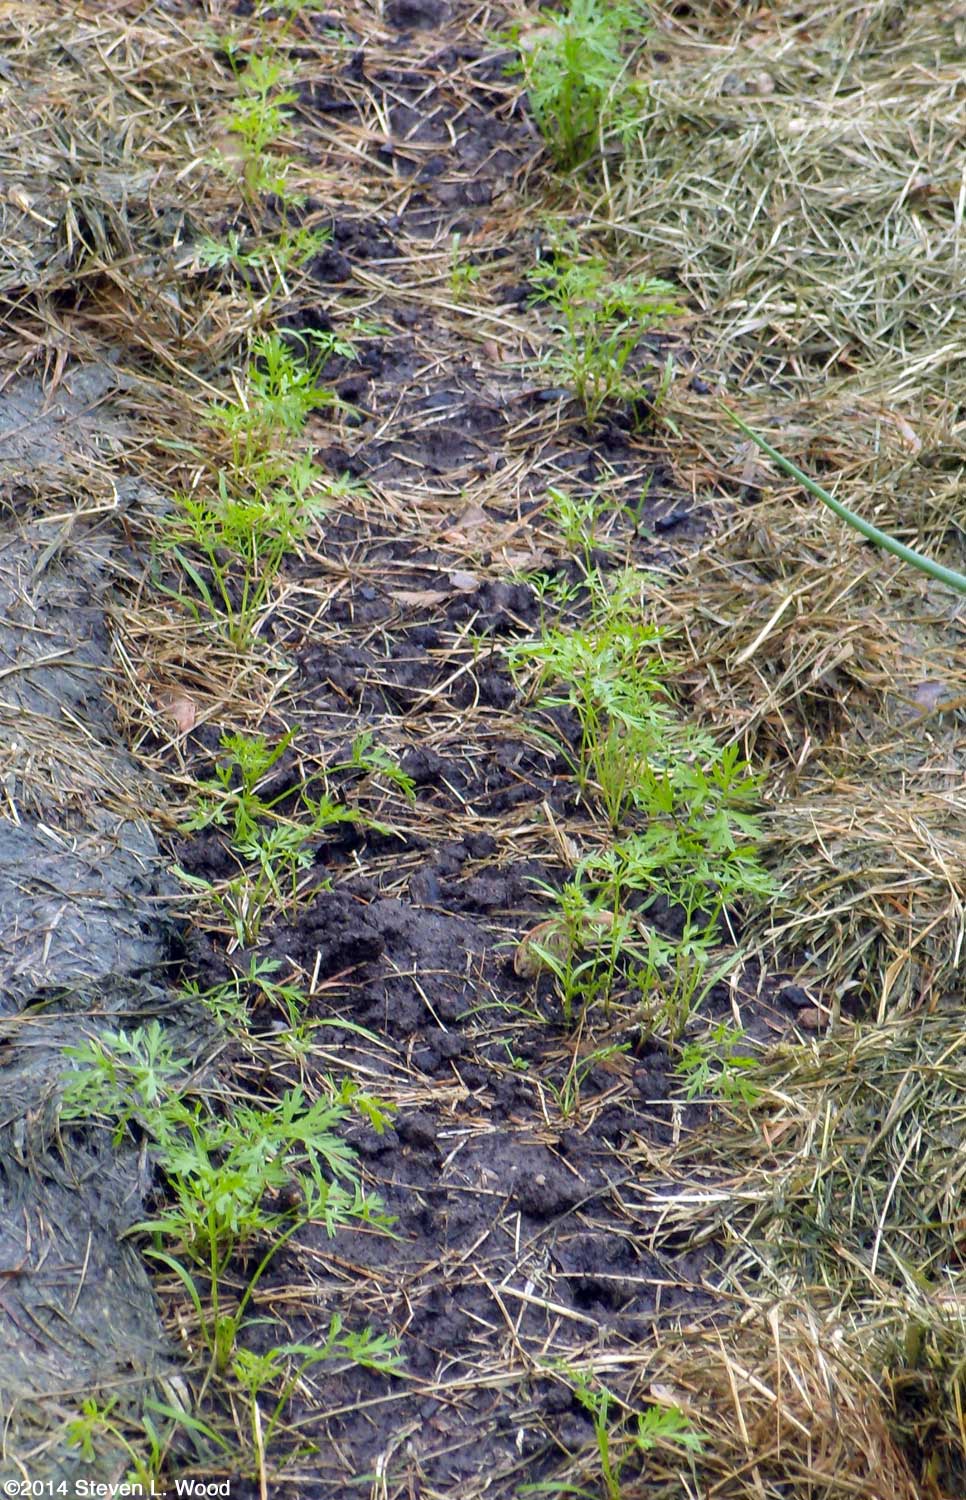
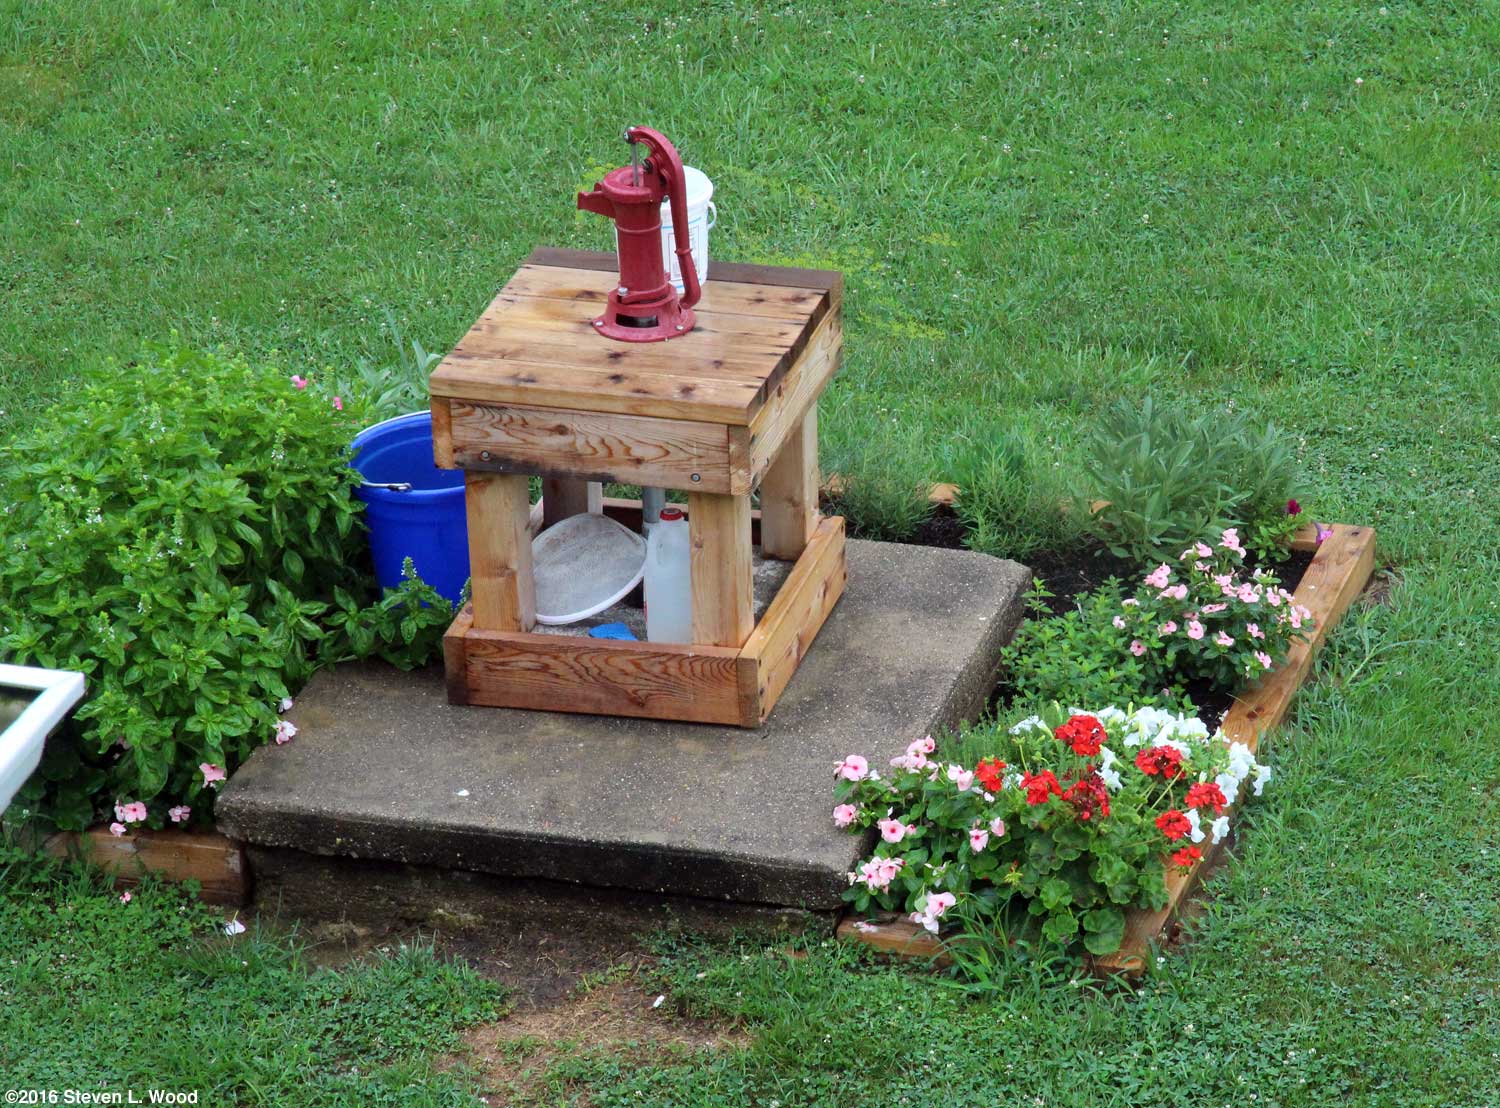
So I was forced to try my hand for the first time at growing fall carrots so we'd have enough to last through the winter. And that turned out to be a very good thing. We seeded our first crop of fall carrots on July 21, 2013, giving them plenty of time to mature before our first expected fall frost sometime in October. We dug a beautiful crop of them on October 2, that yielded twelve pounds of cleaned carrots to store in our refrigerator. In 2014, I got a bit sidetracked with other stuff and didn't seed our fall carrots until August 1, cutting things awfully close if we should have a frost early in October. We started taking baby carrots from the planting in early October, mostly for table use and for the grandkids to walk around eating a fresh carrot or two Bugs Bunny style with the green top still on. We were just plain lucky that our first frost of 2014 didn't occur until October 31/November 1, digging a great crop of carrots on October 25. Starting fall carrots for us is a little different than spring carrots. By July, our garden plots are usually pretty dry, despite being covered with grass clipping mulch. Starting any direct seeded crop then requires frequent watering, something our puny deep well doesn't support well. But for carrots (and kale), we risk running the well dry.
In 2016, I added a pitcher pump to a shallow well behind the house. That well doesn't seem to draw from the same water vein as our deep well, so we're able to water throughout July and August, although my arm gets tired from pumping. Since growing fall onions really isn't an option with the shortening day length in fall, the double row of carrots gets seeded all by itself. We don't overseed the fall carrots with radish seed to break up soil crusting, as the radishes would quickly bolt in the summer heat. Instead, we cover the planted rows with our walking boards to retard weed germination and hold in soil moisture. We also mulch the planting almost to the edge of the boards to conserve soil moisture. When we water, we use a sprinkling can to drench the walking boards and let the water drip off the edges into the soil, just an inch or so outside the carrot rows.
I peek under the walking boards daily checking for germination and also to monitor soil moisture.
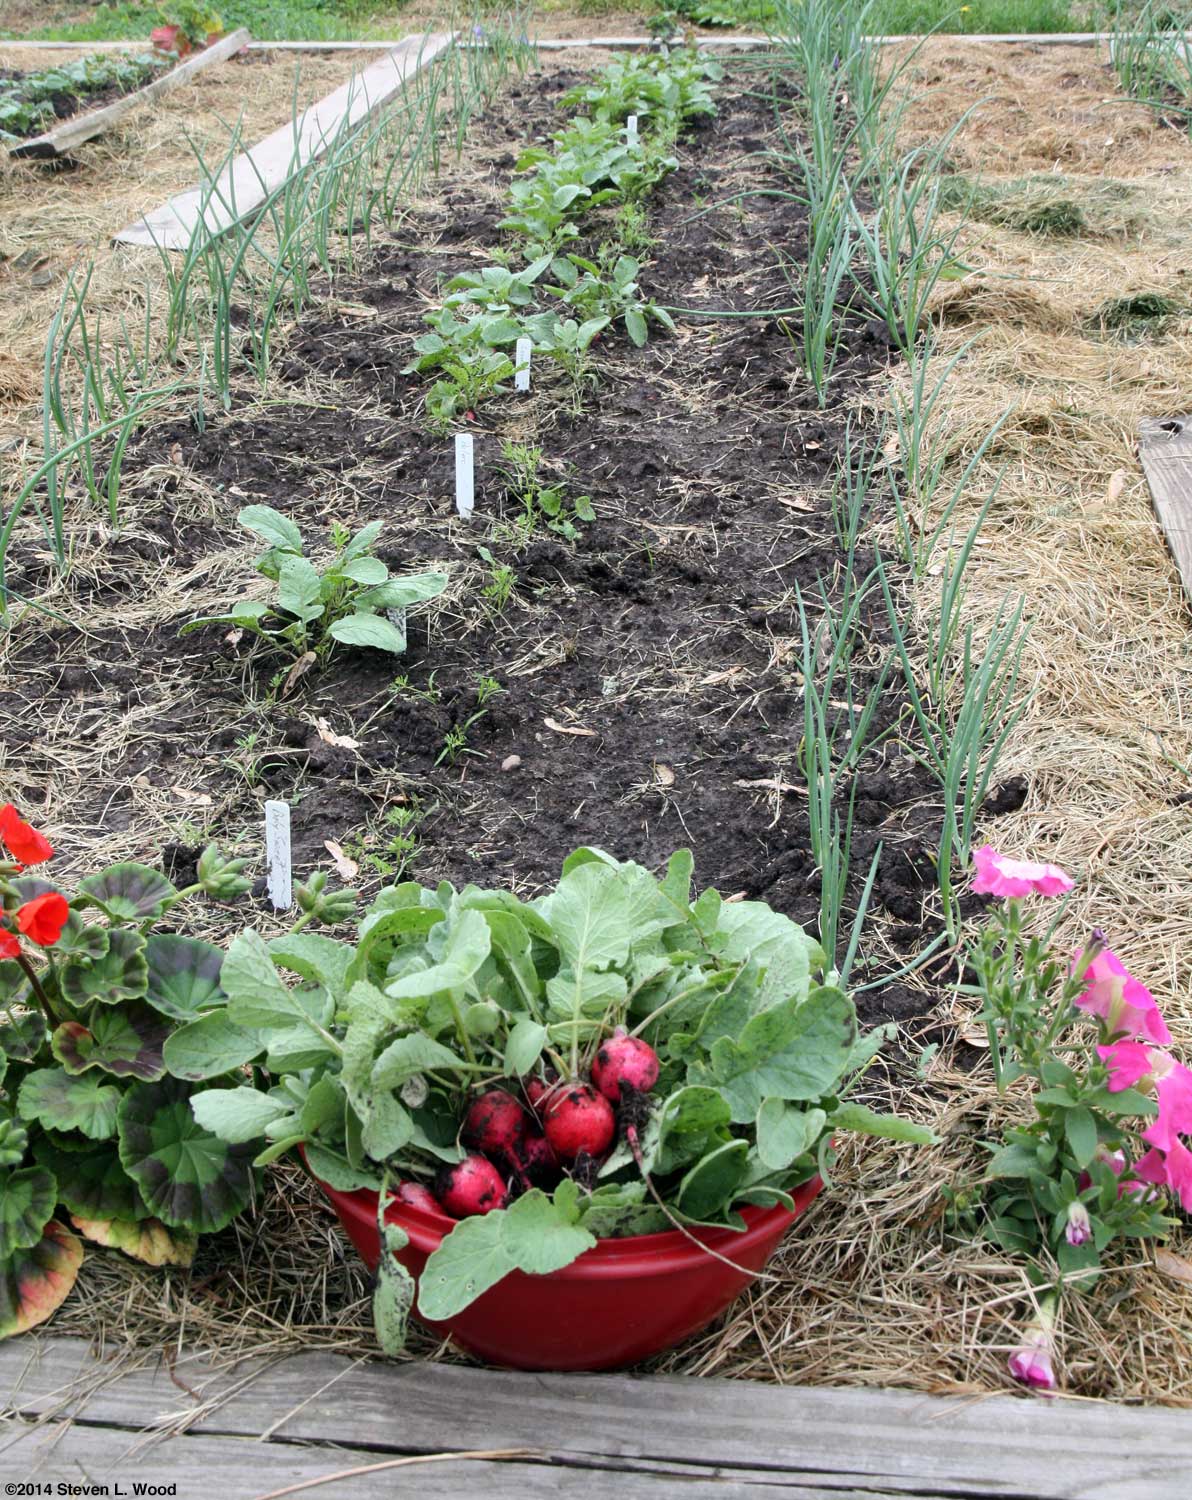
Our carrots grow amidst our other fall crops and lots of flowers that have edged our raised bed throughout the season. Above, our 2014 fall carrots were between some parsley plants and rows of broccoli and cauliflower.
Once the carrots begin to emerge (about 5-10 days), the walking boards get set aside. And of course, then the work of keeping the carrot rows clear of weeds begins, along with thinning out spots where I dropped too much seed. As with our spring carrots, the center between the rows of carrots eventually gets mulched with grass clippings. That's about it for growing carrots, at least, growing carrots on our ground under our climatic conditions.
Disclaimer Just because a retired, old guy has a web site on gardening doesn't mean he knows jack about it. I have absolutely no degrees in agriculture or horticulture or any other special training. At 71 years old, I'm still learning, so there could be tragic errors in the information above. It's just what has worked for us.
From Steve Wood, the at Senior Gardening |
| Affiliated Advertisers |
last updated 4/19/2020
©2015 Senior-gardening.com