One of the Joys of Maturity |
|
| Affiliated Advertisers |
Clicking through one of our banner ads or some of our text links and making a purchase will produce a small commission for us from the sale. The Old Guy's Garden Record
We wound up getting eleven and a half inches of rain in April. While the forecast a few days ago had called for drying conditions, it has now changed. We've had almost two inches of rain already in May, and the new forecast gives us just two possibly dry days before the rain begins again. Local rumor has it that lowland farmers are looking for gopher wood, gathering animals two by two, and reviewing odd measurements in cubits. Starting More Gloxinias
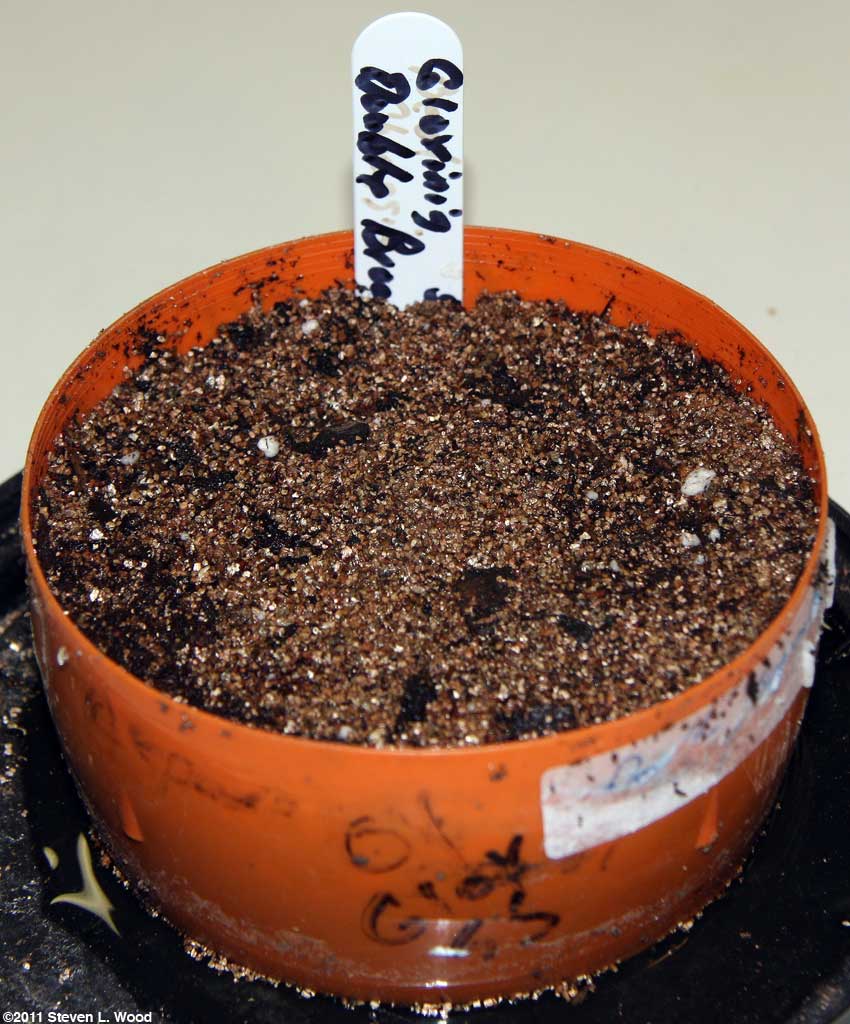
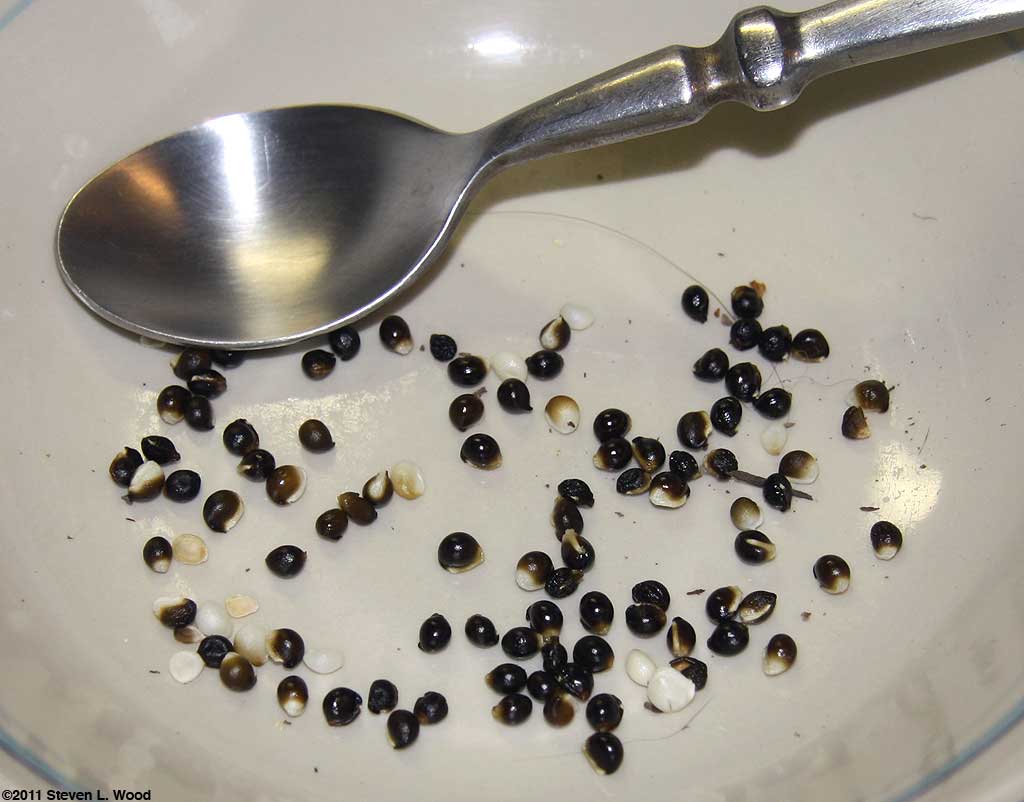
I filled the pot with sterilized potting soil and topped it with a layer of vermiculite. I'm hoping the vermiculite will hold moisture, but not block the light required for germinating gloxinia seed. Before seeding, I top watered the pot with warm water. I often have trouble with moss growing among our gloxinia starts, so I added a touch of captan to the water. Our Double Brocade seed comes from Thompson & Morgan (US). I'm not very happy with their packaging of the seed, as they put 30 (they say) of the dustlike seeds in a foil package. The seeds cling to the foil, making it hard to get them out of the package and onto the planting medium. More seed and/or putting the seed in a glassine (as Stokes Seeds does with their Empress variety) would be a big improvement.
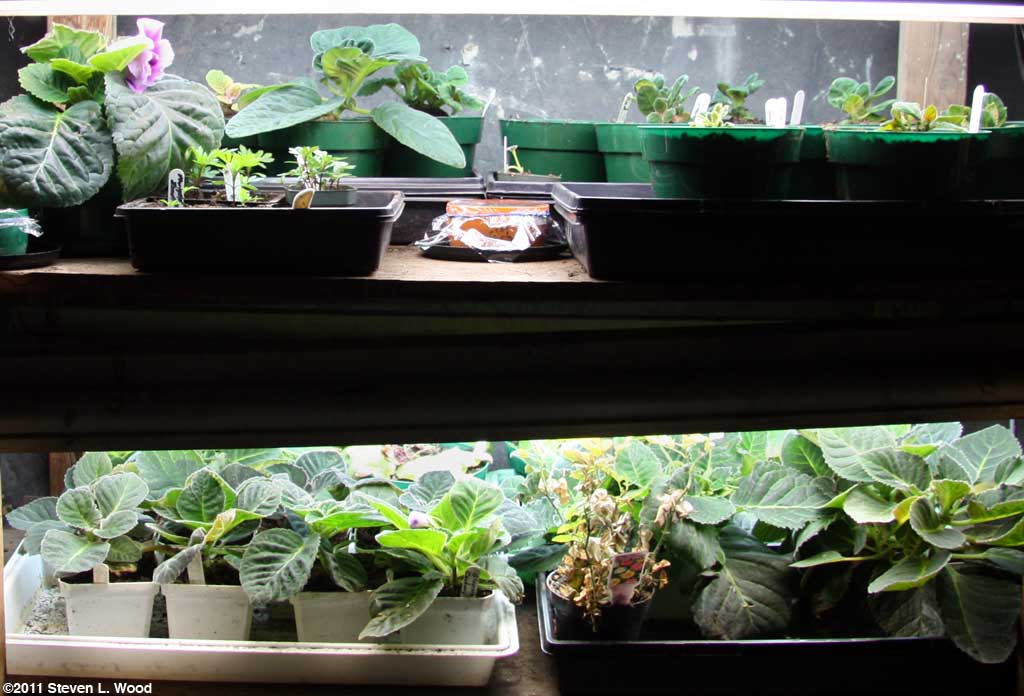
Note that the "hardware" involved in this process is all pretty low tech. An old pop bottle reinforcer serves as a pot with a recycled plant label. Glad wrap allows enough light in, and while I'm working on the seeding, I keep the pot on an old Folgers Coffee "can" lid so water doesn't get all over the kitchen counter. The plastic coffee can lids also can be used under four or six inch flower pots to bottom water mature gloxinias. (Inverted plastic frisbees also do well for that job!) Since I've pretty well wrapped up our continuing feature on Gloxinias, I didn't add this info to it. But if you're interested in trying your hand at growing them from seed, the feature story covers all the ins and outs of the process. It's really pretty easy. Dianthus and Daffodils
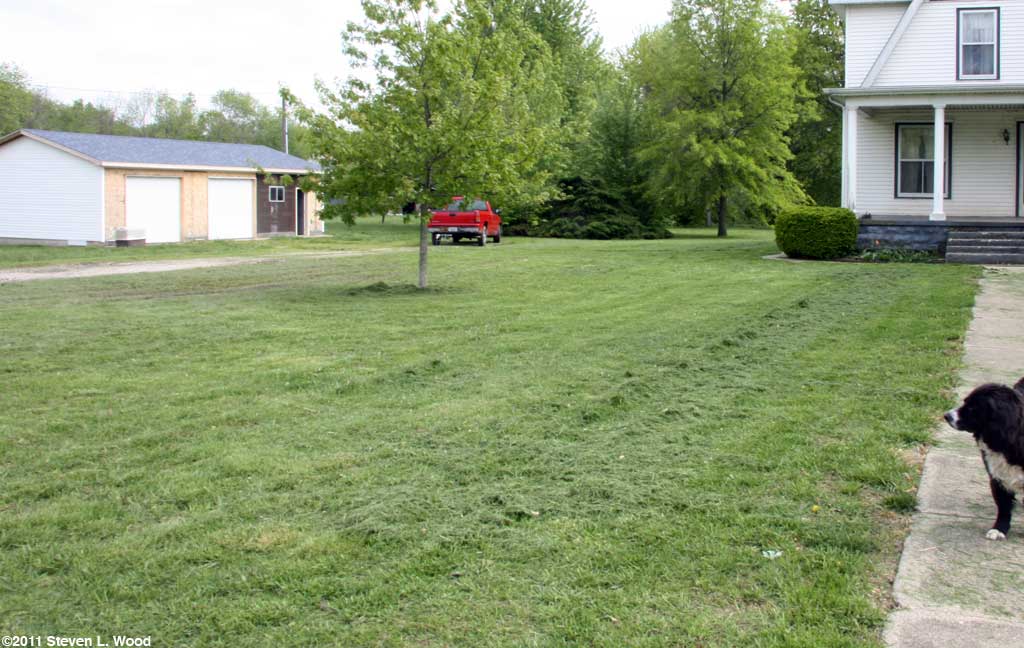
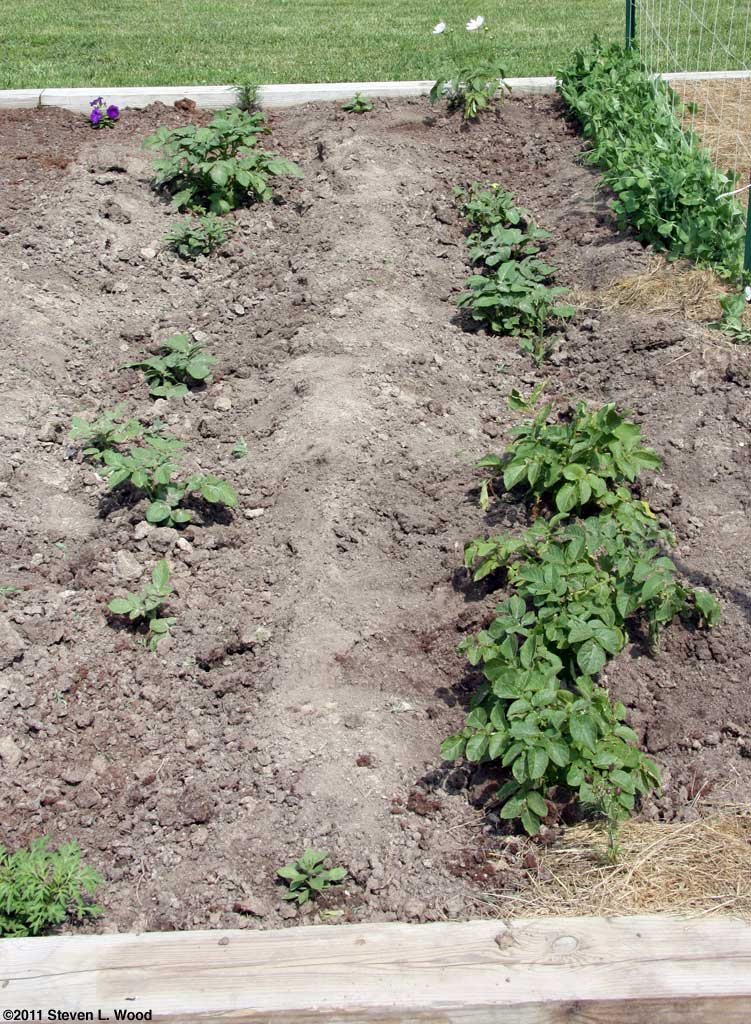
Outdoor Gardening Nearly at a Standstill In the short periods we've had without rain over the last week, I've tried to get what little I can done in our garden. I strung our trellis for our second row of peas over the weekend. I also poked in some more seed along both rows of peas, as it appears much of the seed may have rotted in the ground from the excessive moisture. With both pea trellises in, I transplanted several varieties of snapdragons at the ends and along the backside of each row of peas. I like to grow our snapdragons there, as the trellis and T-posts provide some support for the plants and also a bit of protection from the winds that sweep across the open field to the west of our main garden. I'm hoping to get some lawn mowing done tomorrow. With several clear days in a row (but still some rain at night), you'd think I'd be back to doing some serious gardening. Sadly, I spent the time wresting my old lawn mower away from a really bad John Deere dealership, hauling it to a more reputable outfit, trading it off, and getting our lawn mowed. During the interruption for mower "service," we had patches of grass get a foot tall.
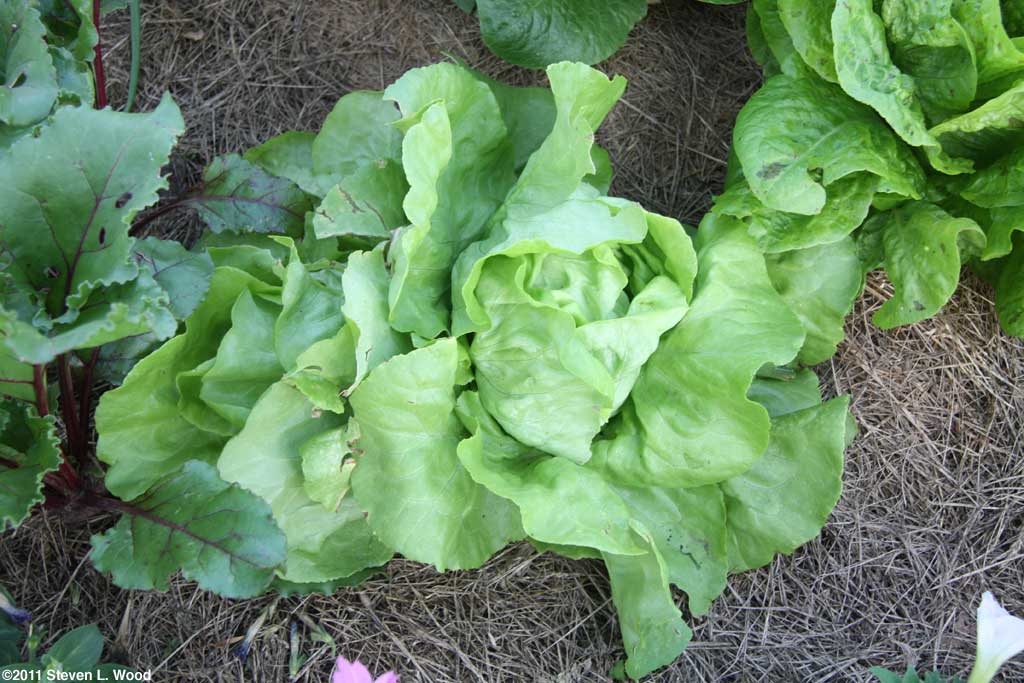
Our softbeds at either end of our main, raised garden bed seem to be just marking time. Our onions really aren't growing very rapidly, although I noticed today that we have lots of carrots poking through the overcropped radishes. We've only lost one lettuce plant (to rot), but the incredibly wet growing conditions haven't been conducive to everything taking off as I'd hoped it would.
So while the weather has really slowed things down in the garden this spring, we're now at a point where things may really start growing rapidly. With our last frost date now past, I can begin getting our melons, tomatoes, and peppers into the garden...once things dry out enough for me to rototill again. Tomato Grafting Clips I wrote in April about some tomato grafting instructions on the Johnny's Selected Seeds site. I noted then that the initial investment was a bit steep. The tomato understock (rootstock), Maxifort F1, runs $21.95/50 seeds and silicone grafting clips cost $14.95 for a bag of 250. James E. Bradley wrote this week of a couple of places to purchase smaller quantities (and thus, less expensive) of grafting clips. He's not investing in the understock this year, but plans "to play with a Sweet 100 rootstock with Big Boys...to try my hand at it this year." He found smaller quantities of tomato grafting clips at:
Monday, May 9, 2011 - The Radish Murders and Grass Clipping Mulch
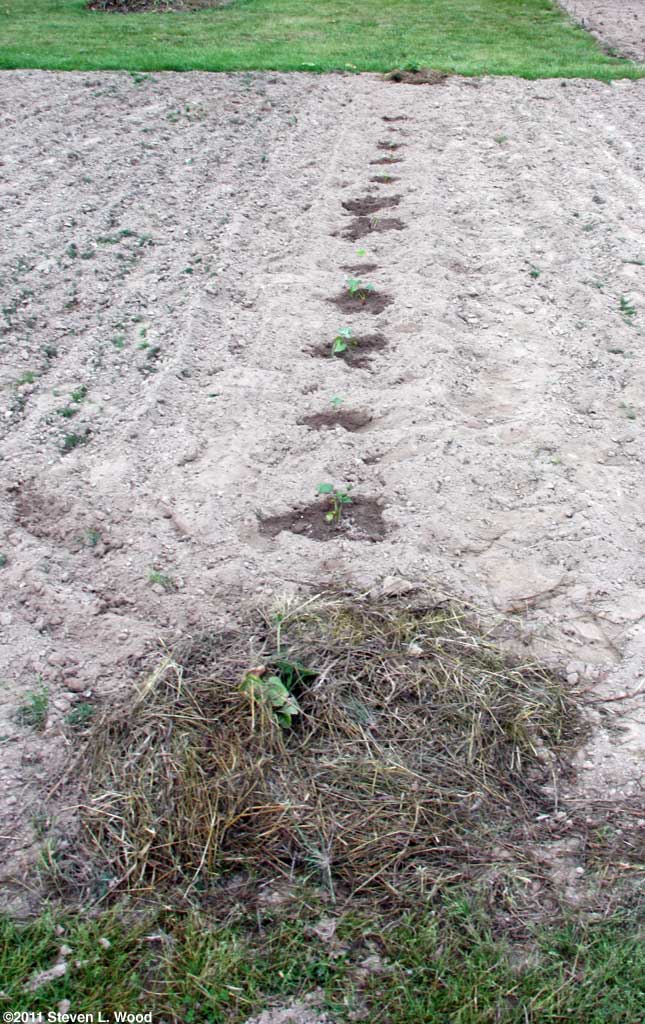
So I began thinning the radishes from the combined carrot and radish rows. But thinning quickly became near annihilation for the poor radishes, as almost every one of them was preventing one or more carrot plants from getting sunlight and probably taking necessary nutrients as well. Some of the ill-fated radishes landed in piles of mulch beside the softbed, while others ended up in the yard, where they'll be slashed by the lawn mower and eventually picked up by our lawn sweeper to be used as lowly mulch. (Is "vegicide" really a word?)
I'd mulched around several of the brassica plants in a raised bed a few days ago to see if the grass clippings I had on hand had cooled down enough to use. They had, so I went ahead and fertilized and mulched all the broccoli, cabbage, and cauliflower in the raised bed yesterday. Since I have a row of spinach intercropped down the middle of the bed, I had to be careful not to cover those plants.
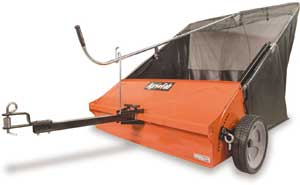
And no, the lawn sweeper in the photo isn't ours. It's an ad shot. Ours is quite dirty and worn from over ten years of use. I've replaced the wheels on it once, and rethreaded the roller chains that drive the brushes more times than I can count.
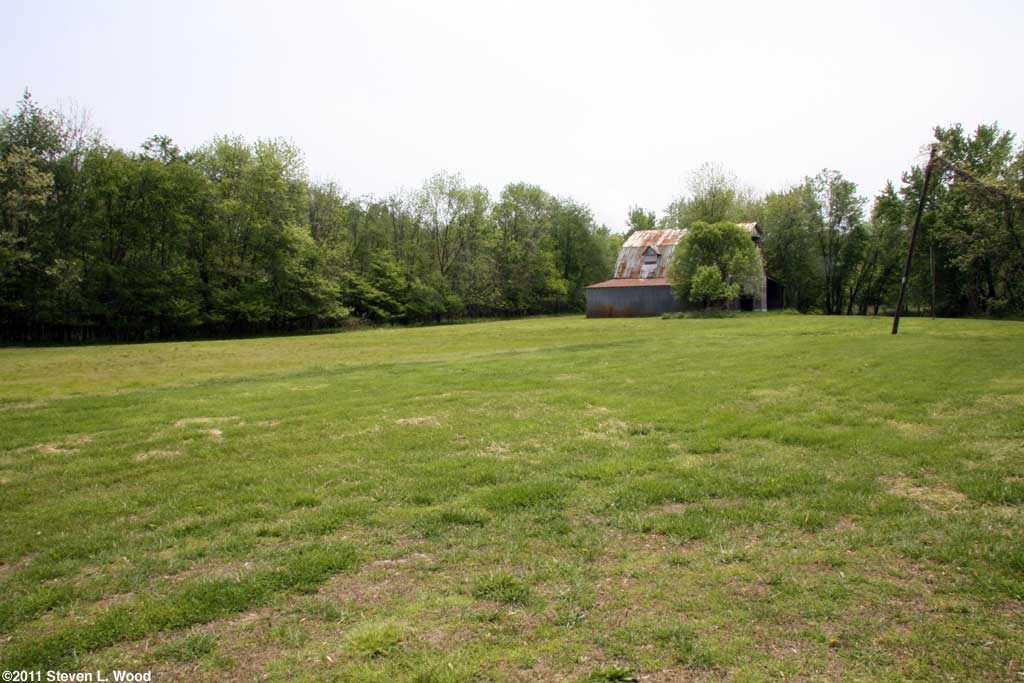
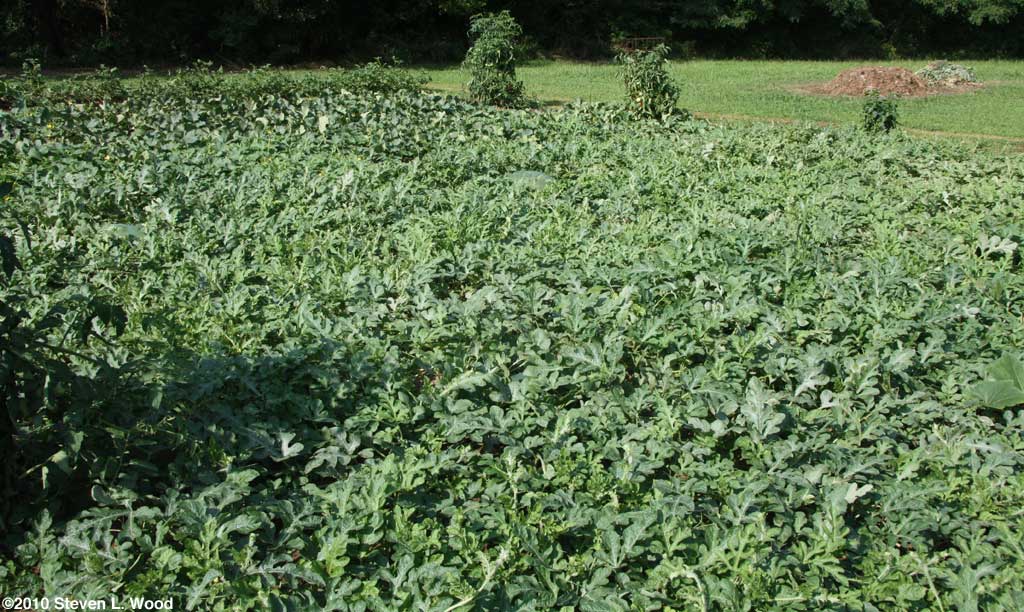
To wind up today's discussion about grass clipping mulch, I should add that we mow a lot of ground to get our mulch. Our lot is 1.3 acres, but we mow around 4 acres total! We keep an eye on the barn, pond, and field that abuts our property to the east and south for the landowner who lives in town. Although it takes a lot of time to mow that much ground, we also get to use the barn, pond, and especially part of the field for our East Garden. That's where we grow our "space hogs" such as sweet corn and melons. I also use the East Garden for isolation of varieties from which we intend to save seed (Moira tomatoes, Earliest Red Sweet peppers, etc.). Since our melons, squash, and pumpkins are grown in the East Garden, I grow our Japanese Long Pickling cucumbers in our main garden to provide the necessary isolation for saving seed. We offer our saved seed to other gardeners via the Seed Savers Exchange annual yearbook.
Saturday, May 14, 2011 - Planting Melons The heavy rains have finally let up here, and we've had a whole week without significant rainfall. I got our mowing out of the way early in the week and was able to begin tilling soil late Tuesday. I turned the open ground in our main, raised bed first, moved on to a row for our caged tomatoes in our old, main garden plot, before moving on to our large garden plot in the field east of our house (our East Garden). I changed the configuration of our East Garden plot. The tilled area is slightly smaller than last year (30' x 75') with the long dimension running east and west this year. I decided to rotate out the section we've had in cultivation since we began using the ground three years ago. That section is somewhat shaded and really needs some work on the soil compaction that troubles the whole field. I plan to seed it to alfalfa with a buckwheat nurse crop to try to break up the compaction.
I'd turned a bit of the ground in the East Garden in late April, but got cut off on that project by a month of heavy rain. In the interim, I held down weed growth with a couple of passes with Roundup. I returned to tilling the area Tuesday and Wednesday. Rather than going for a full, deep till before planting our melons, I did a shallow till of the entire patch east and west. Some of it is "new ground" that makes for difficult tilling. Then I went back and tilled north and south as deeply as possible. I didn't till the whole area, only turning the areas I had marked off for our north and south rows of melons. Interestingly, the tiller bit in full depth on those passes.
I prefer transplanting melon plants over direct seeding, but some of our transplants got burnt when I forgot to open our cold frame one sunny morning. I added a few insurance seeds to several hills with rather weak looking transplants, just in case. Our watermelons include Kleckley Sweet, Crimson Sweet, and Ali Baba. Our Moon & Stars and Farmers Wonderful starts got zapped in the cold frame fiasco. Our cantaloupe include Athena, Sugar Cube, Sarah's Choice, and Roadside Hybrid. I also have a hill each of Passport and Tam Dew honeydew melons. Not in the East Garden proper is our one hill of Waltham Butternut squash. Since this variety can take over large areas with its vines, I transplanted our one pot of butternuts into the ground where our compost pile had been all winter. I've had good luck doing this before with both butternuts and pumpkins.
I only transplanted six plants into a fifteen foot row this year. I'd gone with seven plants in the same length row last year, and they seemed to suffer a bit from the crowding.
Since we've had some really awful experiences with cutworms and peppers, I continue to use cutworm collars around our pepper plants even though I've treated the soil with Milky Spore I set the paper cup into the hole and put the transplant into the cup, checking to make sure the top of the transplant's soil is level with the surrounding soil. I want the paper cut to extend at least an inch above the soil level (which keeps out the cutworms). I add dirt into the paper cup to fill in the edges around the transplant. I then water inside the cutworm cup collar and around the outside edge before backfilling with soil around the cup. I started caging our peppers several years ago with good results. I use some old cone shaped tomato cages that came with the property. I've never used them for tomatoes because the plants would outgrow the short cages before they ever set any fruit. But they're close to ideal for peppers. (Note: I've noticed retailers with much taller versions of these cages. Some even have a rubberized coating on them to prevent rust.)
After adding a geranium "row marker" at each end of the row, I mulched around the pepper cages. I had to go back today and pull mulch away from the cutworm collars. I'd gotten mulch up against them, providing a fairly deluxe cutworm ramp right to my pepper plants! Our bell peppers this year include Red Knight (2) and Red Ace for greens and reds, and Mecate and Sunray for yellows (and greens). I also put in a pimento variety, Lipstick, that is supposed to have wonderful flavor. I also have lots of paprika peppers started, but haven't figured out where I can put them. Of course, we have lots of ground paprika from last year, so if I don't get the paprikas in, it won't be a major loss. With our peppers in, it took just a few minutes to get our green beans and kale planted in the last available space in our main raised bed. I planted Bush Blue Lake and Strike for green beans and a mixture of old kale seed (mostly Vates) I had on hand. The beans and kale got marigold and vinca row markers. Using flowers as row markers allows me to know where the rows are without leaving the stakes and strings I use as planting guides in place. If I'd had the space available, I would have planted more varieties of green beans, as I find that when canned, a mix of varieties seems to give a better flavor. I also think that's true with tomatoes.
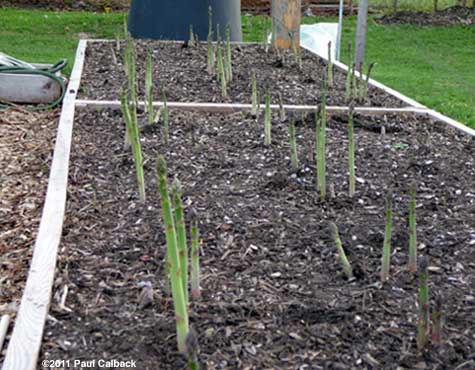
The really nasty looking softbed of onions, beets and lettuce I showed last Monday (shown again at left) looked totally different yesterday after being hoed, fertilized, and mulched this week (shown at right). A light shower Thursday evening also gave it a boost. Saving the Best Until Last - Paul Calback's Asparagus Patch
Paul found it "somewhat frustrating finding page after page of research info talking about planting rows five to ten feet apart so you could fit your tractor down, etc. Great for farmers, but for city folks trying to get by on a few hundred feet rather than a few hundred acres, different rules should apply." Paul has been good to share his experiences and gorgeous photos so that others might benefit from his experience. What he found was that one can "break the rules" for planting asparagus with proper (actually, superior) soil preparation and wind up with an incredible patch in just a year. Here's Paul's report:
Paul wound up a later email, "I just ate a thumb-thick spear right now, and my wife is chomping on the rest of the bundle that actually made it home from the garden. I feel like a kid in a candy store with my own grown asparagus!" I think that's the way gardening is supposed to be.
Despite apparent weather conditions that would normally preclude working the ground, I was able to till the row for our tomato plants yesterday and some of our East Garden patch. The soil conditions for tilling were marginal at best, but I really don't think I did any damage by tilling too wet soil. I certainly wasn't turning up muck.
I didn't do anything special in the planting. Each transplant hole got a sprinkle of 5-10-5 commercial fertilizer and a very light touch of lime worked in deep. Tomatoes need calcium from the lime, but don't like really sweet soil. I watered the holes with a bit of starter fertilizer, and transplanted the tomato plants fairly deep, leaving about six inches of each plant above soil level.
Burpee Gardening now carries what appear to be some excellent, tall, commercially made tomato cages. Their XL Pro Series Tomato Cages Let me add that I really am not too happy with the tomato transplants I put in yesterday. We have some spotting on the leaves that could be indicative of a plant disease. I'm spraying the plants with Serenade Our tomato varieties in the main garden this year are two Better Boys, two Bella Rosas, with a Red Grape and a Sweet Olive at either end of the row. I find that putting the grape tomatoes at the ends of the rows facilitates grandkids (and grandmas and grandpas) getting to the fruit easily. With a row of sugar snap peas right beside the tomatoes, our grandchildren will have a feast out in the garden. Just four main season, caged tomato plants isn't a lot for us, but we also grow several caged Moira tomato plants in our East Garden. While the soil there isn't very good, growing the Moiras there allows us to use them not only for table use and canning, but also to provide tomato seed that hasn't crossed with another variety. Both the Moira and Bella Rosa varieties are classed as determinates, or bush types, but I've found that growing them in cages produces more useable fruit than growing them on the ground, mulched, as is often done with determinates. Note: Both About.com and the Garden Web have good pages about determinate and indeterminate tomato types. I'm glad to see that those pages and other sources are now recommending caging determinates "since the concentrated fruit set can contribute considerable weight to the branches."
While I had the tiller out yesterday, I worked up the ground we'll use for sweet corn and another row for sweet potatoes. The corn ground isn't planting ready as yet. It will need at least one more pass with the tiller before I get out any sweet corn seed.
Gloxinia Plants from The Violet Barn
Well, one wasn't so healthy after I overeagerly ripped open its packing and broke the stem! But a bit of Rootone
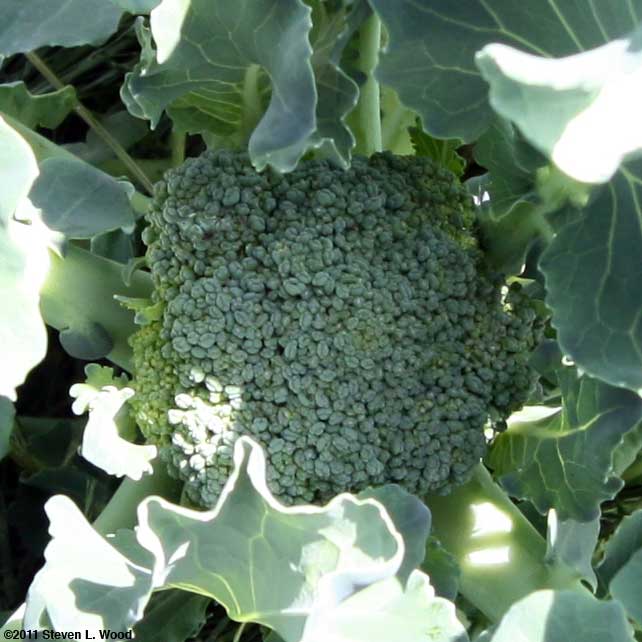
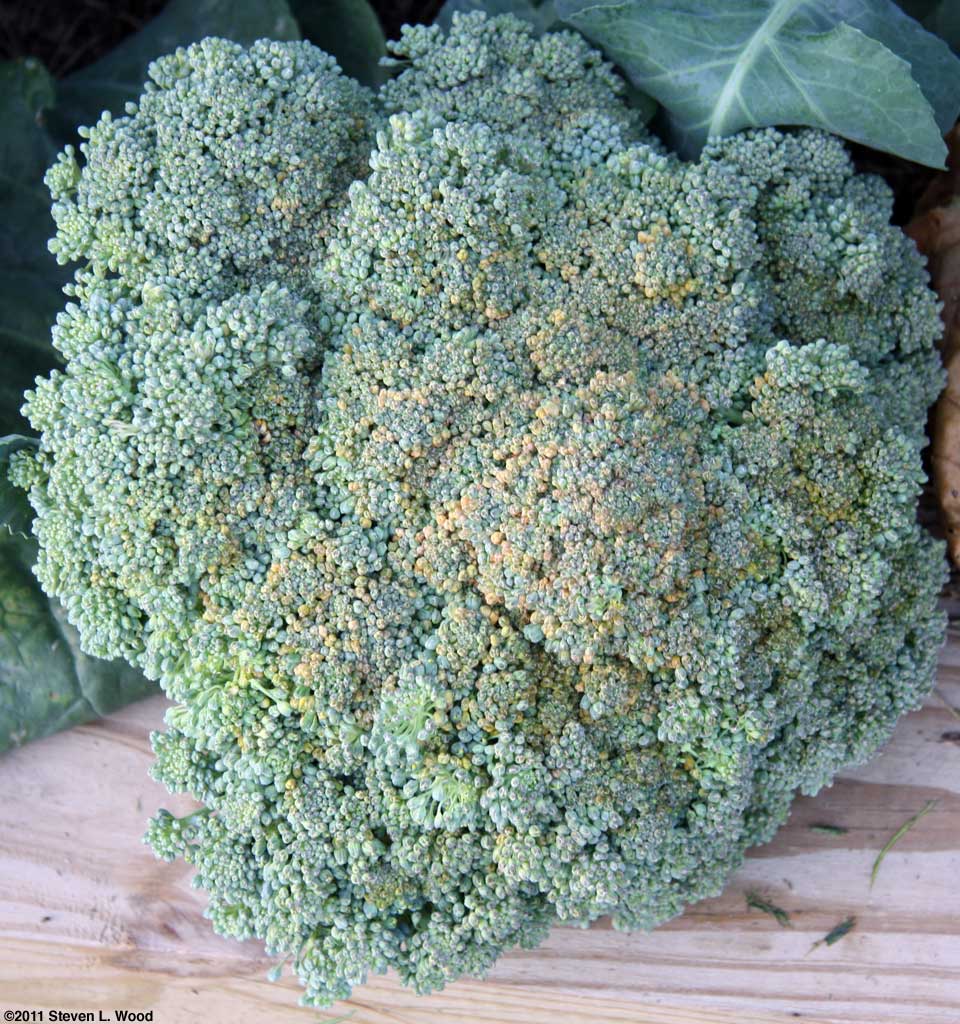
I'm not complaining (too much), as the broccoli was sweet as I sampled some. The five heads and assorted sideshoots pretty well filled a twelve quart pot! Two heads went in the fridge for fresh use in the coming days, while the other five were blanched and frozen. If our plants follow their usual habit, we'll get good sideshoot heads of broccoli for a month or so more. And we still have three Belstar broccoli plants that are just forming their main heads.
Sunday, May 22, 2011 - East Garden
I was able to save and set out four of the dozen dried out sweet potato plants Shumway sent me. Upon receipt of the plants, I immediately noticed how dried out they were. I put them in a glass of water and covered the glass with a translucent pitcher to hold in moisture but still allow them some light. I filled in the row with some Nancy Hall sweet potato plants I'd grown in a glass in the kitchen window. After the sweet potato put on lots of green growth, I snipped off the top growth, applied some rooting powder, and allowed the slips to root in potting soil. I also put in a few small, whole sweet potatoes we had left in storage from last year's crop. A large geranium went at each end of the row as a row marker and to add a bit of color to the area. Growing sweet potatoes is still an experiment for us. Last year was the first time we've harvested sweet potatoes. We were fortunate to have two hills survive last summer's drought. When I was done planting sweet potatoes, I took a few moldy sweet potatoes to our compost heap. For some reason, instead of just plopping the sweet potatoes on the top of the heap, I lifted some grass clippings on the side to slip the sweet potatoes under them. To my surprise, the pile was quite hot! That's a good thing, as a compost pile should heat up as the material within decays. Pushing my luck with storm clouds overhead in the early afternoon, I went ahead and tilled the entire area we plan to use for a late row of melons and our sweet corn. With the rain holding off, I marked my rows for the sweet corn and applied half a coffee can (39 oz. size) of 12-12-12 fertilizer to each row in a band about a foot wide. I tilled in the fertilizer in a final, deep till before opening furrows with a garden hoe. I planted six rows of sweet corn, spacing the seed 8-12" apart and the rows 3' apart. I used a garden rake to pull soil over the seed which ended up about 2-3" deep in the soil. To ensure good soil contact with the seed, I walked each row, letting my footsteps pack the soil over the seed. I planted just a bit of Mr. Mini Mirai, an unusual 74 day variety that produces extremely sweet 5" ears of corn. I had to laugh when I went back and read the variety description. It read, "Strong plants hold the ears high off the ground which makes it difficult for raccoons to reach the ear. Give this one a try - we’re sure you’ll be pleased with its eating quality." Difficult for your raccoons maybe, but ours got almost all of our Mr. Mirai last year. (And yes, I'm strongly considering an electric fence around our melons and sweet corn this year.) I also put in a bit of Stokes' Gourmet Sweet 2171, a good 71 day early bi-color. Of course, early corns don't have the deep kernel and sweetness of full season sweet corn. So the bulk of our planting was Twilley Seed's Summer Sweet #7640R, a true, full season (84 day) yellow variety with excellent sweetness and good ear tip wrap (to keep out bugs). All of our sweet corn varieties are of the sh2 type. Note that the homozygous shrunken 2 gene type, sh2, is not a genetically modified organism (GMO) or seed, but a product of selective breeding for a shrunken gene...the gene that tells corn to turn its sugars into starch. I was an early adopter of that type of supersweet back in the 80's when we raised 2-4 acres of sweet corn each year to roadside from our farm. The sh2 type, like other supersweets, does require isolation from field corn and other types of sweet corn. Since all three of our varieties are sh2, we don't have to isolate them from each other. The farm fields around us are far enough away that it's highly unlikely wind would carry corn pollen from their plants to ours. While isolation by distance works well for us, one can also isolate different types of corn grown in close proximity if they tassel and shed pollen at distinctly different times. We benefit from that type of isolation also, as the field corn grown around us generally tassels a good bit later than our sweet corn. We're not quite done planting in our East Garden, but we're getting close to it. I've left one row open in the melon area for some late melons that I just started seed for yesterday. I also need to plant a few more tomatoes and peppers for seed production. I'll be adding some marigolds at the ends of the corn rows to replace the stakes I used to string twine as row guides. I don't have enough "planting stakes" to leave them in the ground, and flowers are certainly prettier and mark the rows just as well (unless something eats them!!). Weeding Asparagus
But on Thursday, I took my scratcher to the bed, added a bit of fertilizer, and loosened the soil and scratched out the weeds as carefully as I could. I did hit the tops of a few not yet emerged spears of asparagus. I was relieved yesterday when I got a good picking. I apparently did little damage to the plants and roots. Once I quit picking asparagus, weeding will rapidly become less important. Our asparagus fills in so fully with foliage that most weeds close to the soil surface don't get enough sunlight to survive. Of course, the seedling asparagus plants will also have to compete for light. Another Flowerbed Mulched
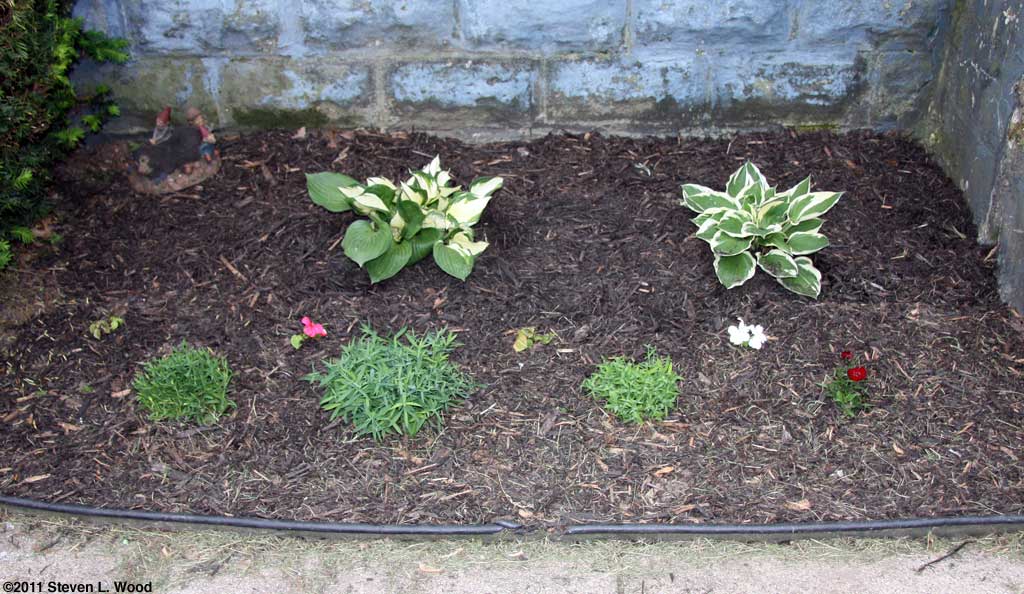
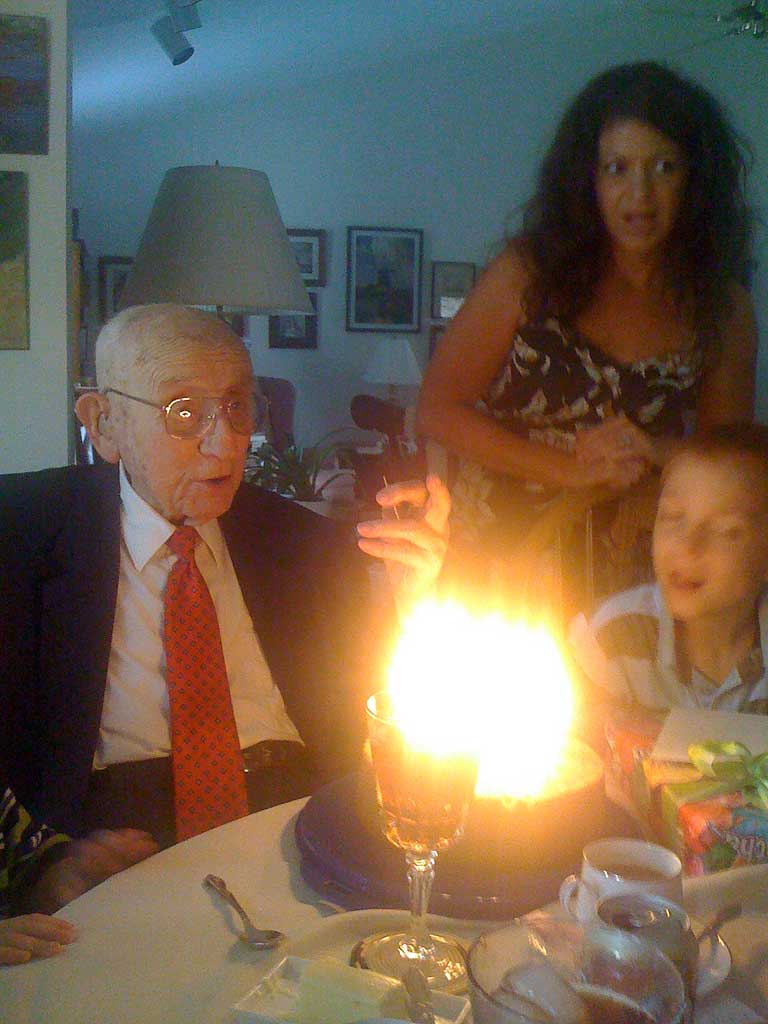
I used a black, wood chip mulch that was on sale at Lowes for a little over $2/2 cubic foot bag. It's the same stuff I used on our front flowerbeds last week. This bed already had a good mulch base from what I'd applied last year from our maple tree stumps. I'm not confident that this bed will produce beautiful flowers, as the soil in it has received little improvement and is mostly heavy clay. One of our dogs also takes an occasional liking to wallowing in it. But even if all the plants die, the bed will look better with the mulch on it. I'm almost out of the flower planting "business," as I sent most of our remaining flower transplants home with one of our daughters yesterday. She'll get some good out of them in one of her flowerbeds, and I'll have one less flat of plants to keep watered on the back porch. As I mentioned earlier today, I still have some marigolds to get in, and I want to plant a row of nasturtiums along one edge of the East Garden. But after tilling, hoeing, planting, etc., all day yesterday, I'm going to take it easy today. Monday, May 23, 2011 - Birthday Party
Snapping Off Garlic Seed Heads
I didn't get back to the garlic until evening, after a good rain had cut short my mowing and gardening for the day. Most of our elephant garlic plants had seed heads to be snapped off. Our German garlic appears to be running a bit behind (and actually doesn't look all that healthy). I just plopped the snapped seed heads down on the mulch for the time being, but will probably gather them up tomorrow and throw them on our compost heap. Green Beans and Kale Up
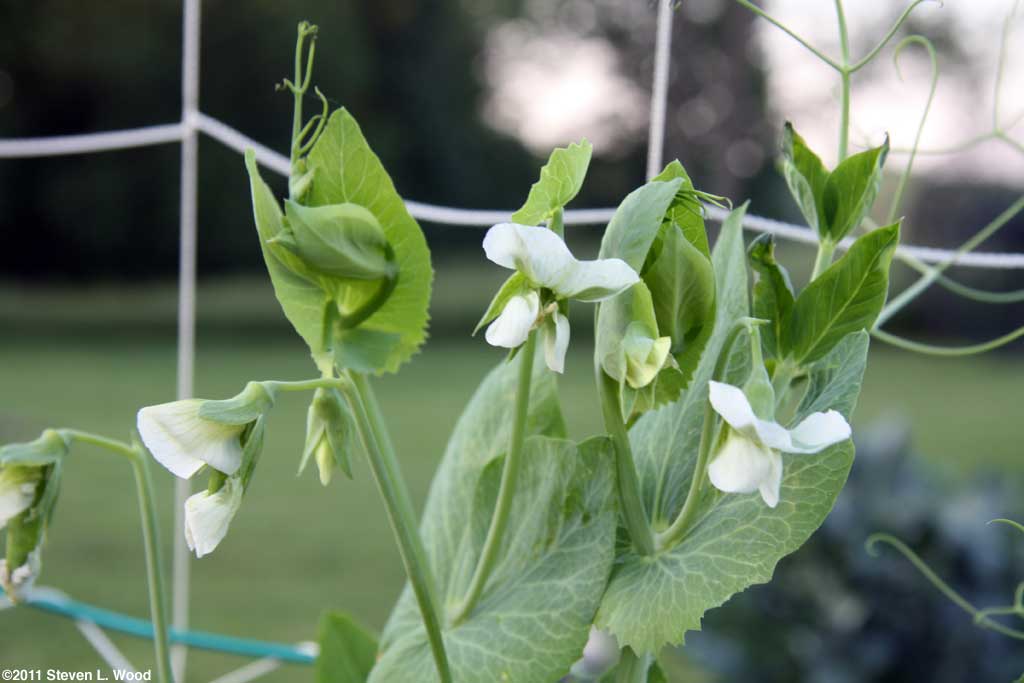
I was especially gratified to see the kale coming up. Kale can be a bit difficult to get going once the weather warms and the soil dries a bit. I didn't water either the green bean or kale rows, as it was just a year ago that I forgot I had the soil soaker turned on watering emerging beans and kale...and burnt up a well pump when the well temporarily ran dry. I'll be planting more green beans as space opens up in our main garden. Later planted beans do experience more insect pressure, though. One good row of kale, however, will give us lots of greens for boiling with bacon drippings, garlic, and onion and also for our Portuguese Kale Soup. The kale will get preventative sprays of the biological, Thuricide Peas Our peas are pretty much a disaster this year. I didn't get our early peas planted in March because I didn't have ground prepared in the fall for them. Actually, I did, but changed my mind last fall and put our garlic in the area I'd prepped for the peas. So I ended up waiting until I could work the soil before planting our Sugar Snaps in April. Standing water slowed them down and required some re-seeding. We now have a very thin stand of the excellent edible podded variety that will just have to do for this year. Instead of planting half of the "early" row to Sugar Snaps and the other half to Encore, a great shelling pea, I planted an entire row of Sugar Snaps in the early row that gets our tall trellis. I decided to plant the Encores in our main garden, splitting a row between them and a supersweet variety, Eclipse. The Encores germinated well and are doing fine. But the Eclipse planting germinated poorly, as the supersweet requires considerably warmer soil than other pea varieties. I've been replanting the half row of Eclipse about every two weeks without getting a good stand. (I don't take out any emerged plants, but just scratch around them to put in more seed.) After two or three replantings, I'm now seeing what may be a good stand of Eclipse emerging. I ended up going though all the fresh Eclipse seed I bought last winter, and the final replanting was done with seed from 2009 that has been continuously stored in our freezer.
With the weather warming, it's hard to say if we'll get good, sweet peas this year. While the Eclipse peas require fairly warm soil to germinate, they don't do well in really hot weather. With the Sugar Snaps and Encore getting started much later than usual, I'm not happy with my garden management this year for peas. I made a really dumb mistake in not getting my pea ground prepped in the fall so I could plant in March as usual. Not planting our Encores early was another dumb move. All of that is to say that gardening is a continual learning, and in this case, re-learning process. And even when you do everything right, some crops will be a smashing success while others aren't due to weather, insects, and other variables. My guess right now is that we won't have many, if any, peas on the table next Thanksgiving Day. But then, we may feast all winter on frozen sweet corn and asparagus, canned green beans and Portuguese Kale Soup. And it appears we're just about ready to begin picking lettuce! I didn't get to do any gardening today. I had other stuff that kept me occupied in the morning, and I even missed my morning garden walk. When the grass dried just after noon, I mowed a bit, pulled the lawn sweeper some to rake up grass clippings, fixed the lawn sweeper, swept a bit more, fixed the lawn sweeper again, mowed and swept a bit more...and again had to tear down the lawn sweeper's wheel assembly and get the roller chain back on its sprockets. Obviously, the lawn sweeper is wearing out, but I finally found that if I didn't do fast, tight, left turns and kept my wheel speed down, it wouldn't throw the chain. And then I mowed a whole bunch more and just left the lawn sweeper in the garage and said to heck with the grass clippings. But the day certainly wasn't a bad day. While mowing the field east of our house, I mowed an area behind the barn I only do about once a month. When mowing a rather secluded area behind the barn, I came upon a doe and the fawns shown below.
The doe ran off a bit and the fawns sorta went nuts running around for a few minutes, but slowed down enough for me to get the shot above. From the material on the ground in the photo, I'd guess the fawns were born overnight or sometime in the morning. I didn't get off the mower or intrude very long on them. But it sure made my day. I've posted the photo to our free Desktop Photos page. I also shared it on Pics4Learning, a copyright-friendly image library for teachers and students. (Note: It takes a few days before uploads become available at Pics4Learning. They manually screen all submissions.)
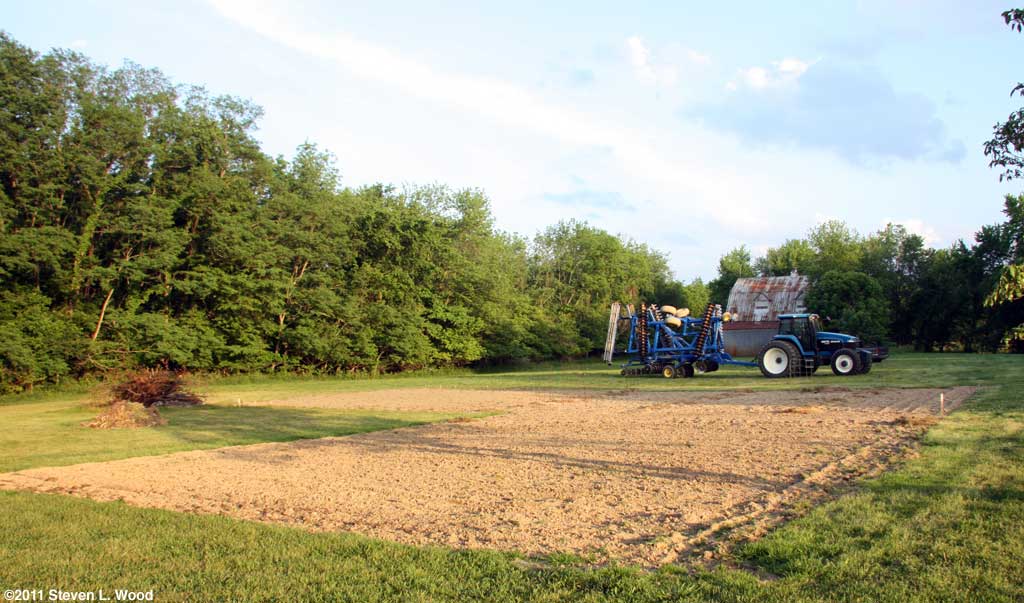
Wednesday, May 25, 2011 - Cover Crop
If the alfalfa comes on strong, I may just mow the buckwheat (and alfalfa), letting the cuttings stay on the ground. The alfalfa part of the experiment is an attempt to let it grow for a season, putting down roots that may break up some of the soil compaction in the field. And either way, this section of our East Garden gets rotated out for a season. East Garden Our East Garden is pretty well planted for this year. I added a row of nasturtiums with several marigolds and geraniums thrown in for a bit of variety. I will need to plant a late row of watermelons whose transplants are just now germinating in our basement. And I'd like to add a row of zinnias just beyond the last row of sweet corn. I hate to have a garden that doesn't have marigolds and zinnias in it somewhere!
I also spread mulch in the rows of melons today. I always try to train the melon vines to first run in the row on the mulch. Eventually, the melons will fill the 15' aisle between the rows with vines. It's always a race to collect enough mulch and get it down to suppress weed growth before the melons take over. A side benefit of grass clipping mulch is apparent in the photo above. In the foreground, there's a very green patch of lawn grass. That's the spot where we first had a compost pile and followed it with well mulched pumpkins. Even though I raked and composted the grass clipping mulch last fall, some grass seed from the mulch stayed in the soil, producing a very out of place green patch of good grass in an area that's pretty much filled with field grasses and weeds. Main Garden
While I had the scuffle hoe out, I clipped some seedling weeds in and between our rows of green beans and kale. Even when weeds aren't visible, roughing the soil a bit with the scuffle hoe can interrupt weed germination.
Softbeds
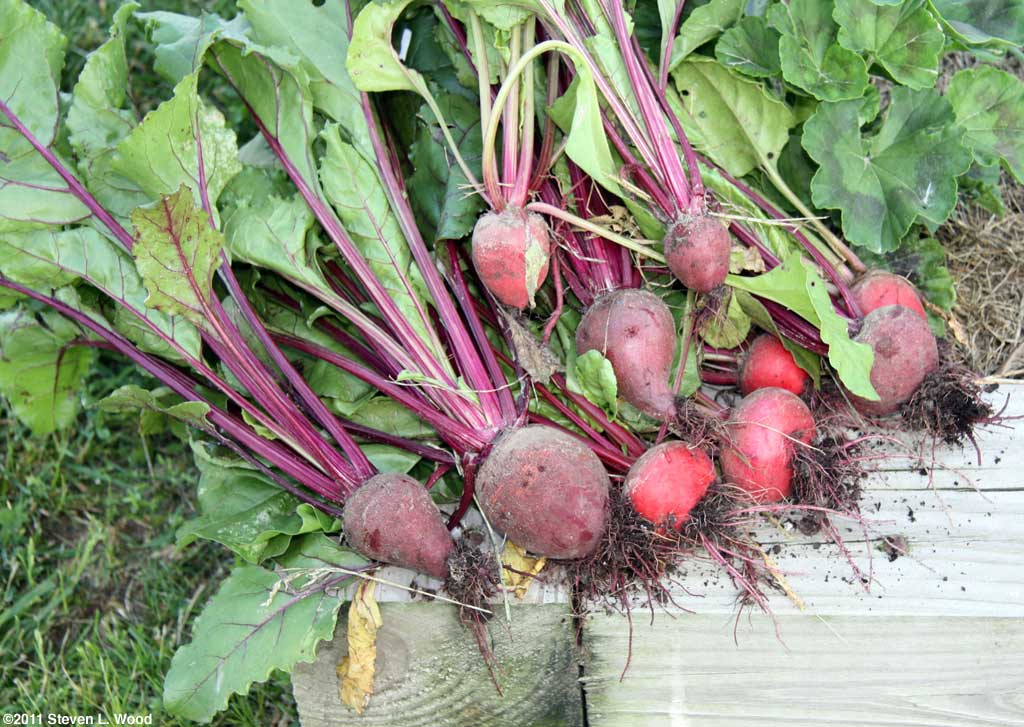
Our bed of onions and carrots that was mulched first is now growing well, after virtually standing still for weeks in some soggy weather. I still need to finish weeding and thinning the carrots, a job I've been doing a little at a time when I pass by the bed. A few of our beets, which had such a rocky start, are ready to pick. They're slightly larger than golf ball size. Some of the lettuce is ready for a light picking, while some of the plants I had to replace are lagging a bit behind. That will extend our harvest a bit if the weather doesn't turn really hot in June. I also popped in a couple of basil plants at either end of our caged tomato row this afternoon. My hands smelled good after handling the basil. I still need to figure out where to put our sage, oregano, and parsley, though. Weather
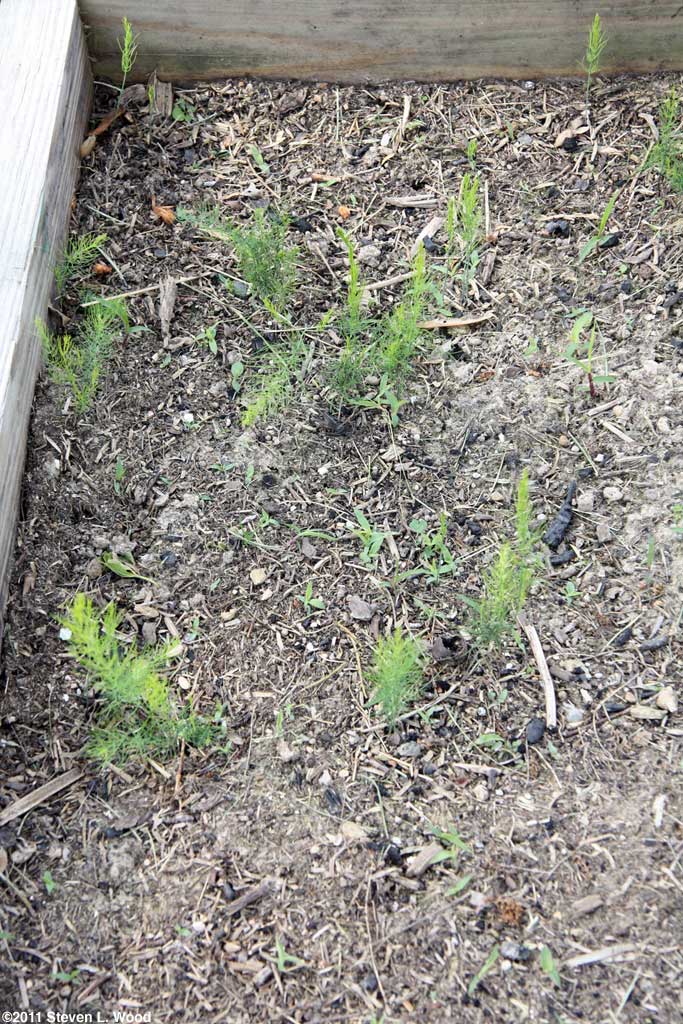
I got our double row of carrots thinned today. As I thinned, I was surprised at the number of seedling weeds that were hidden amongst the carrots. The thinning was necessary because I'd seeded a bit too heavily, and carrots don't like touching each other as they grow. Ideally, one would thin to at least one inch apart, but I let some go that were a bit closer. We'll harvest our carrots fairly early and small to get maximum tenderness and flavor, so we can let them be a bit tight in the row. I decided yesterday that it was time to stop picking asparagus for the year and let the plants begin building energy for next year's harvest. It's always a little sad when a crop goes out, but at this time of year, there's always something new to pick. Today, it was our first picking of spinach.
While picking the spinach and later looking at the cauliflower growing beside it, I noticed an unacceptable level of insect damage to the spinach leaves and the cauliflower. Ants were all over one head of cauliflower and either they or their aphids had left a visible dent in the head. I sprayed the brassica-spinach bed with rotenone-pyrethrin to knock down the pests. I'll now check the bed daily to see if something more potent is necessary. So far, we've had excellent control of cabbage loopers and white cabbage moths on the brassicas by using Thuricide I noticed that my bottle of rotenone-pyrethrin was getting low, so I went online to order some more. When I did, I only found Pyrethrin Monday, May 30, 2011 - Memorial Day
For several years, we had all the praying mantis egg cases we wanted from ones attached to bushes around our property. We would cut some of them in the fall and store them in the fridge until spring, allowing us to place them where we wanted. Something changed a few years ago (pruning the bushes?), and we're back to buying the egg cases. We've used Arbico Organics the last two years and have gotten good service from them. (Note: We dropped Arbico as a Senior Gardening affiliated advertiser for what we considered unethical handling of their affiliate accounts.)
I transplanted two Japanese Long Pickling cucumbers along our row of Sugar Snap peas. I'm hoping that the peas will come in before the vigorous cucumber vines overwhelm them. Some of the pea vines are blooming, while others are just getting started. But the cukes were ready to go into the ground, so... I also transplanted a couple of pots of muskmelon into the East Garden to replace hills that had failed. Roadside Hybrid is one of our favorite varieties of muskmelon, so I was sorta crushed when our first transplant didn't make it. I also put in a replacement for a hill of Sarah's Choice, a variety we tried last year and liked well enough to give it another try this year. Our Athena melons also got off to a rocky start when transplanted, but they've perked up a bit with some timely rain. I have two replacement pots of Athena transplants ready, but don't think I'll need them now.
I'm still withholding judgment on the Belstar variety. We tried it this year because it is supposed to be more heat resistant than other varieties. I've not seen that in evidence yet. It produces a good sized main head, but it's too early to tell about sideshoot production. And of course, our usual second broccoli variety, Goliath, is pretty hard to beat for main heads and sideshoots.
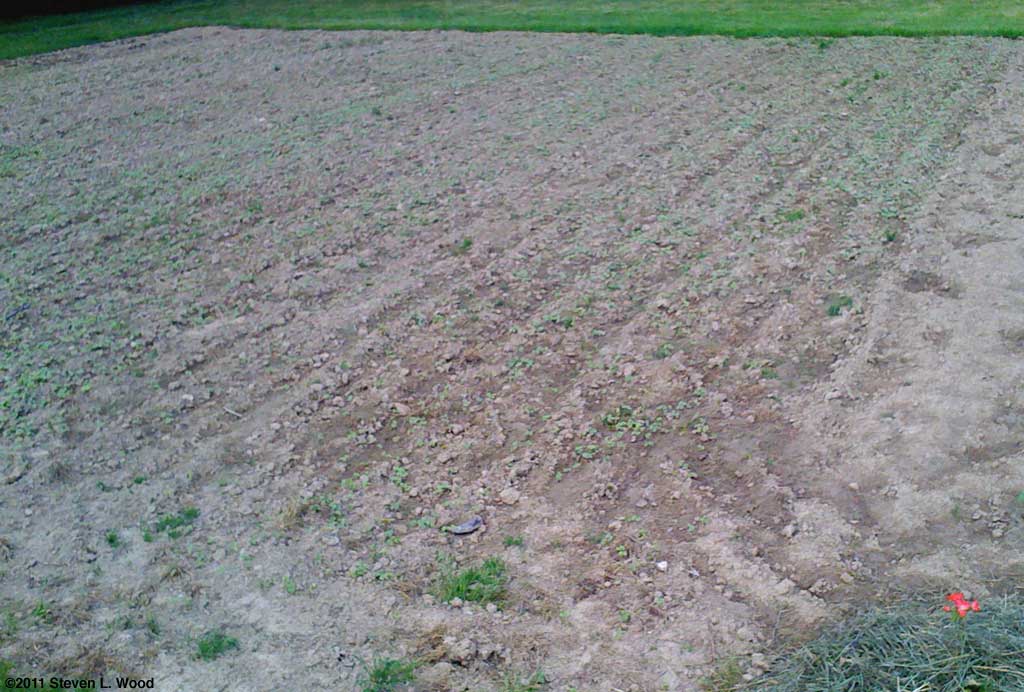
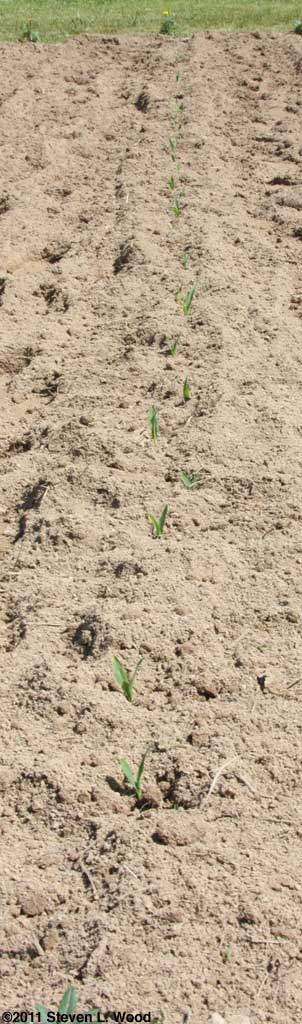
And the first shot I took of our sweet corn today at around 7:30 A.M. didn't look very good. So I went back out in the heat, decided it was time to roll a little soil into the rows, and tilled a bit before grabbing the photo at right. It may not appear to be much, but we've had lots of trouble in past years getting a good stand of sweet corn in the East Garden. There are a few bare looking spots in the rows, but when I brushed a bit of soil aside on a couple of them, I found a corn shoot just emerging.
From the
at Senior Gardening |


 I'm hoping when I do my morning garden walk tomorrow morning that I won't find too much storm damage. We had a really nasty line of strong thunderstorms move through our area about nine o'clock in the evening. The first blast of strong winds took out an attic window (shown at right) I'd been trying to save because of some nice woodwork above it. We'd replaced the two smaller windows on either side of it years ago. I finally resigned myself last winter to replacing it, as the window and the decorative woodwork were just too far gone to save. And yes, I got to find our roll of plastic and some plywood and cover the hole during the storm. But we're all safe and sound, unlike many folks in the south central part of our nation who have lost family and property to recent, horrible storms. Annie and my prayers go out to them.


©2011 Senior-Gardening.com