One of the Joys of Maturity |
|
| Affiliated Advertisers |
Clicking through one of our banner ads or some of our text links and making a purchase will produce a small commission for us from the sale. The Old Guy's Garden Record
Saturday, March 5, 2011 - I'd Rather Be Planting Peas Our sunny, springlike weather has changed to wet, windy weather. The temperatures are still a bit above normal for this time of year, but it's not pleasant to work outside today. As things cooled a bit and got wetter outside this week, I took advantage of what nice weather there was to pick up sticks, bone shards (Our dogs drag deer parts and bones into the yard to gnaw on.), and construction trash around our garage rebuilding project. I also overseeded parts of our lawn that died out in last summer's drought. Overseeding is usually only somewhat satisfactory, but the rain should wash the seed in, and the temperature is close to ideal for starting new grass.
To do the germination test, I numbered my saved seed packets and a paper towel. I put out ten seeds from each packet, folded up and wet the paper towel, and popped it into a ziplock freezer bag. The bag went into a warm, dark area. My first check of the seed after about three days showed strong germination from one group of seeds and none from the rest. After a couple more days, I began to see some germination in the other groups. I'll only be sending seed from the number two seed packet, as it had 100% germination in the test. The other packets tested from 0-20%...and need to be pitched.
And while I pictured our tulips and daffodils that had emerged last week, I omitted showing our garlic, which is coming up early as well. While garlic, like onion, can handle some pretty cold weather, a heavy freeze with no snow cover could do it in.
And our garlic area brings up an error in my planning. On a last minute whim, I planted our garlic last fall in the area I'd planned to plant peas this spring. I really don't remember the justification for the change, but now am left with no ground properly prepared for a March sowing of peas! The one area I had considered for peas is now underwater from all the rain we've had.
Tuesday, March 8, 2011 - Thinning When planting small seeds, I often will get too many seeds in a cell, flower pot, or flat. I'd much rather have to thin a seedling or two than have to transplant a seedling to another cell or even reseed to have every cell or pot filled with a plant. Our lettuce planted on February 28 was a perfect size today for thinning. There were as many as six seedlings in some cells, so leaving one plant behind with its root system undisturbed was a bit of a challenge.
Where I could, I just used my finger to grasp the leaf of seedlings to be thinned. If the thinning were too close to the seedling to be left, I'd use a finger hold the potting soil in place while pulling the seedling to be thinned. In a few really crowded cells, I used tweezers to remove plants one at a time. Thinning the lettuce seedlings at this point should allow them to grow into somewhat sturdy lettuce plants, despite the tiny cells they were seeded in. They won't have to compete for light, root space in the soil, or moisture. Of course, I may have to move some of them to larger cells or pots later on, as the cells I used for this seeding really are pretty small.
While returning the lettuce flat to its spot under our plantlights, I noticed our brassicas were ready to thin as well. Most of the cells of broccoli, cabbage, and so on had just one or two plants in them. They really weren't crowding too much as yet, but needed to be thinned to one plant per cell. That work went quickly without the need for tweezers, as these plants were considerably larger than the baby lettuce.
The transplanting process today was quick and easy. I re-used some old flower pots, and since there's no danger to the plants at this point from damping off fungus, I could also use unnsterilized potting soil.
An absolutely gorgeous, sunny day today made the geranium transplanting possible! Every square inch of shelf space under our plantlights had been occupied until today. But with the nice weather, I got out and put a new plastic cover on our cold frame. Onions, lettuce, beets, and our brassicas (broccoli, cabbage, etc.) were all ready for a trip outside, making room under the plantlights for the freshly repotted geraniums (which take up a lot more space now).
Before moving our flat of onions under the cold frame, the leggy plants needed one more "haircut." As I carried the somewhat heavy flat of potting soil and onion plants outside, I was glad I had used a sturdy Perma-Nest
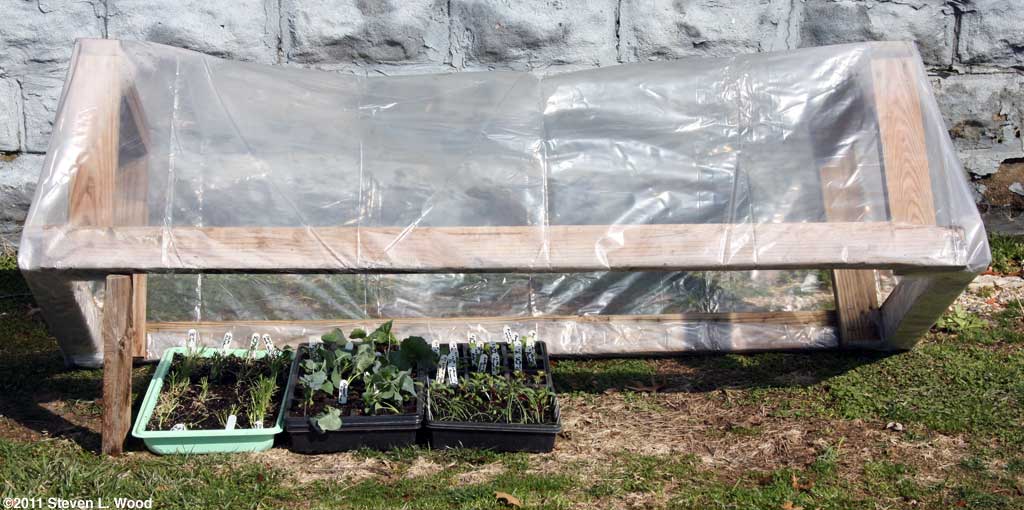
Besides the obvious benefit of closing the cold frame entirely to hold in heat, I use an old 2X4" scrap to prop it open at various heights to allow some direct sun in on the plants while also giving them necessary protection from the wind. As days go by, the frame will remain wide open more and more until the plants are hardened off enough to go onto the porch to await transplanting. Our cold frame is homemade and requires new plastic every year or so. It's heavy and clunky, and I wish it were a bit wider and longer (and a lot lighter:-). But it also was very inexpensive to construct. I hope to build a new cold frame this year that is considerably longer and a bit wider to use over crops in our new, narrow raised bed. The old frame was built specifically to cover 1020 flats and just barely does that.
I'd actually started to order more Perma-nest trays today to replace the leaking flats. A quick check of prices, coupled with a day warm enough to use the hose outside gave me lots of enthusiasm to recycle the old flats. Besides rinsing them out, I also tested each solid flat for leaks. Those that were intact were sandwiched between a slotted flat on top and whatever I had (slotted or a leaking solid) under them to absorb the abuse from the shelves. With three of the "cheapie" 1020 flats costing a little over $3 and Perma-nest flats running $10 each, I think I can make do with my old flats for a while longer. But as I can afford to, I plan to switch over almost totally to the more durable Perma-nest flats. Today our cold frame stayed fully open until mid-afternoon when the wind picked up a bit. Temperatures were in the upper 50's, so both the plants and I enjoyed a warm, sunny day. Buster, a worn tabby tom that adopted us, still found use for the open cold frame cover.
Still to be started are our peppers and tomatoes. I like to start our peppers eight to ten weeks before transplanting and our tomatoes six to eight weeks before transplanting. Getting tomatoes going too early produces "tomato trees" that are hard to handle, may stunt growth, and actually produce less fruit than plants started and transplanted in a more timely fashion. Peppers and tomatoes want warm soil, so even getting them out early with covers won't bring them into fruiting all that much earlier.
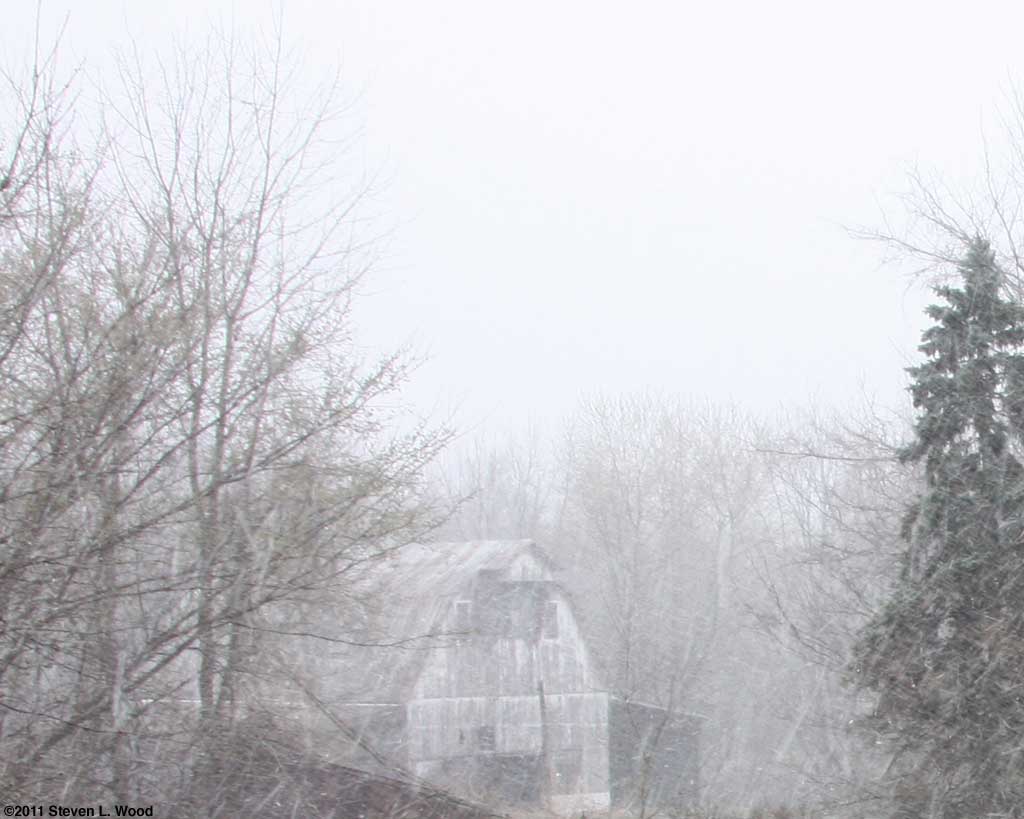
After several tries over several days while standing, I finally just got down on my belly today to get a good shot of our garlic. Most directions for growing garlic suggest pulling back the mulch used to cover ones garlic bed over the winter, but our garlic just pushed right through the old grass clippings. We planted a little over one 15' row with elephant garlic last November. The rest is German garlic. While I haven't tried it, I read that one can still plant garlic cloves in the early spring. They won't produce a full bulb, but are said to produce a very large, round clove of garlic by fall. Obviously, if you live in a similar growing zone as we do, there's still plenty of time to get many transplants started at home for your garden. Tomatoes, peppers, melons, cucumbers, squash, and many other veggies can be started in the next week or so and be just about the right size for transplanting in May. Thursday, March 24, 2011 - Winter Returns After a week or so of unseasonably warm temperatures, weather cold enough to possibly harm plants under our cold frame is now expected. We've had highs in the 70's for several days, but have a prediction for an overnight low tonight of 23o F! I began the process of bringing in plants from our back porch yesterday and will bring in all but our brassicas and onions from under the cold frame late this afternoon.
And while just a few spikes of asparagus have popped up (and been picked and eaten:-), the asparagus appears to be breaking dormancy much earlier than usual due to the warm weather we've had. We've been hoping for a good crop this year, as we haven't had a good crop from it as yet. I set out asparagus plants we'd grown from seed in 2006, but drought, neglect, and putting a raised bed around the asparagus have delayed us getting much from it. If I had it all to do over again, I'd still start my own asparagus plants from seed, but I wouldn't ever put a raised bed around existing roots again. It just did too much damage to them. Compost
The recipe for the compost starter concentrate is a cup of household ammonia, a 12 ounce Coke (regular, not diet), and a quarter cup of Palmolive dish detergent. Baker recommends using a hose end applicator at a 15:1 water-concentrate ratio, but I just pour a bit of the concentrate in a 2 gallon plastic watering can that I reserve for this task.
Turning a large compost pile for a senior citizen with kidney stones, arthritis, and a penchant for laziness is a lot of hard work. But the payoff is rich, crumbly compost like that pictured at right from last September's screening of our compost pile. Our asparagus patch got about three cartloads of the compost with all the rest going into our new raised garden bed. Let me add for city gardeners that we live way out in the country, so any odors from our compost pile will only compete with skunk smells to annoy us. (Shep, our "herding dog," just can't seem to stay away from skunks!) Folks living in town can still use a compost pile, but would need to be diligent with their turning of the pile and use of lime to control unwanted odors. A commercial compost drum Apple Trees We lost our main apple tree last summer to fireblight, but still have a "young" Granny Smith tree in our yard and a volunteer tree on our neighbor's property (that we mow and care for). I've already sprayed both trees with dormant oil this year. The trees are beginning to open leaf buds that could be damaged by a hard freeze (still quite possible in our climate zone). But if they survive the cold weather, the early leafing out is a pleasant harbinger of spring.
With the weather beginning to moderate, our cold frame is full again. I'd brought a couple of trays of plants inside, but Molly, one of Annie's rescued cats, kept pulling the dianthus plants! So the flats went back outside with the added protection of the tarp at night. Farmers in our area are beginning to turn their ground, and I've been itching to get our brassicas out into the garden. But the soil is just a tad too wet, and the nights a bit too cold for me to try it yet. Our broccoli, cabbage, and cauliflower plants are ready to go, though.
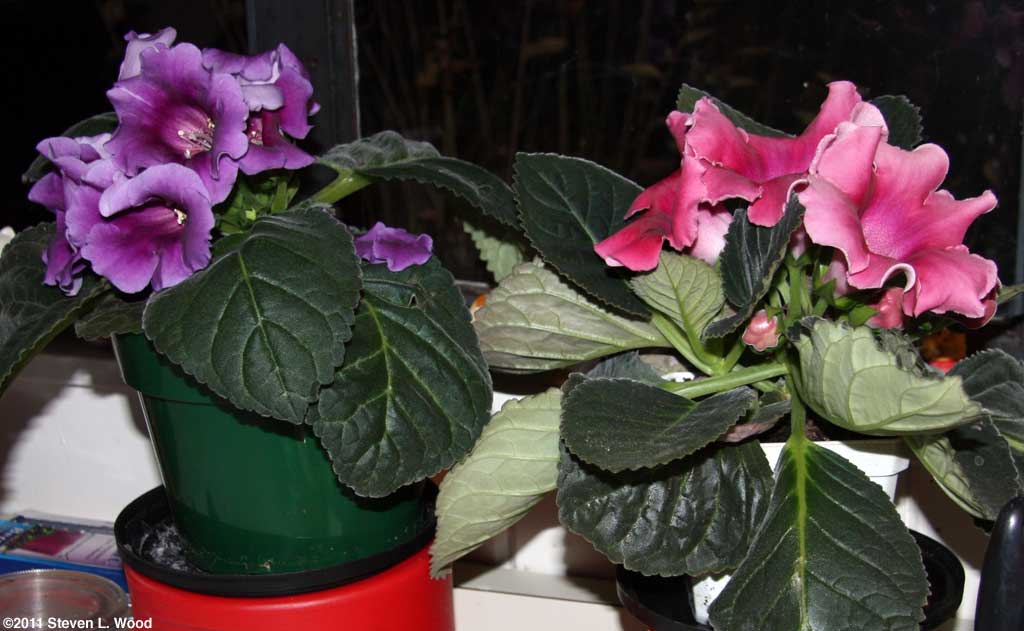
We still have some flower transplants and herbs under the lights, but they're a bit too small to up pot or move outside as yet. Our gloxinias dominate the bottom shelf. Currently, none are in bloom! But I did notice in my dark storage area that two older gloxinias were breaking dormancy and had put on some tiny new leaves. They got watered and moved under the lights. I'll also take them out of their pots and repot the rootball and soil surrounding those roots in fresh potting soil.
When I looked carefully at the photo above, I was aghast to see what might be some form of mold or fungal disease on a few leaves. I rushed downstairs and found, on closer examination, that what I'd seen was bits of inner seed coating that hadn't fallen off as yet. Whew! That pretty well wraps up March for the Senior Garden. I may yet have time this evening to get some peppers started. We still need to get our tomatoes started as well, along with some marigolds. It just doesn't seem like a garden without marigolds!
From the
at Senior Gardening |


©2011 Senior-Gardening.com