One of the Joys of Maturity |
|
| Affiliated Advertisers |
Clicking through one of our banner ads or some of our text links and making a purchase will produce a small commission for us from the sale. The Old Guy's Garden Record
February is the last of our lazy winter months of gardening. We'll continue to tend the things we seeded in January and actually start some vegetables this month. I try to start our cauliflower several weeks ahead of our broccoli, as the cauliflower always takes several weeks longer to mature than broccoli. Sadly, starting the plants early hasn't seemed to help much in getting the cauliflower to mature with the later seeded broccoli, and it often turns bitter in late spring and early summer hot weather. We'll also start a couple of new varieties of Brussels sprouts, another vegetable I've not had a lot of success growing in the past. Beyond the brassicas, we'll seed a little celery, lettuce, and spinach towards the end of the month. For flowers, we'll start some hostas from saved seed that have been stratifying in the refrigerator for a couple of weeks. We'll also seed some short daisies for our flower beds and some tall, gloriosa ones for an area in our back yard. Late in the month, we'll seed flowers to go in the garden. While we started impatiens, vinca, and petunias for hanging baskets last month, we'll start more along with some snapdragons to color our raised garden beds. I have some serious pruning to do of bushes, shrubs, and trees around the property. Pruning in winter seems to shock the plants less than warm weather pruning. Along that line, we sometimes get our first spray of dormant oil on our apple trees during a warm spell in February. A General Caution While I'm excited to be starting some plants for our 2019 garden, let me add a few words of caution here. In a 2016 Getting Started posting, I shared the cultural information below from the Johnny's Selected Seeds page about Mountain Fresh Plus tomatoes.
In our climate zone, February and early March are way too early to start things like tomatoes, peppers, squash, and melons. We've had years when wet soil conditions prevented working the ground in our East Garden in April and May while our transplants for that plot grew to ungainly proportions. Good Gardening Books
A couple of other volumes I wouldn't be without are Rob Johnston, Jr.'s Growing Garden Seeds and the late Nancy Bubel's The New Seed Starter's Handbook. Johnston's brief but informative booklet has about all the basic information one needs to begin saving garden seeds. While there is a shipping charge on orders from Johnny's, the booklet itself will only set you back $3.09! Bubel's volume on starting seeds runs a little over five bucks shipped for a used paperback copy and exhaustively covers starting garden plants from seed.
|


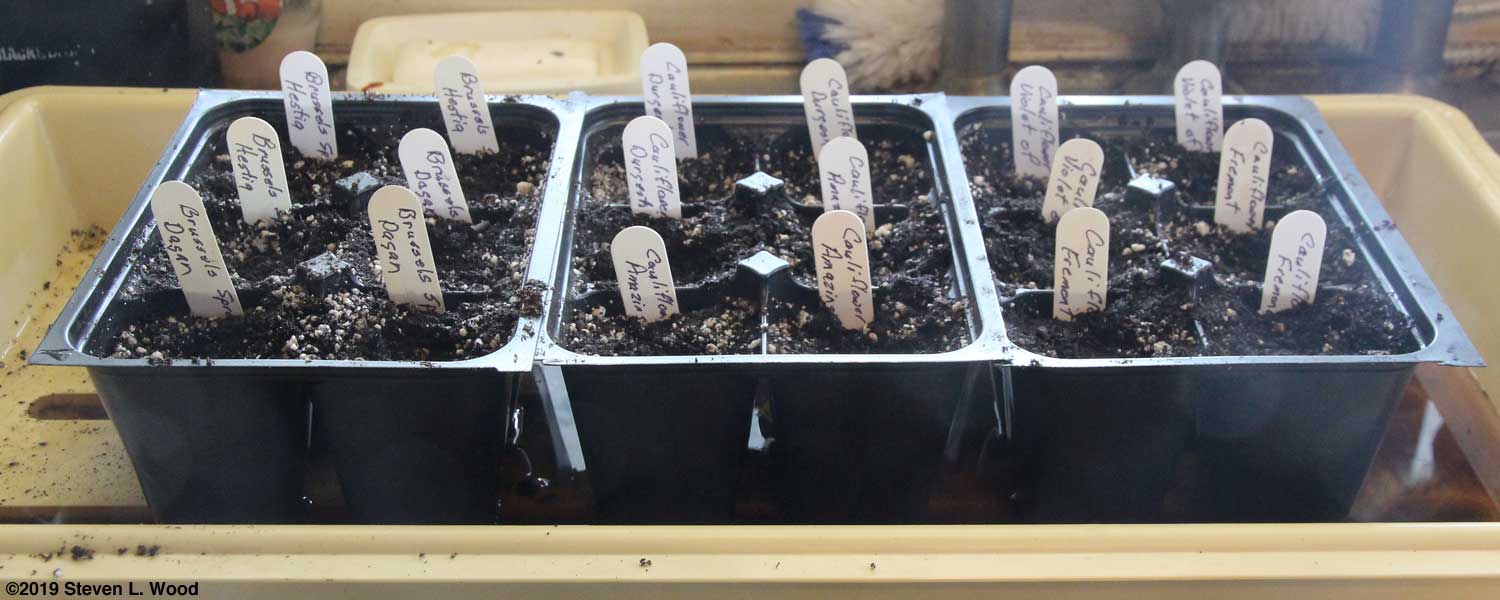
Saturday, February 2, 2019 - Cauliflower I started some cauliflower transplants today in deep sixpack inserts. I chose the deep inserts as the plants will have to grow there for around eight weeks before getting transplanted into the garden. Even with the deeper inserts, we risk the plants stunting in planting them this early. But if we don't give our cauliflower a big head start, it often gets caught in late spring or early summer hot weather that makes the heads bitter. Sadly, our fall cauliflower often gets nailed by early frosts. But we almost always get a few nice heads each season which keeps us trying.
I seeded three cells each of Amazing, Durgesh 41, Fremont, and Violet of Sicily in sterilized potting mix. The seed went in about an eighth inch deep. Amazing is a longtime favorite variety for us as it is productive and has a tight leaf wrap that keeps the heads from turning yellow in the sun. Durgesh 41 is a new variety we're trying this year. Fremont is an excellent hybrid that actually has done better for us the last few years than Amazing. And Violet of Sicily (also known as Purple of Sicily) produces nice sized red heads that cook up green, but still taste like cauliflower. The cauliflower will get transplanted into a row alongside our broccoli, which we'll start in several weeks. I keep trying to give the cauliflower a head start so it will mature with the broccoli, but that hasn't worked as yet. Broccoli is far more heat resistant than cauliflower and often continues producing long after we've harvested all of our heads of cauliflower, or they've turned yellow and gotten bitter. Like cauliflower, broccoli can also buttonhead, especially if started too early or kept in planting cells too long. Unusual weather can also cause buttoning in both broccoli and cauliflower.
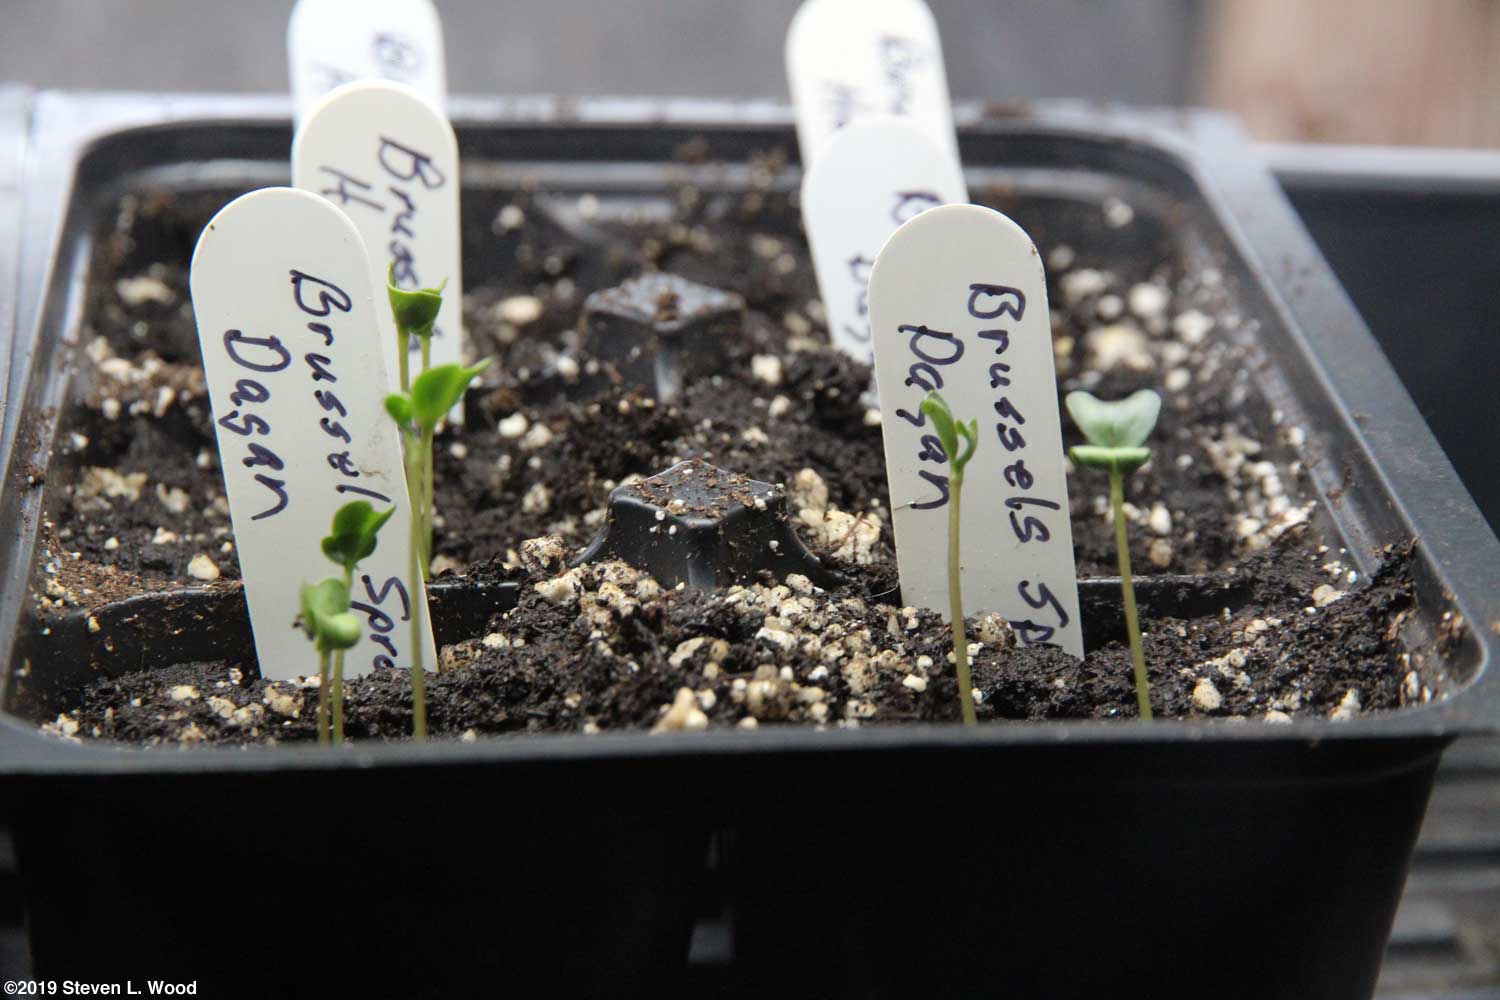
In Growing Cauliflower, Iowa State's Linda Naeve notes, "The optimum soil temperature for seed germination is 80° F, however, cauliflower will germinate at temperatures as low as 50° F." Since our soil heating mats can't quite hit 80° right now, the cauliflower will just have to do with soil temperatures of 75-77° F. Bubel gives a germinating range for cauliflower from 40-100°, with 80° being optimal. Brussels Sprouts Brussels sprouts is another crop I've not had much success growing. We get nice plants, but have trouble keeping bugs from ruining the sprouts. Still willing to learn at my advanced age, I planted fresh Dagan and Hestia Brussels sprouts seeds today. The Fedco Seeds description for the Hestia variety begins, "If you have trouble growing decent brussels sprouts, here at last is a variety that is early and easy." I wonder if the nice folks at Fedco will come spray our Brussels sprouts plants for us once a week this spring. At this point, I only have a vague inkling of where I'm going to put the Brussels sprouts. For that matter, I also have to work in a big planting of Goliath broccoli I want to grow for seed, as Stokes dropped their excellent strain of the variety this year. I'm considering opening up a new or expanded isolation plot in the field where our East Garden lies. Both the cauliflower and Brussels sprouts seedings went into a tray under our plant lights and over a soil heating mat. Satisfied I have a pleasant feeling of satisfaction today. Other than our trays of onions that I started last month, the cauliflower and Brussels sprouts are the first vegetables I've started for the coming gardening season.
Tuesday, February 5, 2019 - Starting Celery and Hosta
Instead of using inserts, I seeded the tiny Ventura celery seed in a round, four inch pot. I'd filled the pot with sterile potting mix topped with a quarter inch of vermiculite. I watered the pot with boiling water, further insurance against the dreaded damping off fungus. The vermiculite will hopefully provide enough cracks in it for the celery seed to snuggle into it to stay moist, but won't obscure the necessary light. The pot went into our germinating tray under a plant light and over a soil heating mat set to 75° F. I should add that getting celery to germinate isn't my problem with growing it. I get into trouble keeping the celery watered and mulched when it is in the garden. Our Ventura celery seed came from Turtle Tree Seeds, although there are several other vendors offering the variety. The Adaptive Seed description of Ventura notes that it was "once one of the most common workhorse celery varieties," but "has recently become less common and has undeservedly been eclipsed by proprietary celery varieties." When boning up on how to start celery, I ran across several interesting pages on the subject:
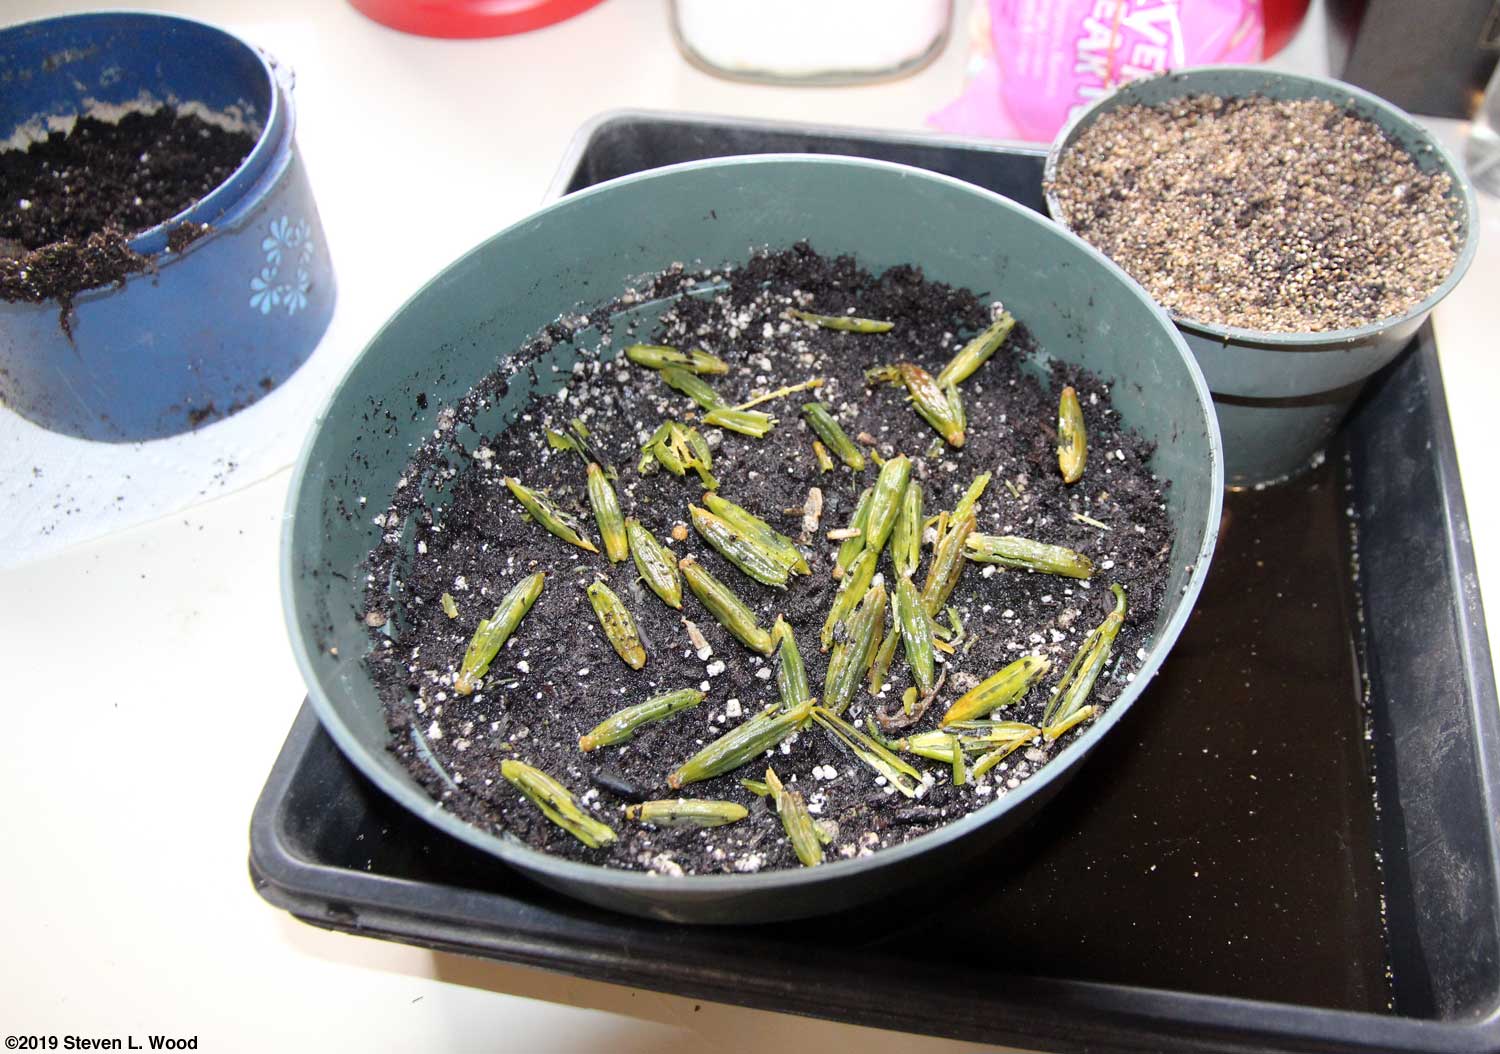
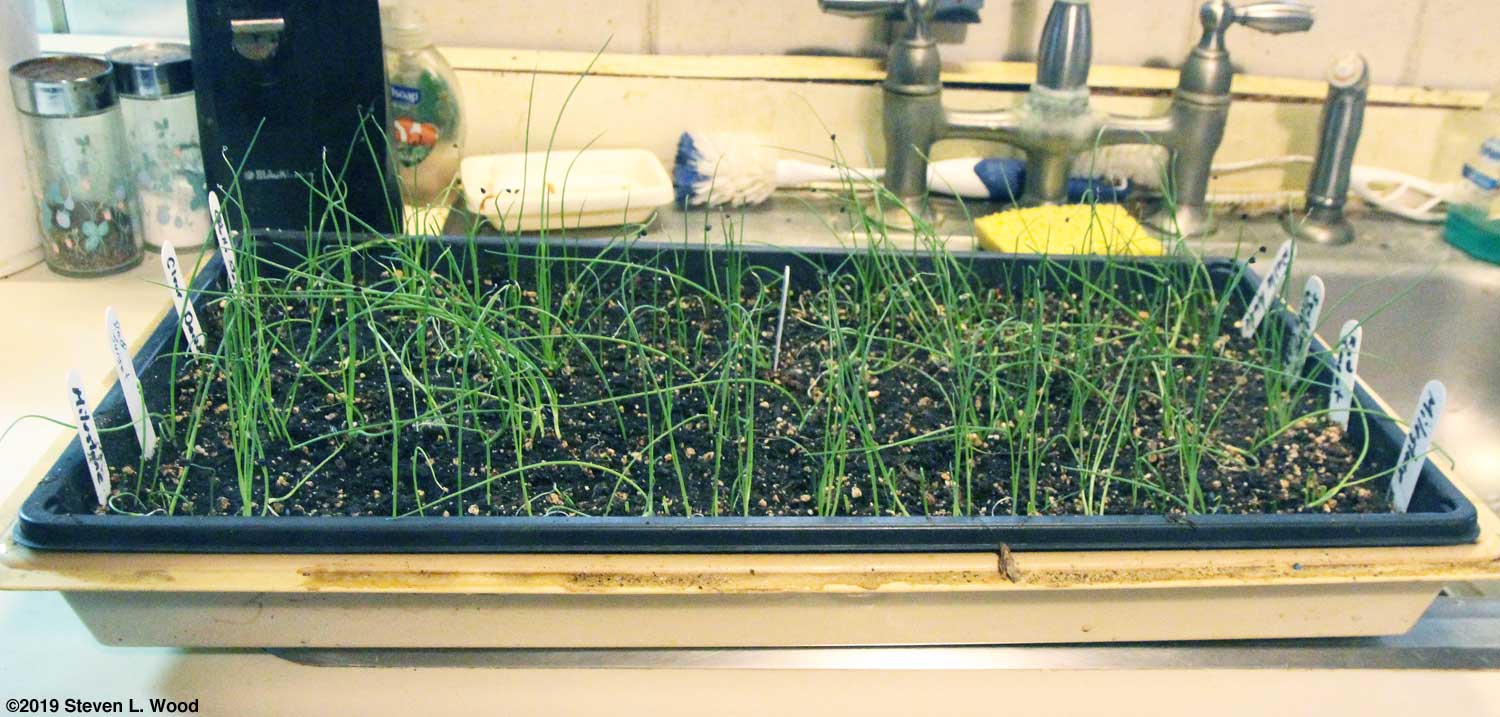
I'm not really expecting much from this planting, as I think I collected my hosta pods to early. Most of them were still green. At any rate, the bulb pan went over another soil heating mat on the bottom shelf of our plant rack. I found Joshua Spece's page on Starting Hosta Seed to be helpful in refreshing my memory on starting hosta seed. Do note that hosta plants take years to really mature. And, one should probably start them in the late fall or so to have something usable the next season. I'm hoping to pick hosta seed again this season, only dry brown pods this time. Then I'll freeze them for a month before soaking them in water in the fridge for a couple of weeks before trying again. On the bright side of things, I noticed lots of cauliflower and Brussels sprouts plants emerging today when I put the celery in their planting tray. I also replaced a failed shop light on our plant rack that had only lasted 30-40 years!
With some rainy weather, I turned to some web work the last few days. I checked and updated (where necessary) the links on our Grow Your Own Transplants page. Then I moved on to doing a Best Garden Photos of 2012 page. I didn't start doing the best photos pages until 2013. Doing this page was a reminder that 2012 was a droughty year.
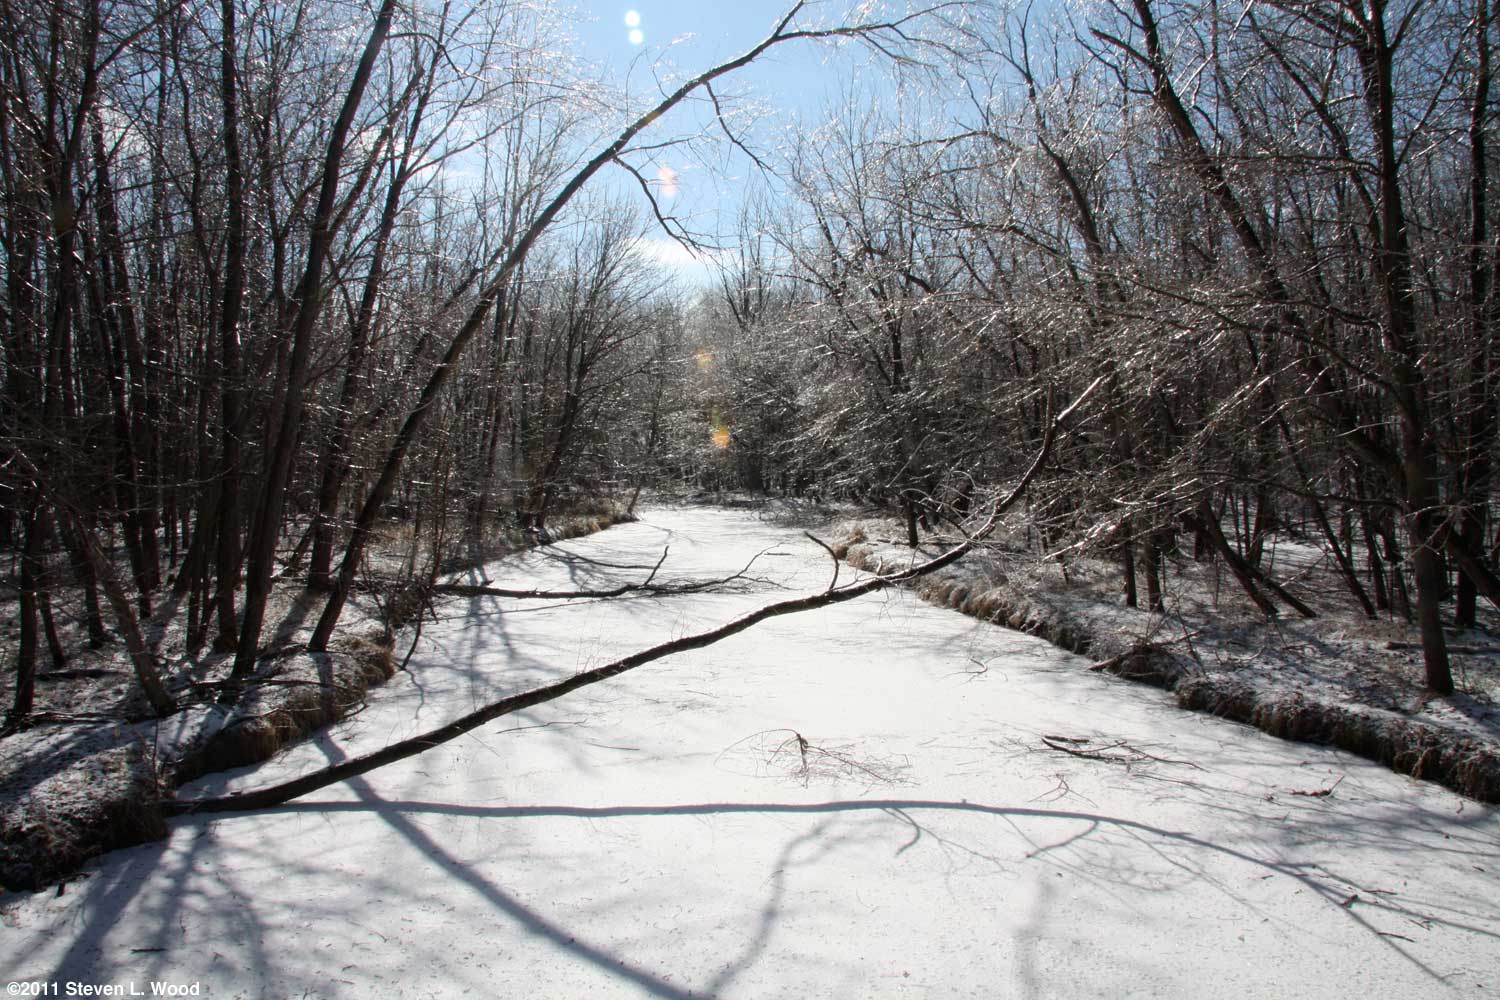
Thursday, February 7, 2019 - Rain When just messing around on this site last night, I ran across a pretty photo of the creek just down the road from us. The shot was taken on February 3, 2011.
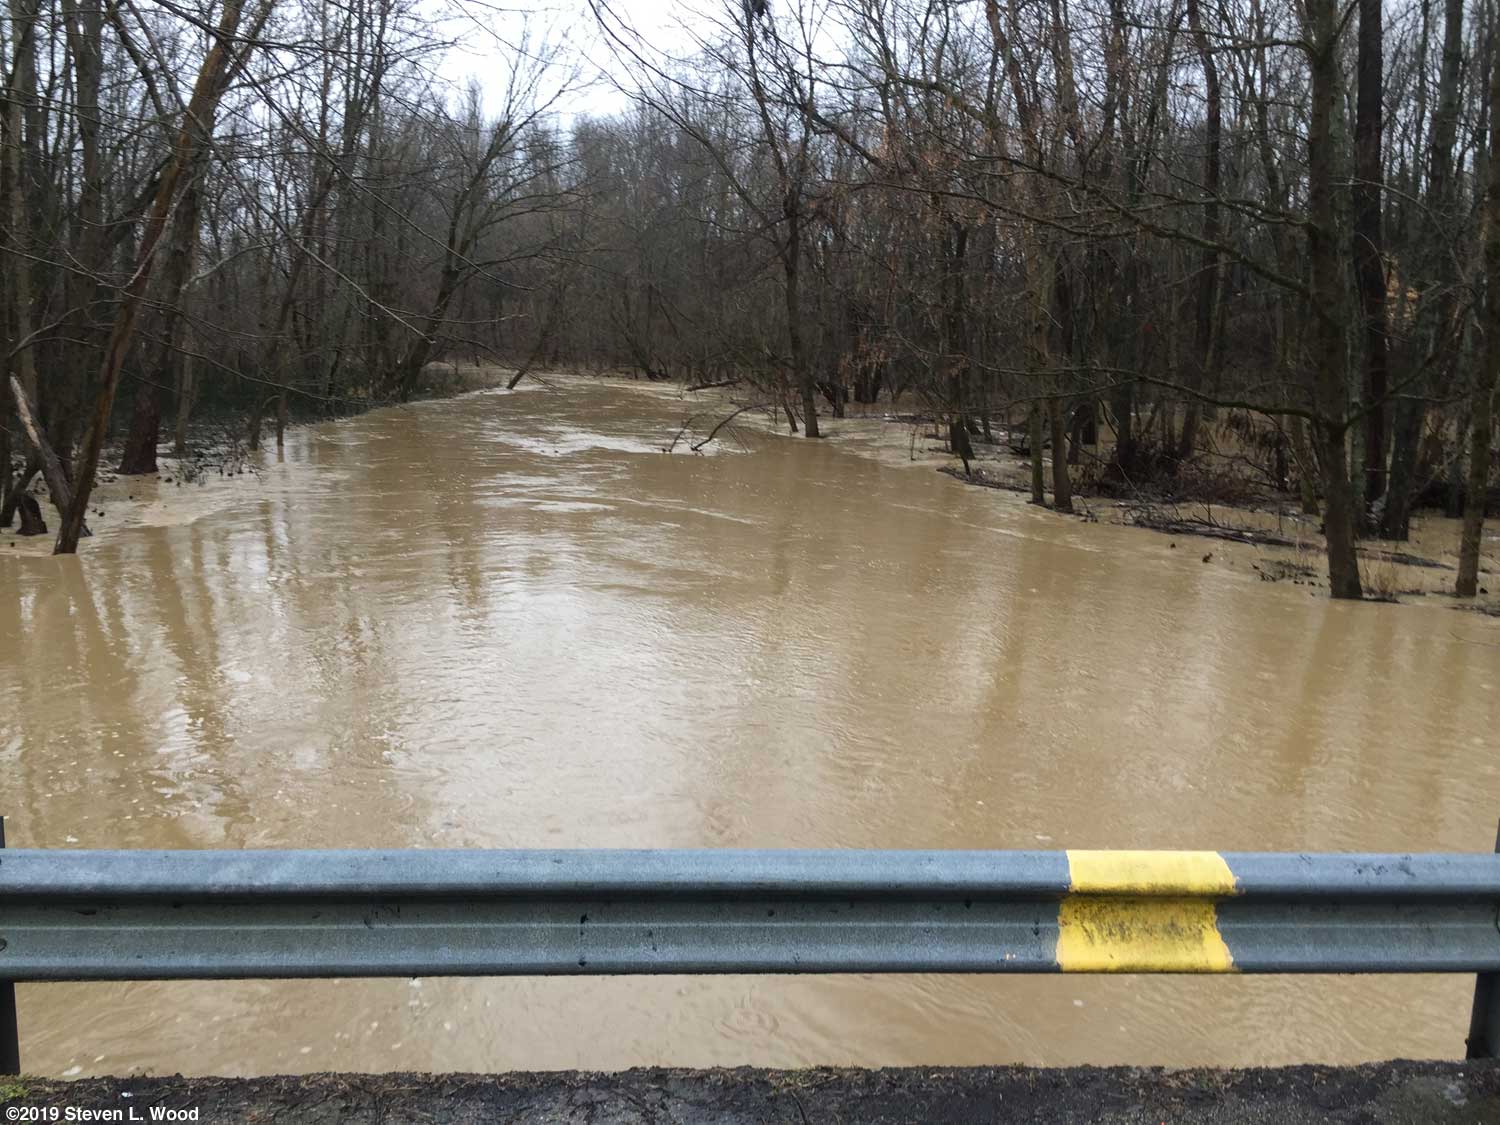
As I drove into town this afternoon, I was amazed at how far over its banks the same creek was. On the way home, I stopped and snapped a picture of it with my iPhone.
The Creek feeds into Turtle Creek Reservoir. Whatever surveyor shot the reservoir dam and the level for the bridge over our creek did a good job, as I've not seen water over the bridge in the twenty-five years we've lived here. He/she is one of those unsung heroes doing great things every day on their job. Our house is a good 50-100 feet above the creek, so we're dry and safe. The reason I went to town, though, was to get a fresh container of plumber's putty Gardening Oh, yeah, this is supposed to be a gardening site. My sole gardening effort today was splitting up a tray of gloxinias into two trays under our plant lights so the plants wouldn't crowd each other. Several of the gloxinia plants seeded in early October are getting ready to bloom. After over forty years of growing gloxinias, I still find myself getting excited to see what colors the open pollinated plants produce.
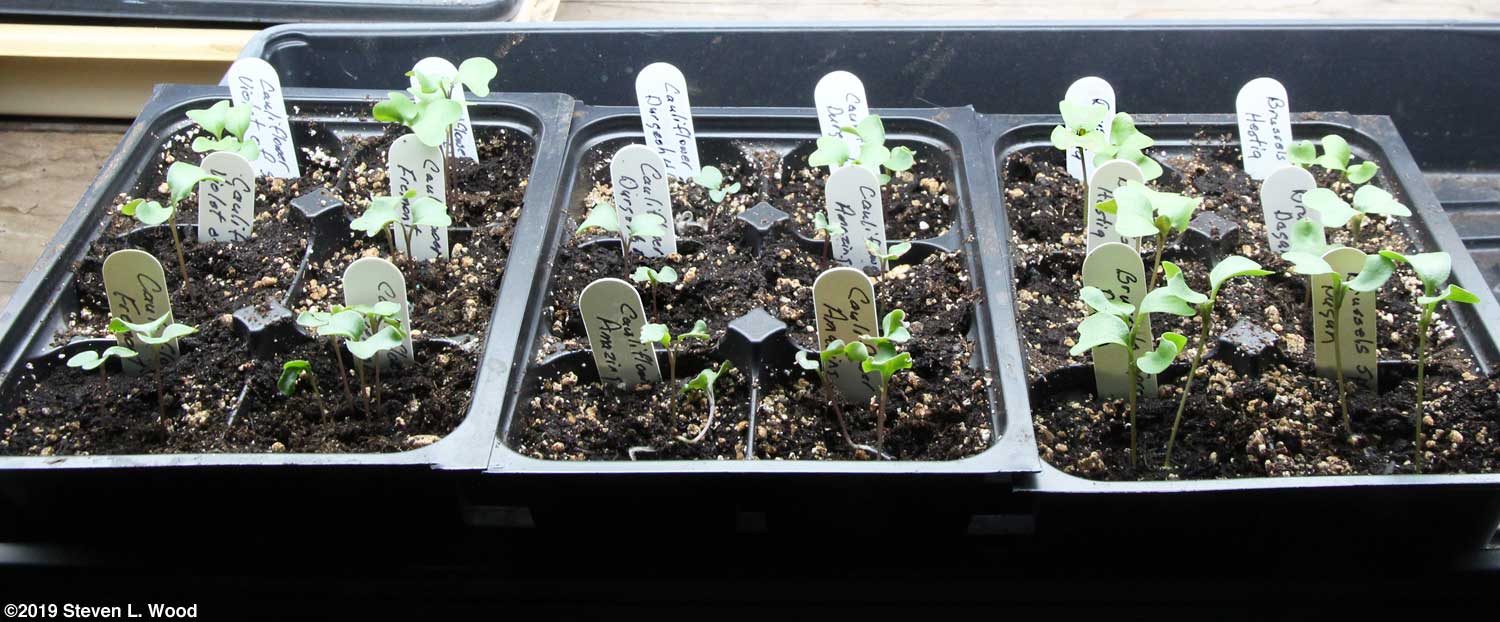
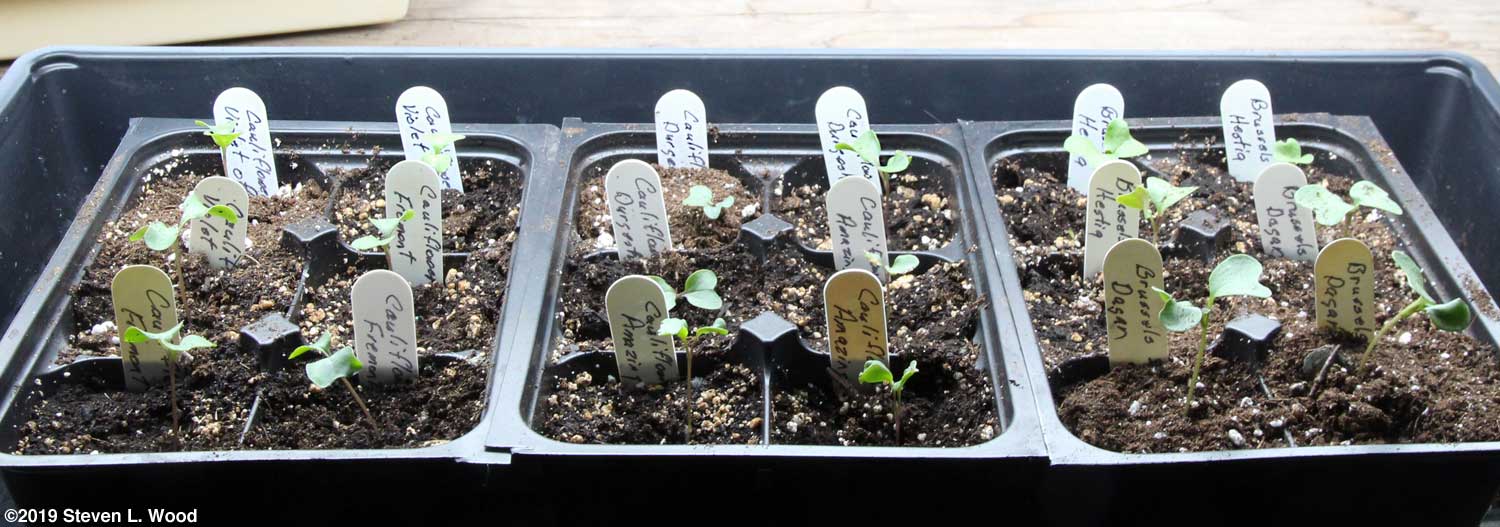
Monday, February 11, 2019 - Thinning Cauliflower and Brussels Sprouts The cauliflower and brussels sprouts I started on February 2 needed to be thinned to one plant per cell today. Since some of the seed I used was several years old, I was pretty generous with my seeding. Rather than just pulling the extra plants and risk disturbing the plant to be left, I used a pair of scissors to trim the extra plants at the soil line.
Thinning the plants early on should allow the remaining plants to put on better growth. Saturday, February 16, 2019 - Starting Lettuce and Spinach
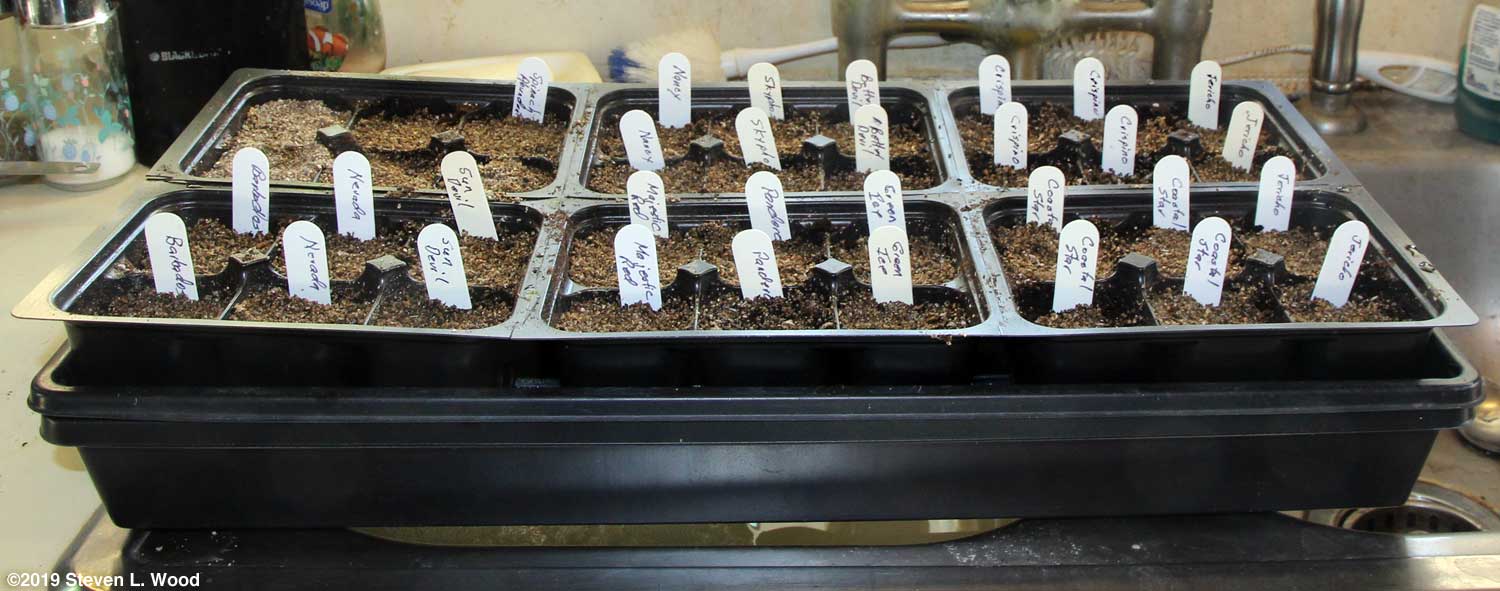
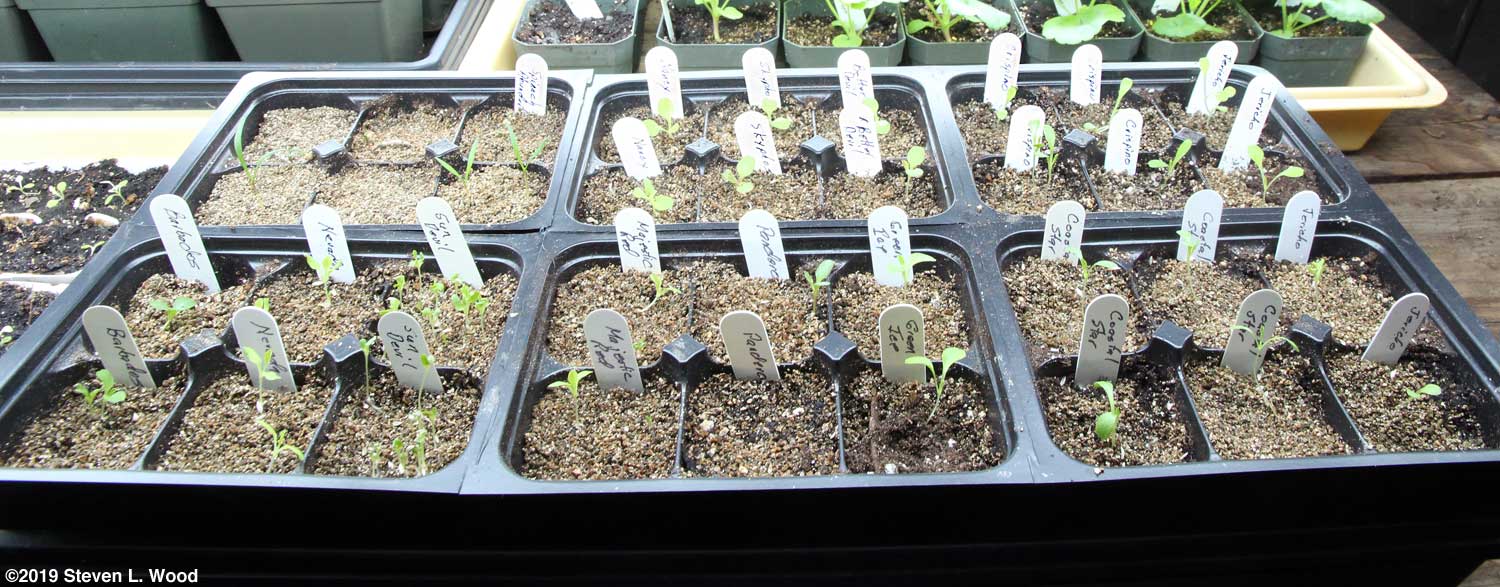
I generously seeded the cells of the five sixpacks devoted to lettuce. After seeding, I used a finger to push the seed into the vermiculite, trying not to cover the seed (other than the spinach seed). Once seeded, the flat got covered with a clear humidity dome and went on a shelf under our plant lights. Since lettuce germinates pretty well in cool soil, I didn't put the flat over a soil heating mat. Even if I had wanted to, our heat mats are all currently occupied, although I saw a lot of germination getting under way with the daisies and snapdragons I started on Sunday.
Our best lettuce the last few years has come from a couple of romaine varieties, Coastal Star and Jericho. Likewise, the Crispino iceberg variety gives us nice, soft head lettuce with good flavor. The plants hold up pretty well in warm weather, although we're still using Crispino seed from a plant that bolted in 2014 that I let ripen seed. We're also trialing two new-to-us lettuce varieties this year, Majestic Red romaine and Green Ice looseleaf. We're also giving the Better Devil red romaine another try. It was a new variety we tried last season, but well, last season was mostly a bust with my knee problems. The thirty cells of lettuce seeded today will be far more than we'll need. But I'm not shy about sneaking in a lettuce plant here and there in our raised beds. Our best spring lettuce last year came from a Barbados and a Jericho at the opposite ends of our spring broccoli row.
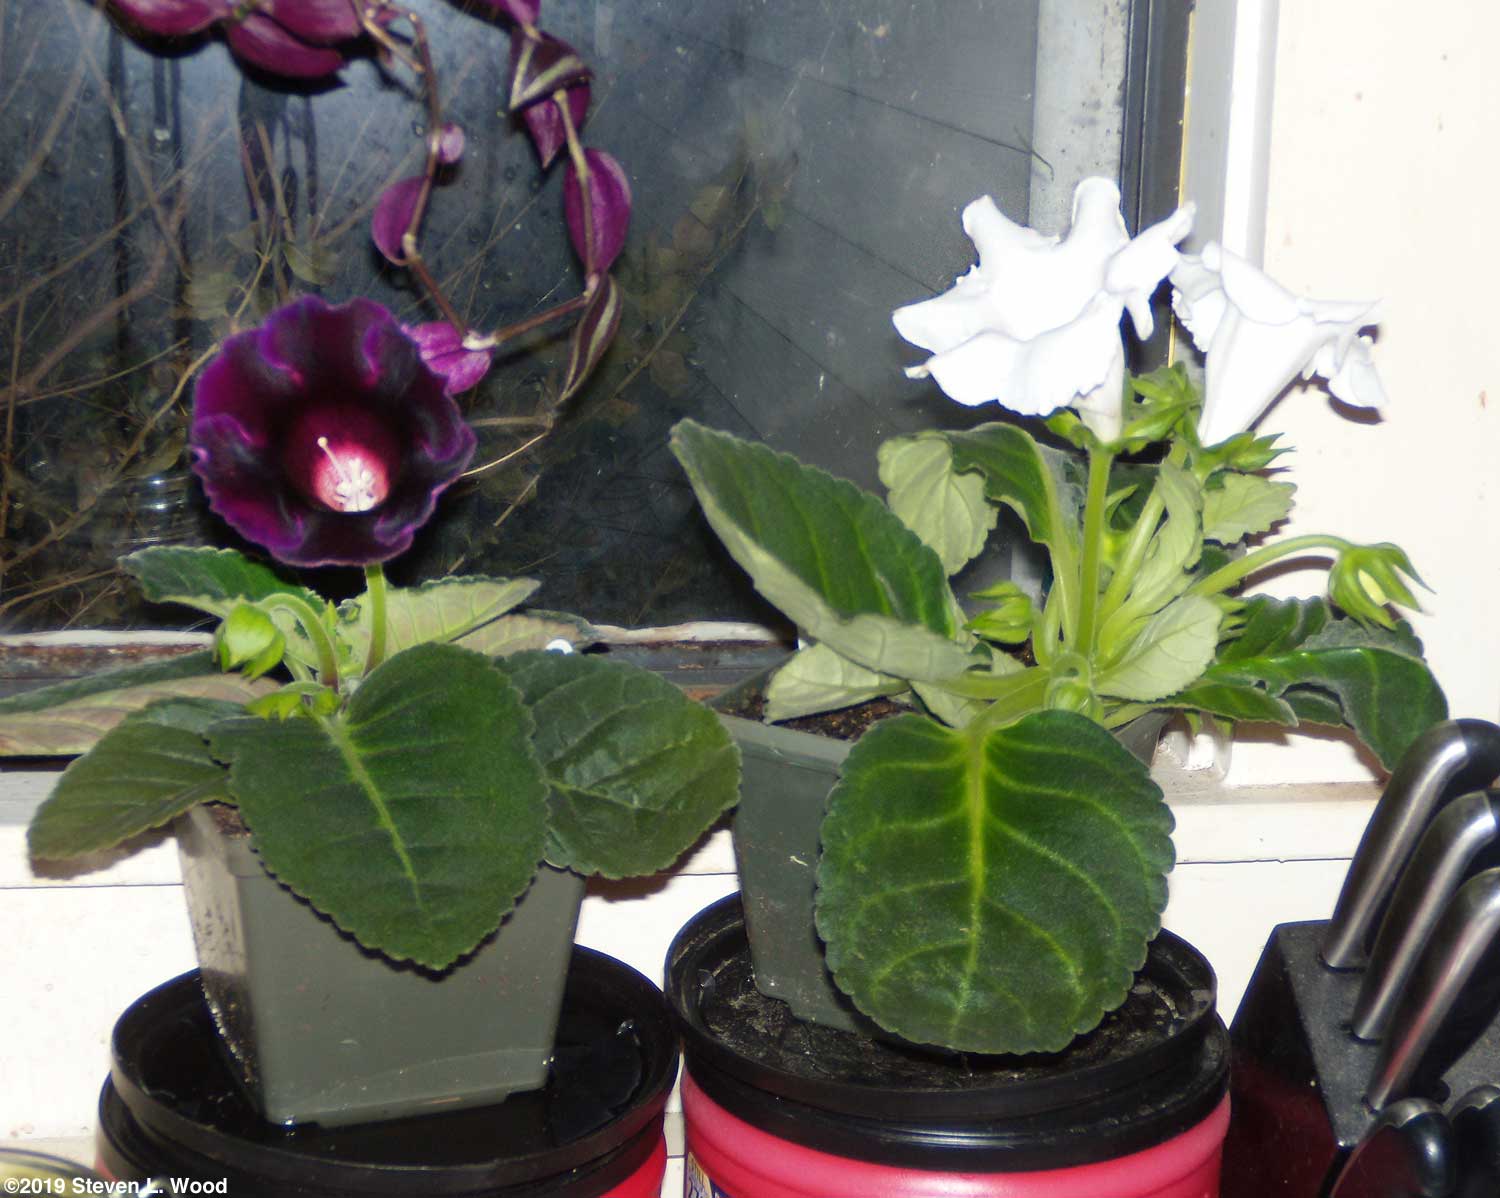
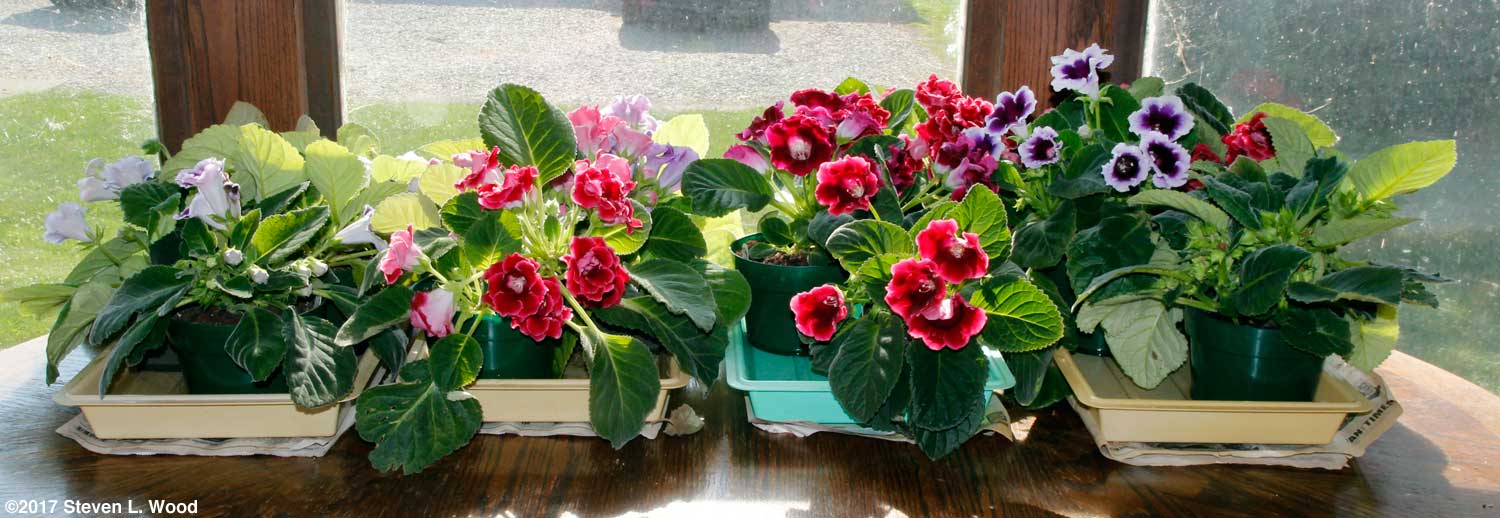
Monday, February 18, 2019 - Gloxinias We saved a lot of gloxinia seed last summer. To be sure the saved seed was good, I started a communal pot of the seed in October. The plants from the communal pot were moved to fourpack inserts and finally to 4 1/2 inch square pots. After four and a half months, some of the new plants are beginning to bloom. We have two in bloom now with another six or seven getting ready to bloom. And since I staggered moving plants from the initial communal pot into fourpacks, we have another bunch of plants that I just moved to 4 1/2 inch pots that should follow up the first batch with some blooms.
First year gloxinias are pretty, but don't put out the quantity of blooms older plants do. Gloxinias can grow for years if allowed to go dormant after their blooming stage. I tell all about how to grow these gorgeous plants in our Gloxinia Blog. If you'd like to try your hand at growing gloxinias, I'll gladly share some of our bounty of seed with you...while supplies last. Just send me an email with your postal address.
For those wondering about the timing of growing gloxinias from seed to bloom, here are the pertinent dates for this planting.
Of course, your growing conditions may produce different timing. And four months is pretty quick to go from seed to blooms. A more accepted figure would be five to six months.
Saturday, February 23, 2019 - Busy
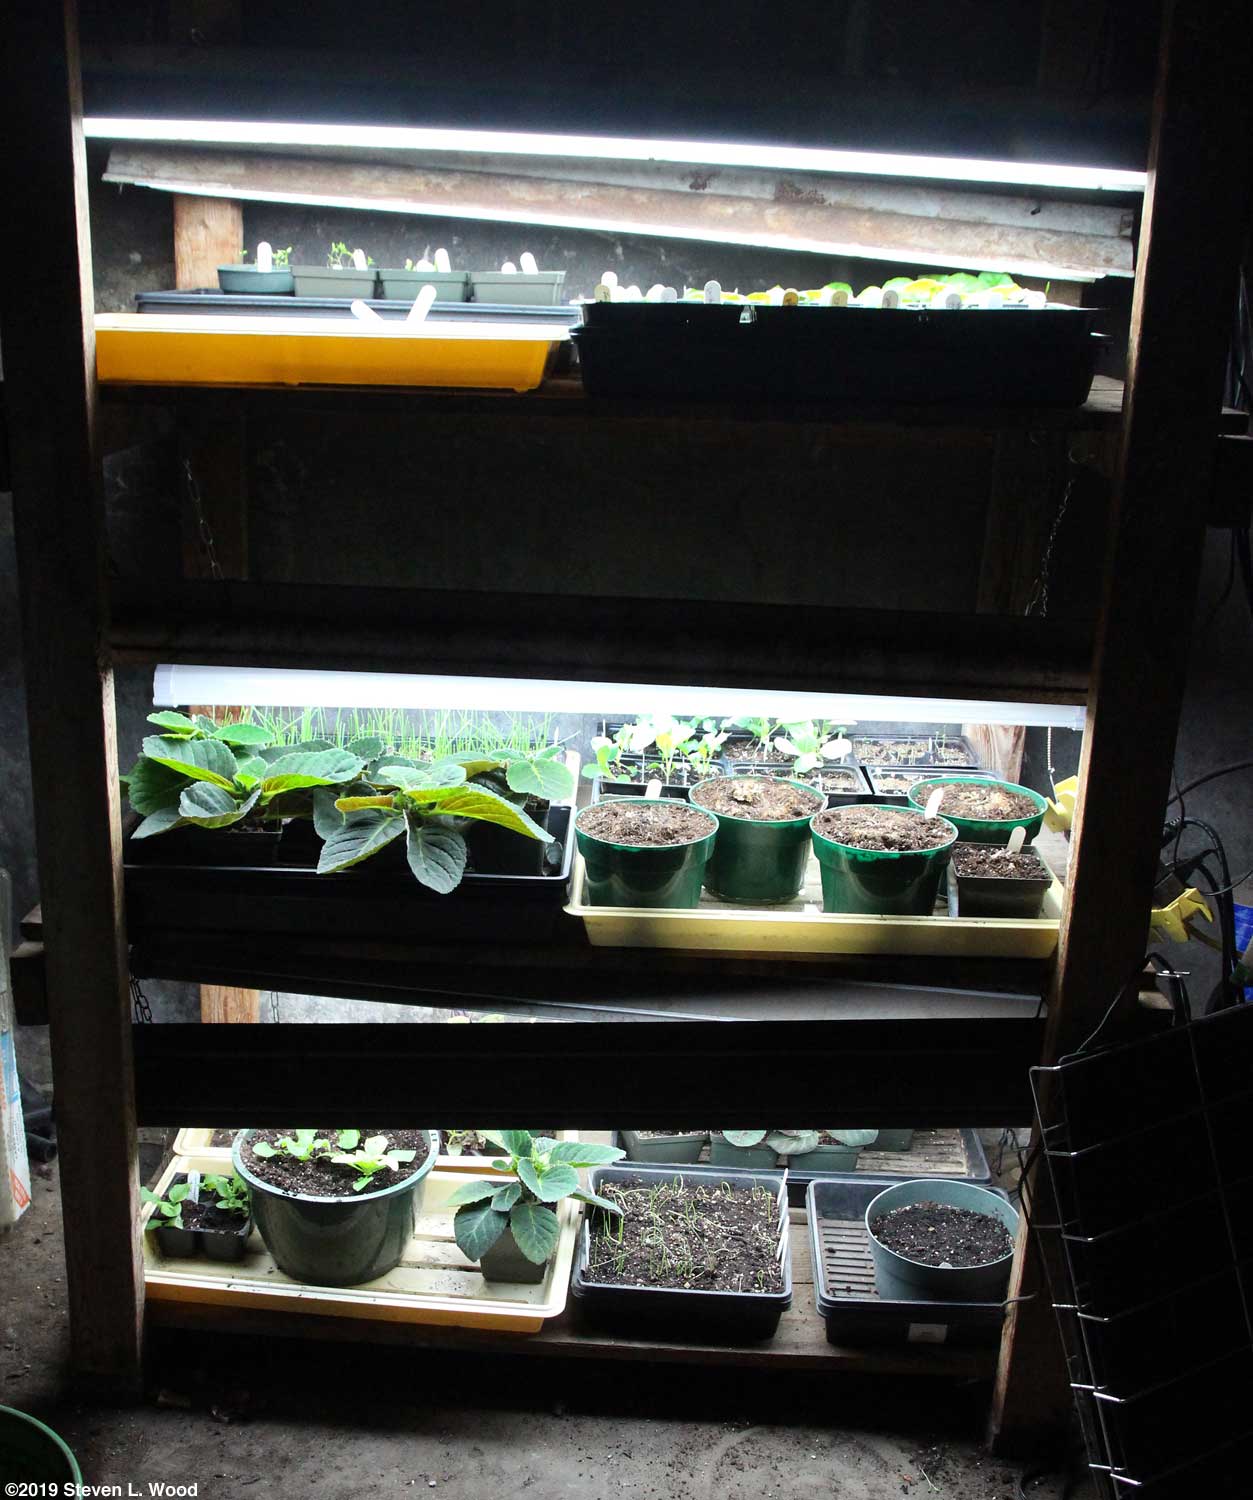
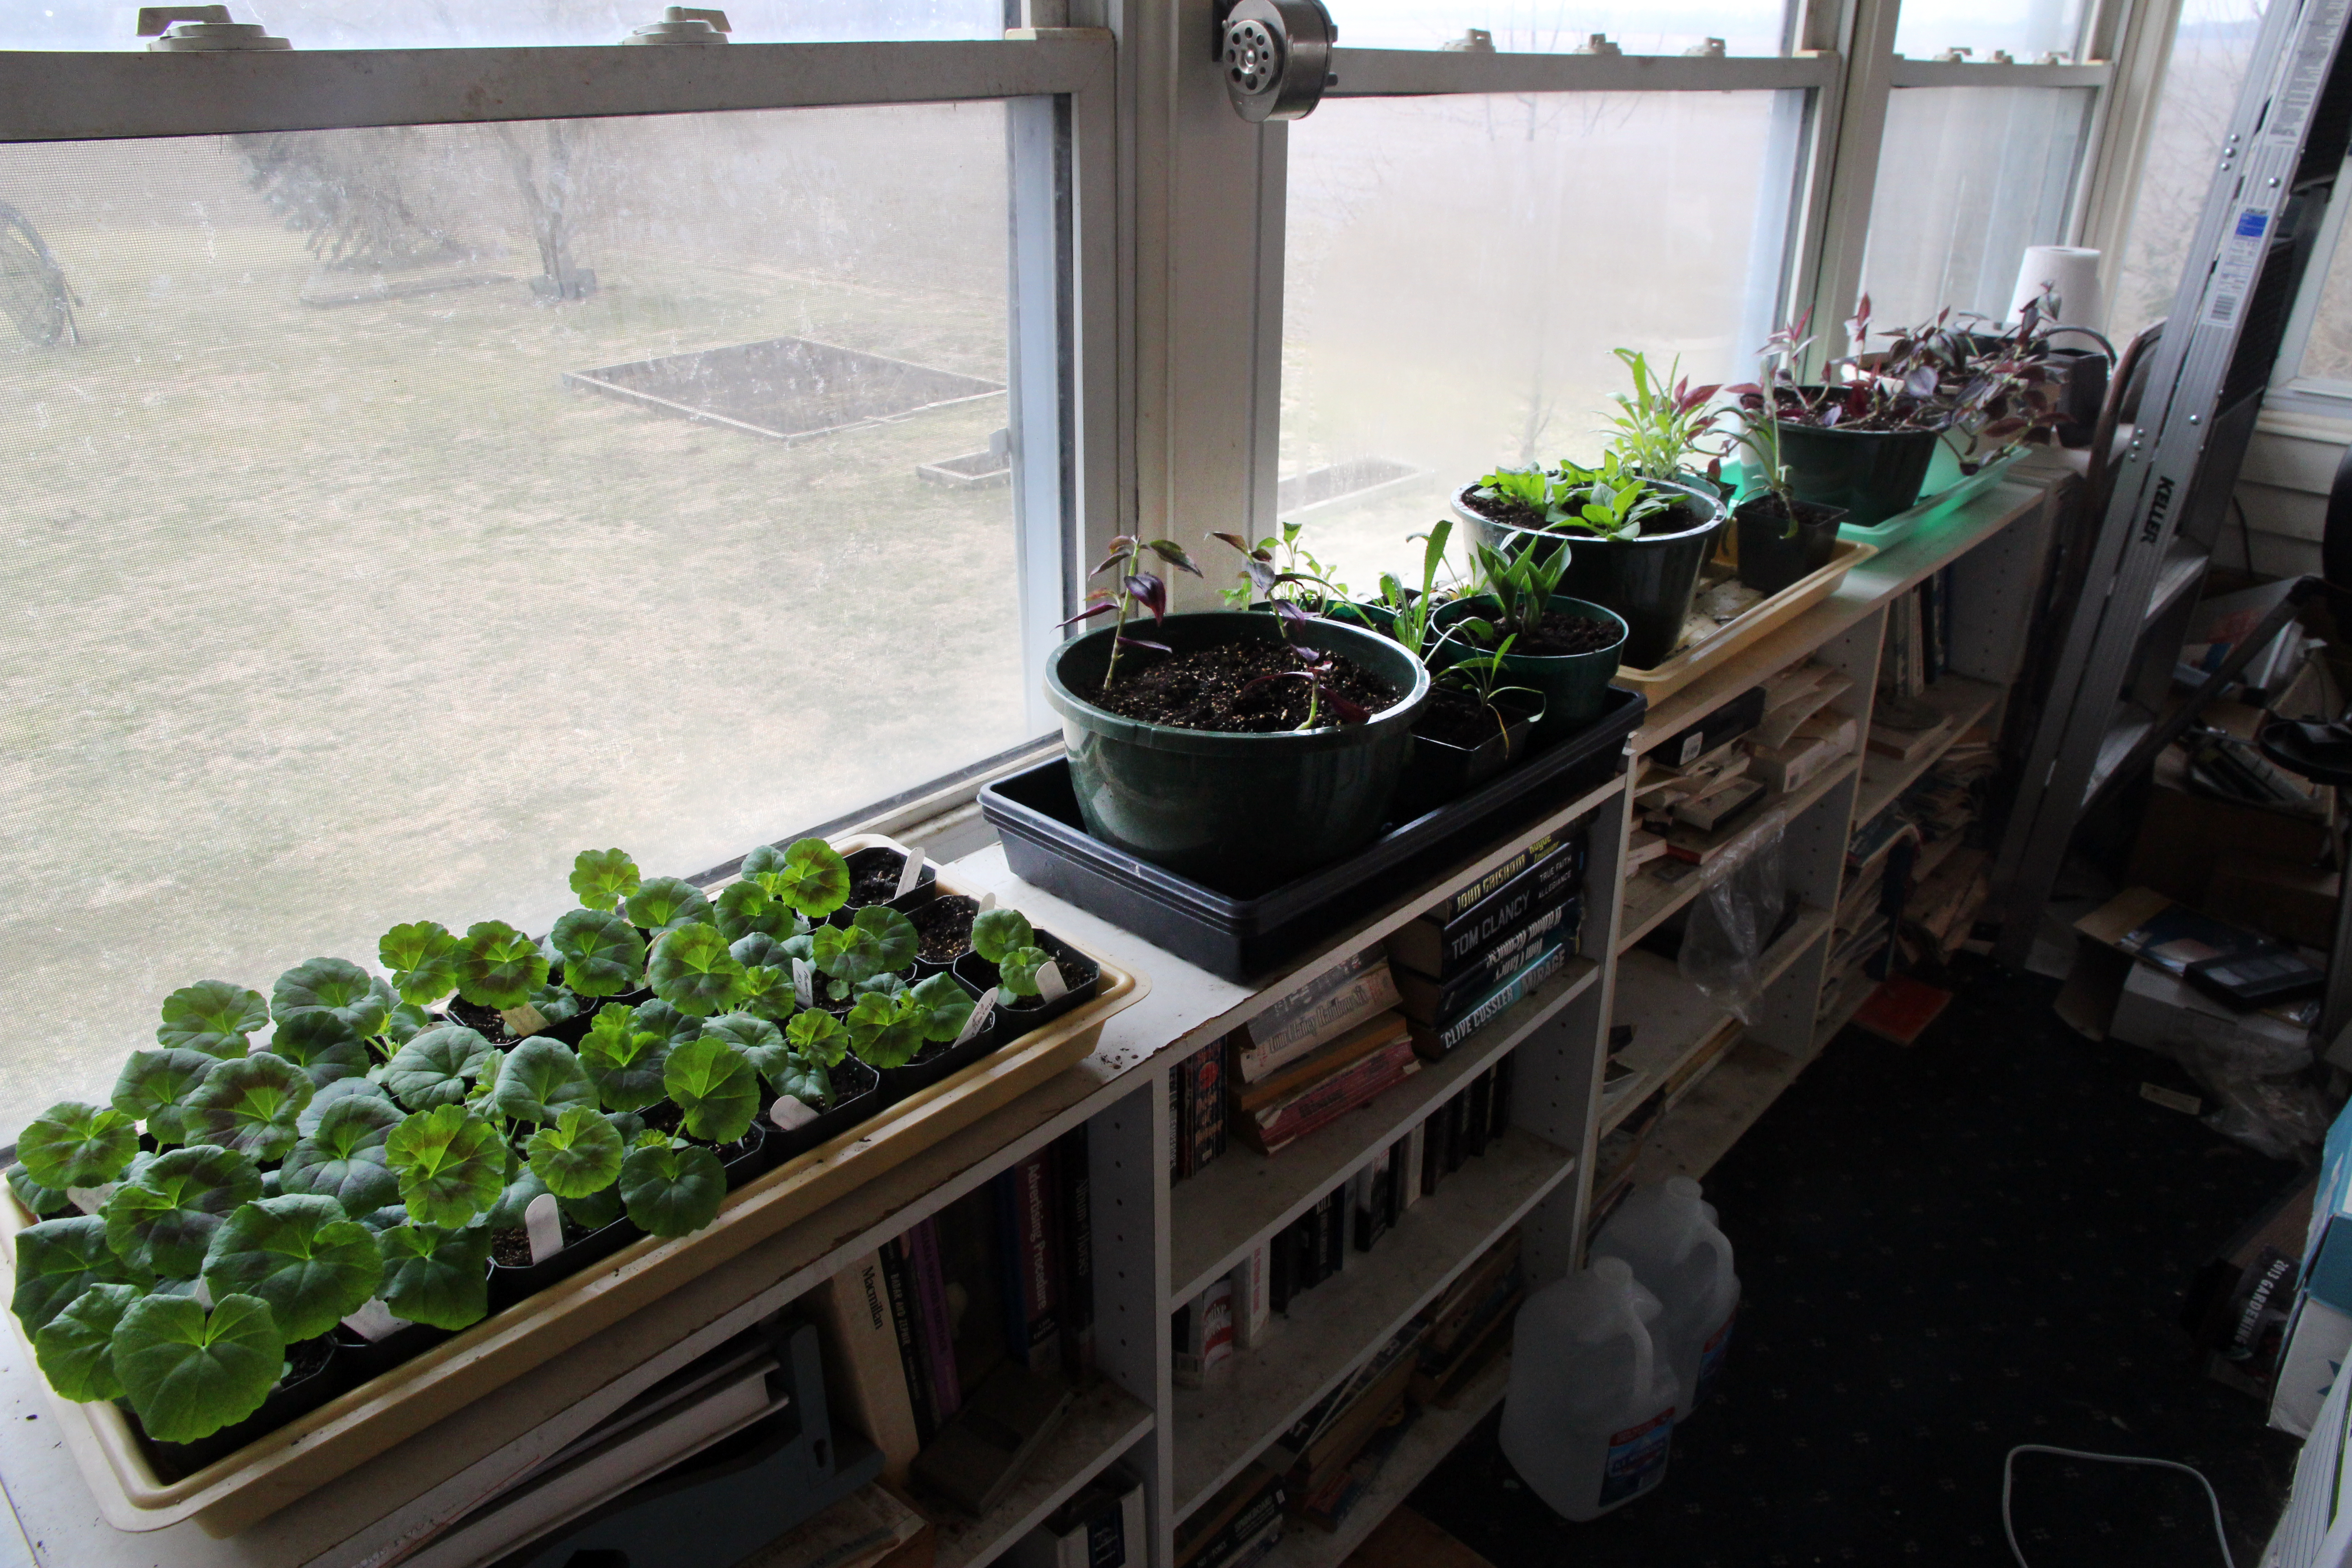
Note that in the image at right, the lights have been raised to improve the shot. Normally, the lights are just a few inches above the tallest plants under them. Some trays of cold hardy plants will probably have to go to the south facing windows of our mostly unheated sunroom. I'm thinking maybe our cauliflower, Brussels sprouts, and possibly a tray of onions and another of gloxinias. I could move a tray of gloxinias to our dining room by our east facing bay windows, although our cats tend to chew on the gloxinias' leaves! Also, geraniums can benefit from being moved to a cool, bright area after they get started. And at this point, we really haven't gotten a lot of vegetable transplants started yet. One bright note for me was moving three Supercascade petunias into a hanging basket pot this week. They should provide us with some late March blooms on our back porch. Of course, the hanging basket will have to come inside on nights with late frosts. I also thinned our lettuce starts mostly to one plant per cell. I'd been a bit too generous with my seeding of the insert cells and ended up with seven or eight spindly plants in several cells. But almost everything germinated well. I was amazed that some very old (2006) Sun Devil seed germinated. I'm still trying to get a Sun Devil plant to go to seed, as seed for the variety is no longer available. More on Gloxinias I wrote myself a note last night to check our dormant gloxinias that are on a shelf in a dark corner of our plant room. When I checked today, I found that six plants had emerged from dormancy, putting on a few tiny sprouts from their corms.
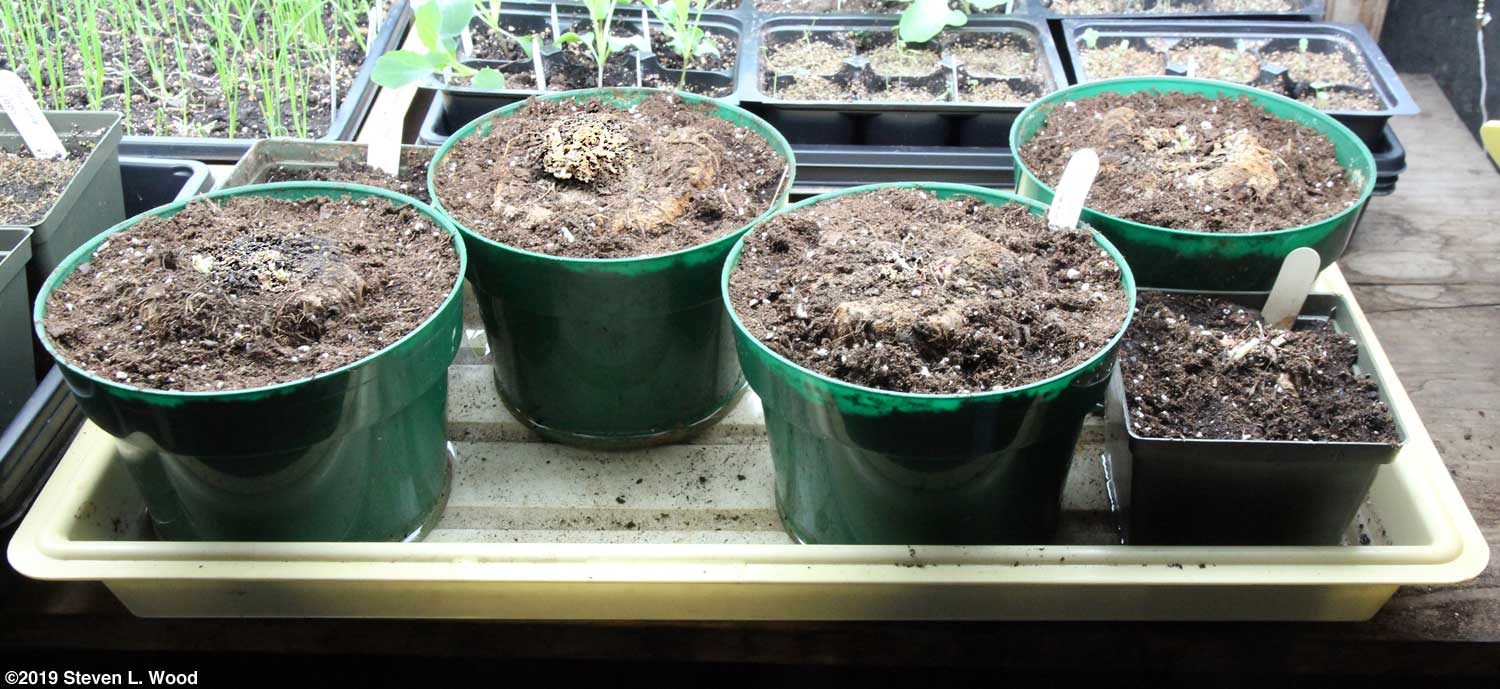
After weeks to months of sitting in darkness, dormant gloxinias will begin putting up shoots from their corms with tiny leaves. At that point, it's time to repot the plants with fresh potting soil
I rub off any soil around the sides of the corm that does not have any roots in it. Likewise, I break off a good bit of the bottom of the soil from the previous season until I reach soil where roots are present. Then I put fresh potting soil in the bottom of the pot with a bit of systemic insecticide, pop in the corm with the soil around it, and carefully fill in the sides of the pot with more potting soil.
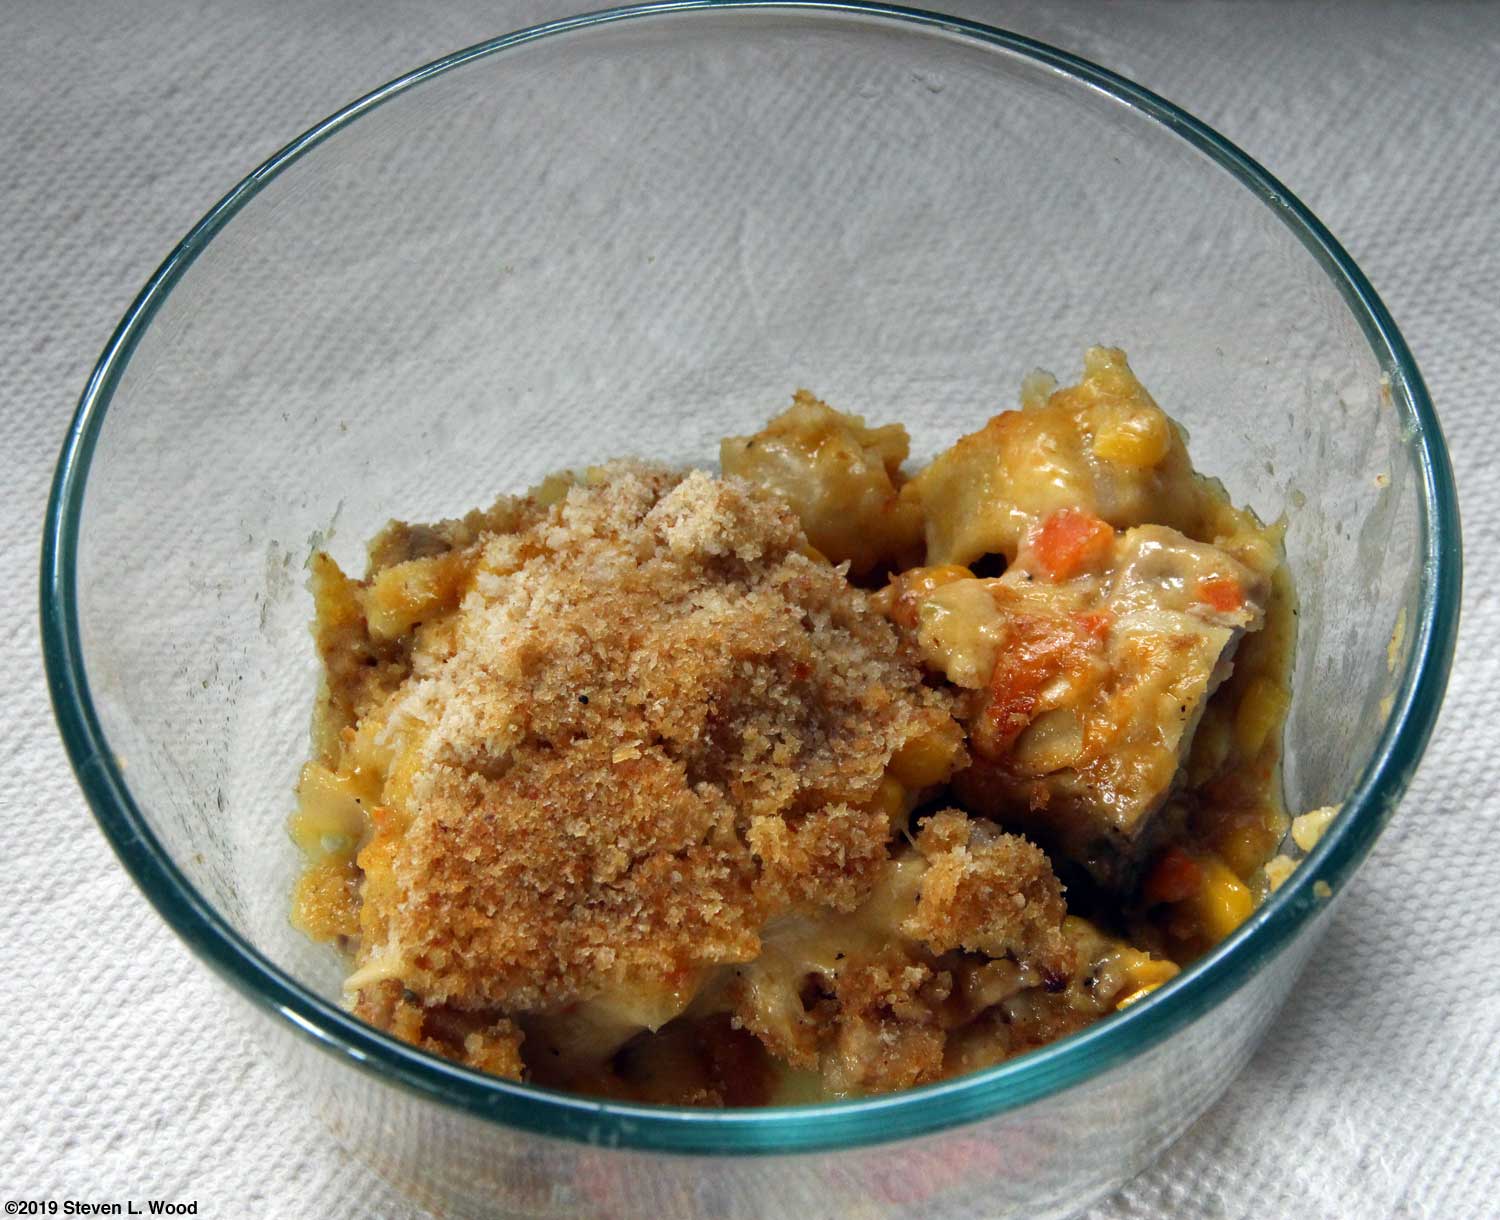
On a more positive note, we had a small, very lean pork roast for supper one evening last week. With just Annie and I home to eat the roast, the question arose of what to do with the leftover pork. I often make it into pork barbecue, but that isn't one of Annie's favorite meals. So I Googled uses for leftover pork roast and found a dandy recipe on the All Recipes site, Yummy Pork Noodle Casserole.
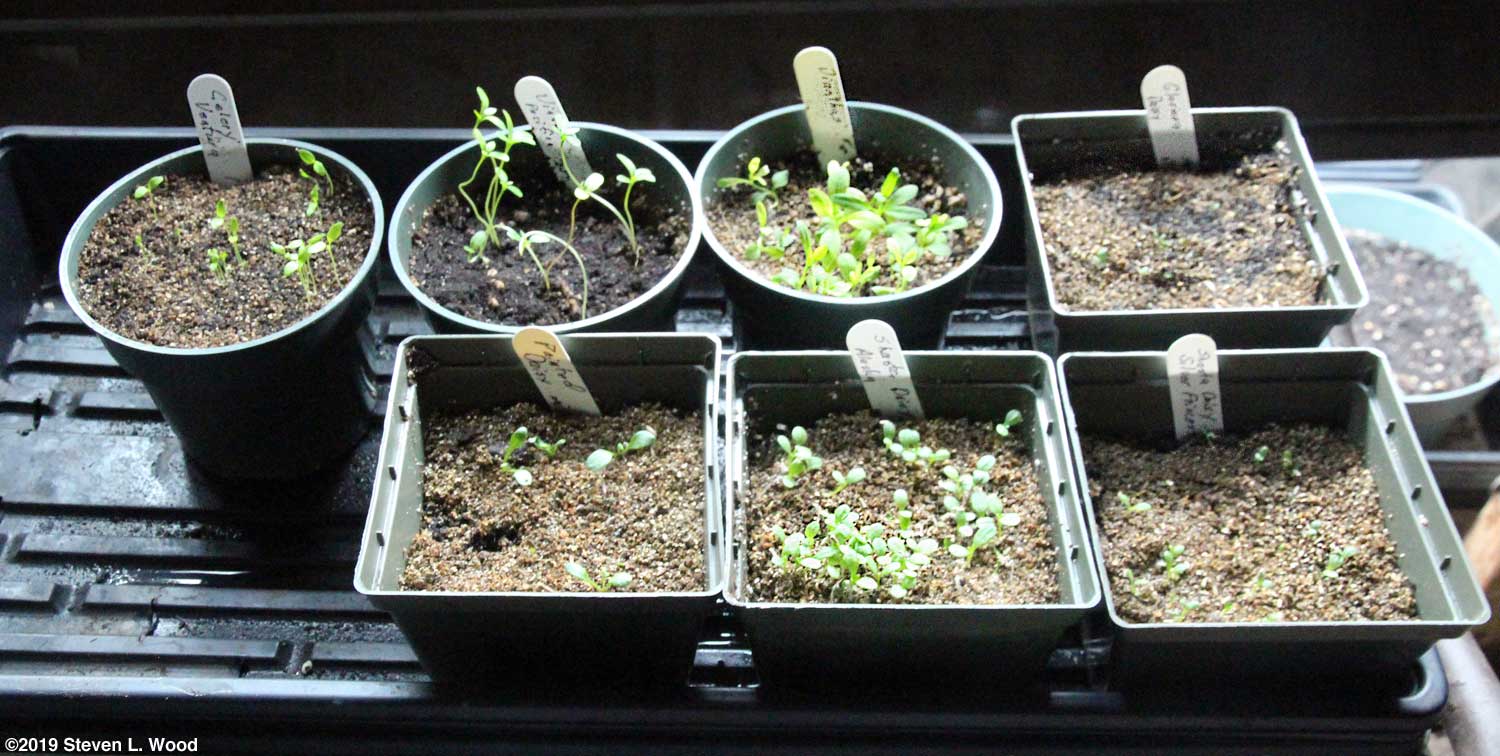
The recipe turned out to be great. I could see substituting chicken for the pork in the recipe. And while egg noodles were recommended, I used our favorite Oakland Noodle Company noodles. We go through lots of them for chicken/turkey/beef and noodles. When I grabbed the image of our baby celery plants a few minutes ago, I also took one of our newly thinned lettuce starts. Other than the Sun Devil variety, I thinned the lettuce to one (occasionally two) plants per cell. I was pleased when I looked at the plants today to see that my thinning hadn't killed any of the plants I left. While the Sun Devil plants from 2006 seed germinated well, the plants seem to be having trouble shedding their seed coat. So I gave them a bit more time to do so. Also, I may transplant some of the Sun Devil starts to other inserts, as I'd really like to save seed from the variety.
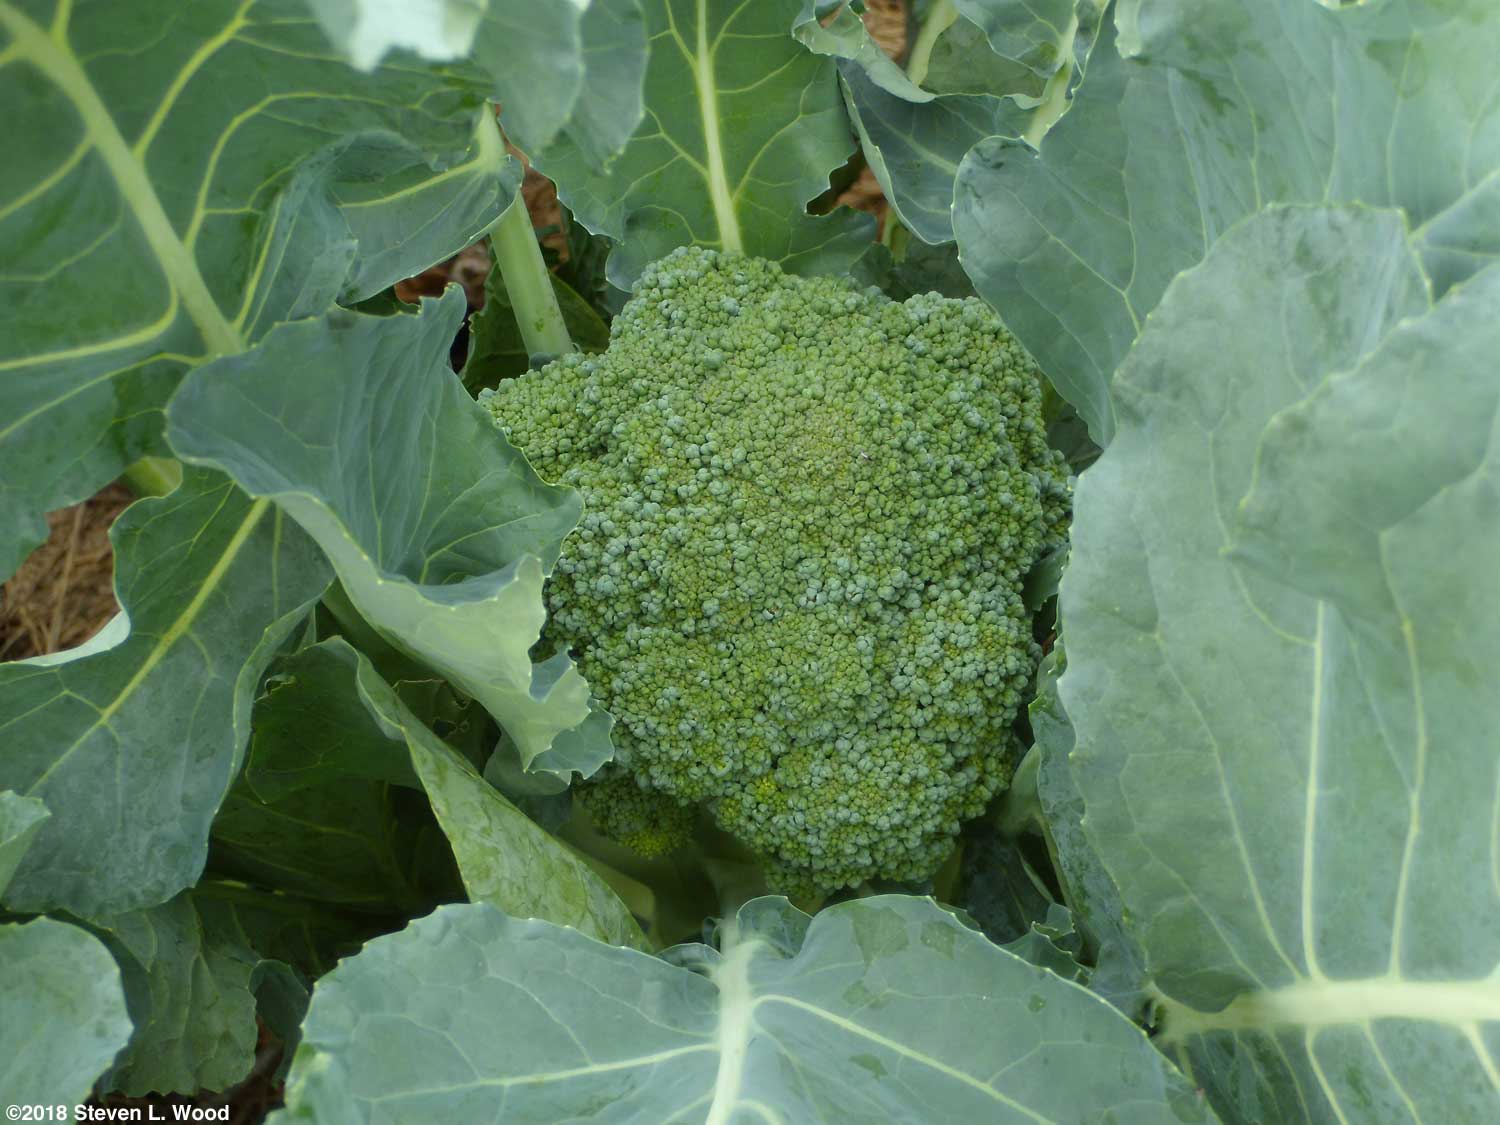
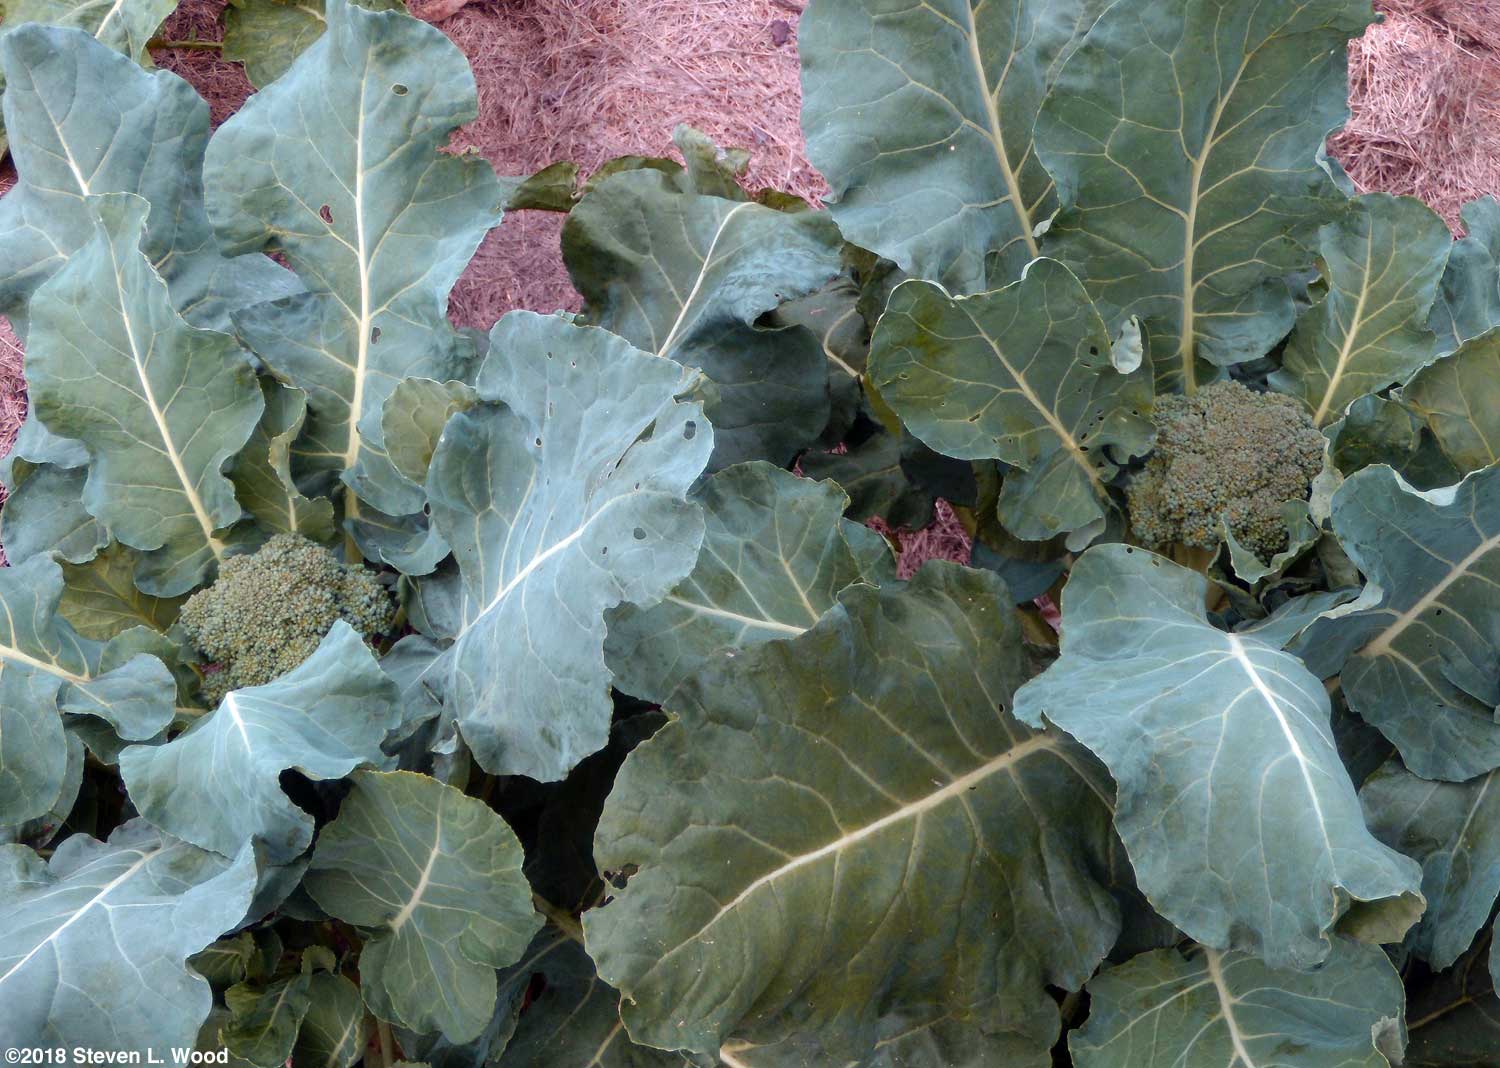
We've been pleased with our new web host so far. We switched to them in November. Tuesday, February 26, 2019 - Starting Broccoli My wife recently admitted that the broccoli we grew years ago was unappealing! Over time, we've improved our broccoli production and harvesting, getting fairly large, sweet heads well before they begin to bloom or turn bitter in summer heat. And, of course, when the weather cooperates, we get an extended harvest of small to medium sized broccoli sideshoots, especially in the fall.
Castle Dome is a new-to-us hybrid variety as we search for suitable replacements for Premium Crop and Goliath. Over the last few years, we've experimented with the Destiny and Green Magic hybrids and the open pollinated Umpqua, but have had disappointing results with each. Sometime in the future when we're not trying to grow a seed crop of Goliath, we may give each of the previously tested varieties another try. Starting our broccoli transplants is much the same as with the cauliflower and Brussels sprouts I seeded early this month. I also give an extended step-by-step description of the process in our how-to feature, Growing Great Broccoli and Cauliflower. As with all of our seedings, I used sterile potting mix for this planting. The potting soil was mostly Baccto Lite, which we buy in big bags at a good price at our local garden center. I also mixed in some ProMix to make the starter mix a bit lighter and more retentive of moisture. While ProMix is considered a sterile planting medium, the Baccto is not, especially after I let the bag sit open outside for a month. So the mix got to share our oven with what turned out to be a delicious arm roast as the mix heated enough to kill off any damping off organisms. As a sidenote, we also had some great broccoli with cheese with the roast. The broccoli, of course, came from our garden last summer.
My target transplanting date for the broccoli is the first week of April. But that time frame can sometimes slide a bit due to weather conditions. To give the plants as much room as possible, I use deep sixpack inserts for the planting, in case transplanting gets delayed. The actual seeding is done by just making a depression in the soil in each cell, dropping in a seed, and covering it with a little more starting mix. While broccoli like most brassicas will germinate at temperatures between 45-95° F, our seeding went over a soil heating mat set at 75° F. If one lacks a soil heating mat, we germinated our brassicas for years without one. It is really important, however, to get newly emerged plants under some strong light as soon as they come up. Failure to do so produces spindly plants that fall over easily. We cover our seed flats with clear humidity domes to allow light to hit the plants when they come up and as we wait for some seed to sprout that may take longer. Once off the soil heating mat, the plants go under lights set a few inches above the tallest plant. If, by chance, you end up with spindly broccoli plants, the condition can be corrected. I've gone back and dug up plants with a paring knife, made their hole deeper, and plopped them back into the soil much lower than they previously were. At this stage, broccoli plants are incredibly forgiving of such abuse. I did not start our planned Goliath for a seed crop today. Those plants will have to go somewhere in our East Garden or an isolation plot in the same field. We usually don't get those areas worked up for planting until sometime in May. Having experienced buttoning with our broccoli several years ago caused by either weather conditions or sitting too long in too small containers before transplanting, I'll wait several weeks before starting more Goliath seed.
Wednesday, February 27, 2019 - Weather and Early Peas
While I could still seed the peas in such freezing weather by laying the seed on the frozen soil surface and covering it with bagged thawed soil, the seed would just sit there until things warm up a little. I'd rather wait a few days for the cold spell to pass before doing our first outdoor planting of the season. I generally purchase untreated seed for our garden. Even so, I treat our early pea seed with Captan fungicide because the seed may sit in the ground for some time before things warm up enough for it to germinate. Once the pea seed is in the ground, it's a long wait until we transplant our broccoli and cauliflower, usually in the first week of April. Peas are one of those labor of love crops. For all the work one puts in growing and shelling peas, you don't get a lot of peas for the effort. On the other hand, when I woke up with a nasty runny nose today. I quickly brought a jar of canned Portuguese Kale Soup up from our basement pantry for a blast of vitamin C. As I gobbled it down, I was pleased to see a few delicious homegrown peas in the soup. I'll share this link again when we finally get our peas seeded. Another Garden Delicacy: Homegrown Peas tells how we grow our peas from seeding (sometimes in freezing weather) to harvest to storage.
Thursday, February 28, 2019 - February Wrap-up
I also decided to revisit the Yummy Pork Noodle Casserole recipe I wrote about on Sunday using chicken breast meat instead of pork. The result was equally good if not better than using pork. I also added French's Onions to the bread crumb topping to good effect. Since the dish takes some time to make, the planned photography got left out. I also heard from longtime reader Mike Bryce. Mike requested some gloxinia seed. (Yes, I'm still giving away gloxinia seed.) Mike shared a couple of tips with me over the years. He put me onto a seed producer's fact sheet that carried the following helpful information on germinating geranium seed:
We now let our geranium seed get some light while germinating. It does seem to improve germination rates. Mike's second tip was to use a sheet of fabric softener rubbed over glassine or plastic ziplock bags to release small seeds held in place by static electricity. It really works. With dustlike seeds such as gloxinia seeds, getting them all out of the baggie is really difficult without the fabric softener trick. Thanks again, Mike! So that's it for February.
Contact Steve Wood, the at Senior Gardening |


| Affiliated Advertisers |
©2019 Senior-Gardening.com