![]()
One of the Joys of Maturity

Custom Search
One of the Joys of Maturity |
Custom Search
|
| Affiliated Advertisers |
Clicking through one of our banner ads or some of our text links and making a purchase will produce a small commission for us from the sale. A Year in Our Garden - 2014 - Page 3 When I was teaching, our gardening season pretty well came to a close in late August or early September. There simply weren't enough hours in the day to do a good job of starting a new school year and garden at the same time. Since retiring in 2008, I've been able to extend our gardening season through September into October, with one notable year when we picked fresh lettuce a few days before Thanksgiving!
While our harvests become less in September, the flowers along the edges of our raised beds were in full bloom all month long. Our fall lettuce and spinach didn't get transplanted and direct seeded until September 1. Oops!
I have to check and sort out bad onions and potatoes at least once a month. The onions are much more prone to sprout and/or rot early, as some had bad spots not detected when they were bagged. And some just go bad early on. If an onion truly rots, you can count on one or two adjacent onions being damaged as well, so frequent sorting is a must. To sort, I just dump the onions out in a plant flat. I return them to their mesh bags one at a time, feeling for any soft or moist spots. I follow the same procedure with potatoes, although bad potatoes usually look bad as well, making the process a bit easier. While down in the basement sorting, I turned my camera to our new collection of gloxinias. After having lost all of our existing plants to the INSV virus a year or so ago, we had to start over, mostly with seed we'd saved ourselves.
Most of the gloxinias shown here were seeded in February.
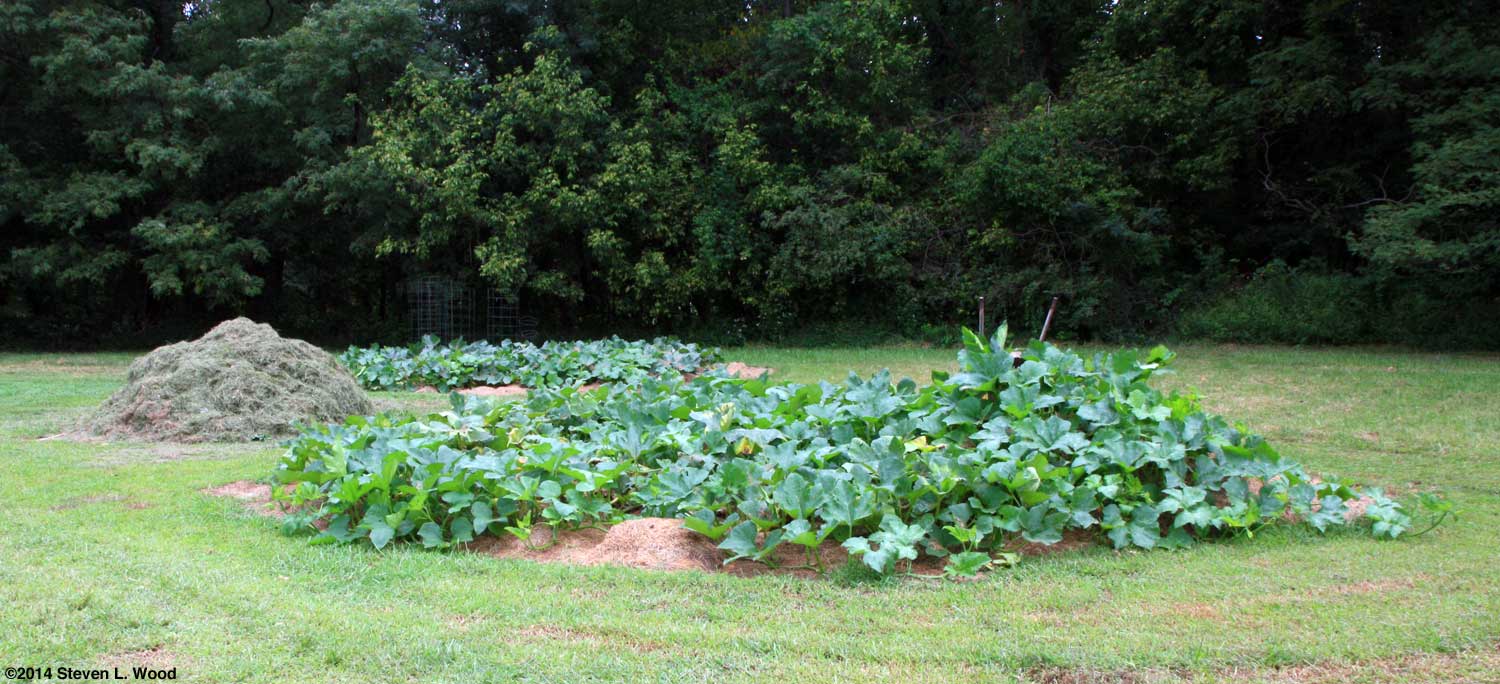
While our East Garden proper was done for the season, just outside of it, our butternut squash were still producing and our pumpkins were trying to ripen a few fruit before Halloween. And obviously, our working compost pile got lots of garden trash. I often build it up to around five feet tall with vines, spent plants, and rotten fruit. Within just a few days, the pile compresses back down several feet before I feed it again. Throughout the month, I picked several kinds of paprika peppers. We saved seed from the Paprika Supreme plants that were isolated from other pepper plants. All the various paprika pepper varieties where dehydrated and made into ground paprika.
On September 14, I turned my attention to getting some bell peppers frozen. Freezing sweet bell peppers is really one of the easier food preservations we do. The peppers need to be thoroughly washed, as spiders hide in their crevices and lay their eggs there and by the stem. Surrounded by large pans and our compost bucket, I cored, halved, and seeded peppers while watching football on TV.
Once seeded, the peppers get washed again and set out to dry in a warm location. When dry, the peppers are cut into strips, placed on cookie sheets, and frozen. It takes about six hours in our freezer for the peppers to become firm enough to go into zip lock bags for long term storage in our big freezer. The two gallons of frozen pepper strips put up today are about twice what we'll use over the winter. One of our daughters loves to cook with peppers, so we'll send some home with her the next time she visits. Even in September, I continue to add grass clipping mulch around our existing crops. The clippings break down and have to be replenished about every four to six weeks to prevent weed breakthroughs.
Our row of kale started on July 18 was ready for its first picking on September 16. That led to our first batch of Portuguese Kale Soup getting canned late that evening. Since we were able to harvest a few kidney beans this year, all of the garden ingredients for the delicious soup came from our garden.
On September 20, I brought in two good pumpkins and a bunch of paprika peppers and hybrid tomatoes. The hill of pumpkins tried to mature a bunch more before our first frost, but they didn't make it.
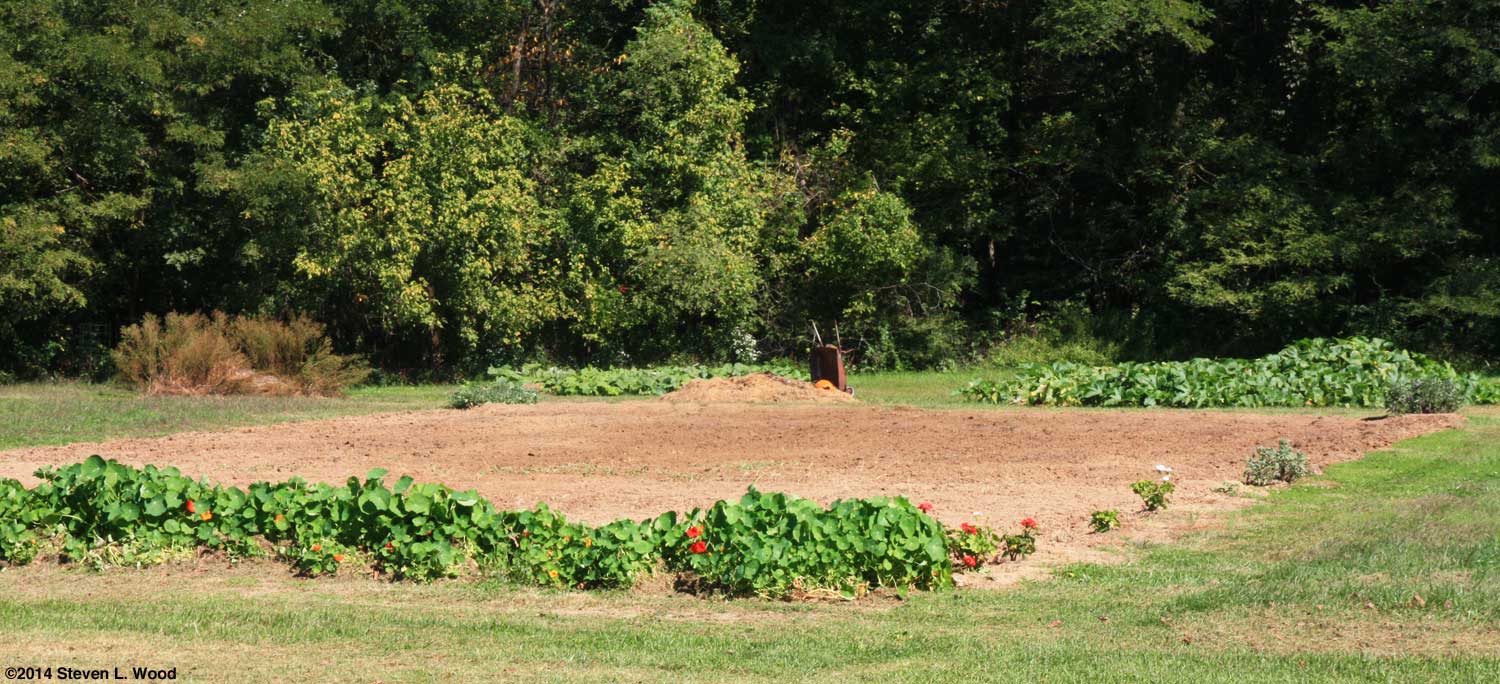
After struggling with some mechanical problems in mounting our dandy, pull-type rototiller on our lawn tractor, I got our East Garden tilled on September 25. There were still portions of the plot untilled, though. I didn't turn over any of our alfalfa cover crop on the rotated out section. I may hate myself for that one next spring when I have to turn down some heavy turf that has grown around the alfalfa. I also didn't have the heart to take out our geranium row markers or our long row of nasturtiums.
With the constant possibility of a killing frost, I always consider anything we get out of our garden plots during October a bonus. As it turned out, we had a very light frost October 23, but didn't have a heavy frost until November 1!
A number of web sites have instructions for drying parsley with a dehydrator, in the oven or microwave, and even air drying. Since we have a nice dehydrator, that's been the way we've done it in the past. While we've had parsley dry down in the dehydrator in just 8-10 hours in the past, the leaves I started this time took the full 24 hours recommended by our dehydrator manual to get the leaves crispy so they'd easily crunch and shatter before going into our parsley jar. When the first batch of parsley leaves dried, I made another picking the next day, but ended up picking too many. The extra parsley leaves that wouldn't fit in the dehydrator got dried on a cookie sheet in the oven at 175° F for a couple of hours. I'd dried other herbs this way in the past, but never parsley. It worked out pretty well. Interestingly, the second load of parsley in the dehydrator was dry after just 8 hours of drying! I'm really not sure what makes the difference in some loads drying significantly faster than others. Possibly the first load was still damp from being rinsed. One can make the job of drying parsley a bit easier on warm, sunny days by simply getting out early and hosing off parsley plants in the garden and letting them dry in the morning sun before picking/cutting. That can eliminate rinsing the leaves after picking. I've also read that parsley (and other herbs such as basil) should be picked in the morning before the sun gets really hot. It has something to do with essential oils in the leaves being most potent and flavorful then. Butternuts and More
Butternuts are great when split and baked with butter and brown sugar, but also make an incredible mock yam dish for our Thanksgiving table. We skin the butternuts, remove the seeds, and cut the flesh into large chunks. We bake them with butter, brown sugar, marshmallows, and a bit of nutmeg.
While not a lot of produce, I was pleased with what I got, considering that we're now well into October.
Our row of kale that was heavily picked in September responded nicely to some fertilizer, compost, and nearly ideal growing conditions (cool, sunny, plenty of moisture). In a little less than a month, it had doubled the volume it had before its first picking. I'm not sure whether I better like looking at the deep green kale accented by a few flowers around it or eating it. The kale provided one more batch of Portuguese Kale Soup at the end of the month. Our cornucopia of harvest continued throughout the month of October.
Our cauliflower plants put on some of the largest leaves I've ever seen on that vegetable. With the weather we had, it was almost impossible to grow a bad fall crop of cauliflower this year. The heads were large, and due to some fairly cool weather earlier (and a good bit of BT), relatively free of worms. Cooler weather slowed the ripening of tomatoes and peppers. I cut and dried parsley again on October 18. We use a lot of dried parsley as most everyone else does in spaghetti sauce and such. But we also use it in special dishes such as our rich, delicious (and probably totally unhealthy) Asiago Cheese & Tortellini Soup. I almost filled a four gallon bucket with cut parsley this time. When I was done cutting, there wasn't much left of the once lush parsley plants. I obviously had to use both the dehydrator and the oven to dry the large batch of parsley. Later in the day, a granddaughter who was intrigued by the drying process, enjoyed putting the freshly dried parsley along with some basil and oregano in spaghetti sauce for dinner. I wished I'd held out a few fresh leaves for the sauce, though. Kale Chips
Shifting Gears With the possibility of frost growing every day, I finally shifted from harvest mode into getting the garden ready for next year mode. I cleared our grape tomato plants on October 21 and continued down the main raised garden bed in the days following. While late harvests are really gratifying, getting the garden ready for the next season became more of a priority. After getting our remaining broccoli and cauliflower plants out of the main bed, our next task was harvesting fall carrots. Carrot Day
As always, the digging was really easier than the cleaning process. I lift our carrots in the ground with a garden fork and then gently lift them out in bunches by their tops. A bit of tapping on the ground drops some soil clumps from the carrots. They then go into a first rinse in a bucket of water before going into our garden cart.
The tops of the carrots get trimmed off outside the house, as that job makes quite a mess of feathery carrot foliage. The carrots are rinsed and brushed again in the kitchen sink before being laid out to dry on kitchen towels. Once dry, they go into Debbie Meyer Green Bags Our carrots were the last critical crop still growing in our main raised bed. Renovating Our Main Raised Bed
I really prefer to till in any major soil amendments in the fall, giving them all winter to settle and also do their work. I didn't get that job done last fall and ended up trucking in compost to raise the bed's soil level a bit this spring. All the flowers that I'd left around the border of the bed had to go first. It seems a shame to pull flowers that are still in bloom, but we had a hard freeze in the weather forecast. Since I added compost to the bed in the spring and the soil structure seemed a bit dense all this summer, I chose to add peat moss to the bed to raise the soil level and loosen the soil a bit. I had six 3.8 cubic foot bales of sphagnum peat moss available, although I planned on using only four of them in the main bed, with the other two reserved for our narrow raised beds. In the end, I ended up using all six bales, as it seemed the soil level had sunk a bit more than I thought over the summer. I sprinkled lime over the bed to help neutralize the acid peat moss. Lime is best applied in the fall, giving it all winter to help raise the soil's pH. I also added a bit of 12-12-12 fertilizer, although the nitrogen in it will mostly leach out of the soil over the winter. In the area where I planned to plant garlic, I added some 0-0-60 fertilizer With the added peat moss, rototilling the plot fluffed the improved soil so that its level was nearly up to the landscape timbers that enclose the bed. The soil will settle a bit over the winter. I took the time to rake the bed smooth before quitting, as I simply like to have it that way. Planting Garlic
I had reserved a 36" wide section in the bed for the garlic. When I checked our purchased and saved garlic, I found that I would need to plant six rows of garlic, making the rows just 7" apart. That's about as close as one wants to get garlic plants, especially since I spaced the garlic seven to eight inches apart in the rows. I started planting from the center rows out so that I wouldn't be compacting already planted rows with my knees while I planted. Each garlic clove went into a hole that was 5-7" deep, depending on the size of the clove. I try to keep my garlic covered with at least two if not three or four inches of soil to prevent freeze damage. I worked a little bone meal into the bottom of each hole with the trowel or my fingers before pushing a garlic clove into it. It's important to get the root side down and the pointy side up of the garlic clove. Then I just pulled dirt into the hole and firmed it a bit.
After planting, I covered the garlic patch with several inches of mixed grass clipping and leaf mulch. While the mulch needs to be pulled back in early spring, it helps the garlic withstand cold winters. I forgot to pull back the mulch one year and greatly reduced our harvest because of weak plants whose leaves couldn't penetrate the matted mulch.
The lettuce picking included a very heavy head of Crispino lettuce and a couple of Skyphos butterhead lettuce. The Crispino seemed especially crisp and tasty, possibly because it came from a plant grown from the seed we saved earlier in the season.
About that Spinach
I had to split the sauce halfway through the preparation, as my wife, Annie, doesn't like shrimp. I substituted small scallops for the shrimp in her half. The shrimp portofino was delicious, although I'll use a lot more spinach the next time I make it. Annie liked her scallops portifino, too, although I found it disappointing in comparison to the incredible shrimp version. |
|
We had our first real frost/freeze overnight on October 31-November 1, getting down to 31° F. With colder temperatures on the way, I did another heavy picking of kale and set to work making one last batch of Portuguese Kale Soup for the year. I picked two, five-gallon buckets of slightly packed kale for the soup, as the kale after being stemmed really cooks down. It nearly filled our twelve quart kettle when I made the soup. After our family had chowed down on the kale, I canned seven quarts of it (the canner's capacity) and had another quart for the refrigerator. While not usually a problem, I had trouble keeping the canner at ten pounds of pressure for the required ninety minutes of canning time. The canner slipped down to as low as eight pounds and once got as high as thirteen pounds. I'm hoping the bacteria that need to be killed in the canning process can deal with an average pressure of ten pounds per square inch, which produces a canning temperature of 240° F.
24° F = End of Growing Season The next morning the sun was bright. Our overnight low was predicted to get down to 28° F. That wasn't accurate, as two nearby reporting stations showed lows of 24° F! Even our usually frost hardy kale looked pretty sad after a heavy picking followed by a hard freeze. Interestingly, our bed of lettuce and spinach appeared not to have too much frost/freeze damage. Fortunately, most of our garden plots had been put to bed for the winter already.
I published several annual blog features during November. Since each is rather lengthy, I'll just supply titles and links here:
I also put up a couple of shopping guides for gardeners and/or those hunting gifts for gardeners:
Our stored potatoes were all in good shape, but I found a half dozen sprouted and/or rotting onions. The culls went into a compost bucket that gets dumped on the compost pile...usually when it begins to smell really bad.
After a long drive home, we enjoyed a fabulous Thanksgiving dinner, hosted by another daughter, Jen. We brought green bean casserole, sweet corn and butternut squash yams from the garden for the feast. Jen also opened one of the jars of canned green beans we'd previously given her for the meal. Since most of the cooking in our house falls to me, as I'm now retired and my wife still works full-time, I really enjoyed not having to host and prepare a Thanksgiving dinner.
After picking a small bowl of nice spinach leaves, I cleared one of our narrow raised beds of the remaining, frost damaged spinach. Then I raked out both of our narrow raised beds before mulching them with a grass clipping/leaf mixture. The mulch will help keep the beds weed free and ready for planting next spring. I also cleared another raised bed of asparagus stalks, cutting the tough stalks off at the ground with a pair of lopping shears. The asparagus stalks went into a hole I'm slowly filling instead of our compost pile. The fibrous asparagus stalks break down too slowly to include in a regular compost pile. I've read that the reason for clearing away old asparagus stalks is to prevent insect and disease carryover. I suspect that's true, but I can't imagine trying to pick asparagus next April with all of the previous year's trash in the way. We have one other asparagus patch yet to clean up, but that will be about the last of our outdoor gardening chores for the year. Even inveterate gardeners like myself need a little downtime. The month of December, when garden chores are at a minimum, provides just such a rest.
The rather unassuming looking 2015 Fedco Seed catalog contains lots of what you might expect, good seed at good prices. But it also contains a lot more important information than other seed vendors are currently willing to supply. There's a very frank discussion about whether Fedco should be selling seed produced by Bayer and Syngenta, both makers of neonicotinoids, insecticides linked to honeybee colony collapse disorder (CCD). It also includes a note that no seed from Monsanto/Seminis is included in the catalog. Beyond that, Fedco tells in general terms where their seed comes from (i.e., from "Small seed farmers including Fedco staff" to "Multinationals who are engaged in genetic engineering"). I really like their "Your Last Chance in 2015" and "Dropped Varieties for 2015" on page 111 that includes some truly humorous explanations as to why stuff has or will disappear from their catalog. Along with "New Seed Varieties for 2015" on page 3, they also have a list of "Back in 2015."
When I got to the final sections of the catalog, I hit upon a real find. Fedco Seeds' Organic Growers Supply division is offering 83" x 50' packages of Agribon-AG-19 floating row covers in the 83" x 50' size for just $13 plus shipping. For comparison, Johnny's Selected Seeds, a usually good, but expensive vendor, is currently charging $25.95 for exactly the same product! Johnny's prices on larger rolls are competitive, but their price on smaller rolls is way out of line. I've ordered floating row covers in this size from Johnny's in the past, usually on sale, but feel a bit put off by an employee owned company that is constantly raising prices well beyond consumer price indexes, and especially what we retired folks receive in Social Security COLAs. There are many more nuggets of golden gardening info in the Fedco catalog. It's one that really deserves paging through from front to back. You can order a Fedco catalog here, or download their catalog (in pieces for the various divisions) here. We had some incredible crops in our 2014 garden plots...and a few spectacular failures as well. That's pretty much normal, as growing conditions change from year to year. It doesn't account for gardener screw-ups, which sadly, I committed a few of this season. I'm blessed that the Lord has granted me some years in retirement to enjoy gardening, the photography that goes hand-in-hand with publishing this site, and the many wonderful emails from readers. Our gardening plans for next season are all proceeded by a big "if," as I'm scheduled to have total hip replacement surgery this winter. We've timed it so that I should be done with rehab in time to have our senior garden once again in 2015, hopefully with a good deal less pain involved. While a touch threatening, such surgery didn't exist for our grandparents and earlier generations. I'm thankful such options now exist to extend ones active lifestyle well into retirement. Have a great holiday season and best wishes for a successful gardening season in 2015.
|
||||||||||||||||
From Steve Wood, the at Senior Gardening |
| Affiliated Advertisers |
last updated 12/30/2014
©2014 Senior-gardening.com


 Unlike any other seed vendor I know of, Fedco is open about their practice of selling old seed that still meets government germination standards. Going a step further, Fedco identifies old seed in catalog listings with their most recent germination rates!