One of the Joys of Maturity |
|
| Affiliated Advertisers |
Clicking through one of our banner ads or some of our text links and making a purchase will produce a small commission for us from the sale. The Old Guy's Garden Record
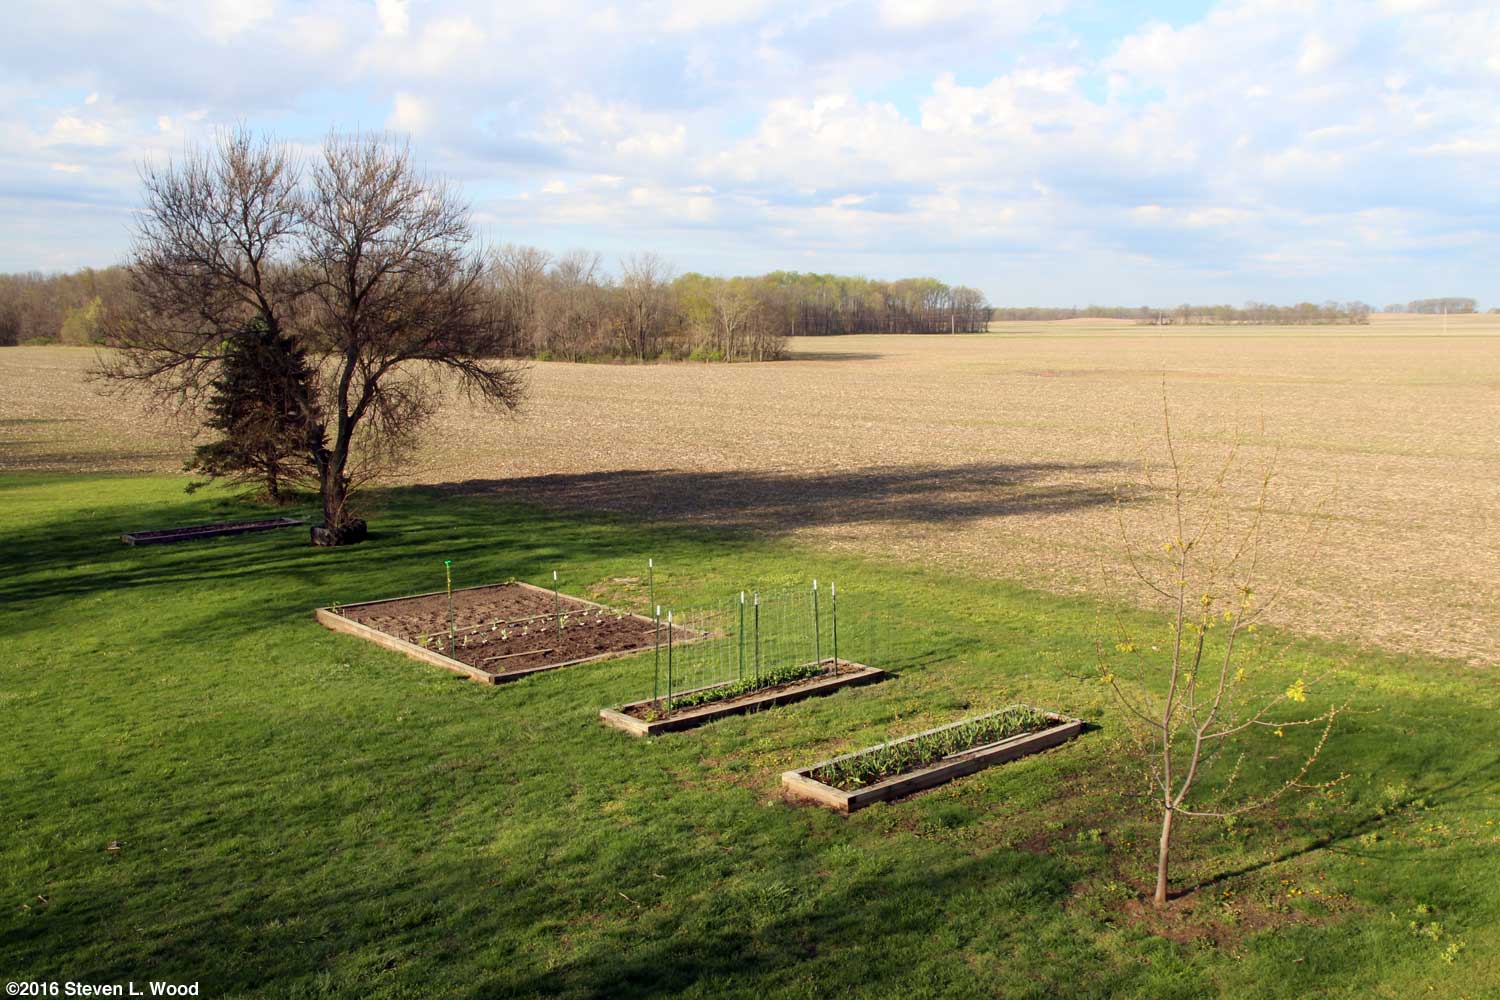
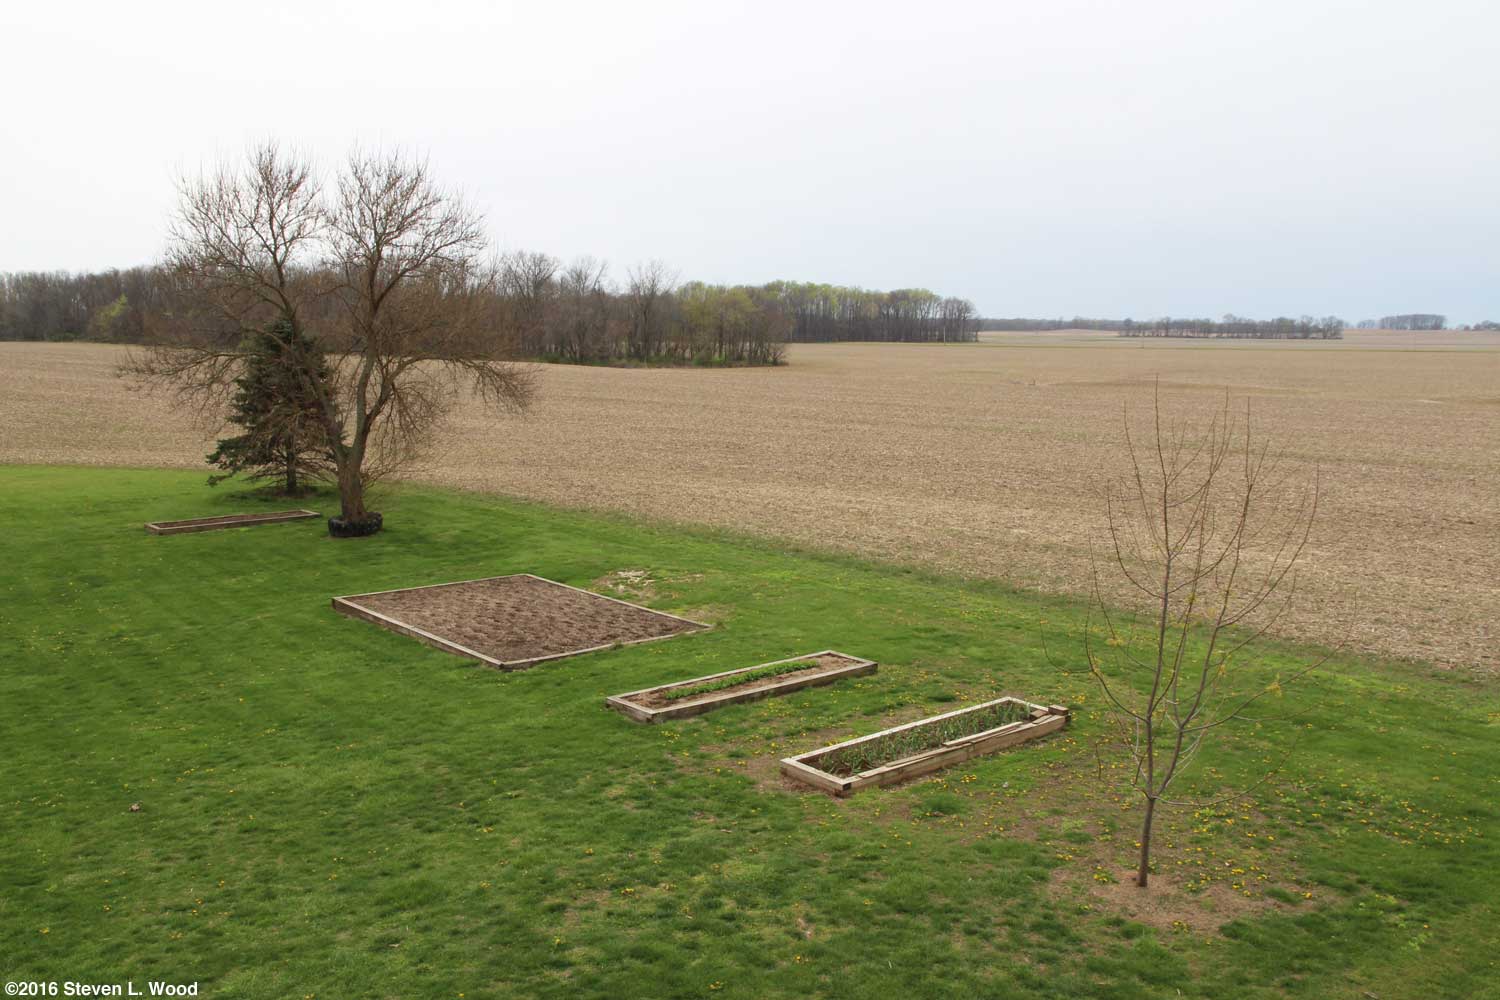
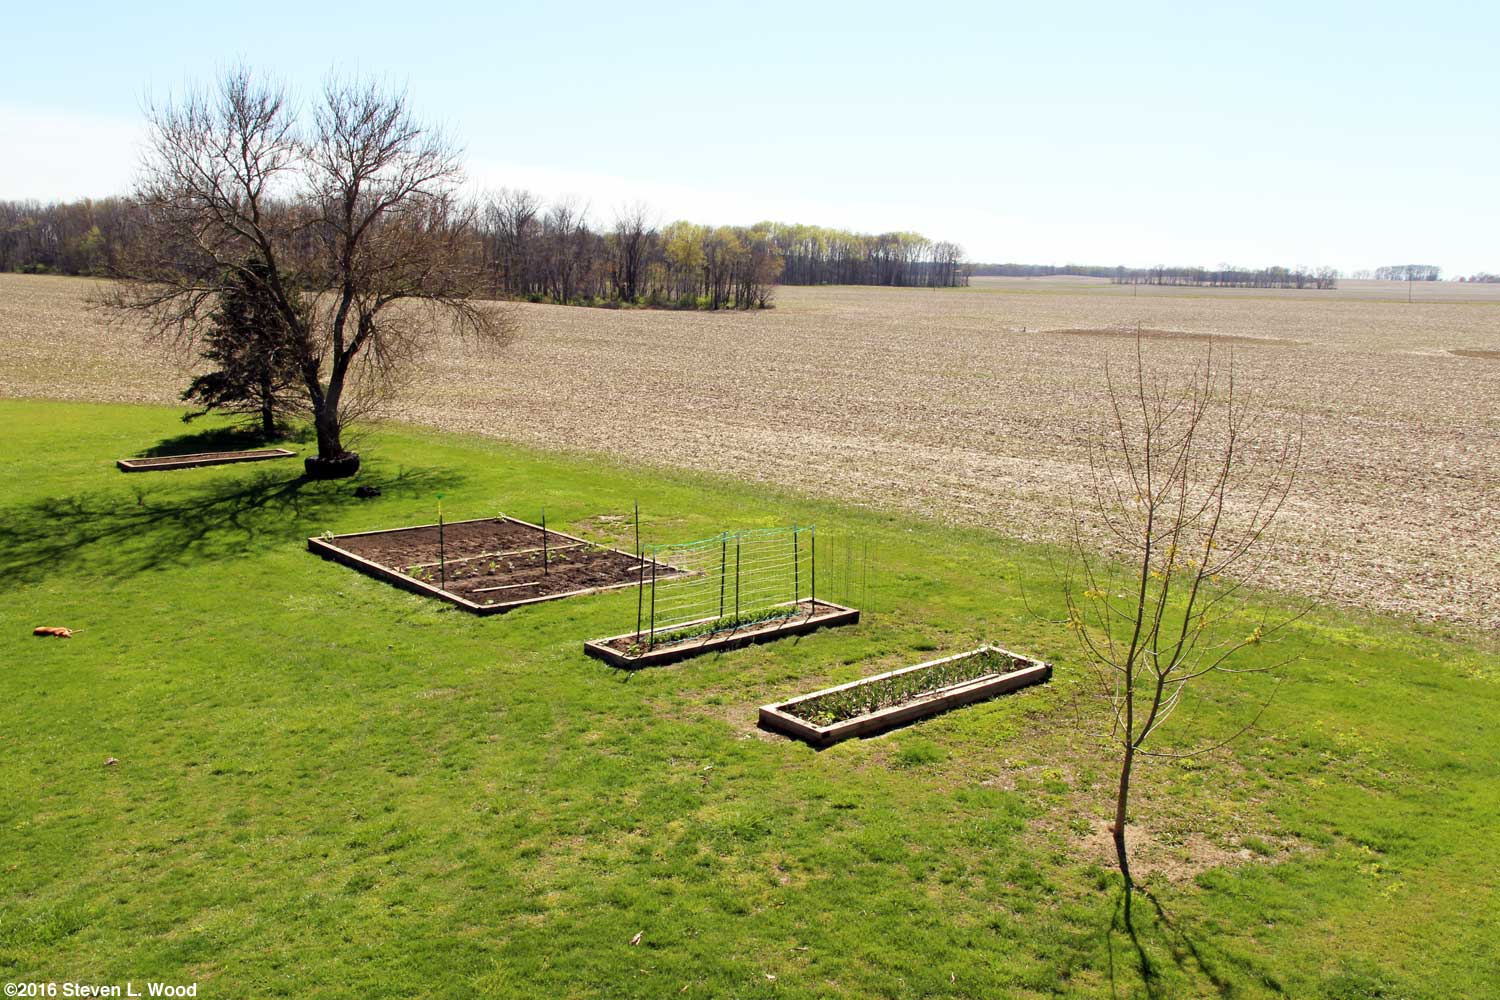
Our first crops in will be hardy broccoli and cauliflower transplants, followed by onion transplants and direct seeded carrots and spinach. Once the danger of a hard freeze is past, lettuce, tomatoes, and peppers will be transplanted. We'll also direct seed green and kidney beans and late peas, although they'll have to wait until the end of the month, as they all prefer warm soil to germinate well. While we've already feasted on some early sprouting asparagus, our main harvest of it will come this month, continuing into mid-May. We pick asparagus for about six to eight weeks each spring before backing off to let the patches grow out, replenishing the roots' strength for the next harvest. A liberal application of compost seems to be the best fertilizer I can give our asparagus patches. With just my wife, Annie, and I home now, we'll be planting a bit less than we have in past years. Although I used up the last of our fall carrots last week, we'll shorten our double carrot rows to just eight or ten feet from their previous fifteen feet. We would have had plenty of carrots until spring had I not accidentally late fertilized our spring carrots last year, pretty well ruining that crop. While planting and mulching our main raised garden bed will be a priority this month, we'll also be watching for a dry period in which we can begin tilling our large East Garden plot. It sat fallow last season while I recovered from a hip replacement, so it will take several passes with our tiller before it is planting ready. Inside, we'll continue caring for our tomato, pepper, and other transplants, eventually moving them to our cold frame to harden off before transplanting. We'll also be starting our squash and melon transplants, as we really don't want them to be much over four weeks old at transplanting. Any more time on them makes the vining plants a bit unwieldy to get into the ground without breaking stems. Even with the apparent early spring we've been experiencing, the weather forecast for the next week still includes three nights with temperatures at or below freezing. So while I'm eager to start planting, I'm going to have to wait just a bit more to begin.
|
|
Saturday, April 2, 2016 - A Freeze Coming
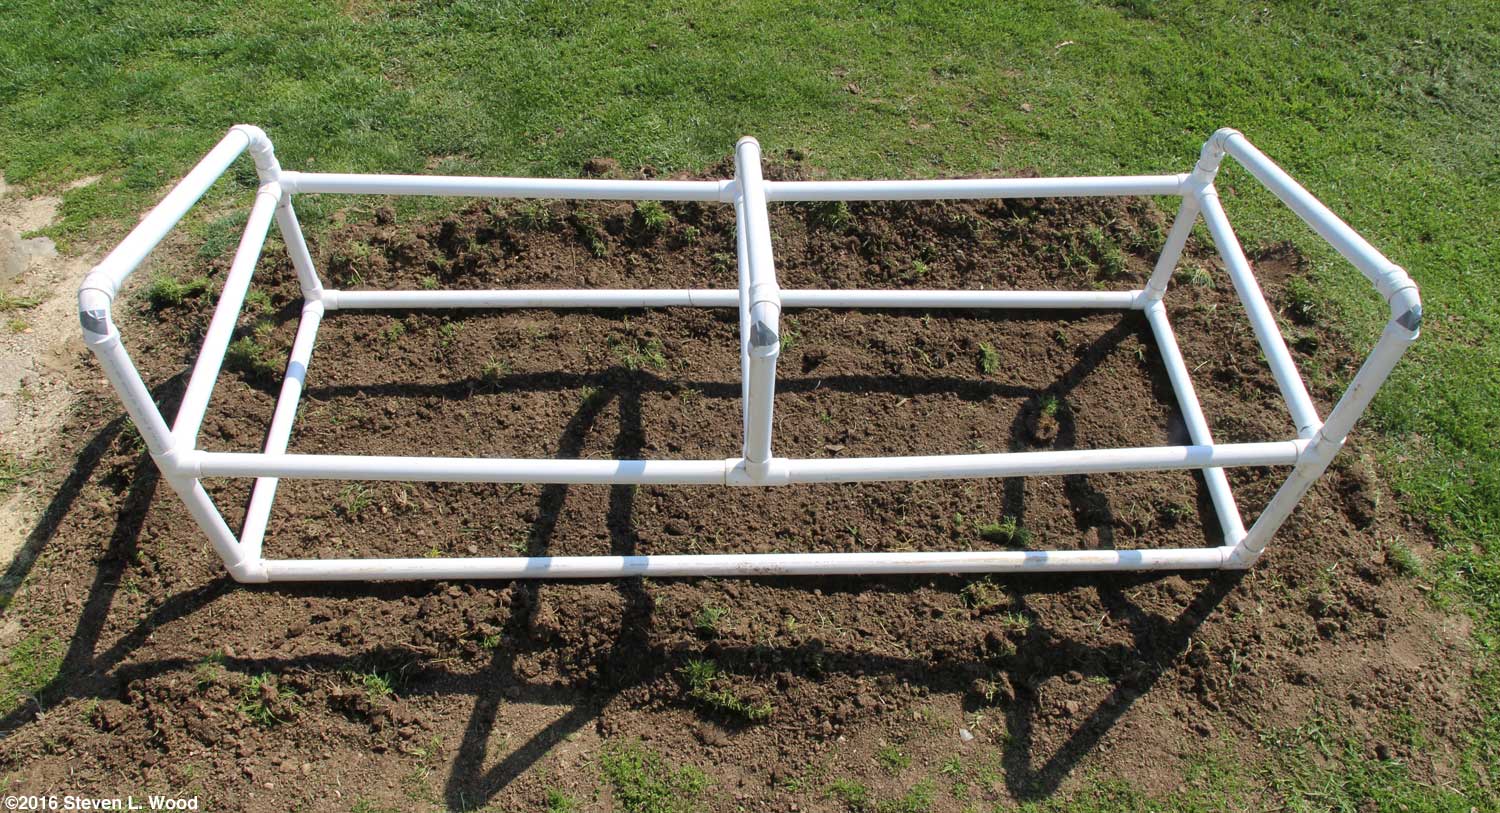
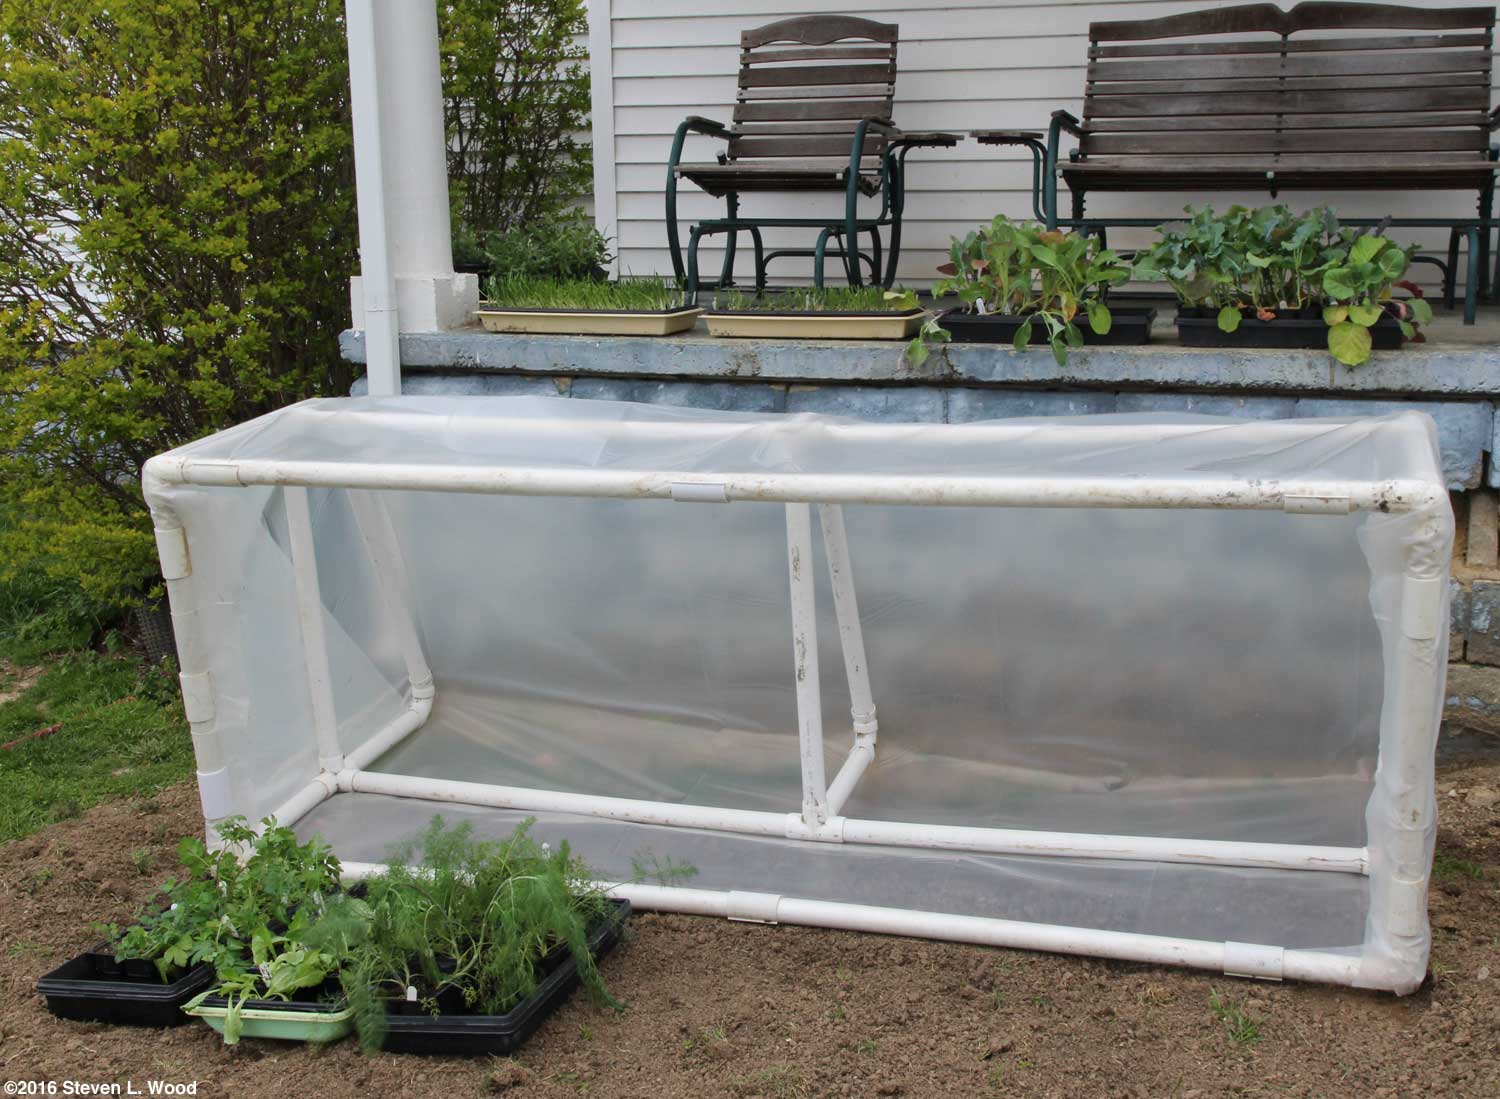
Sadly, the damage to the cold frame cover was preventable. Without thinking, I propped the cold frame open about a foot this morning so it wouldn't overheat in the sun. I knew it was windy, but for some reason, that didn't register. Had I just propped the frame open a few inches, which could have kept temperatures under the frame fairly reasonable, the wind probably wouldn't have been able to get under the frame and lift it up, up, and away! Fortunately, I have plenty of plastic, and covering the frame isn't all that hard...once the wind dies down. The cool temperatures we're going to have over the next few days will delay any transplanting I might have otherwise done. While broccoli, cauliflower, and onions can tolerate frost and even a light freeze, there's no real gain by getting them in the ground four or five days earlier and having them have to recover from some cold nights. While I'm a little disappointed we couldn't begin putting plants in the ground yesterday and today, our frost date for this area is April 14. So, we're actually in pretty good shape with our main raised bed tilled and lots of transplants ready to go into it. And since my wife and my experience with the flu last week turned into a sinus infection for her and bronchitis for me, neither of us really feels up to mucking around outside all that much right now.
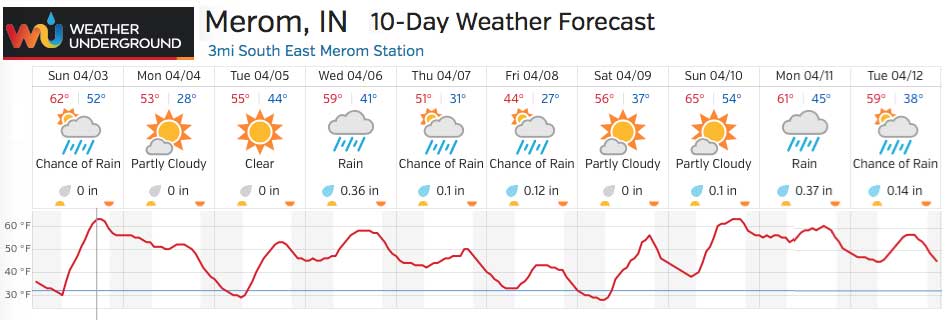
I've resolved to add a little ballast when I build our second PVC cold frame. I'll probably put a little concrete in the bottom pipes to make the new frame a bit heavier. Redoing the cold frame is a lot of trouble to go to this late in the spring, but our long range weather forecast still has me concerned. We have several nights coming up that may be cold enough to produce a frost or even a hard freeze (28° F or below).
So...we're still on hold for putting much of anything into the ground for another week.
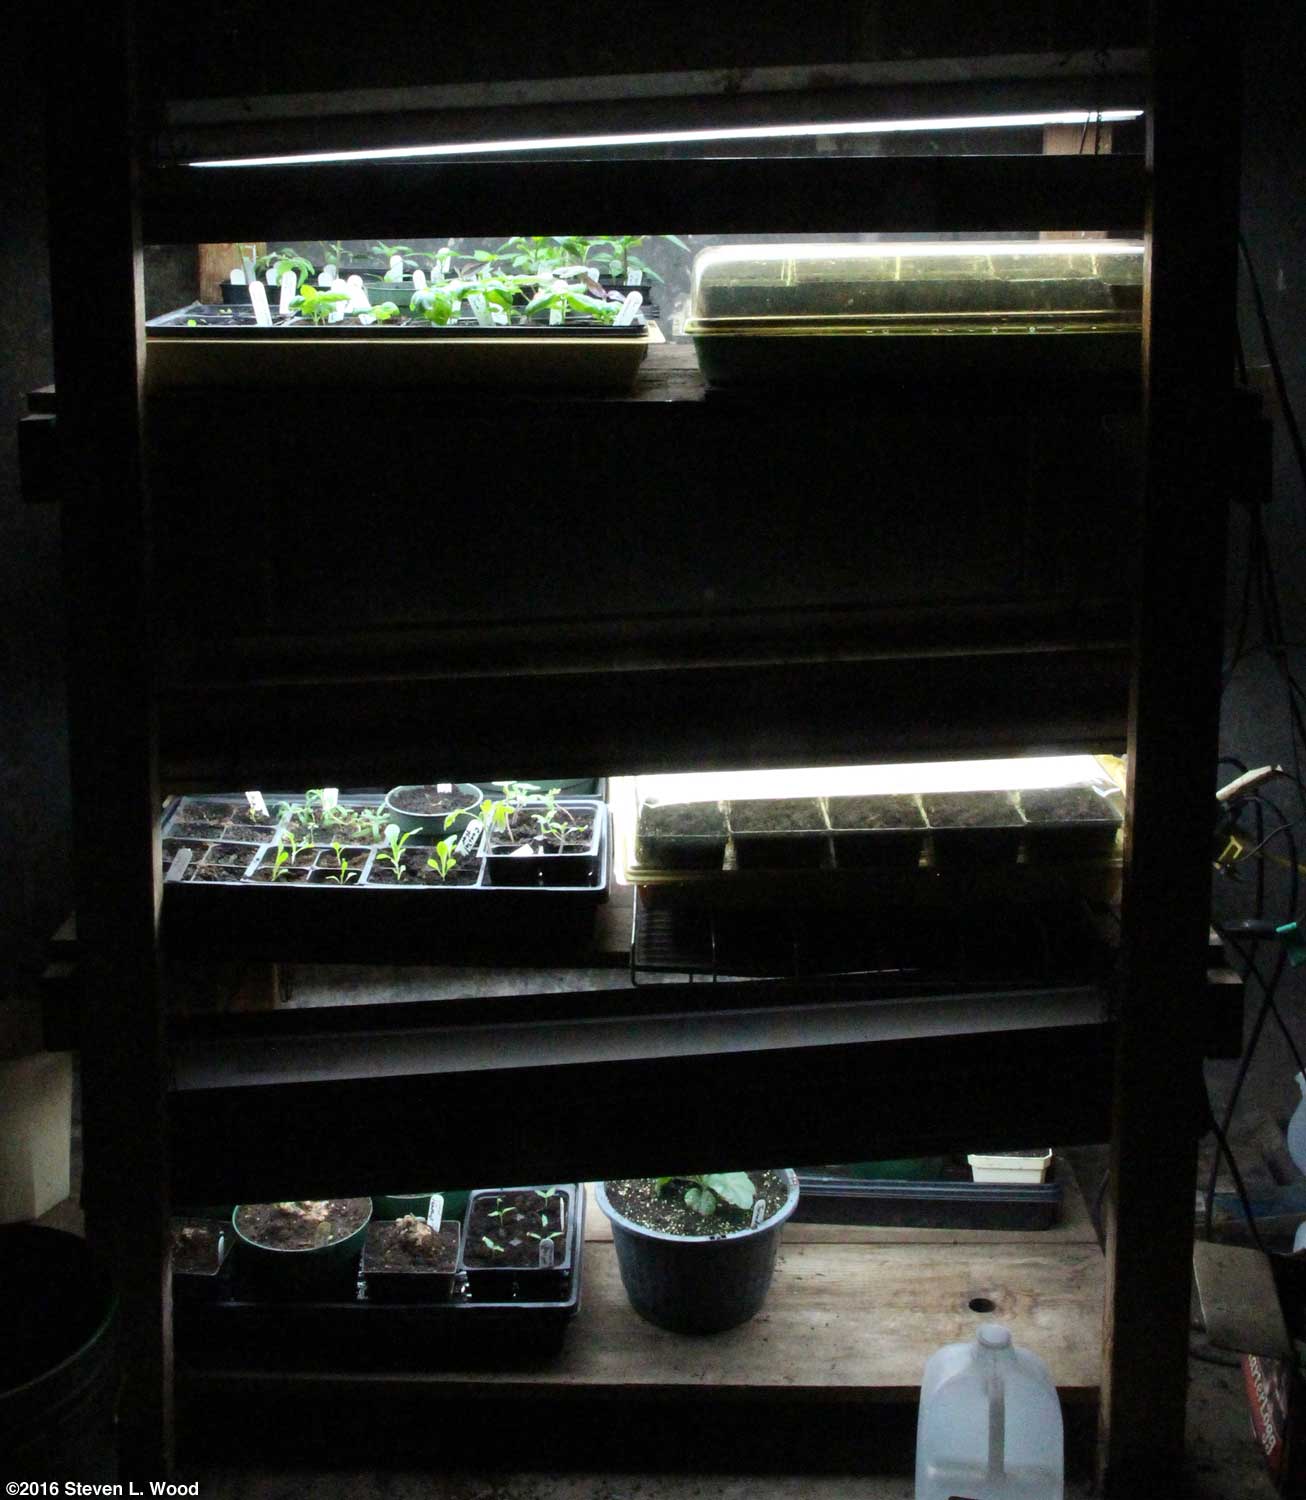
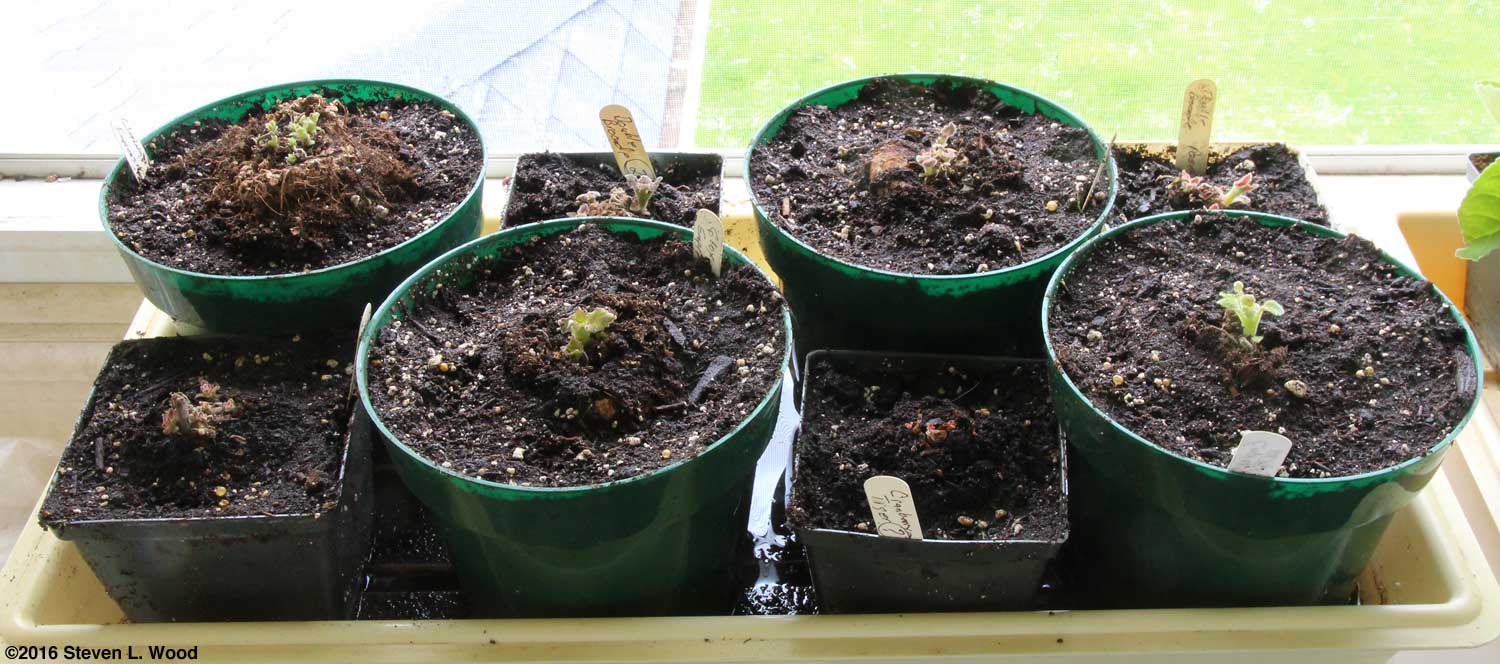
Frustrated at not being able to work outside today, I turned to thinning some of our transplants under plant lights, resetting some tomato plants that had gotten spindly, and moving some other plants from communal pots to individual pots. I also mixed a bunch of potting mix in our garden cart and sterilized one 18 quart kettle load of it. I hope to start melon transplants soon. Oh, no! When I finished writing today's posting, I decided to take a flat of geraniums from the sunroom to put under the cold frame. When I got downstairs, the cold frame was nowhere to be seen! I found it, once again, lying in the driveway with many punctures in the plastic where it hits the PVC pipe frame. I guess propping the frame open just an inch in today's winds was just too much and allowed the wind to get under it. I'll have to re-cover the frame yet again. And now, I'm totally convinced that the next PVC cold frame will have some ballast added to its bottom pipes. If I can, I'll also need to modify the existing cold frame, adding a bit of weight somehow to its base. Thursday, April 7, 2016 - Starting Melons
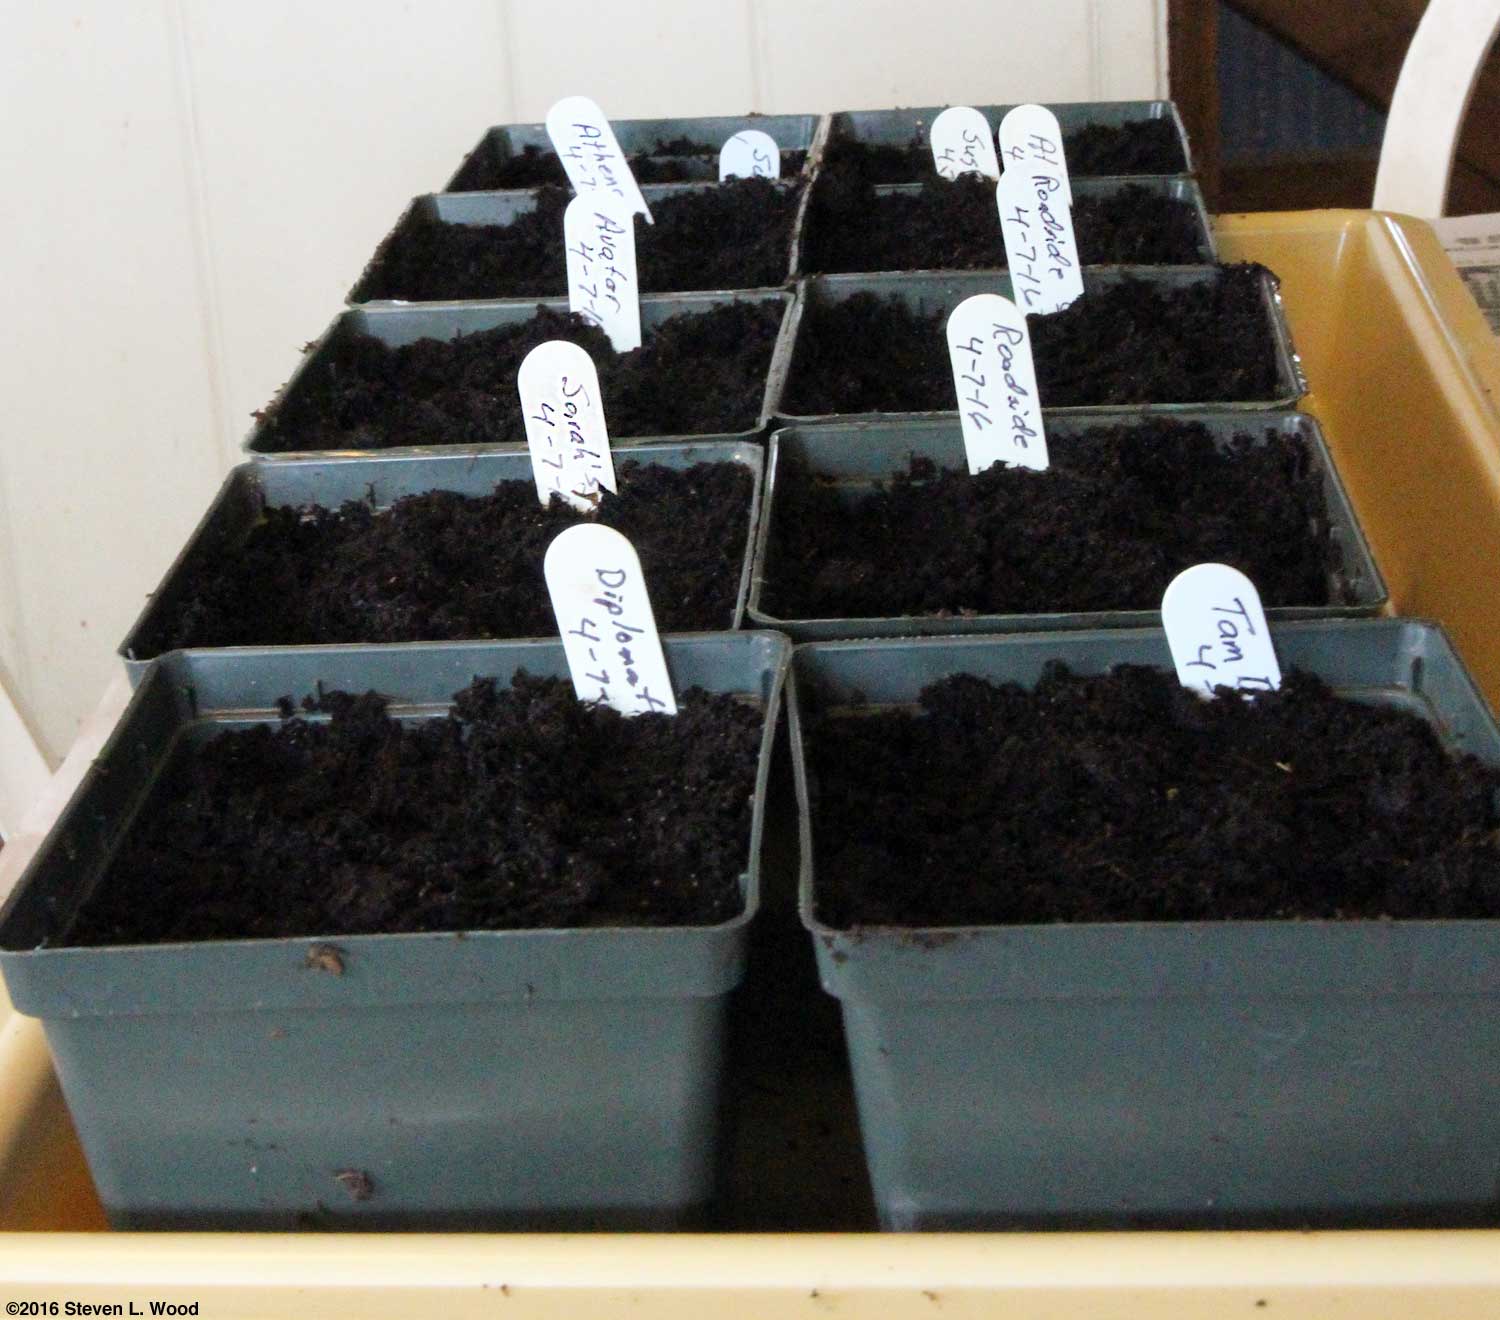
I seeded the melon seed to four and four and a half inch pots. I placed three to five seeds in each pot, depending on how old the seed was. I'm hoping for two to three good starts in each pot which will make a nice hill when transplanted. The seed was planted just deeply enough to have a layer of soil over it. I used a sterile potting mix made up of some very heavy organic potting soil mixed half and half with sphagnum peat moss. My once favorite, local garden center quit carrying my preferred potting mix, so I picked up some Miracle-Gro Organic Potting Mix for our seed starting. The stuff is really like partially digested compost, but works okay when cut with peat moss and lime. I started one pot each of Ali Baba, a reliable open pollinated variety that has never failed us, Crimson Sweet
I started two pots each of Trillion, another seedless Crimson Sweet type that I had just enough seed remaining for two pots, and Moon & Stars The pots of watermelon seed went over our thermostatically controlled soil heating mat at 80° F. That temperature was a bit of a compromise, as seedless (triploid) varieties such as Farmers Wonderful and Trillion actually germinate better at temperatures up to 90° F. My soil heating mats won't quite do that temperature, and our other varieties don't need that much heat to come up. While we're trying a couple of new-to-us varieties, I expect our best results will come from our old favorites, Ali Baba, Crimson Sweet, and Moon & Stars. Anything we get from the seedless varieties we just count as a bonus. They're certainly easier to eat, but often aren't quite as flavorful as the old, seeded, open pollinated varieties. Having a bit of sterile potting mix left after the watermelon planting, I started a single pot of Waltham Butternut Squash in an eight inch bulb pan. Our butternuts get planted outside our East Garden, as they tend to overgrow anything in close proximity. Planting them on the sites of previous compost piles has worked extremely well for us in the past, and I have an old compost site ready for the squash this spring. The pot of butternuts just went in a regular tray under our plant lights to germinate.
While all of our watermelons, other than the triploids, are open pollinated varieties, all of our cantaloupes are hybrids, with one experiment with seed saved from a hybrid. I started two pots each of Athena and Sugar Cube, a couple of our favorites. Athena melons produce large, early, sweet melons. Sugar Cubes produce incredibly flavorful icebox sized melons. The variety also seems to resist heat and disease better than any other cantaloupe we grow. I also started two pots of Roadside Hybrids, sort of. One pot of the heavily ribbed melons was from commercial seed. On a bit of a lark, I saved seed from the variety in 2014, and used that seed to start a second pot of the variety. Saving seed from hybrids is almost always a no-no, but part of the fun of gardening is messing around with stuff, sometimes just to see what happens. I started just one pot of Avatar, a melon slightly larger than Athenas, but with similar flavor, and another of Sarah's Choice, a good producer of medium sized cantaloupe with their own unique flavor. For honeydews, I started one pot each of Tam Dew and Diplomat. Tam Dews have become a favorite with us for their slightly spicy, sweet flavor. The melon rind turns whitish when ripe. Diplomat is a descendent of the venerable Passport hybrid variety we used to grow. With our Passport seed getting pretty old, I decided to try something new this year. The varieties listed that we've grown before are all obviously favorites, but also have their issues. Athena and Avatar melons sometimes don't go to half- and full-slip as they should when ripe. The open pollinated watermelons can all be rather seedy, especially after eating seedless melons. We had a nasty bout with bacterial rind necrosis in 2012 that started in our Roadside Hybrids and spread to some of our watermelons. (Crop rotation and good ground cleanup seems to have solved that problem.) As mentioned above, the triploid (seedless) varieties take a good bit of bottom heat to germinate well. The seed for triploids is also quite expensive. And in 2014, our watermelons didn't reach full flavor until very late in the season, due to cool growing conditions! Despite the occasional problems, we're fortunate to have lots of varieties that grow well for us under our growing conditions. Your results with these varieties may vary greatly from ours. Some of our how-to feature stories may prove helpful if you're just getting started growing melons.
I've figured that we'll need 24 or 25 transplants for our melon section of the East Garden, so I'm not done starting transplants. I haven't seeded any yellow squash as yet and will also need a few more melon transplants, as not every pot will take. But getting twenty of the necessary twenty-five started last night and this morning gets us well on our way.
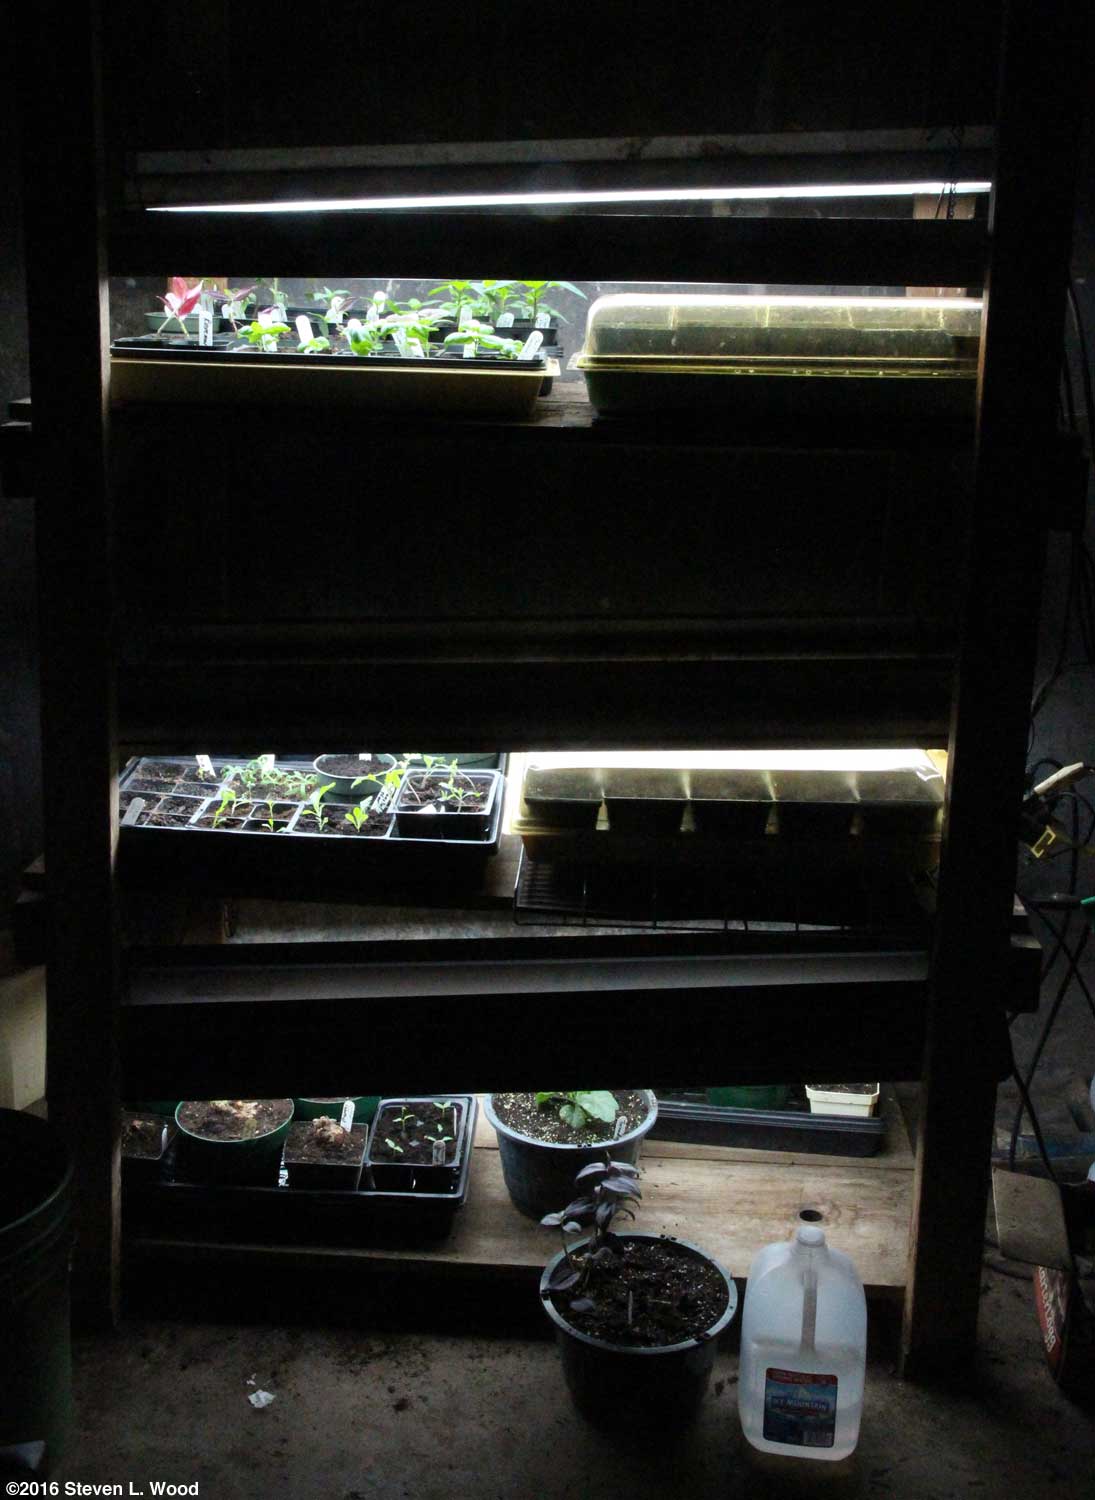
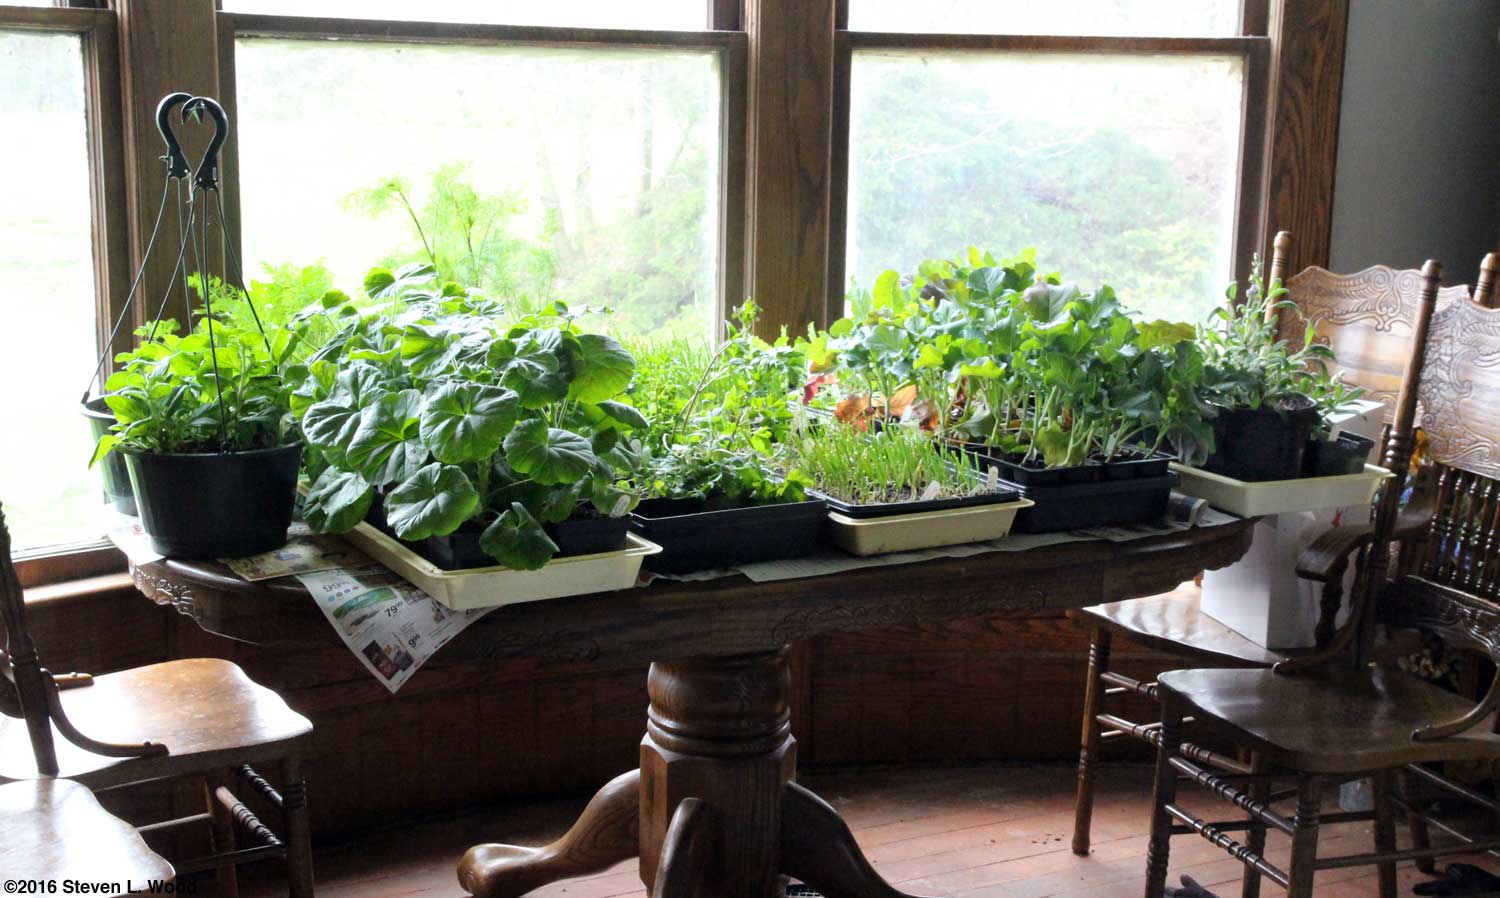
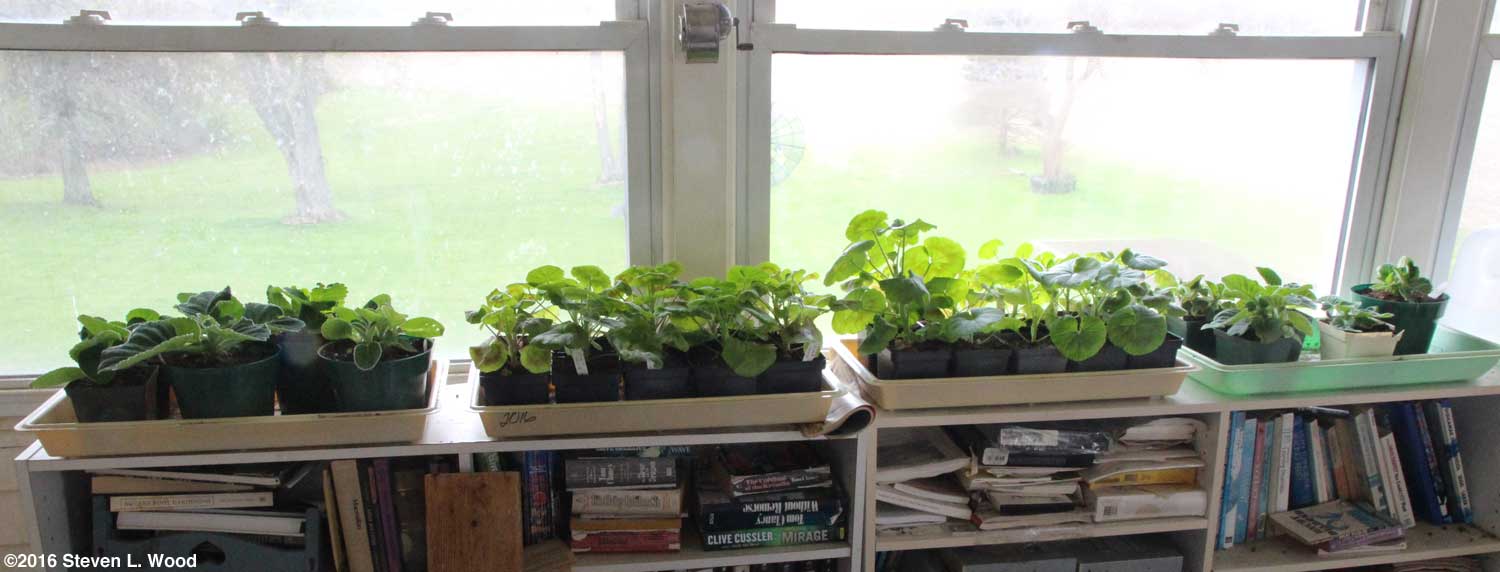
A reader who lives in Ontario emailed me a photo of his Earliest Red Sweet pepper starts this week. He also noted that they still had five inches of snow on the ground there! That makes a late freeze here not sound quite so bad. Our weather forecast has bounced around a good bit of late, but the one constant is that we're going to have some more freezing weather in the next few days. I've once again brought all of our transplants back inside to protect them from temperatures predicted to get into the mid-20s. I'd toyed with the idea of leaving some of the transplants out under our cold frame, but that doesn't look like a safe option. Besides cold nights, our days have been cold and cloudy. Cold frames are effective at collecting heat during the day and holding it in during the nighttime hours. Without much heat through the day, the second cold night (after a cold day) might just do in some of our transplants. Inside our house, there are plants on most of the flat surfaces in our dining room and elsewhere. Brushing past the plants often releases the pleasant aroma of geraniums or various herbs. It's a bit clumsy, but I'm glad we have the space for the plants.
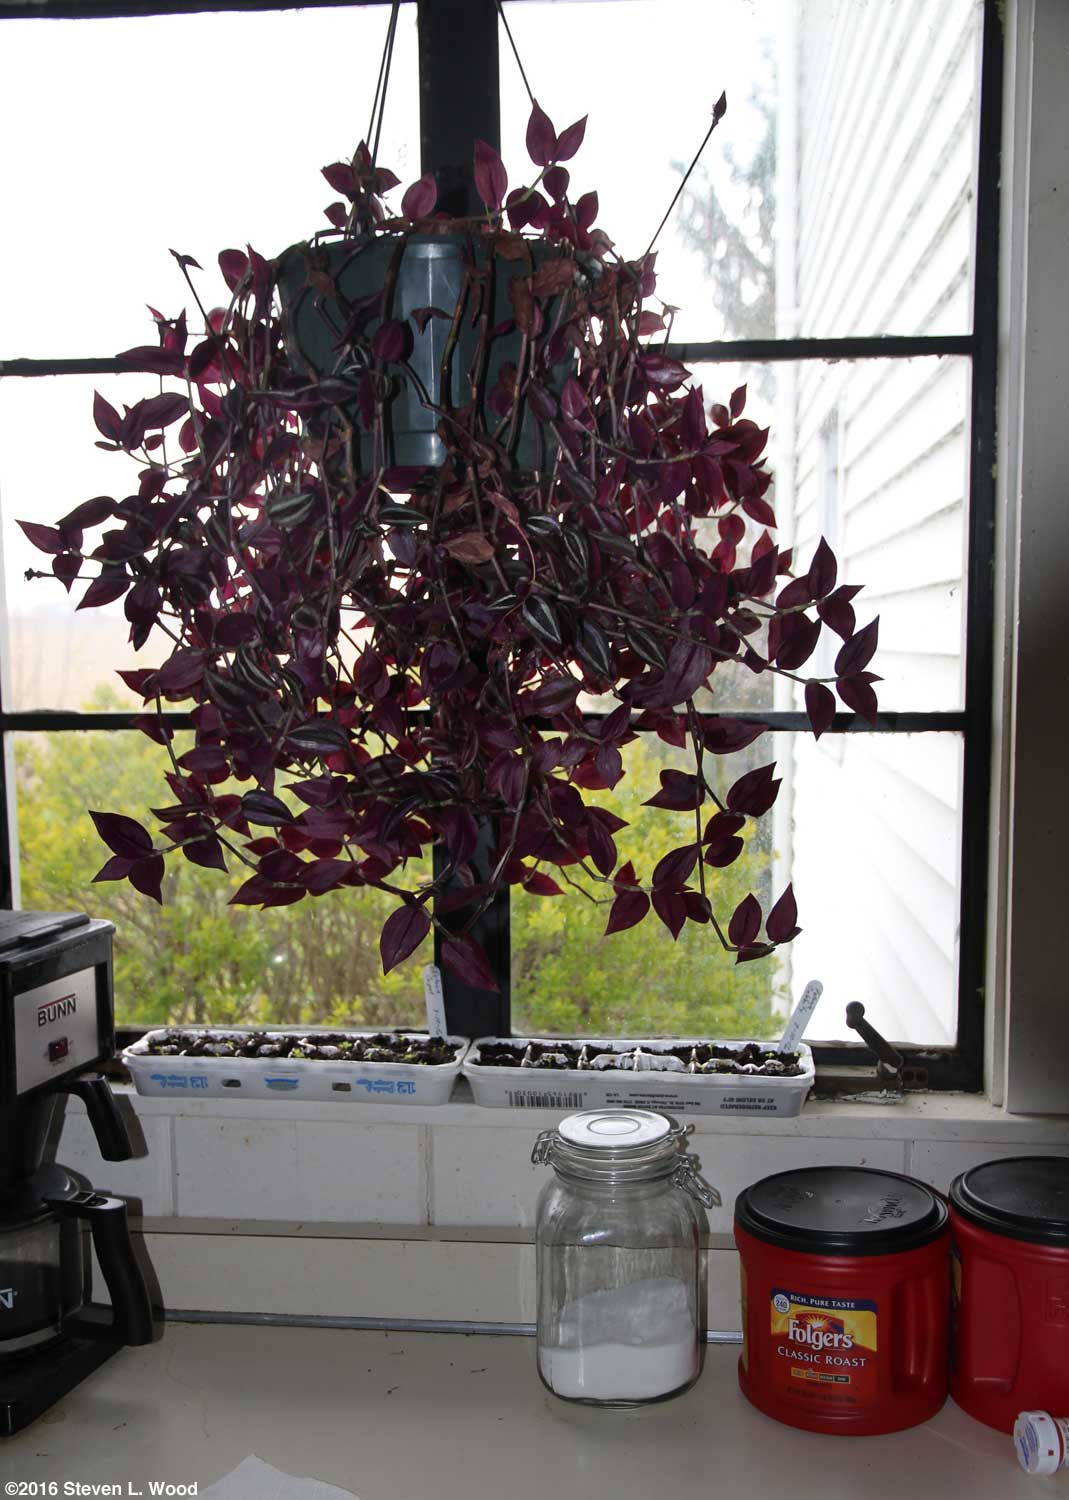
Our kitchen gets off easy, as it already has my wife's cactus collection in one window and a wandering jew and some petunias in egg cartons in the other window. I did have to move eight petunias out of the egg cartons today, as I'd way overseeded them. The tiny petunias went into fourpack inserts and under our plant lights in the basement.
Moving plants outside and inside isn't a whole lot of fun. But we're really getting close to the time when we can begin actively gardening outside. And when tending the plants, there always seems something important and often interesting to do, whether it's uppotting plants to larger quarters or repairing damage from where our cats have taken a few bites out of our plants. I have a few more things to get started. I'd like to get some snapdragons and marigolds going soon, and in a couple of weeks, I'll seed some pumpkins. I usually delay starting our pumpkin transplants, as I try to time the plants to mature their pumpkins around the first of October. If I start the pumpkins with the melons and squash, they mature in late summer and sometimes don't hold well until Halloween.
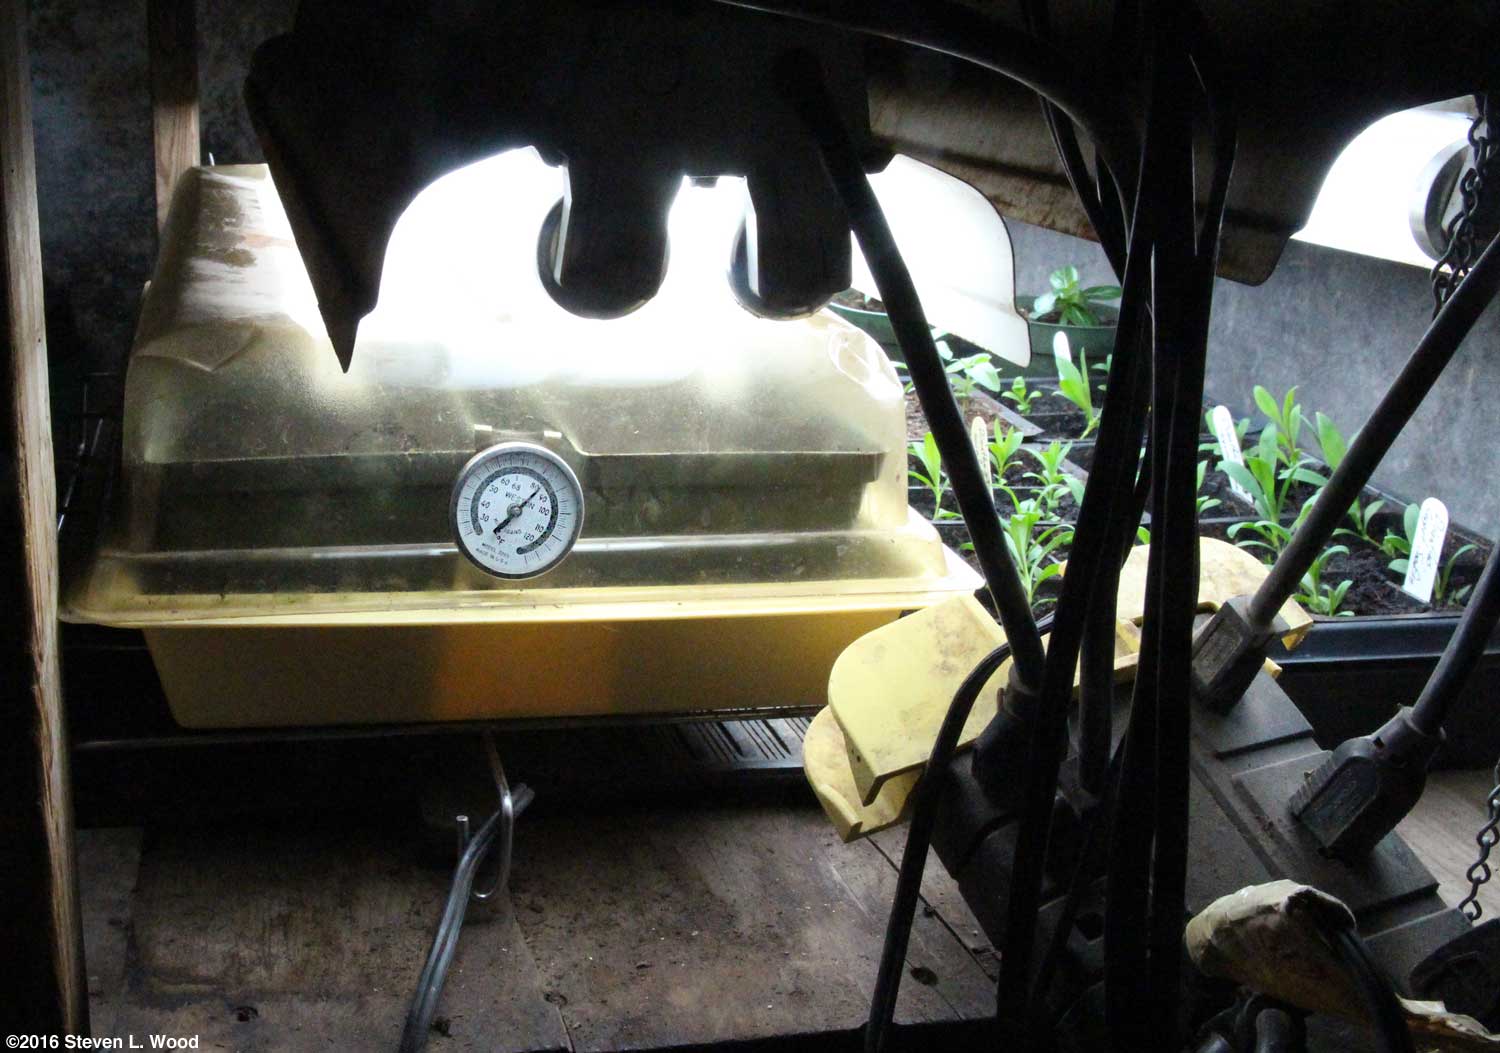
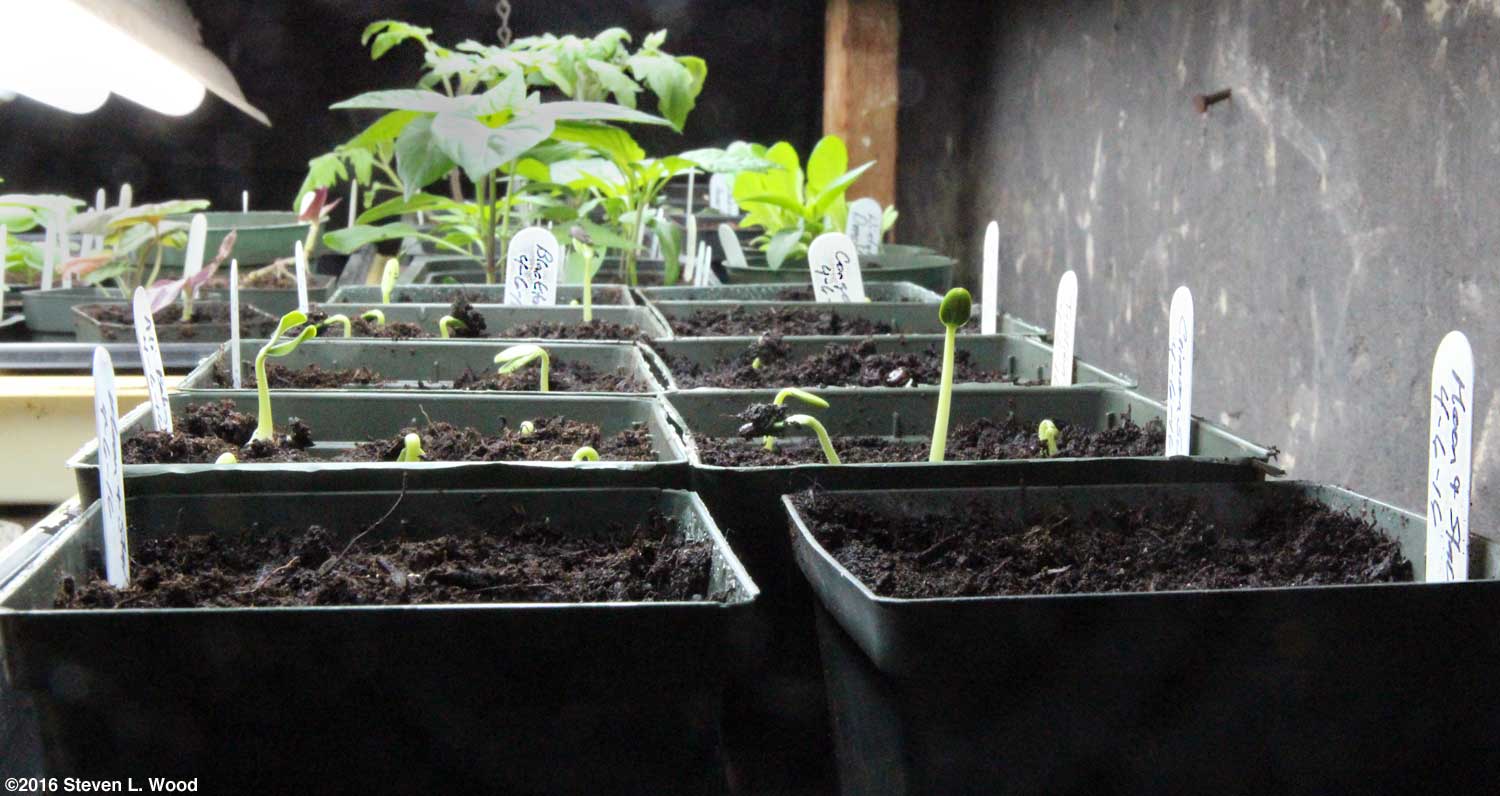
One of the glories of God's creation is that seeds put into the ground burst into life with a little warmth and moisture, producing plants for us to use. The melon seed I started Wednesday and Thursday is coming up already! Some solid bottom heat, of course, aided in the quick emergence of some of the plants. Some of the watermelon seeded Wednesday evening were tall enough that I needed to move the pots from the covered tray they were in to an open tray. The top leaves of some of the sprouts were touching the clear humidome cover over the tray, something that can cause rot because of moisture clinging to the inside top of the humidome.
Having moved several plants out of the tray over a soil heating mat, I had space to start some more plants. I hadn't seeded any yellow squash as yet, so I started three pots of it. I had to use some really old 4 1/2 inch pots, as all of our other such pots are already in use. The old, white, plastic pots were part of a case of 600 I bought over thirty years ago to use for gloxinias. Now mostly brittle, I'm down to the last ten or twenty of the pots and only use them as a last resort. I seeded one pot to Slick Pik, our most reliable yellow squash. Slick Piks produce very tasty, thin, yellow squash, although one has to continue to start plants throughout the season, as the plants don't last all that long. I also seeded two pots of Saffron Both Slick Pik and Saffron produce large bush plants. While they don't runner, a hill of two to three plants will often spread to about five feet wide, especially the Saffrons.
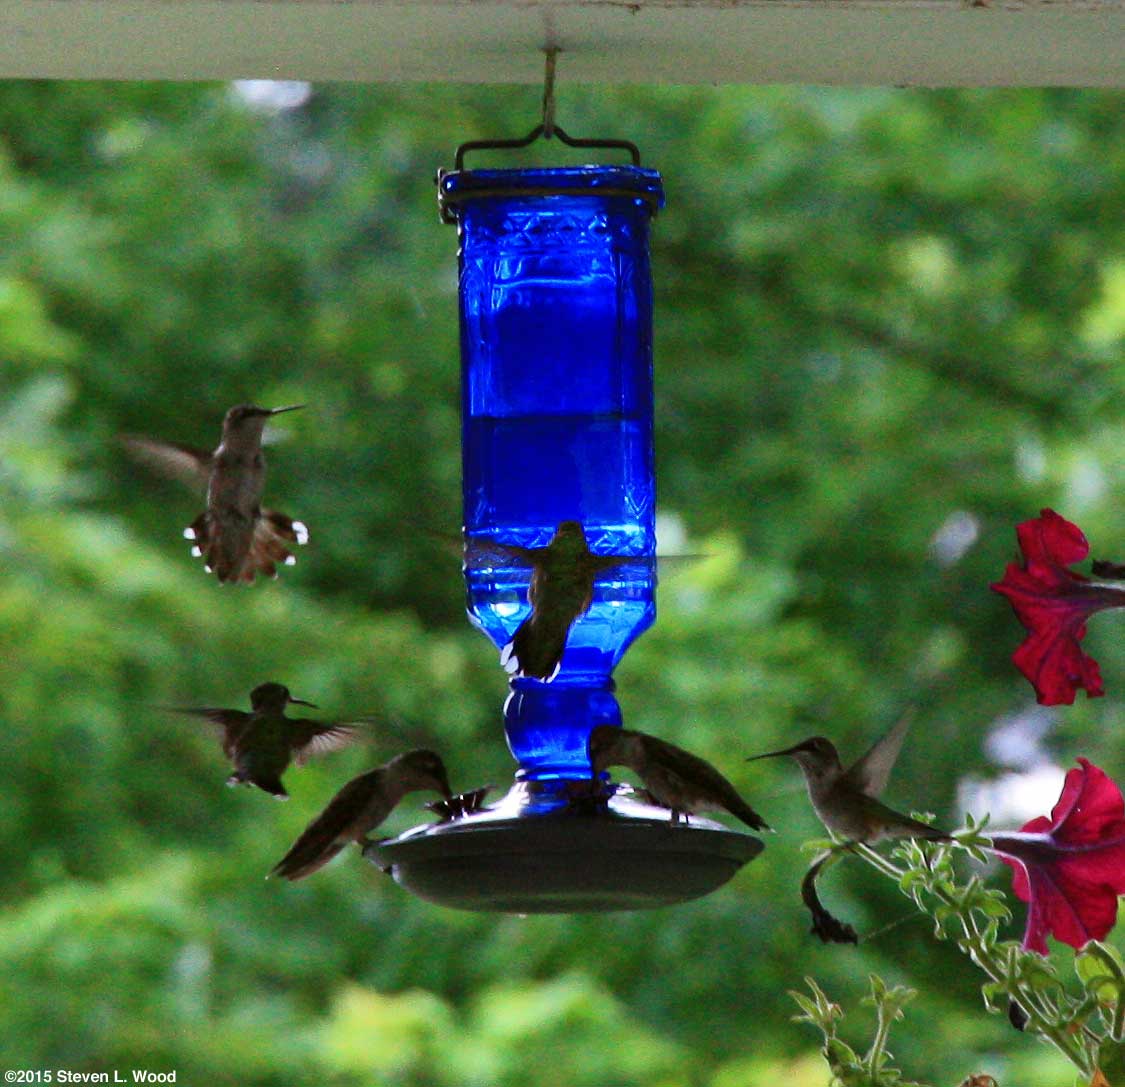
Sunday, April 10, 2016 - Stocking Up for the Hummingbirds
While we also use a Perky-Pet 16 Ounce Hummingbird Feeder The Birdscapes feeders have some really negative reviews on Amazon, but the company seems to stand behind their product, replacing defective parts. Since we've used this same model of feeder for years, we have plenty of spare parts for them, as we've dropped feeders now and then. Our Perky-Pet feeder began to leak a bit last year. The paint inside the glass bottle is chipping, although it hasn't seemed to hurt the birds any. And quite frankly, the blue Perky-Pet feeder is a whole lot prettier than the Birdscapes feeder. We'll probably just put up with the blue feeder dripping a bit and hang it along with two of the Birdscapes feeders this year. While that's more feeders than necessary when the hummingbirds first arrive, all three feeders are often surrounded by hummingbirds fighting for space at the feeders once the first and second clutches of young hatch out. Cleaning the Birdscapes feeders is a bit difficult, requiring a very small brush to reach the insides of the feeder where mold and presumably bird spit build up. The Perky-Pet feeder comes apart for very easy cleaning. If you're wondering when hummingbirds might arrive in your area, I found a page that gives some approximate dates for the eastern half of the United States. We saw our first hummingbird last year on April 25. They also have another page with good instructions for making your own nectar.
Monday, April 11, 2016 - Your Annual Nag about UV Exposure It's that time of year again. Dreading an upcoming appointment with my skin cancer doctor, I feel compelled to nag my readers to protect themselves from the sun's harmful ultraviolet rays. I'm acutely aware of the dangers of sun exposure, as I've had more than a few skin cancers removed over the years and regularly have to use a rather expensive fluorouracil cream product on potential cancers. Being fair skinned, having gotten several severe sunburns during my childhood, and then riding a tractor for eight years with a thin T-shirt on when I was farming, I'm probably experiencing just what I deserve. Beyond getting appropriate medical care, protecting oneself from UV radiation while still being able to do the outdoor things we gardeners love is a major concern. The CDC notes that the hours between 10 A.M. and 4 P.M. (Daylight Saving Time) are the most hazardous for UV exposure outdoors, with UV rays being greatest during the late spring and early summer in North America. Heavy clouds do filter out some UV, but not as much as you'd think. The trick for we senior gardeners prone to actinic keratoses and/or skin cancers is to find ways to garden without exposing ourselves to too much UV radiation. Keeping in mind the CDC recommendations and checking UV scales often posted on weather sites can guide one on when it is safest to work outside. But not all jobs can be done in the safer early or late hours of the day. For me, mowing is one of those jobs where I have to be out in the sun at peak UV hours.
When I get into serious gardening in warm weather, I generally wear a T-shirt with a sun protective shirt over it along with a hat. And since I've had cancers on and in my hands, I wear gloves almost all the time when working outside. At one time, Coolibar Here are some related links about UV radiation and protective clothing:
Plants Back Outside
We have a couple potentially frosty mornings coming early this week, but not enough to hurt anything. It's been raining cats and dogs today, which should help our soil moisture and ground water level. After that, it appears our frost/freeze worries should be over with about a week of sunny, warmer weather to follow. I'm looking forward to being able to do some seeding and transplanting later this week. Tuesday, April 12, 2016 - Trellis Fun
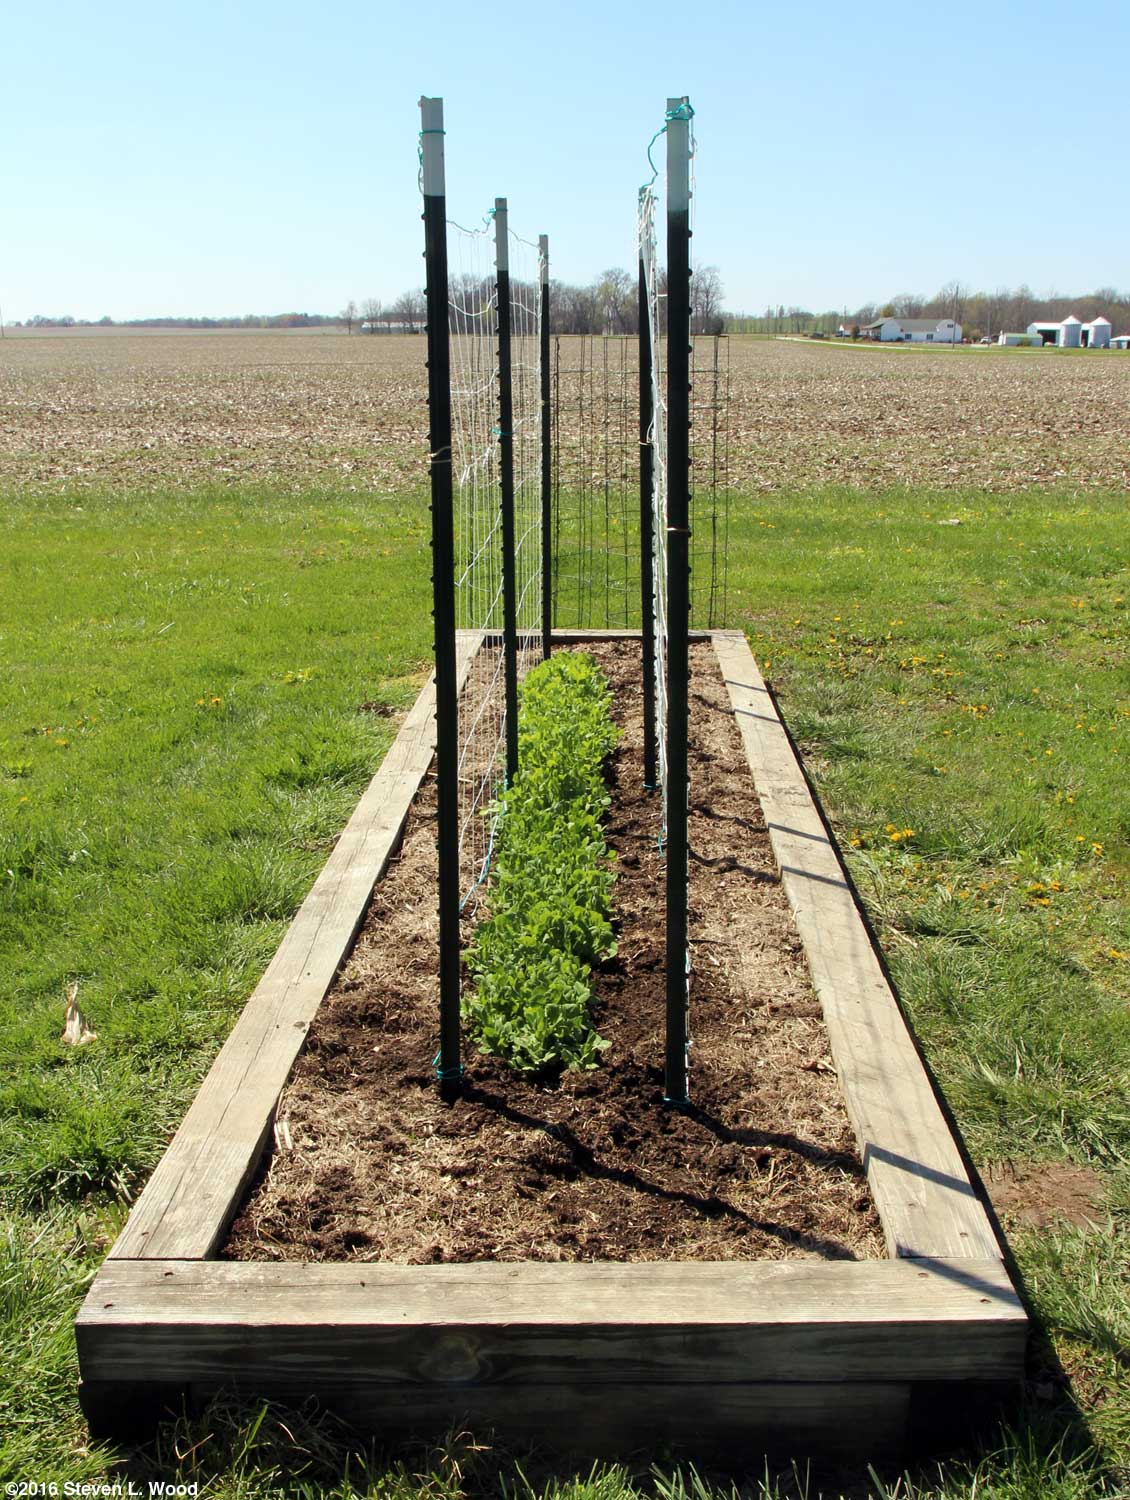
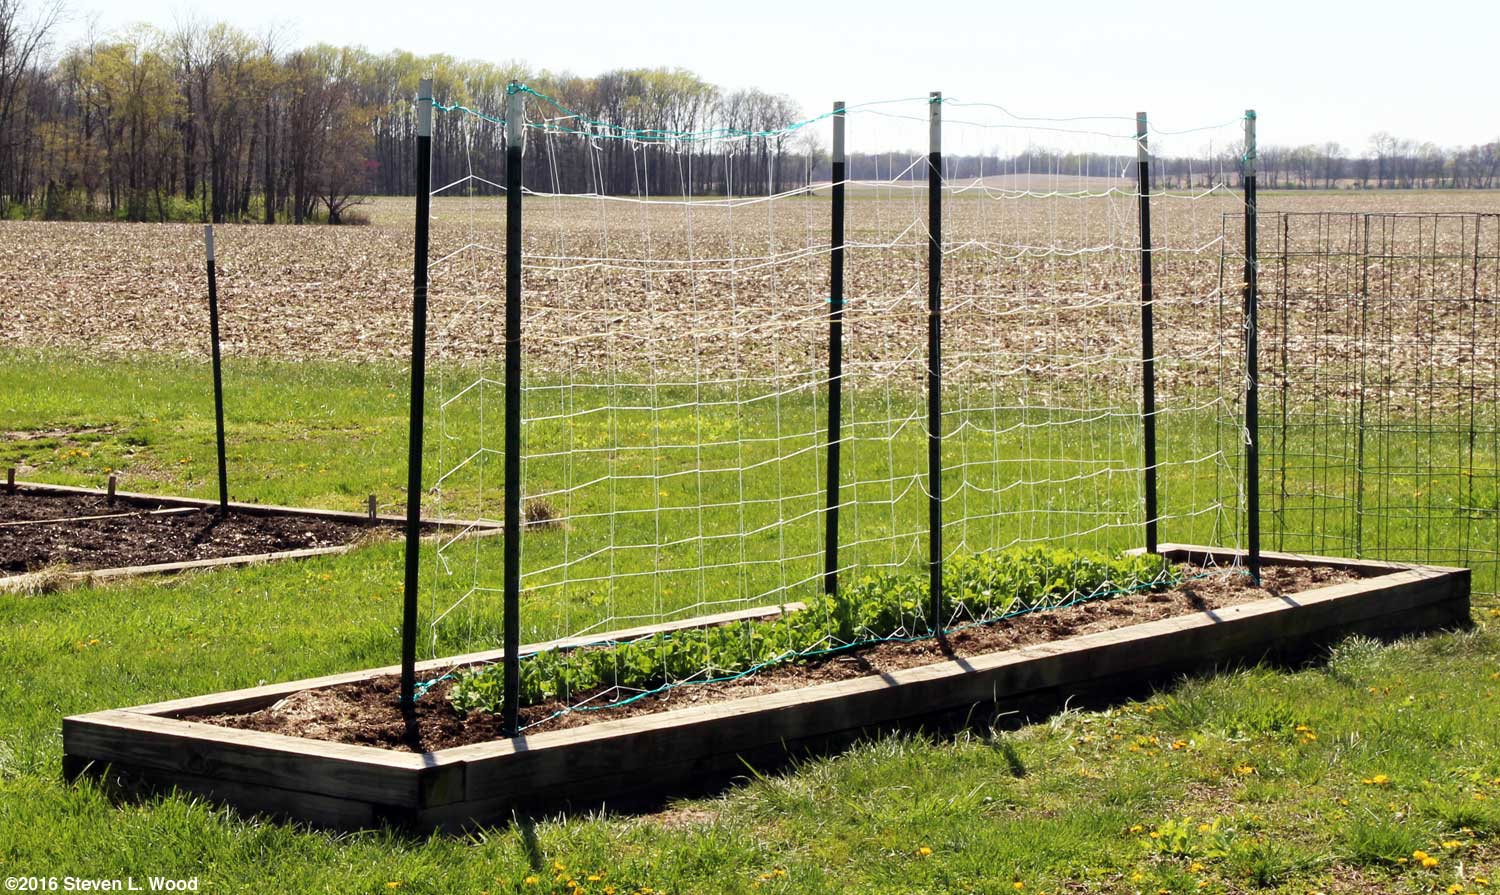
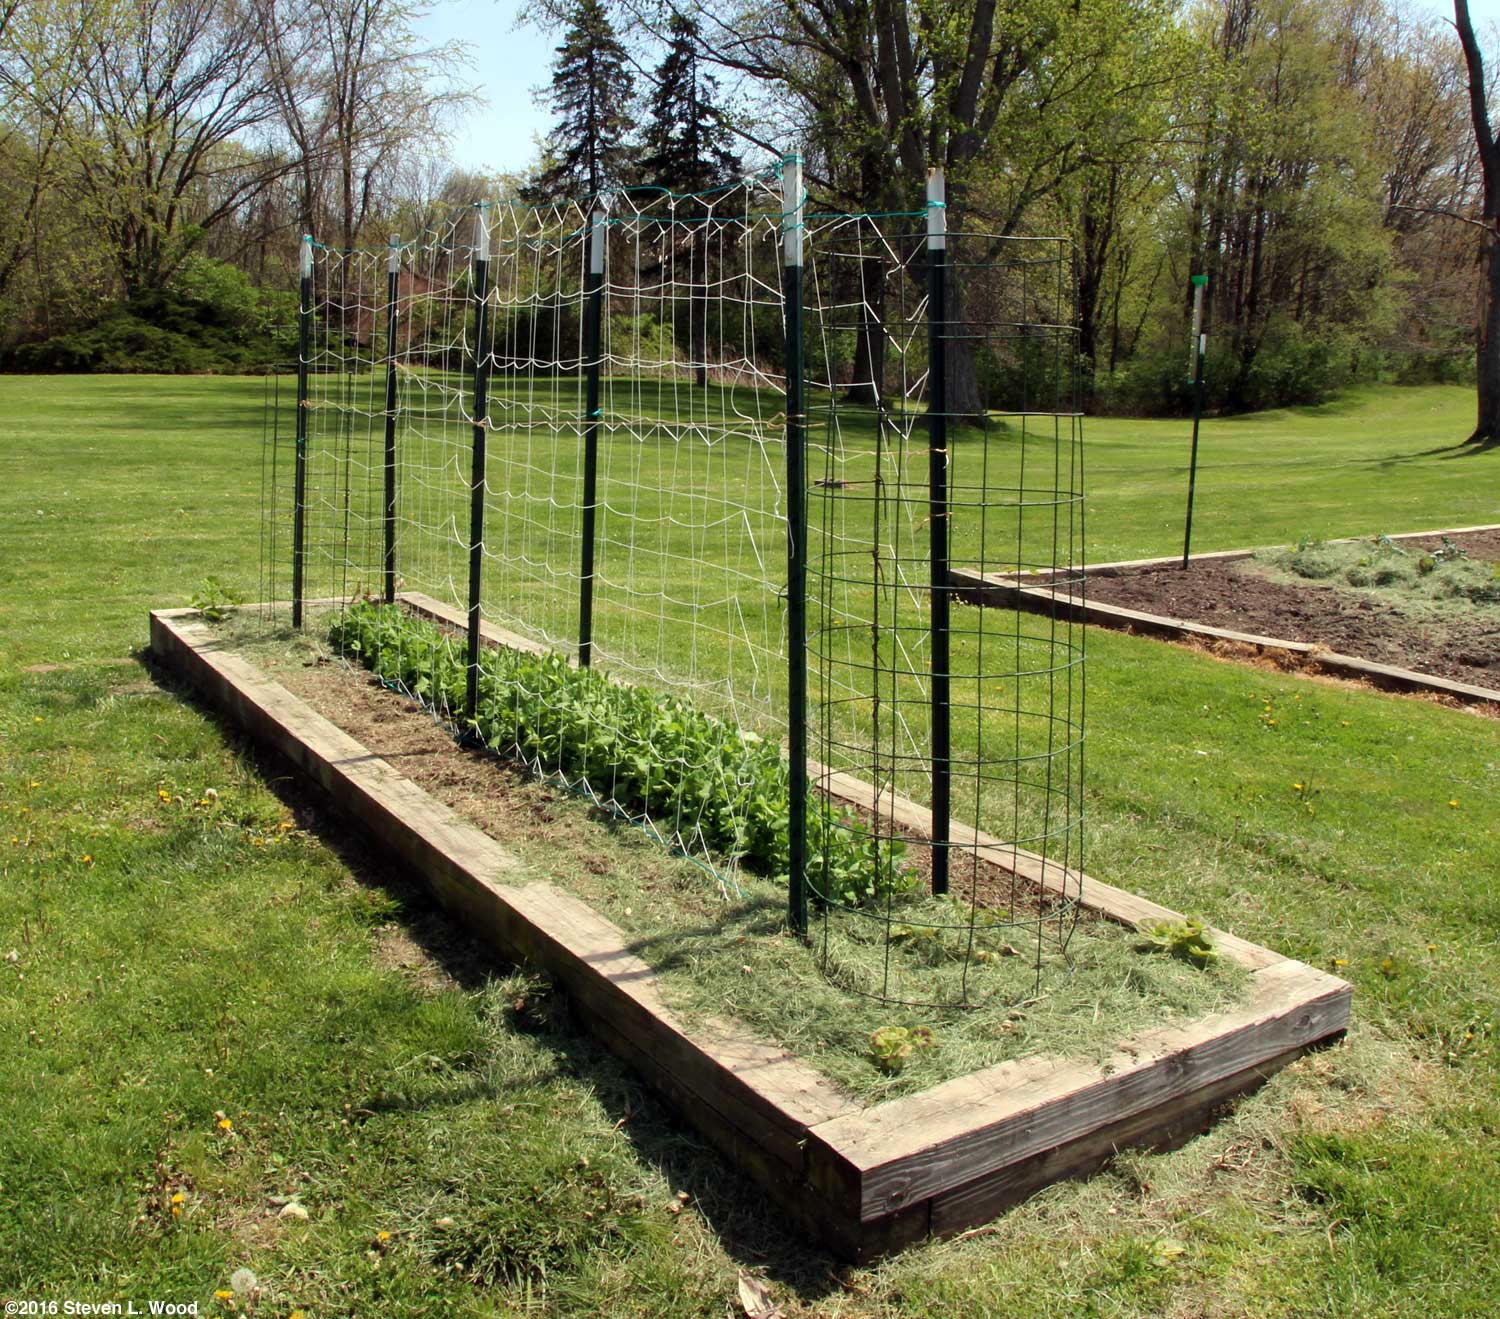
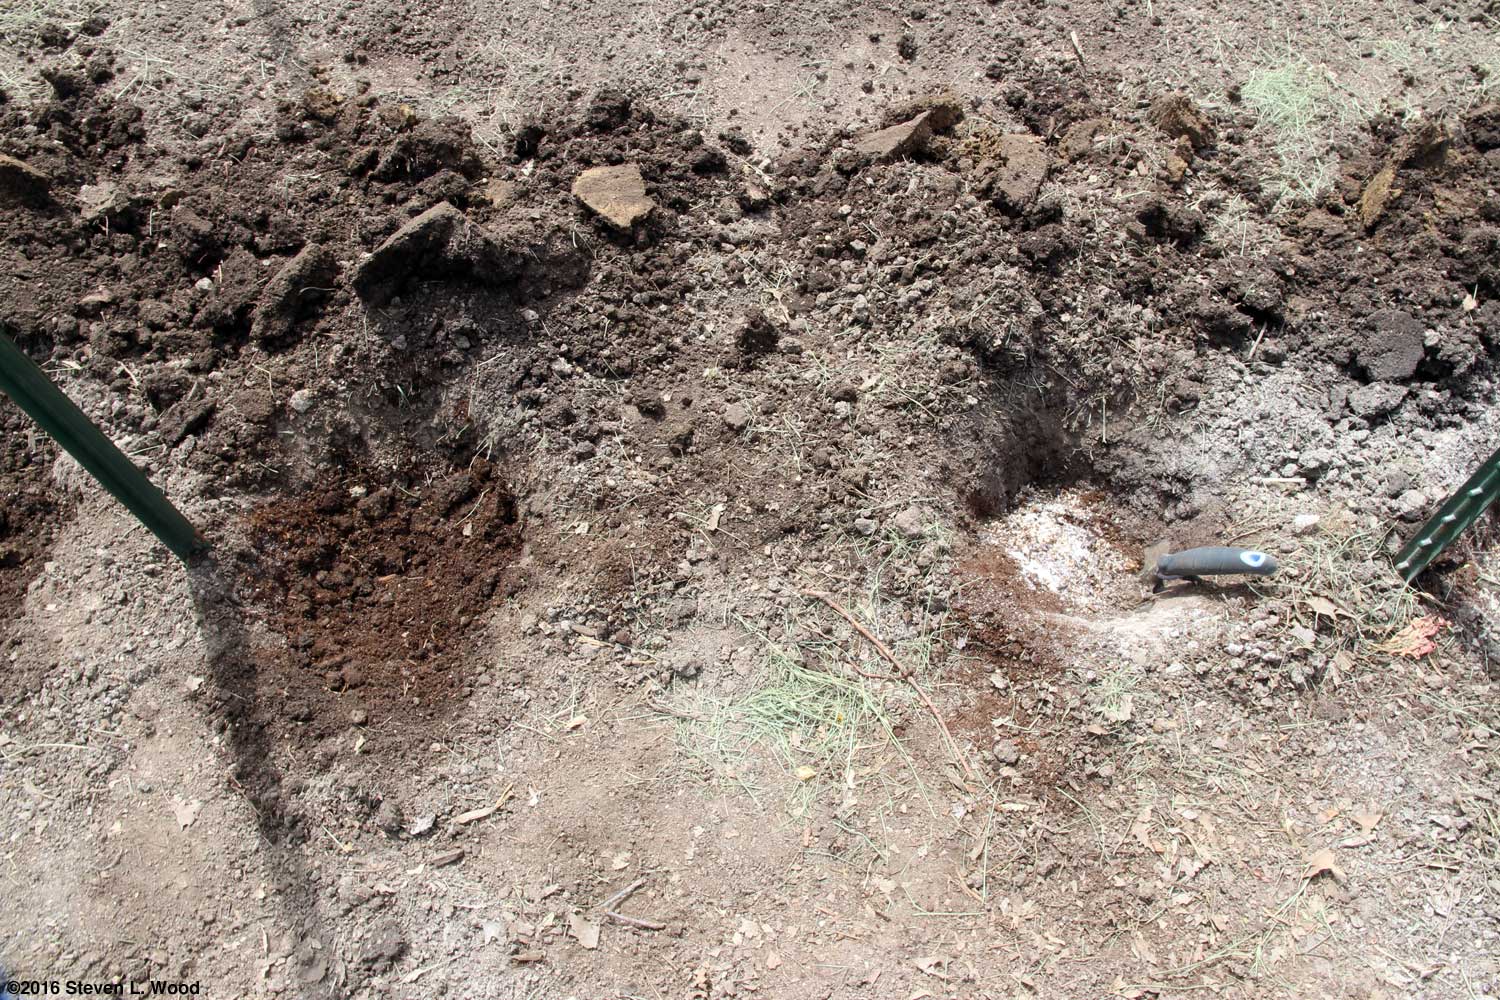
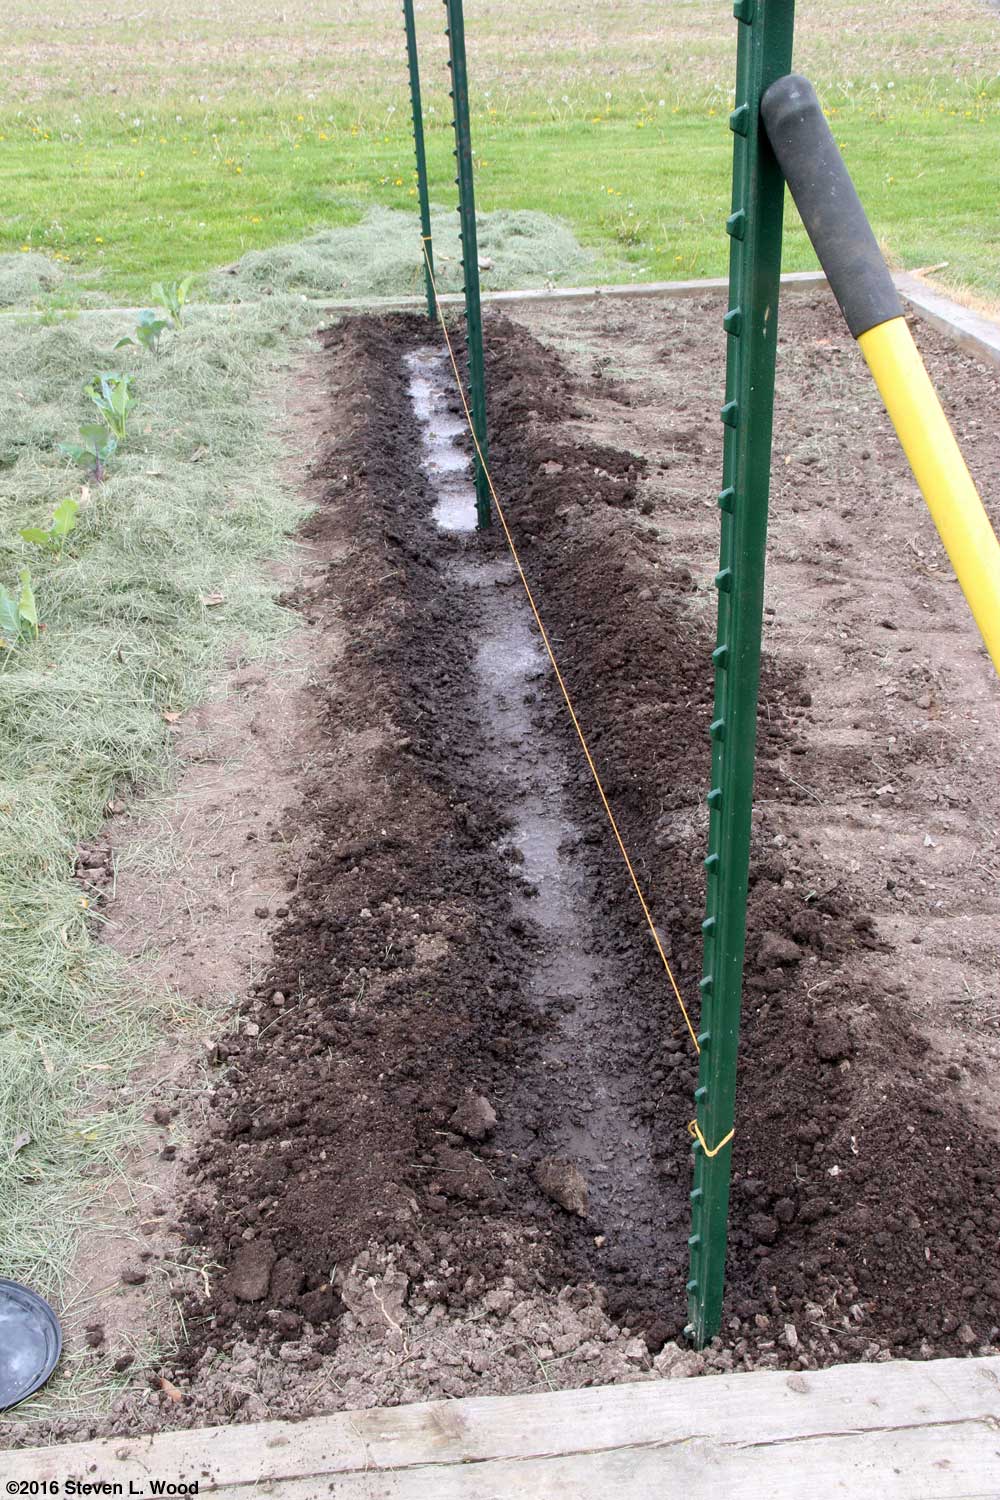
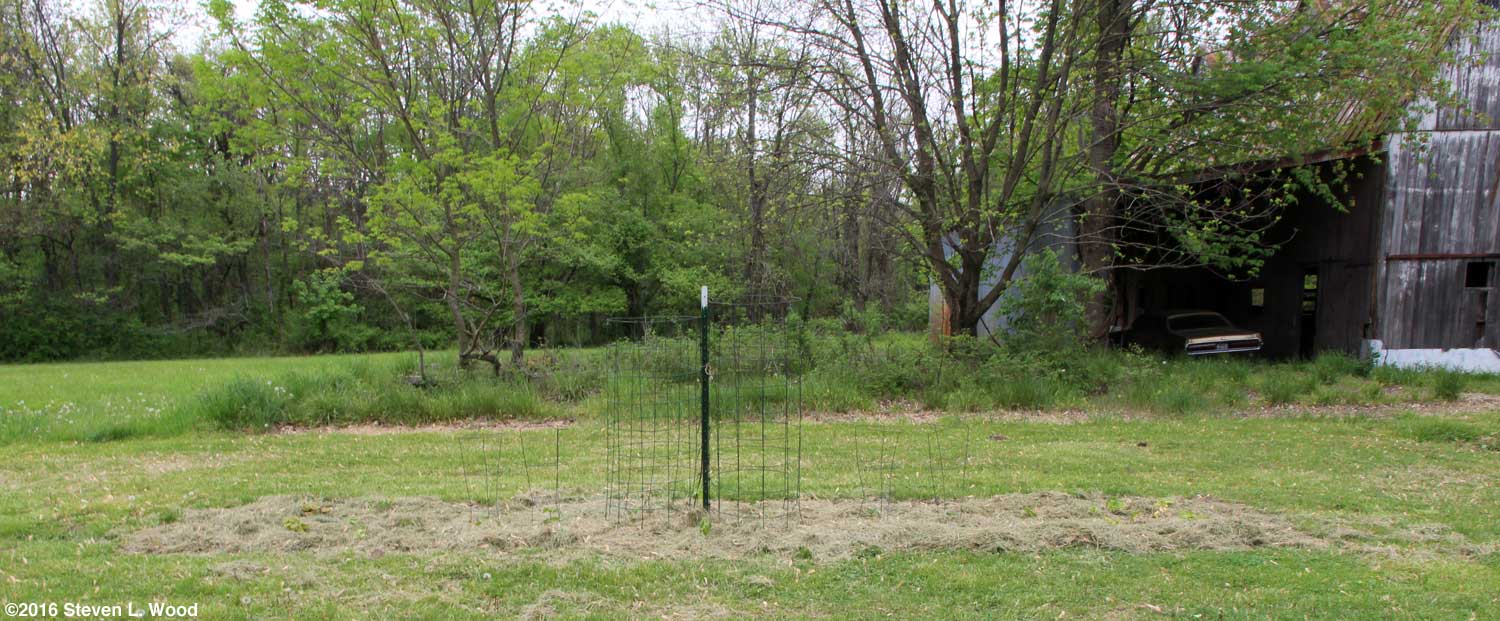
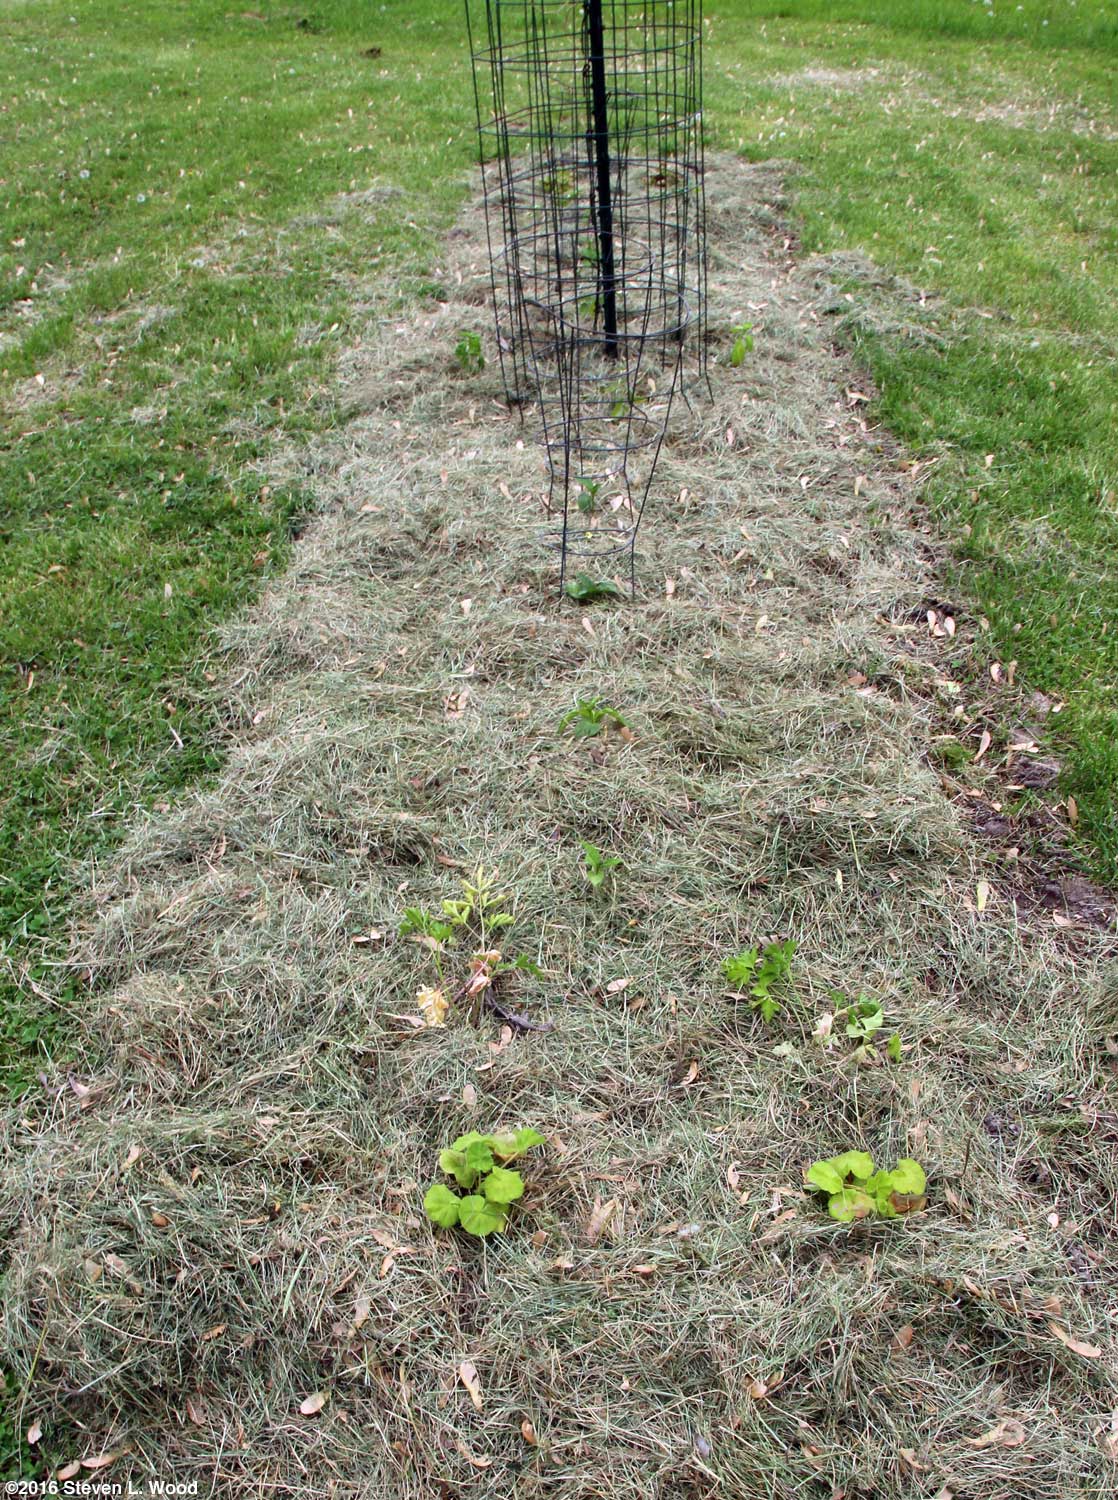
Several years ago, I began experimenting with growing our tall peas between double trellises to prevent the wind damage. The first year I tried the double trellises, I got them too close together. The peas grew outside the north side of the trellises, and we still lost a lot of vines to wind damage. The next year I widened the spacing between the trellises from eight to sixteen inches, and we did a bit better. But the peas still grew to the north trellis, with some still growing on the outside of it and blowing off. This year, I offset our tall pea planting in a narrow raised bed, seeding the pea seed along where the south trellis would go with several inches left bare towards the north trellis. The idea was still to try to keep the pea vines between the trellises. A bit better training of the vines may also help keep them between the trellises.
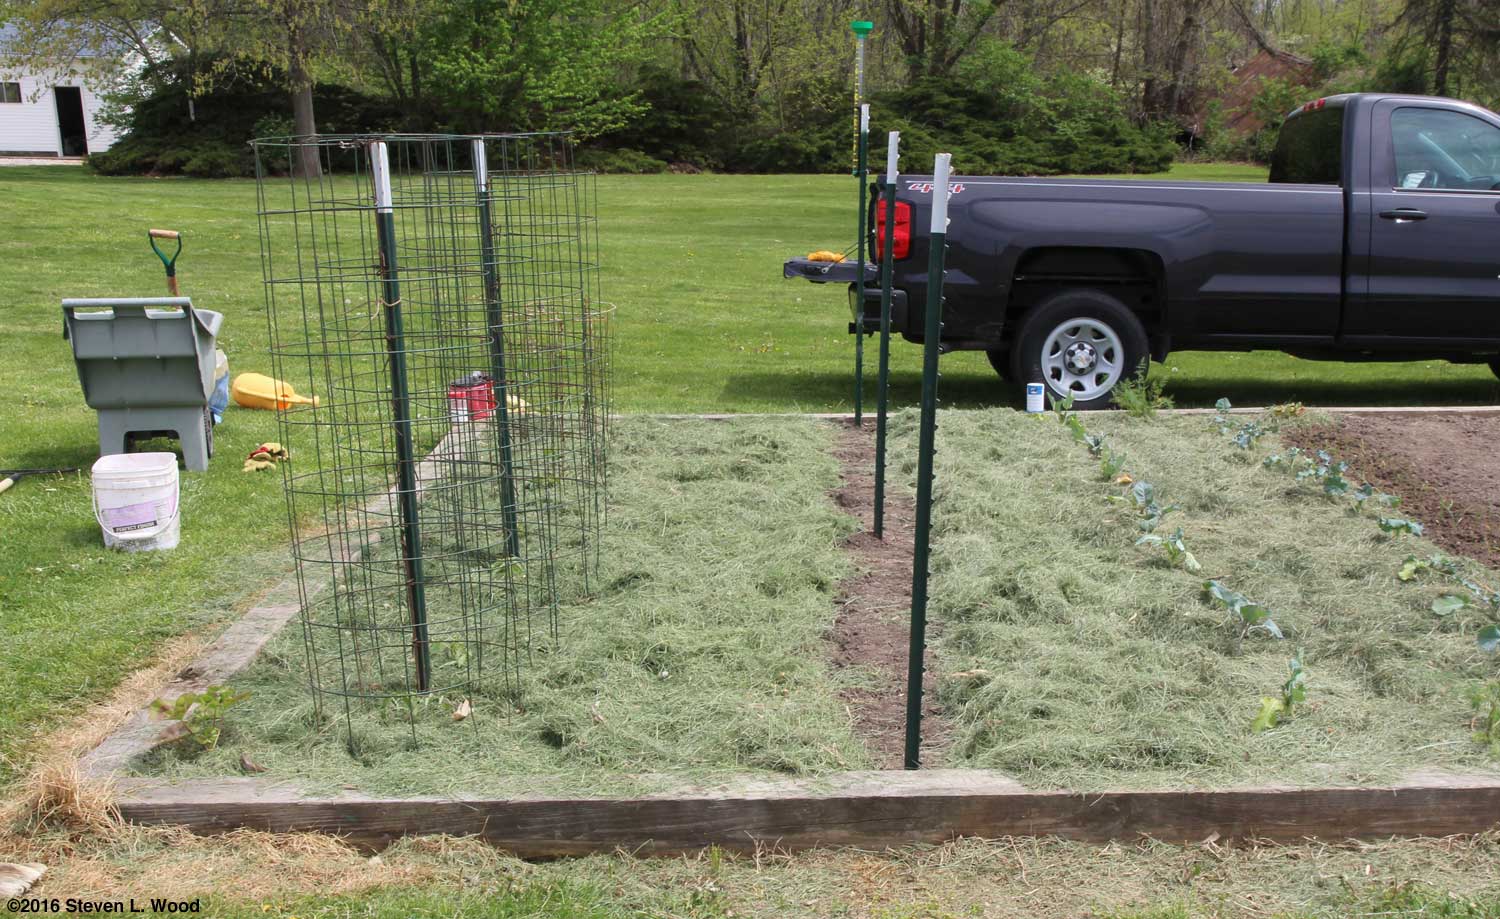
Besides putting in the T-posts, I also staked out where our rows will go in our main raised bed, correcting some problems I'd found in my garden plan. I also hung a new rain gauge from one of the T-posts. Our old rain gauge was in bad shape when I took it down last fall. The new one will be easier to read but seems very cheaply made!
Possibly of interest is the fact that we don't save seed from our tall peas for future crops. Where a variety is commercially available from a stable vendor, we prefer to purchase our pea seed, thus supporting seed houses still offering good, open pollinated varieties. We do, however, buy our pea seed by the half or full pound, saving unused seed in our manual defrost freezer. We save a bit by buying the larger size and spread out our purchases to about once every three years.
Do note that growing peas is a labor of love. Buying frozen peas at the grocery would be a lot easier and actually more economical. But our frozen peas do have better flavor than store bought peas, making all the work of growing, shelling, and freezing them worthwhile to us. And of course, fresh peas picked and shelled the same day on the dinner table are far, far better than any frozen pea one might buy. Once the peas are done on the trellis, a succession crop of vining cucumbers will take over their space, keeping the double trellis in use all season long. While not actually planting, it really felt good today to get outside in the sun and work in the garden, despite the squishy ground conditions from all our recent rain. I'm a bit stiff and sore this evening from the work, but it's a good stiff and sore. A twelve pound fence post driver, however, can make one feel weak pretty quickly! Wednesday, April 13, 2016 - At Last, We Begin Gardening!
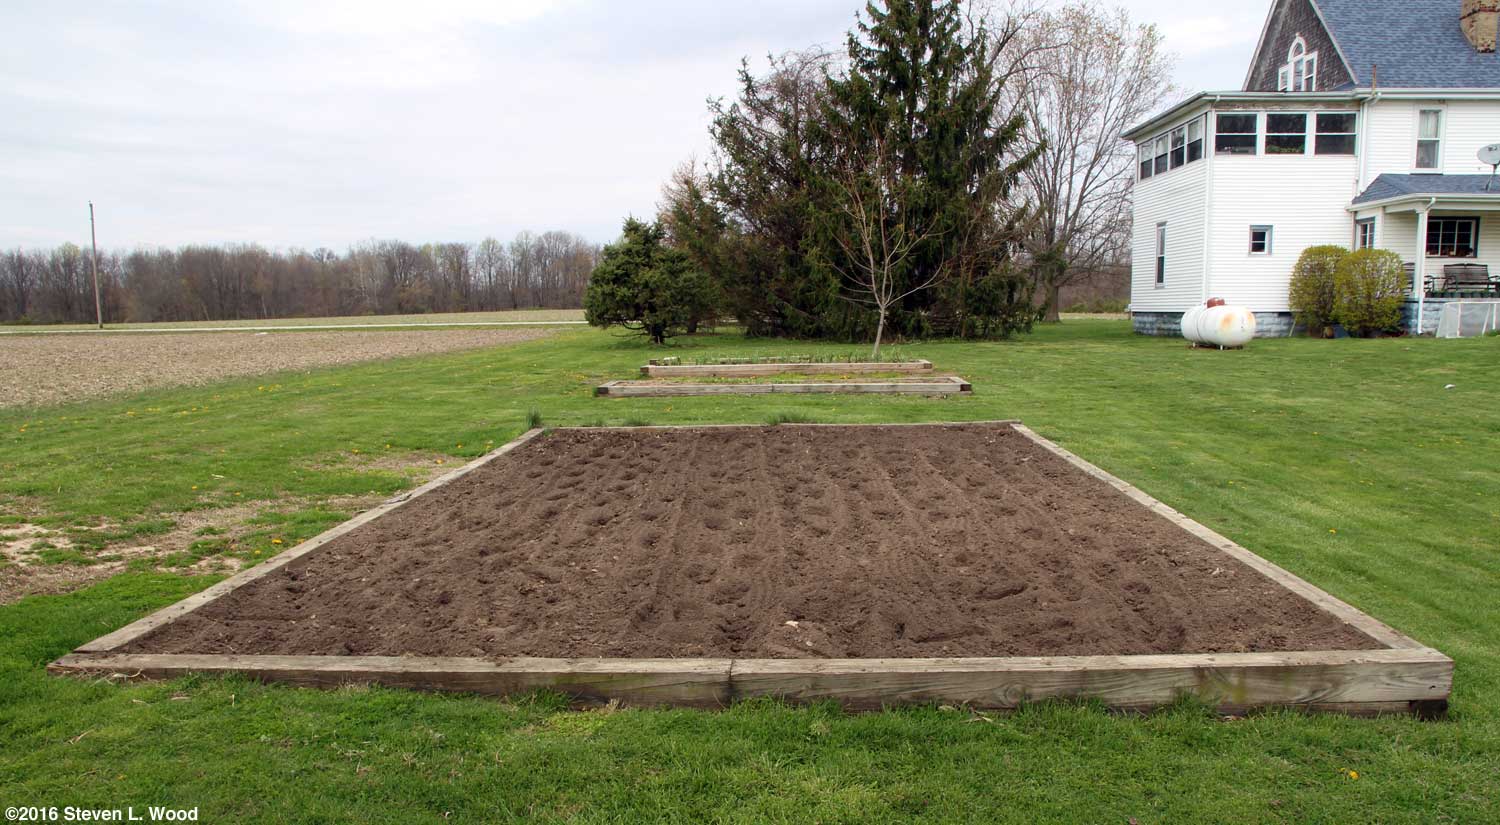
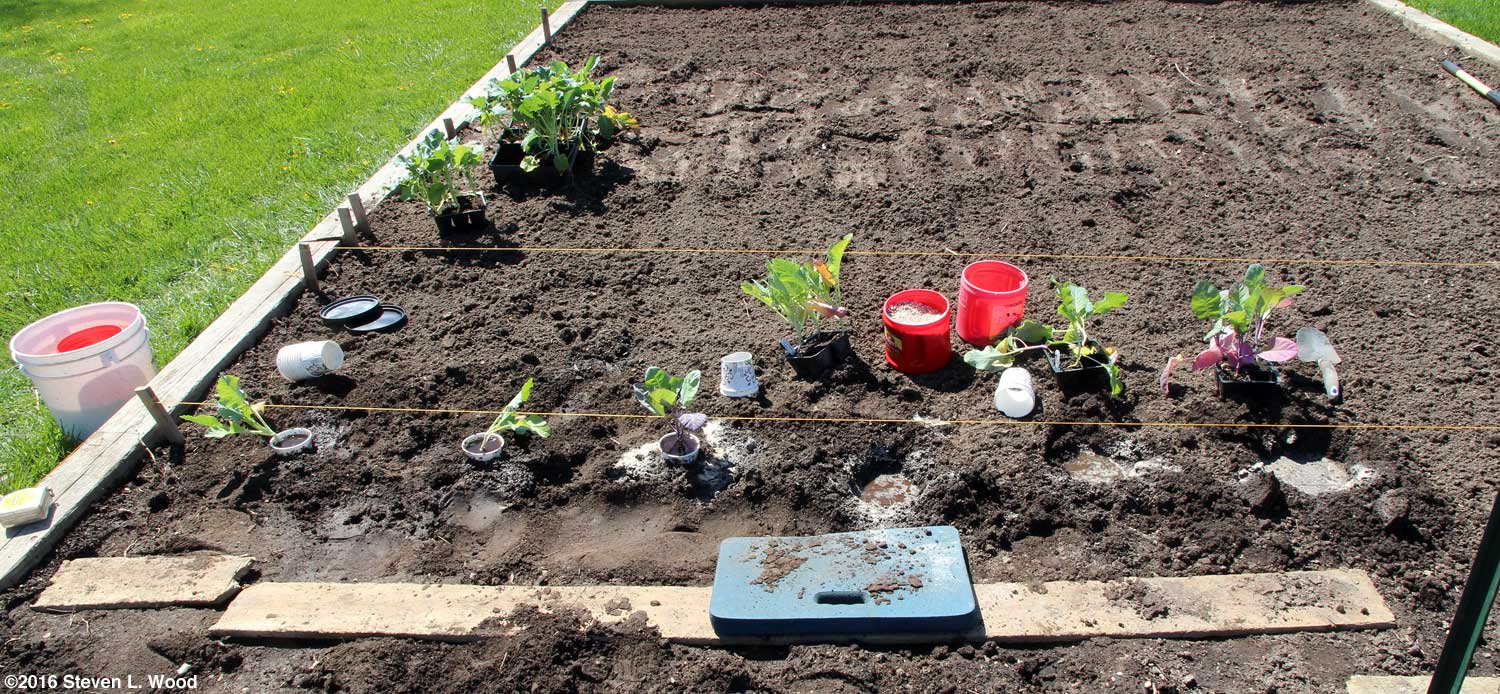
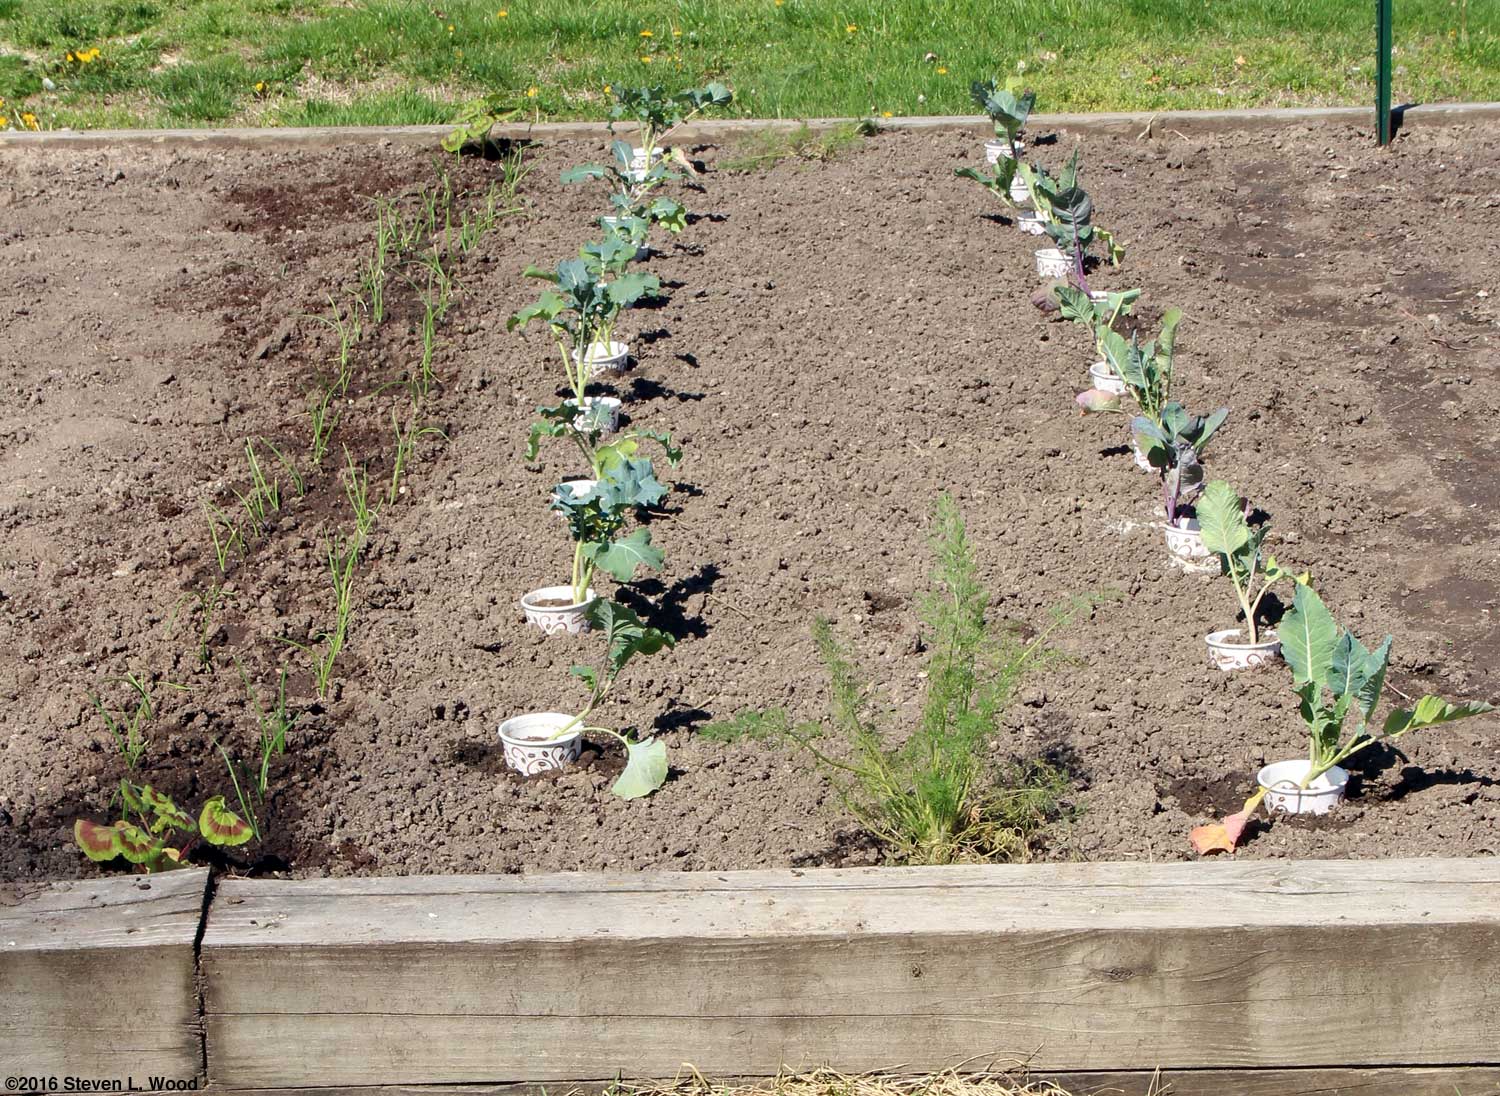
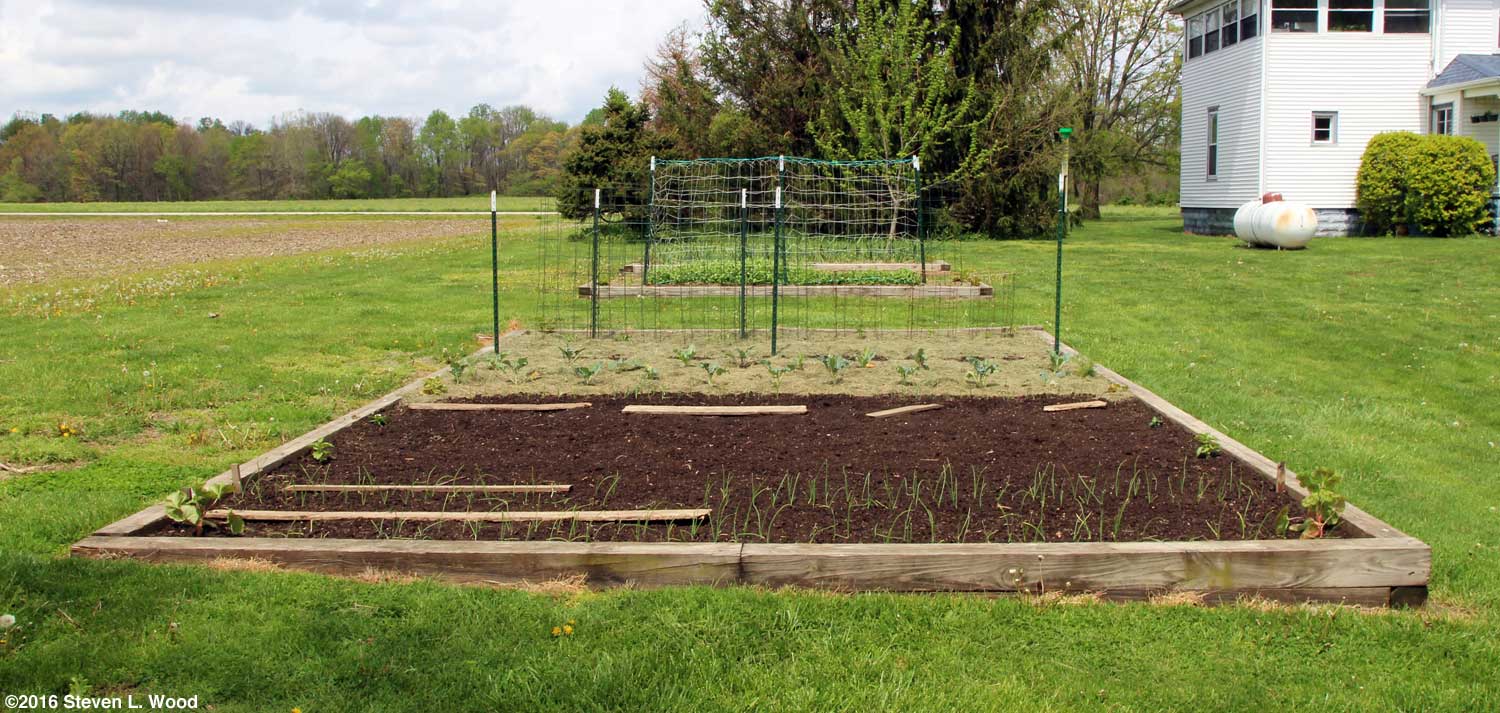
My first task in the transplanting was to rake out the area where the brassicas were to go. I had tilled the whole raised bed towards the end of March, but needed to smooth out the soil, as there were lots of wet footprints in it. As it turned out, the raking took a lot longer than I had expected, as I kept finding seedling weeds, rocks, and inorganic matter (styrofoam, etc.) to pitch out of the raised bed. I also took the time to rake the area where we'll be transplanting onions and lettuce and direct seeding carrots and spinach. It also took a while to assemble all the supplies I needed that were stored in the basement and garage. Trowels, fertilizer, lime, and buckets for starter fertilizer solution all had to be rounded up. And while I finished my second cup of coffee for the day, I cut the bottoms out of the used wax paper coffee cups I'd been saving all winter to use as cutworm collars. Since I'd staked the rows to be planted yesterday, I only had to stretch string to mark the rows before getting started. I had spaced the rows 30" apart, a good bit wider than when we put brassicas in our narrow raised beds. There, I use just 18" between rows, as those beds are only three feet wide. With plenty of space in our main raised bed, I could give the plants more room which should allow them more sun, moisture, and soil nutrients. Using a wide garden trowel, I dug holes for the transplants about six to eight inches deep. I sprinkled and worked in a bit of 12-12-12 fertilizer and lime (to fend off clubroot) before filling the holes with a bit of liquid starter fertilizer (Quick Start
Then I pressed a cut down paper cup/cutworm collar into each damp hole and pushed a transplant deep into the cup. For the cutworm collar to work, it's important to make sure its lip is a full inch above the soil line. Then I added soil into the cup and gently firmed it, topping it with a bit more starter solution.
Just for the fun of it, I transplanted a pot of dill at either end of the brassica rows. I'd recently read online that "aromatic herbs such as rosemary, sage, dill, and mint, help broccoli by repelling insect pests." Not totally trusting the companion planting idea, I also sprayed the brassicas with Thuricide, a biological that kills cabbage loopers, small white cabbage moths, and their larvae by giving them fatal stomach cramps. Tired, but not totally worn out, I went ahead and transplanted geraniums into the corners of some of our raised beds. I couldn't completely finish that job, as I had only ten geraniums hardened off. I later brought the last two trays of geraniums downstairs from the sunroom and put them under the cold frame to harden off. Also added to the cold frame were some tomato, pepper, and basil transplants. I tell the full story of how we grow our brassicas, start to finish, in our how-to, Growing Great Broccoli and Cauliflower. With the danger of frost pretty well past, getting our garden in is now a matter of good weather, having transplants ready, and my endurance.
Friday, April 15, 2016 - Table for Vegetable Germination Temperatures
The same information is available online from any number of land grant university extension services, such as:
Most of the documents are PDFs, easily downloadable for future reference. While there is a wealth of books about gardening available, it's easy to forget that extension services and/or the USDA have lots of good information online about gardening for no charge (our taxes have already paid for it). When I first began farming, long before there was an internet, I spent a whole afternoon sitting at file cabinets at our county extension service going through publications on farming, gardening, and animal husbandry. I came away with a wealth of information and a new respect for the extension service system.
After a lot of fun looking at various charts, I popped out to our main raised bed with my now ancient, but still accurate Weston darkroom thermometer and took our soil's temperature. As one might expect for this time of year in our region, the result was 48° F. That's a pretty far cry from the listed minimum temperature for beans of 55-60° F. And while peas can germinate in very cold soil, as evidenced by our successful March 9 planting, our short peas require far warmer soil than most peas. The supersweet Eclipse variety is famous, no, infamous, for requiring rather warm soil to germinate at all. The Encore variety we'll plant in the same row also germinates better in warm soil. The good news in all of this soil temperature stuff is that carrots, spinach, and onions don't mind cool soil. So I need to get myself outside and get some planting done today. Note: We've gone through some major changes with our affiliated advertisers since the first of the year. We dropped one affiliate consortium (for cause) and added several others. The change invalidated some ads on our older blog archive pages. I'm still working on cleaning up that mess. What all that gets around to is that if you're kind enough to buy through one of our ads, our list of Senior Gardening Affiliated Advertisers is always up to date.
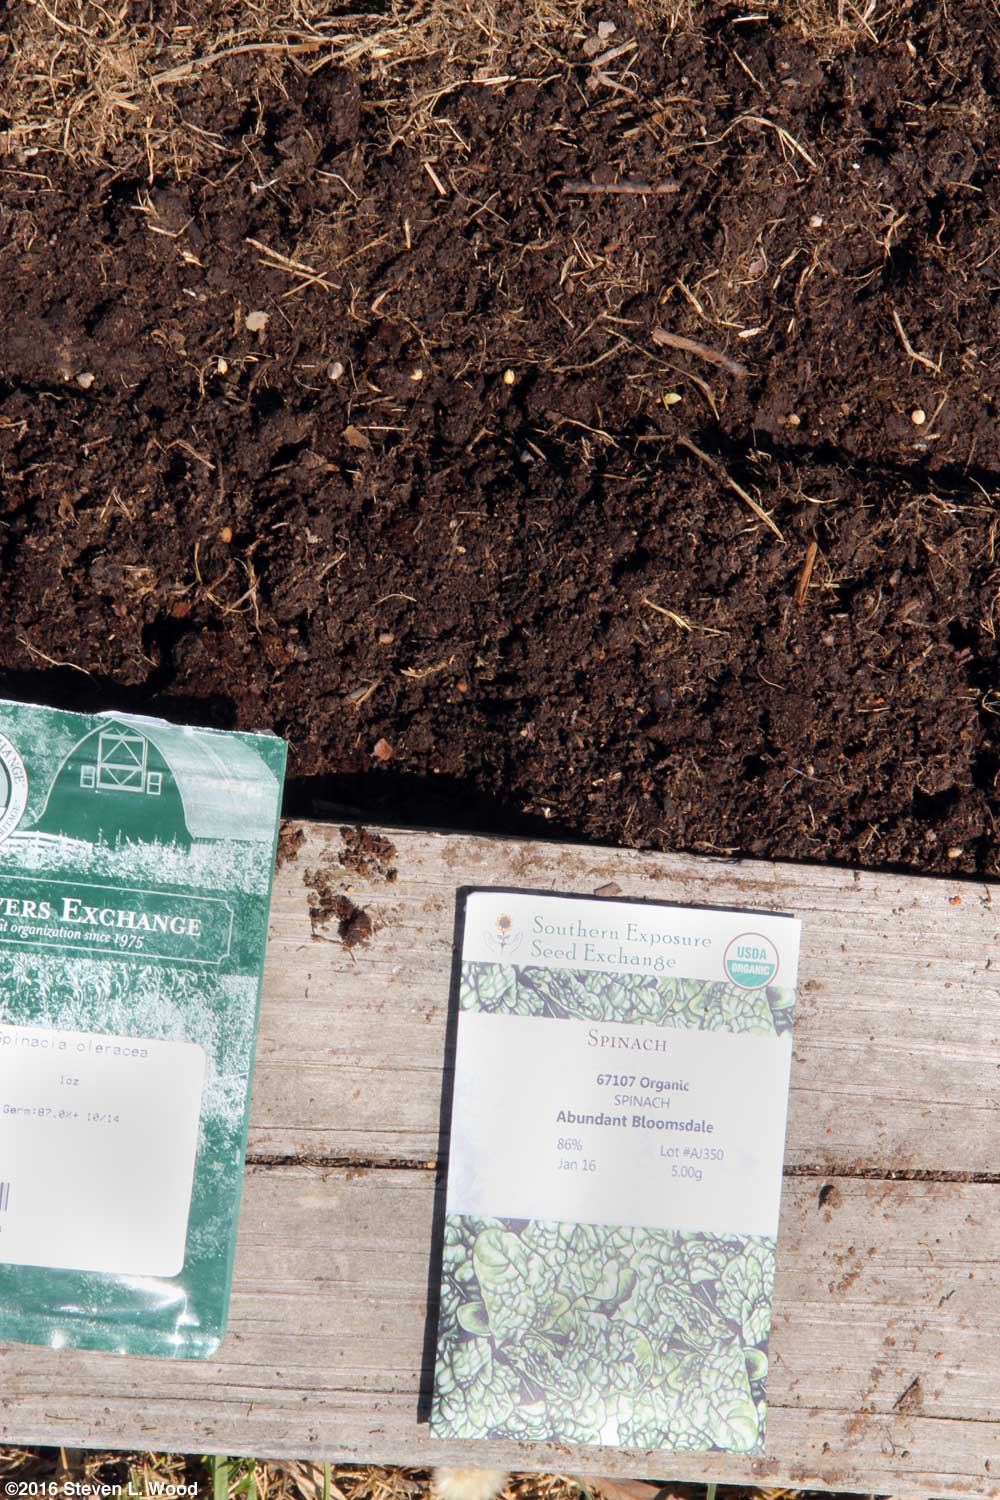
Later - Seeding Spinach
I direct seeded a 15' row of spinach on the south side of our trellised peas. There was just enough space there for the planting. Since the soil had been mulched, it was still fairly moist. After removing the mulch, I hoed the row before using a scrap piece of 1" lumber to make a shallow furrow for the spinach seed. As I spaced the spinach seed an inch to an inch and a half apart, I marveled at being able to do so, as I was later in the day going to work with some really tiny carrot seed. After pinching the row shut with my fingers, I gently patted it firm. The spinach varieties planted were Abundant Bloomsdale, America, and Melody. Abundant Bloomsdale is a new, open pollinated OSSI variety. America, of course, is an old, All America winner. Melody is a hybrid variety we like, but seed for it has become scarce. Spring spinach for us often gets caught before it matures by hot weather. With plenty of seed and just enough space for a row of spinach, it's worth the try. If we miss on spring spinach, we always seem to be able to grow good fall spinach. Onions and Carrots
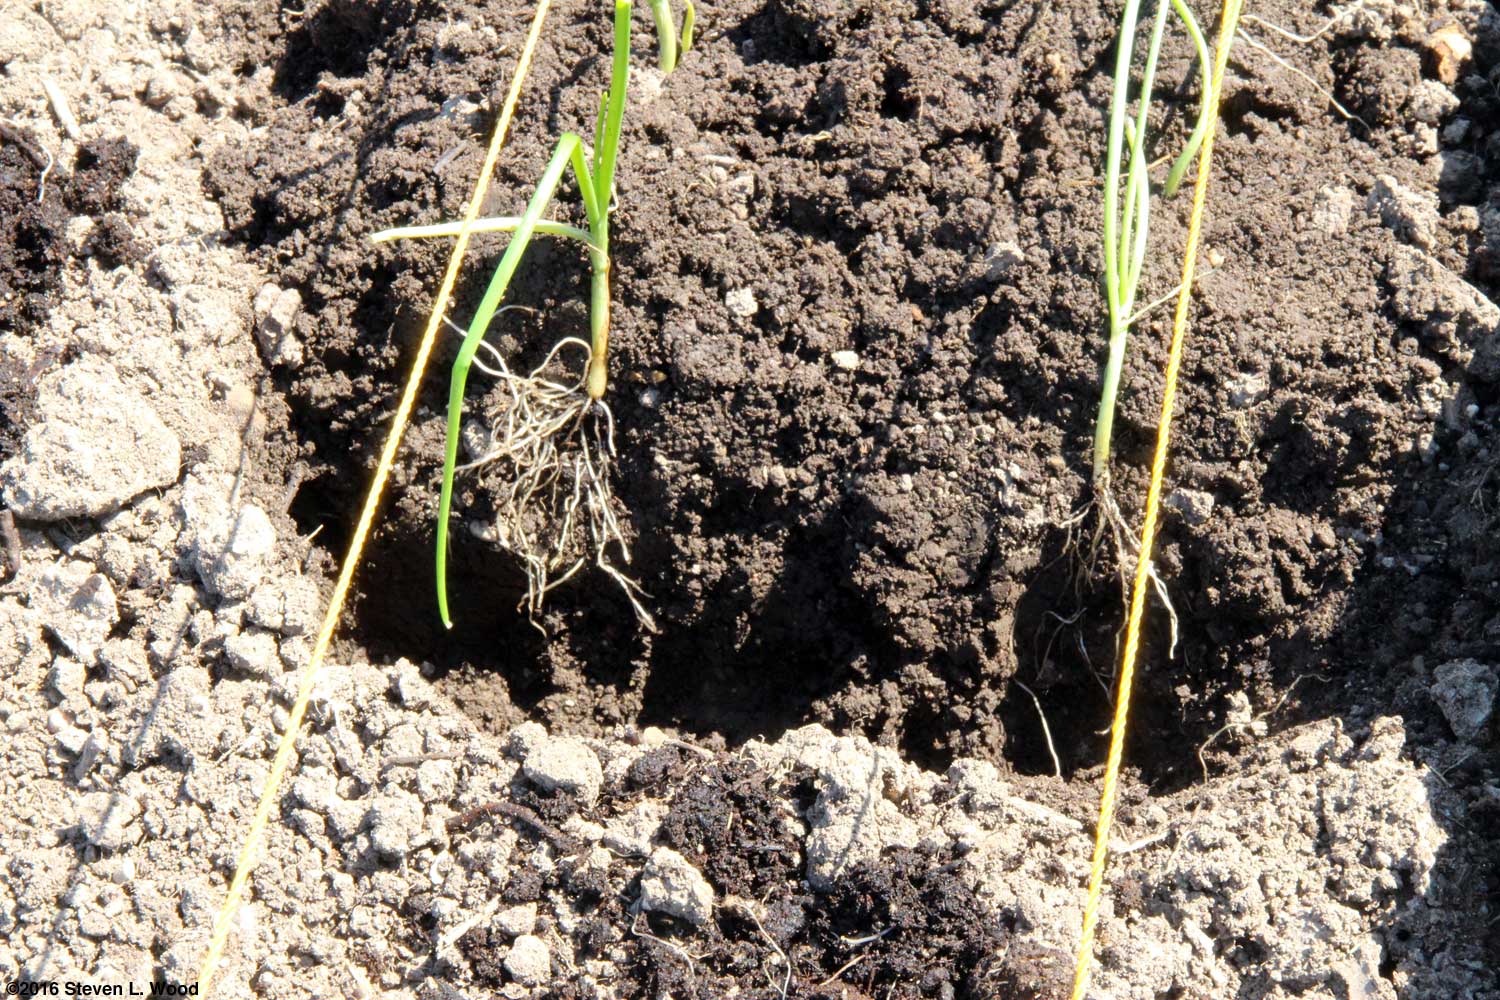
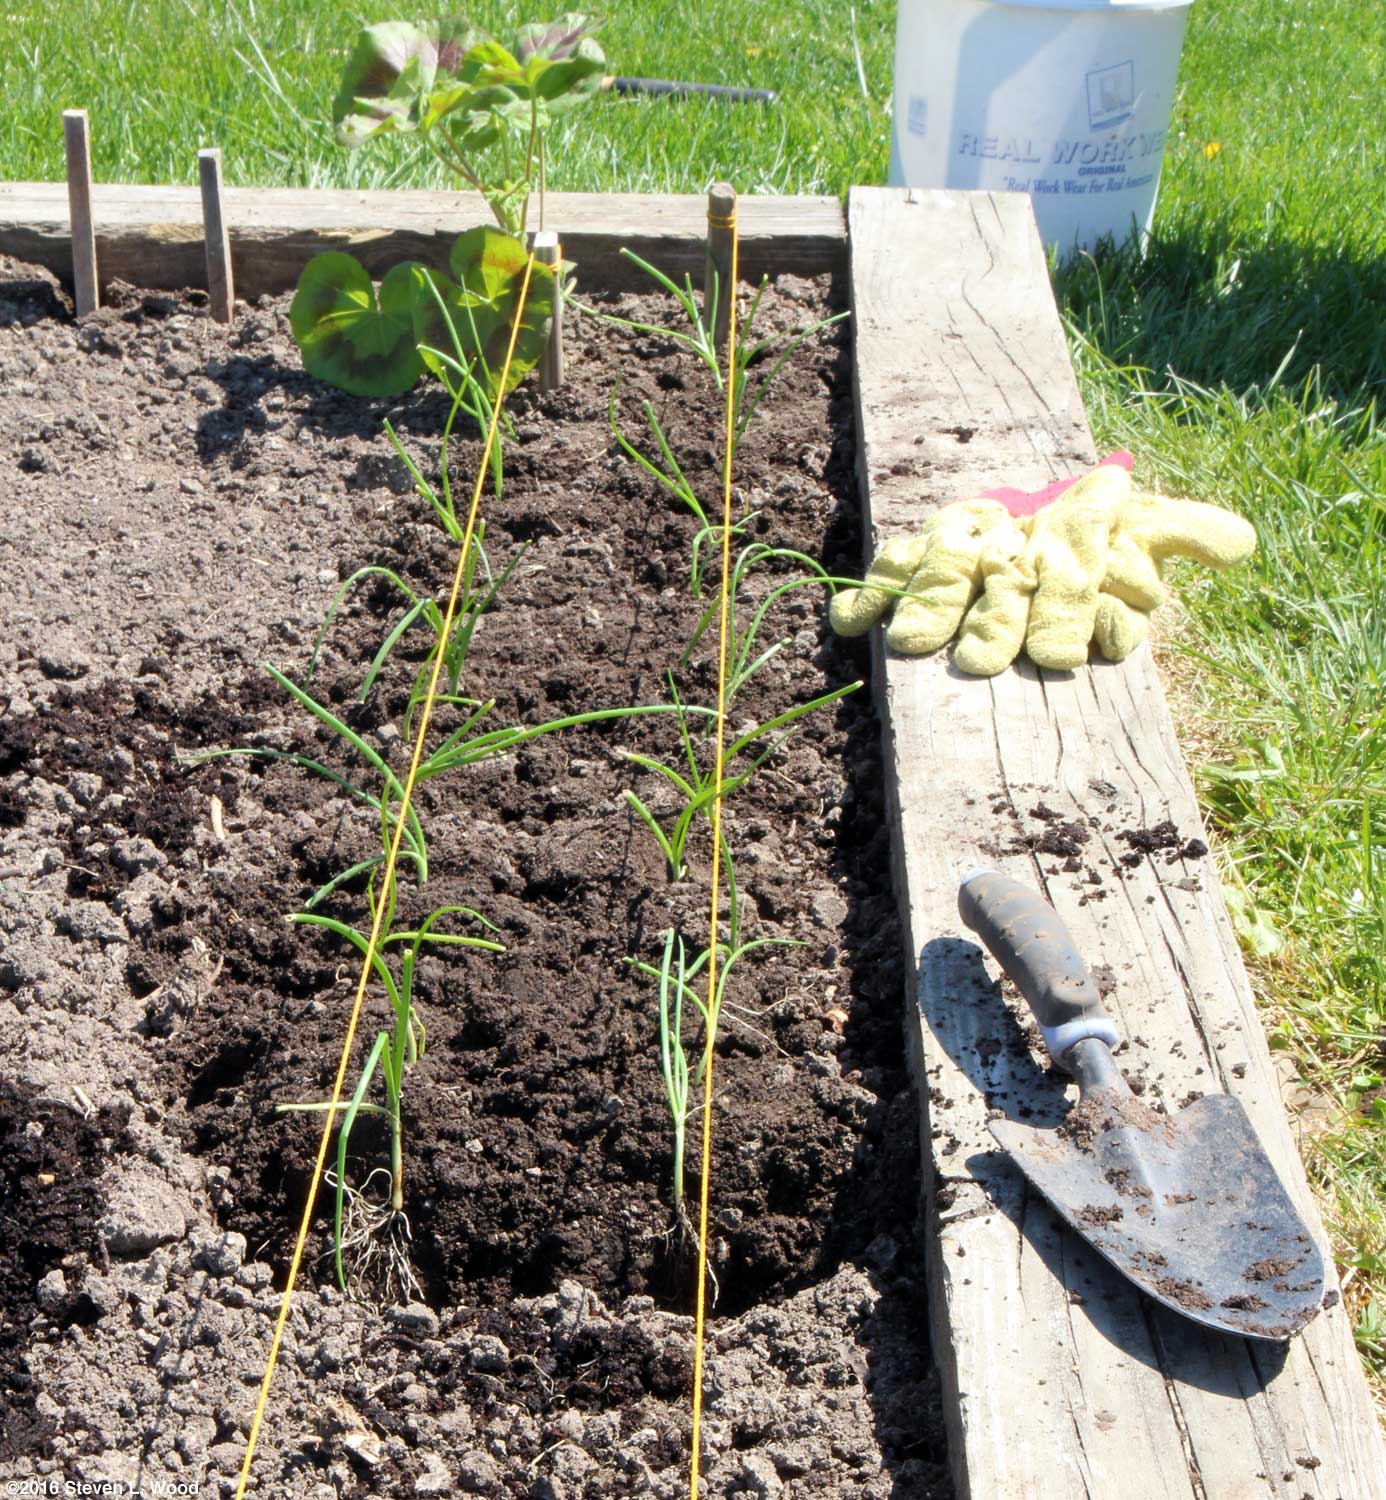
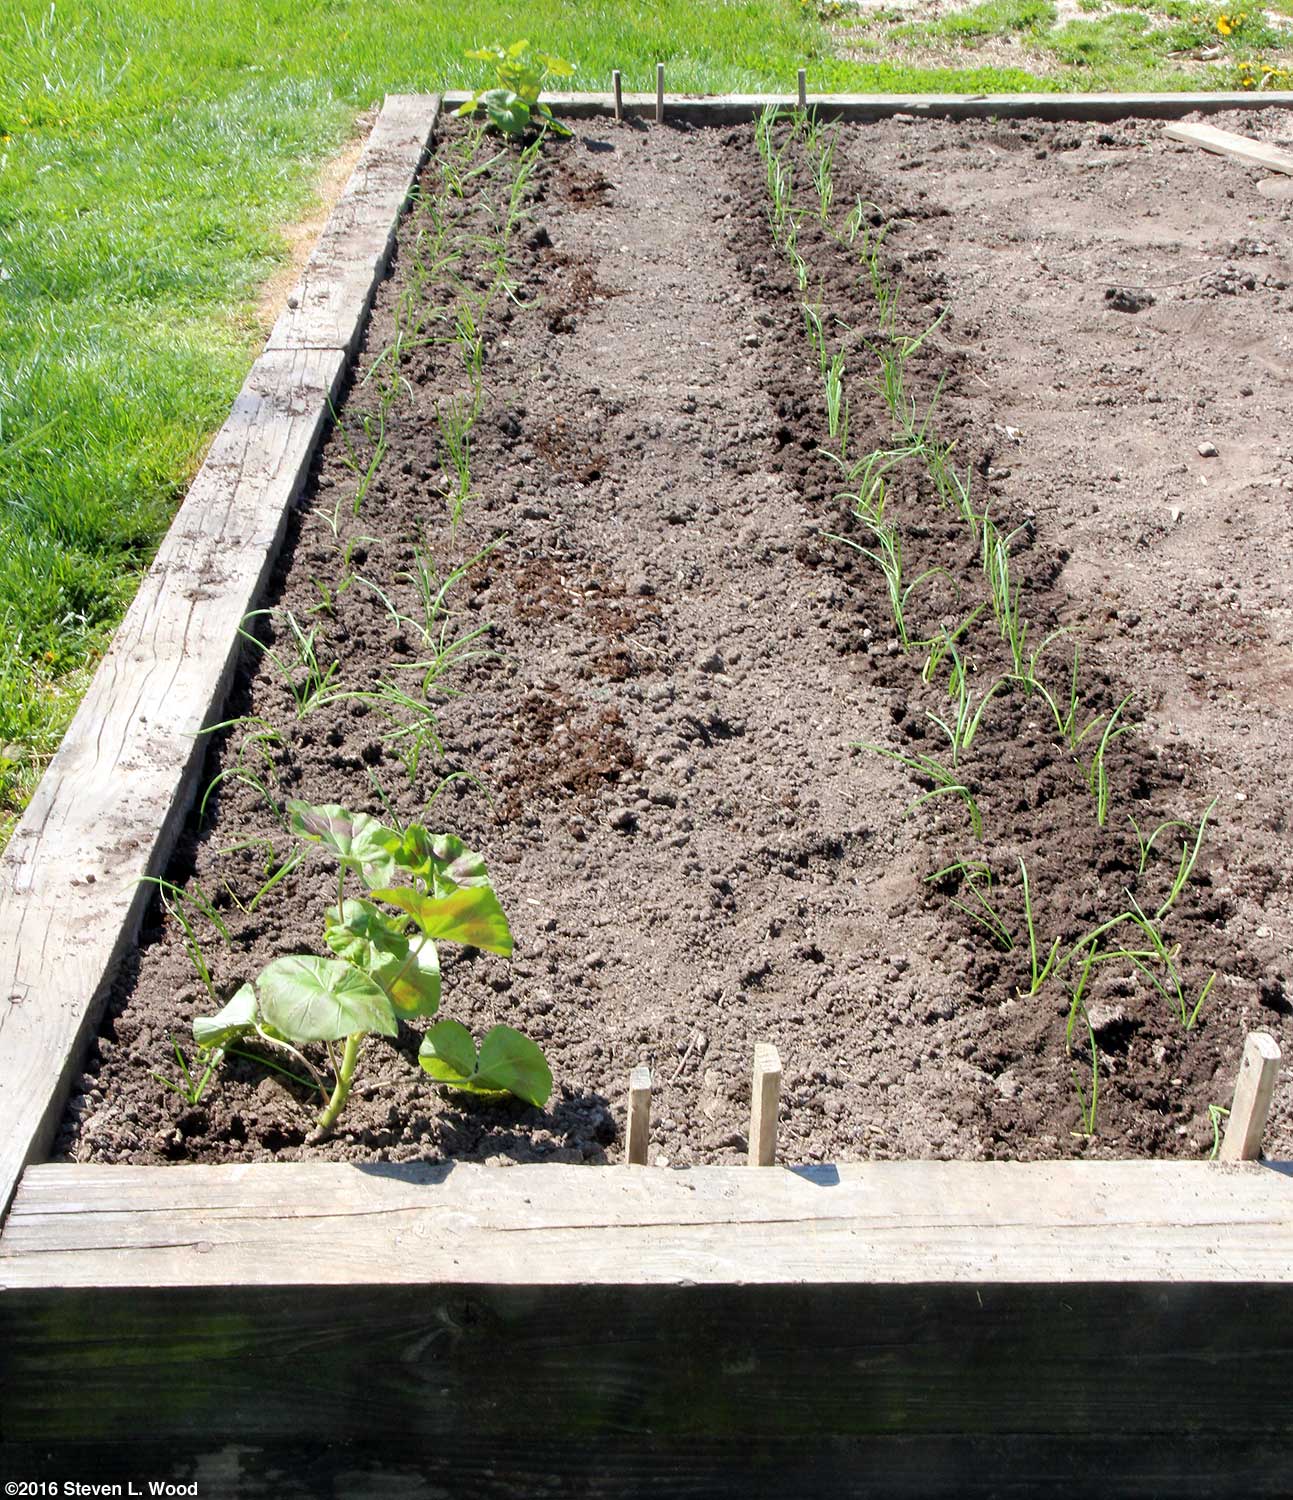
I eagerly got started by planting a half, double row of Walla Walla sweet onions. I've had to cut the Walla Wallas growing season a bit short the last two years, resulting in onions smaller than the variety normally produces. By planting the Walla Wallas at the very end of the bed, I think I can give them as much time as they need to bulb without interfering with any succession crops. When our onion transplants come out of the tray, they often shed most of the soil they've been growing in. I press the nearly bare rooted onion plants into a wall of soil I've made with my trowel and drag soil up against them. Having successfully grown onions for years in double rows spaced only four inches apart, I'm happy with how we do it. (See How We Grow Our Onions.)
Returning to the onions, I finished out the first double row with Red Zeppelins, an excellent red onion. The other double row went to Copra and Milestone. Other than the Walla Wallas, all of these onions store well for us. As the sun set this evening, I watered what I had planted today. The carrots especially will need daily watering until the plants emerge. I still have another tray of onion plants that I'm going to transplant down the sunny side of our brassicas. That tray is mostly plants from old seed leftover from our 2014 Onion Trials. After that, I'll need to take a day or so off from gardening to mow and rake our yard. We already have crops that need to be mulched with grass clippings for weed control and moisture conservation. I really glad that I didn't get around to mowing yesterday, as it's another sunny and warm day today. I'll mow and rake today, but won't be able to do much mulching until the green grass clippings decay and cool a bit.
The onions included a new, open pollinated, storage variety developed out of the hybrid Copra line, Clear Dawn. I planted more of them than any other onion in the row. The rest of the onions were leftovers we liked from our 2014 Onion Trials: Jaune Paille des Vertus; Red Creole; Rossa di Milano; Stuttgarter; Tropeana Tonda; and Yellow of Parma. With three, fifteen foot double rows of onions planted, we should have all the onions we can use with some to share with a local food bank. After transplanting the onions, I did something I should have done with our first planting. I sprinkled a mix of starter fertilizer and Serenade biofungicide over all of our onion rows before watering them with the hose. The starter fertilizer should give them a boost, and I hope the Serenade may help fend off black mold in the onions, although that problem usually occurs closer to harvest than now. I also placed a walking board over our carrot rows to hold in soil moisture and prevent weeds from germinating.
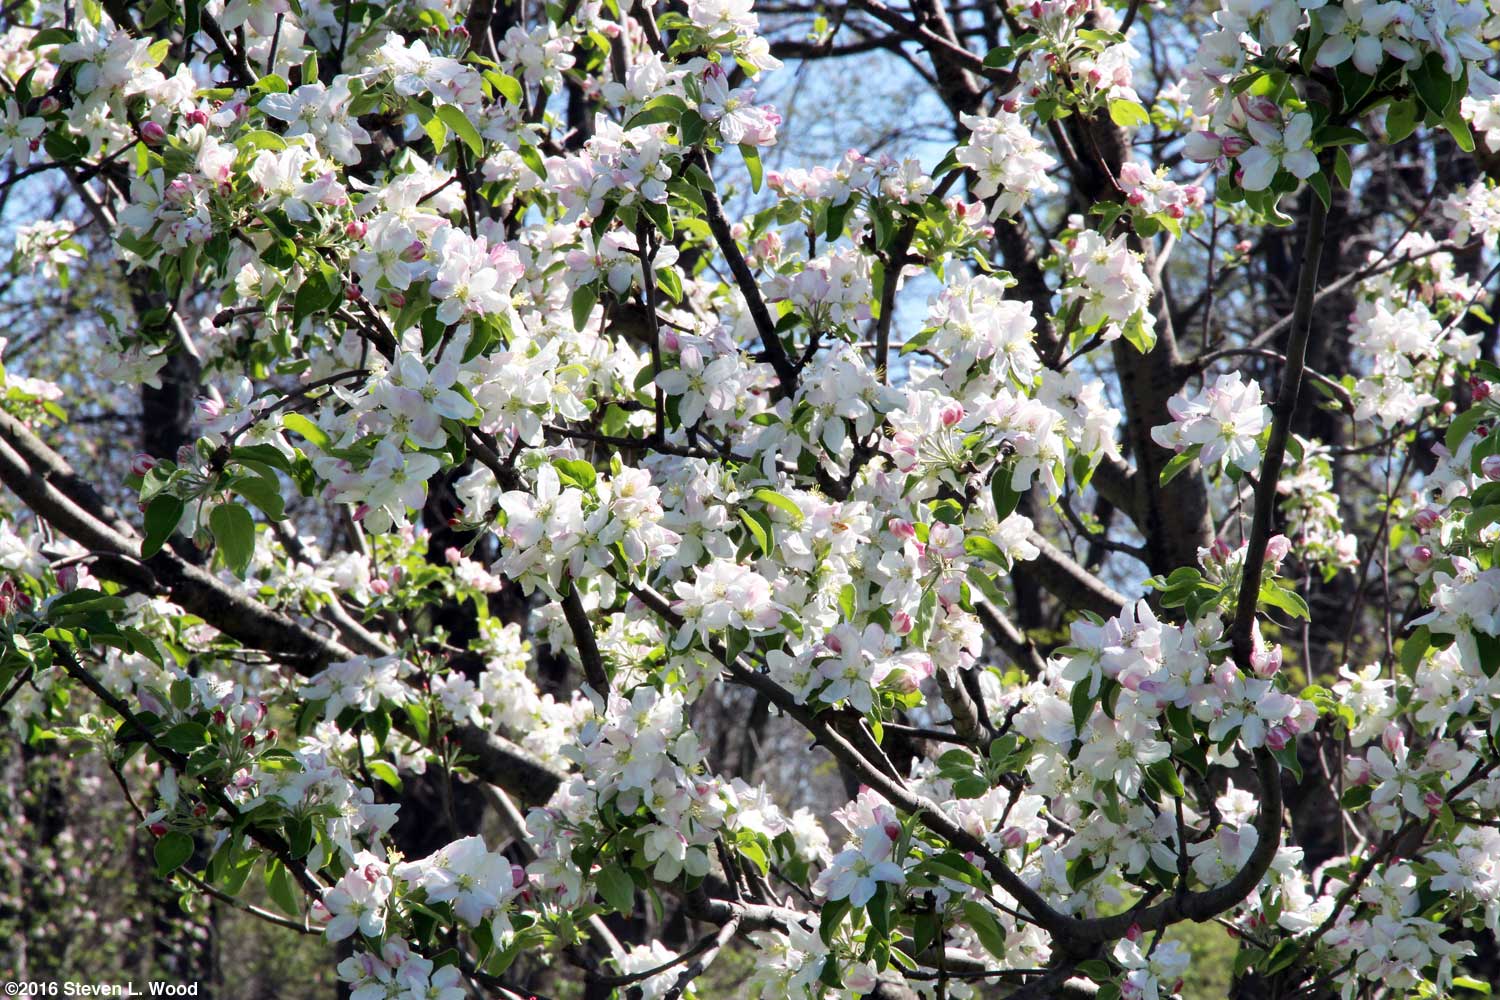
I'd wondered last week if the late frosts we'd experienced had reduced our Granny Smith apple tree's blooms. Since then, the tree has fully bloomed out, although with less blooms than last year. That's mainly because I pretty severely pruned the tree this winter. Our dwarf Stayman Winesap tree has about ten blooms on it, while the volunteer apple tree near our property is also in bloom. Hopefully, there are enough blooms in close proximity for the cross pollination necessary to produce fruit. I have noticed more honeybees this spring than in recent years. Hopefully, that's a good sign of their recovery from colony collapse disorder, which has decimated bee populations across the nation. I've actually noticed more honeybees on yellow dandelions in our yard than on our apple trees. Since we don't use any lawn weed killers so that we can use our grass clippings for garden mulch, we have lots of dandelions.
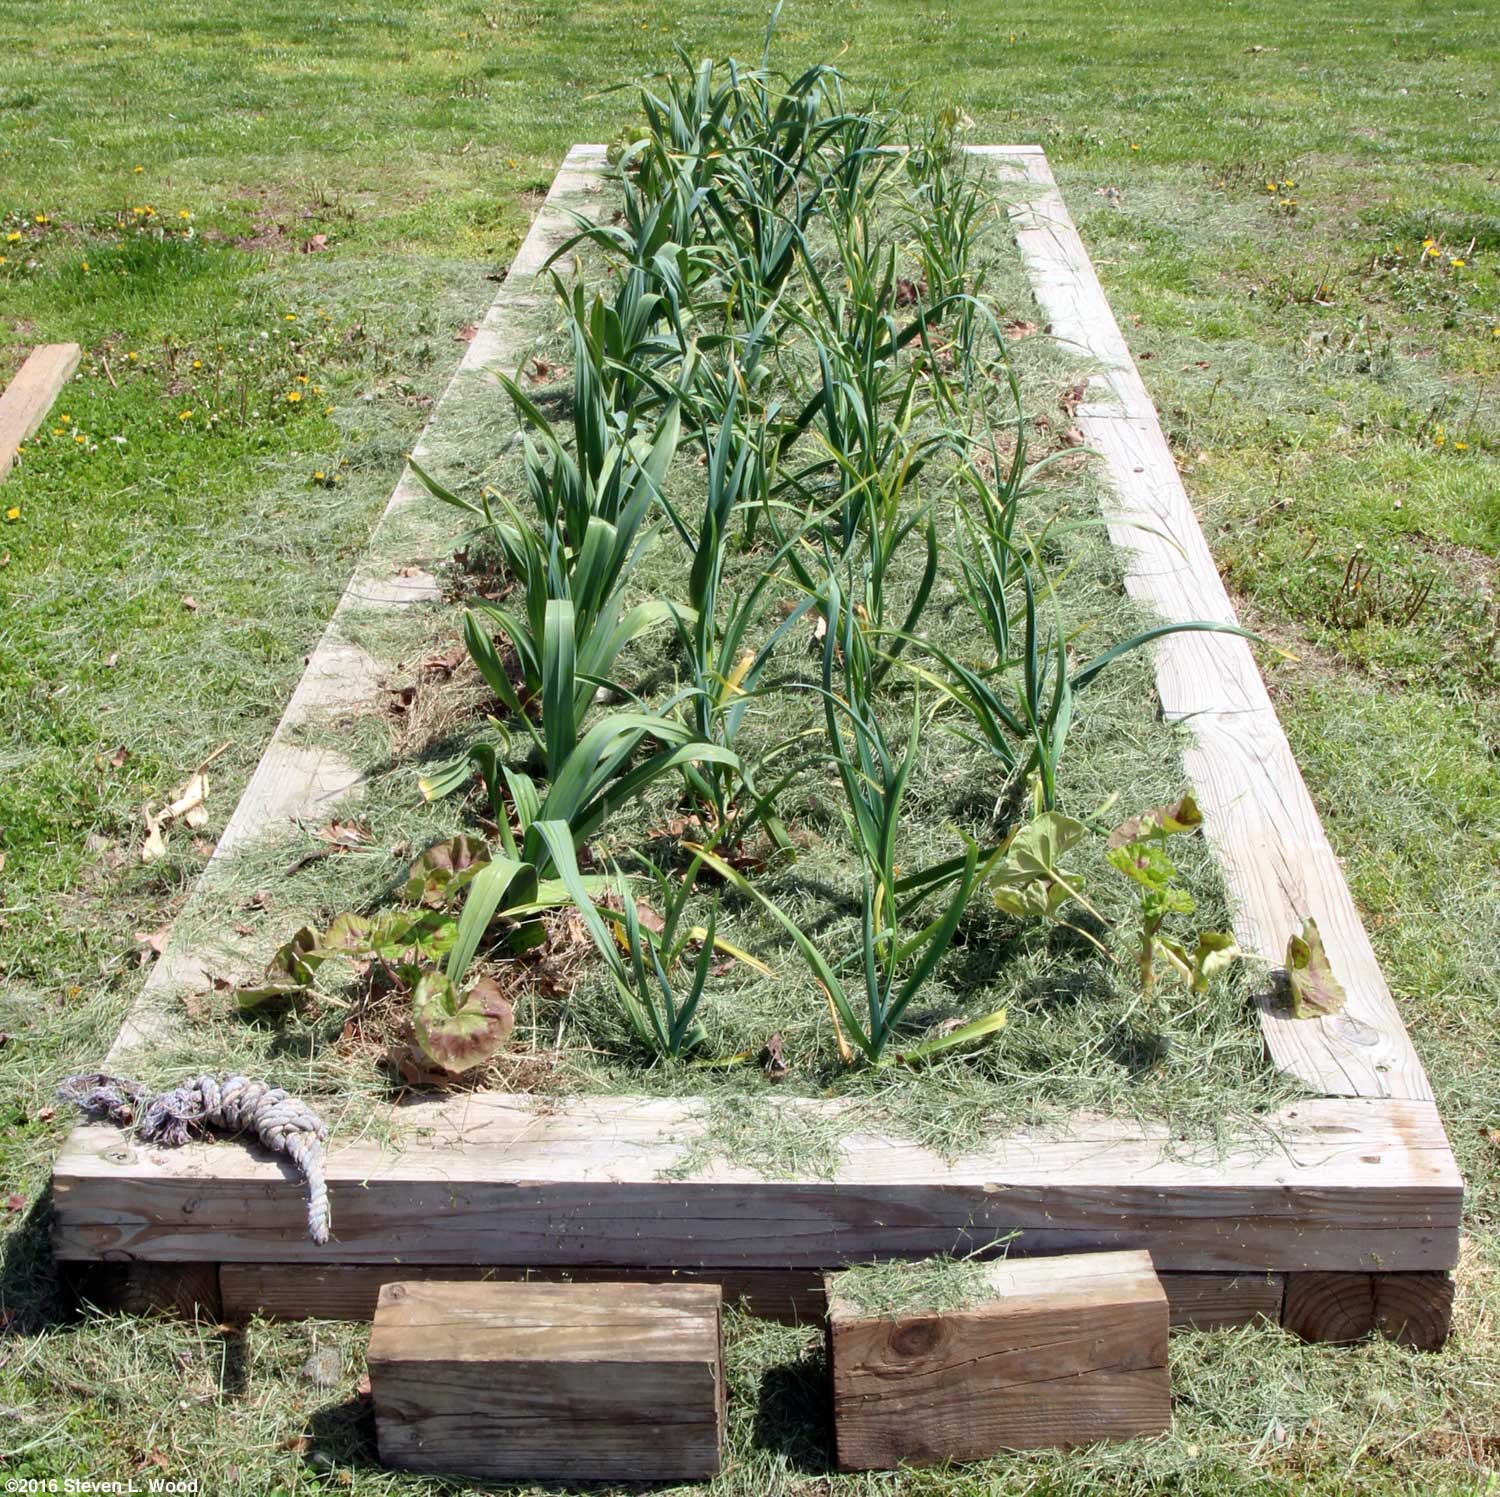
While walking around our garden plots this morning, I spent some time hand weeding our narrow bed of garlic. Lots of seedling weeds had sprung up, but were easily pulled. Once I have some mulch, I'll use a soil scratcher to work in a little 12-12-12 fertilizer around the garlics before applying a good layer of grass clippings to hold back weeds and retain soil moisture. I guess I'd better get out and start mowing!
I then moved on to transplanting tomatoes at either end of our row of early peas. I leave space open at the ends of the narrow raised bed for tomatoes and their cages. Planting the tomatoes there allows me to anchor the cages to the T-posts holding our pea trellis. We've had unanchored tomato cages that were top heavy with fruit blow over in the past, often partially uprooting the tomato plants. I now anchor all of our tomato cages in our back yard with T-posts, as the winds we experience here seem to get stronger each season.
I then watered the hole with a starter fertilizer and Maxicrop Soluble Seaweed solution before backfilling it with the dirt I'd dug out. I then dug a small hole with a trowel, watered it, and pushed the tomato plant deep into the hole. I backfilled the small hole with the soil I'd dug and a bit more peat moss, sprinkling a bit more egg shell around the plant. The plant and ground were then watered with Serenade biofungicide solution as a soil drench to prevent all manner of tomato diseases. I then mulched the ground with grass clippings, pushed the tomato cage into the ground, and anchored it to the T-posts with the same kind of clothesline wire I hang our trellises from. All of that sounds like a lot of trouble to go to just to plant a couple of tomato plants. We don't put in all that many tomatoes, though, and expect to get big production from every plant we put into the ground.
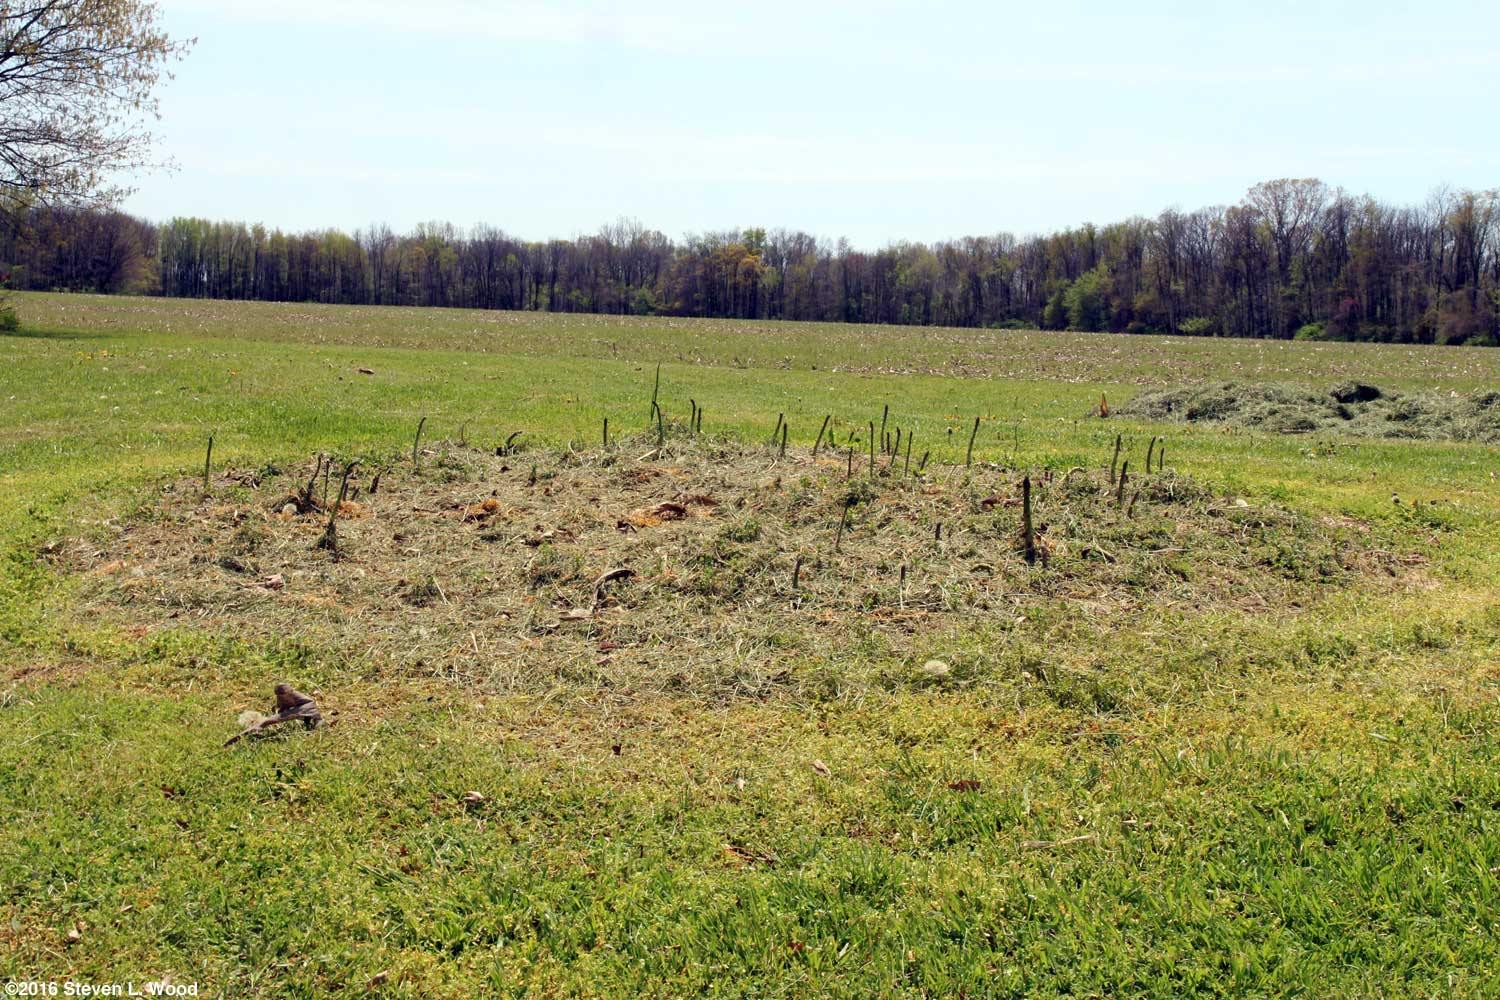
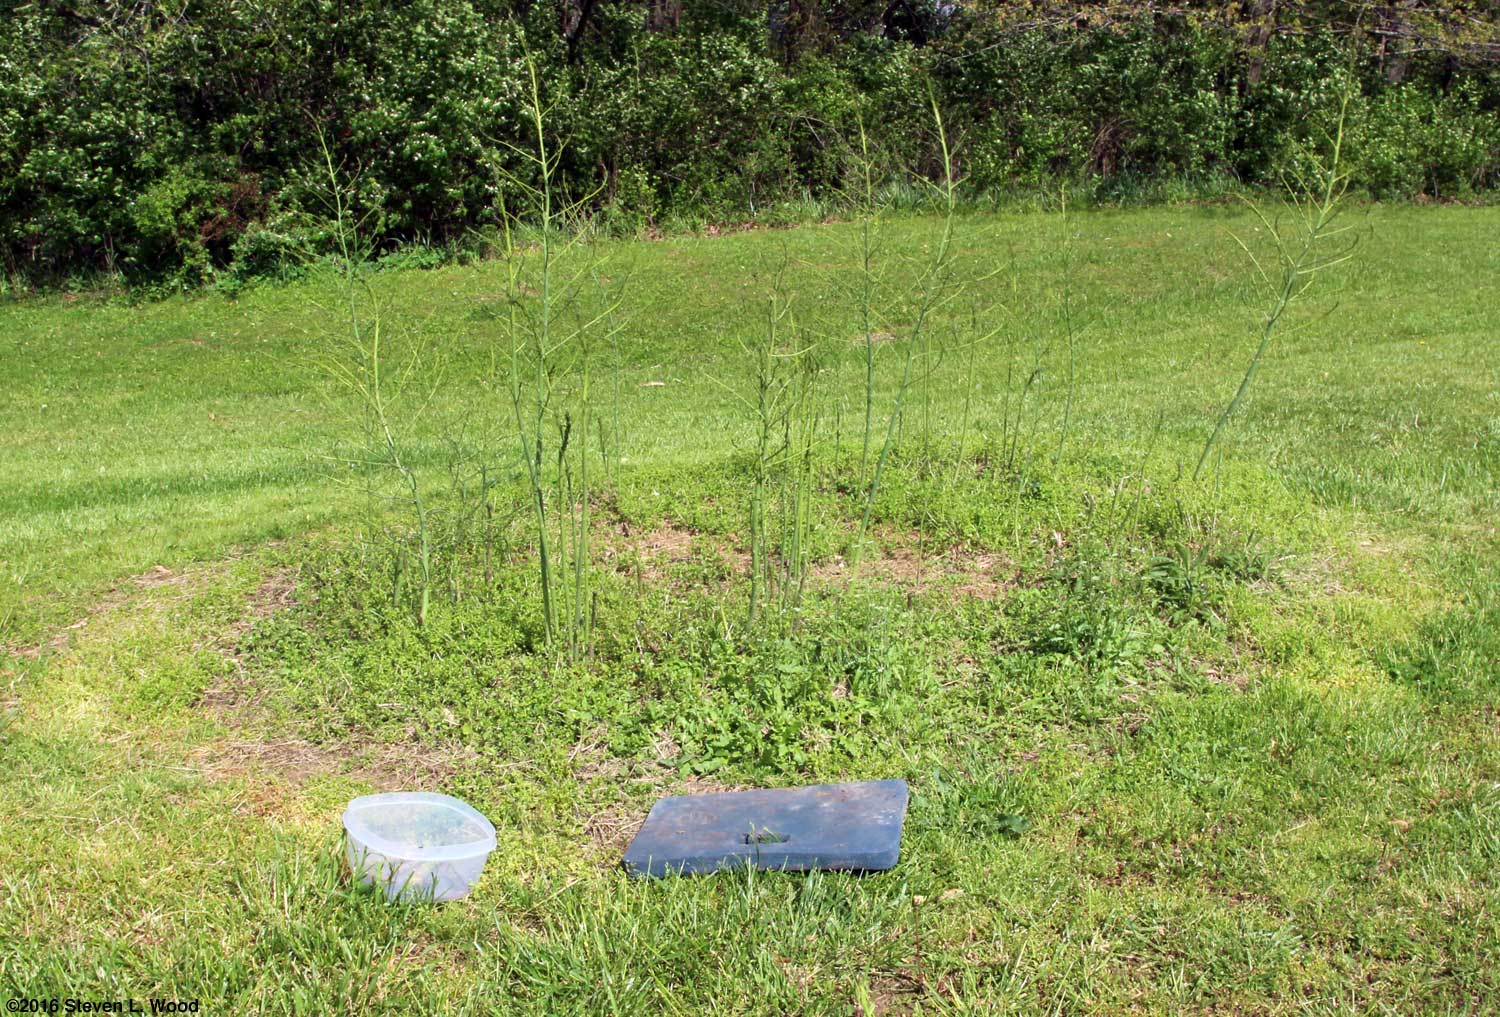
I did a little more lawn sweeping today so that I could cover the areas where our milkweed will go as well as our butternuts. After putting away all my "gardening toys," I trekked out to our asparagus patches, even though Annie had picked them pretty thoroughly yesterday. Our patch in its raised bed had possibly a dozen spears ready to pick. When I approached the extra patch we call Bonnie's Asparagus Patch after the landowner of the ground around us, I was really surprised. The twenty-plus year old patch hadn't produced much this year, and I'd begun to worry that we might have overpicked it the last few years. It definitely hit its stride today.
What to do Next? Our stretch of incredible weather may draw to a close by tomorrow afternoon. Rain is on the way. I should have time to either transplant tomatoes and peppers and seed peas and beans into our main raised bed or switch out the mower deck for the tiller attachment and turn over our East Garden plot. Sadly, there simply won't be enough time (or energy) to do both. At nine o'clock Monday night, I have no idea which I'll try to do tomorrow. Tuesday, April 19, 2016 - Tomatoes and Peppers
We still grow and save seed from Metcalf's Moira and Quinte varieties as well as the Earlirouge variety. We grew Earlirouges last year in really good soil for the first time and had excellent results. Doing so made me change our practice of growing hybrids in our raised beds (our best soil), and bring the Earlirouge and Moira varieties back to our main garden beds this year, exiling our hybrids to isolation plots we previously used for tomato seed production.
The Earliest Red Sweet peppers planted are a variety I'm trying to preserve. I got our start on them from Stokes Seeds in the 1970s, but lost our saved seed in storage. Fortunately, another Seed Savers Exchange member had seed several years ago, and we now share ERS seed with lots of readers and seed libraries. The Earliest Red Sweet variety produces medium sized peppers in abundance that have good flavor. I was sorta shocked this winter when I realized that I was the only SSE member still offering the variety. I still have some other tomato and pepper varieties to put out, but they'll be going into isolations plots that haven't been turned over yet. In fact, those plots sat idle last season as I rehabbed from hip surgery, making crop rotations a good bit easier this year.
Both the Encore and especially the shrunken seeded Eclipse varieties require fairly warm soil to germinate well. The soil in our main raised garden bed measured at 66° F four inches down last evening, easily enough to pop up peas and beans. Just four days ago, the soil temperature was only 48° F. I guess that tells one what several sunny days of seventy and eighty degree weather can do for soil temps. I had tried soaking some of our short pea seed before planting last year with rather dismal results. With rain possibly on the way in the next few days, I decided to just go ahead and plant the pea seed dry today. I did, however, thoroughly deep water the furrow I seeded the peas into. I used a bit of old and new saved seed for the planting, putting it in a fairly narrow row. I'd worked in a little 12-12-12 fertilizer, lime, and granular soil inoculant before the seeding. I used about the same method in seeding rows of green beans and kidney beans to pretty well fill out our main raised bed. I still have a little space reserved for lettuce transplants, which are almost ready to go into the ground. When I finished up today, I realized that other than the lettuce, I had our main raised bed totally planted. Half of it is mulched already. I would have mulched up to the edges of the bean plantings, but I ran out of grass clippings.
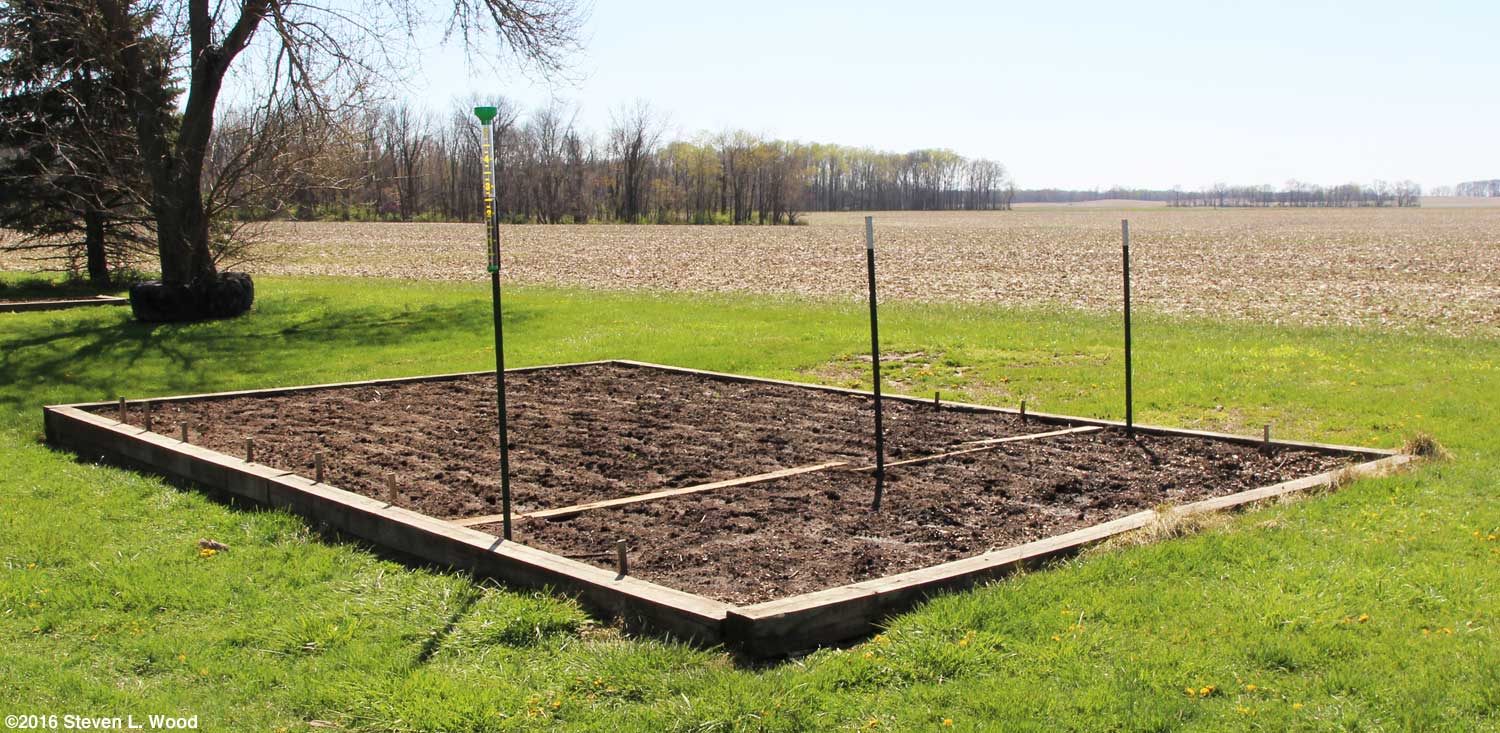
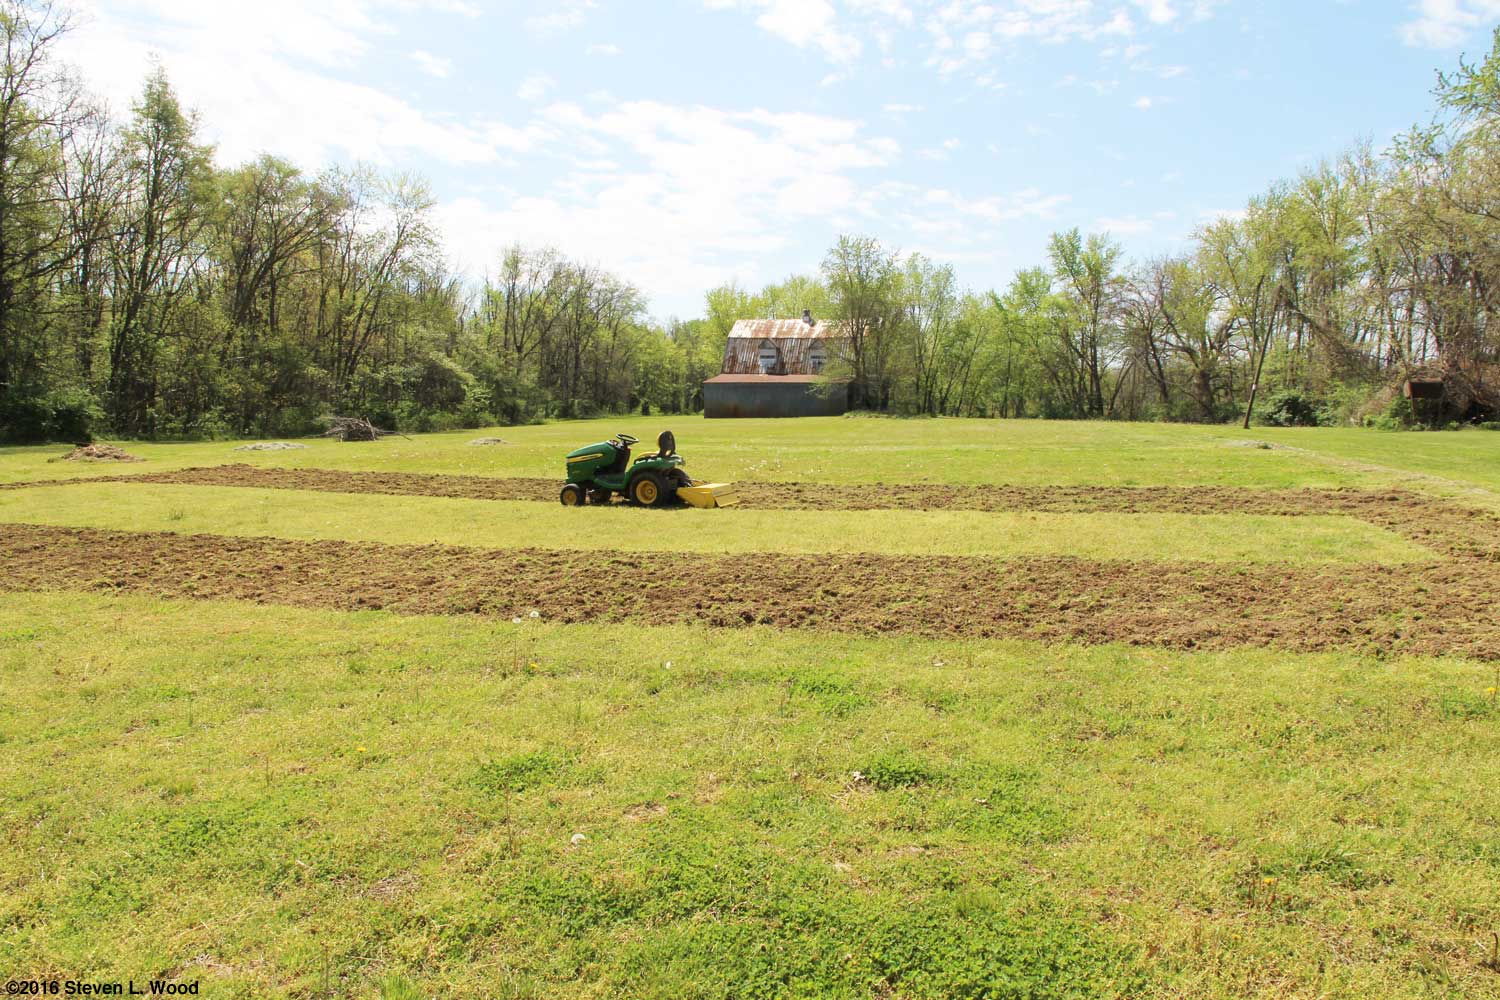
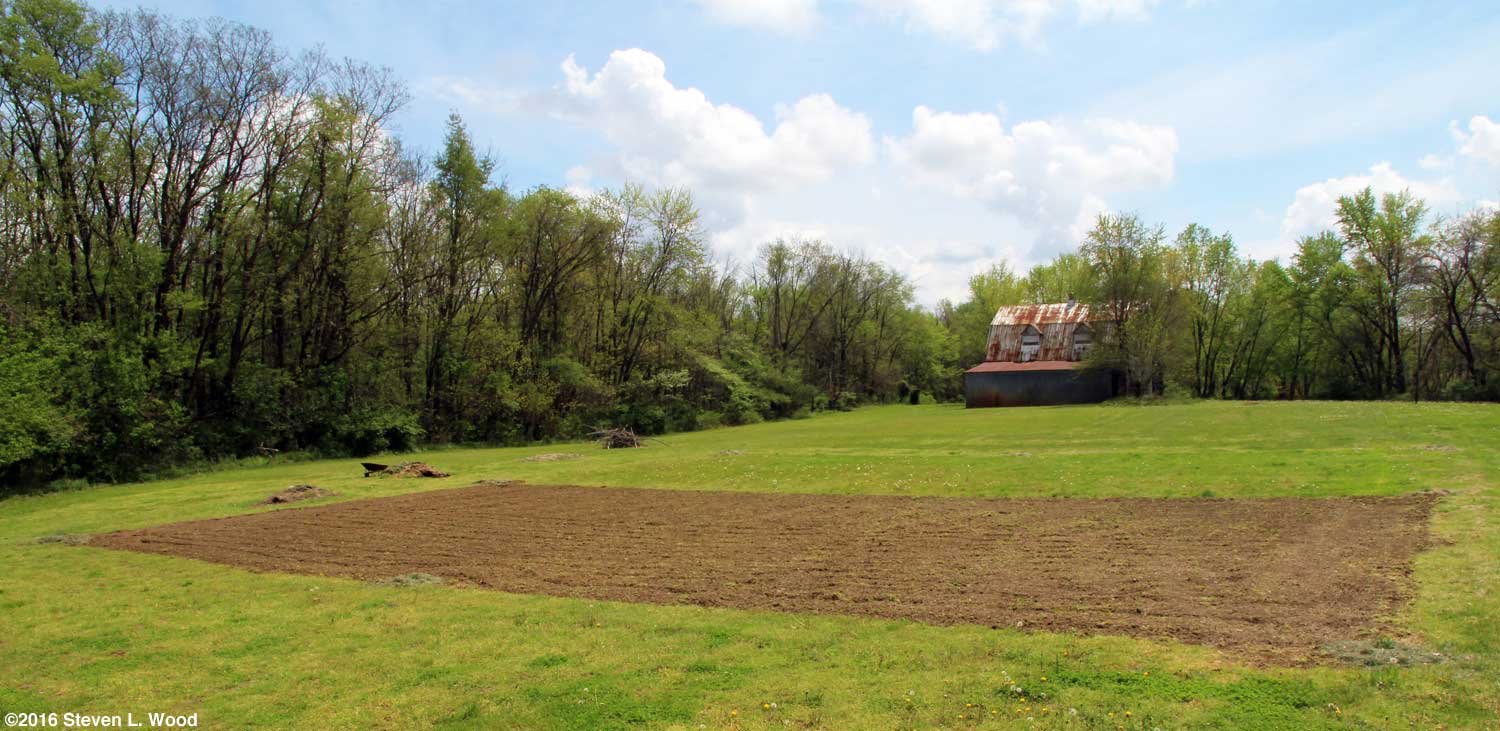
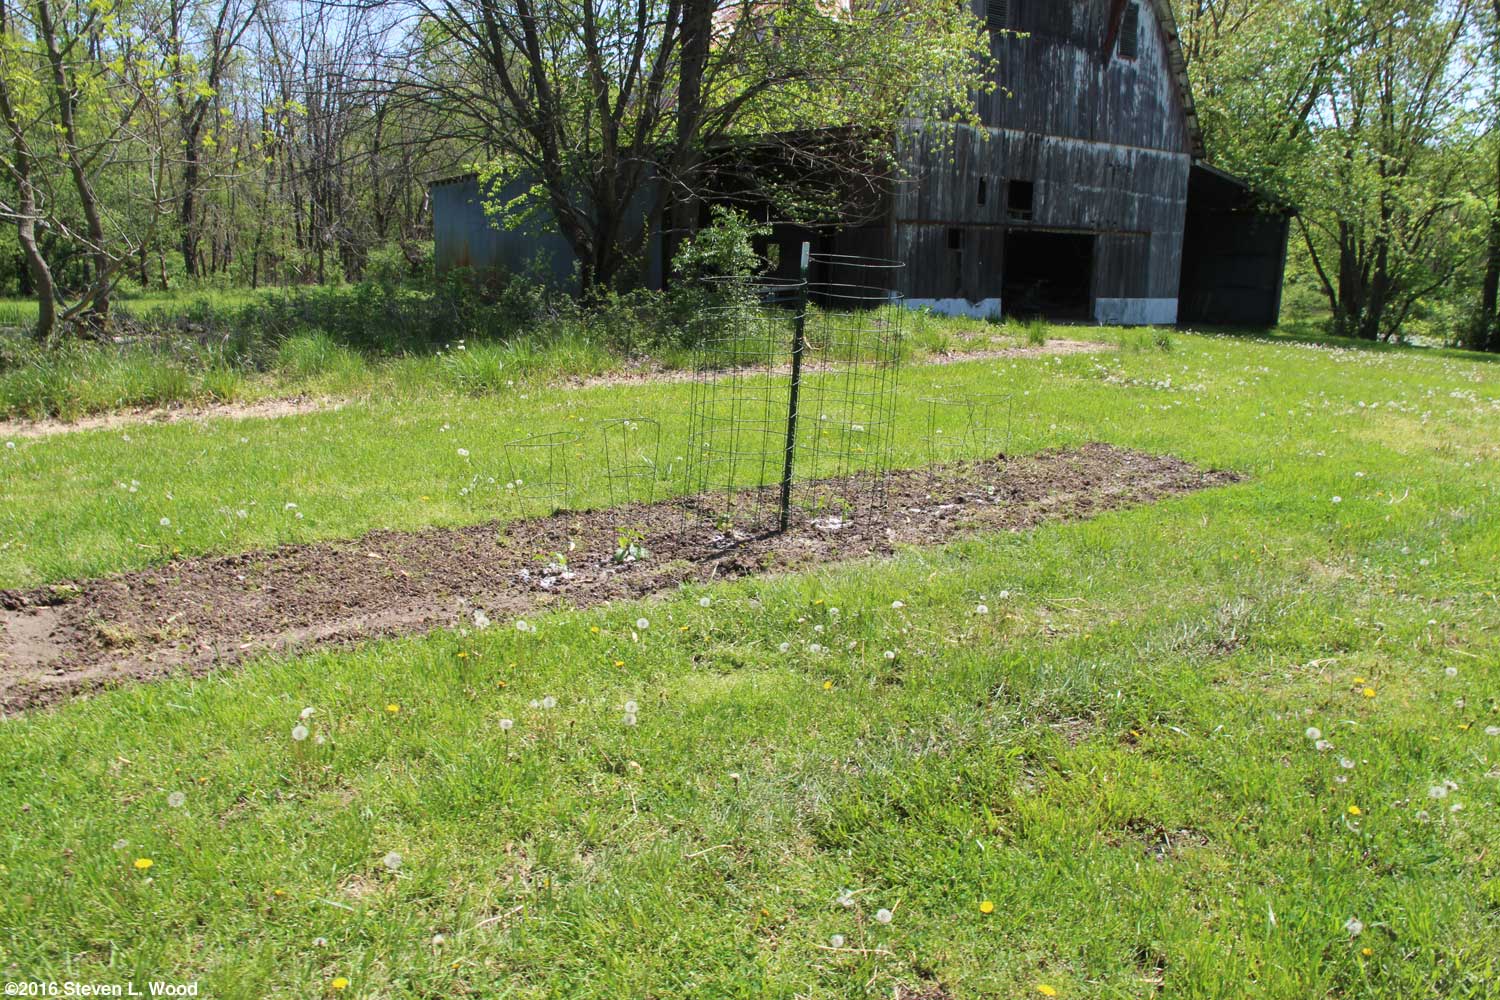
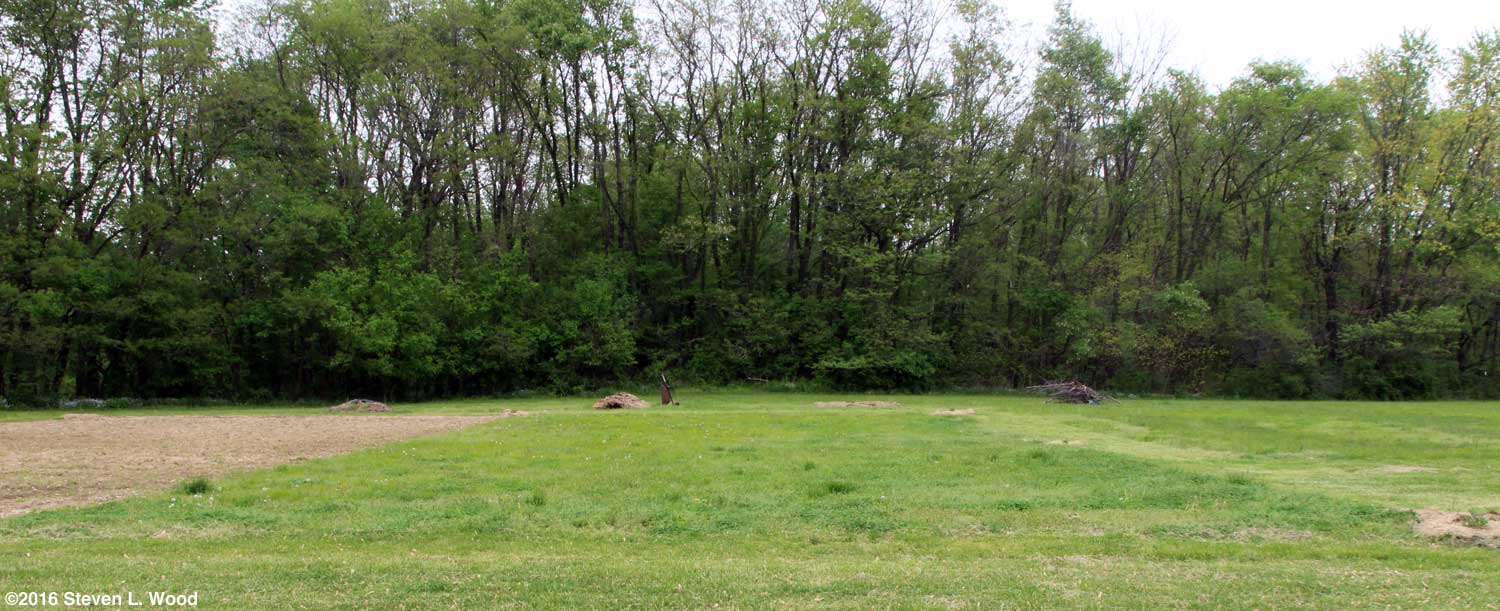
Wednesday, April 20, 2016 - East Garden Tilled It's going to start raining here in a few hours. But the rain held off long enough for me to get our East Garden and a couple of isolation plots tilled this morning.
I'm watching the weather radar to the west of us, hoping to pop back out and turn the plot again just before it rains. While I'd prefer for the ground to sit and dry out a day or so after the initial tilling, getting even the first tilling done this early is a big plus. Later
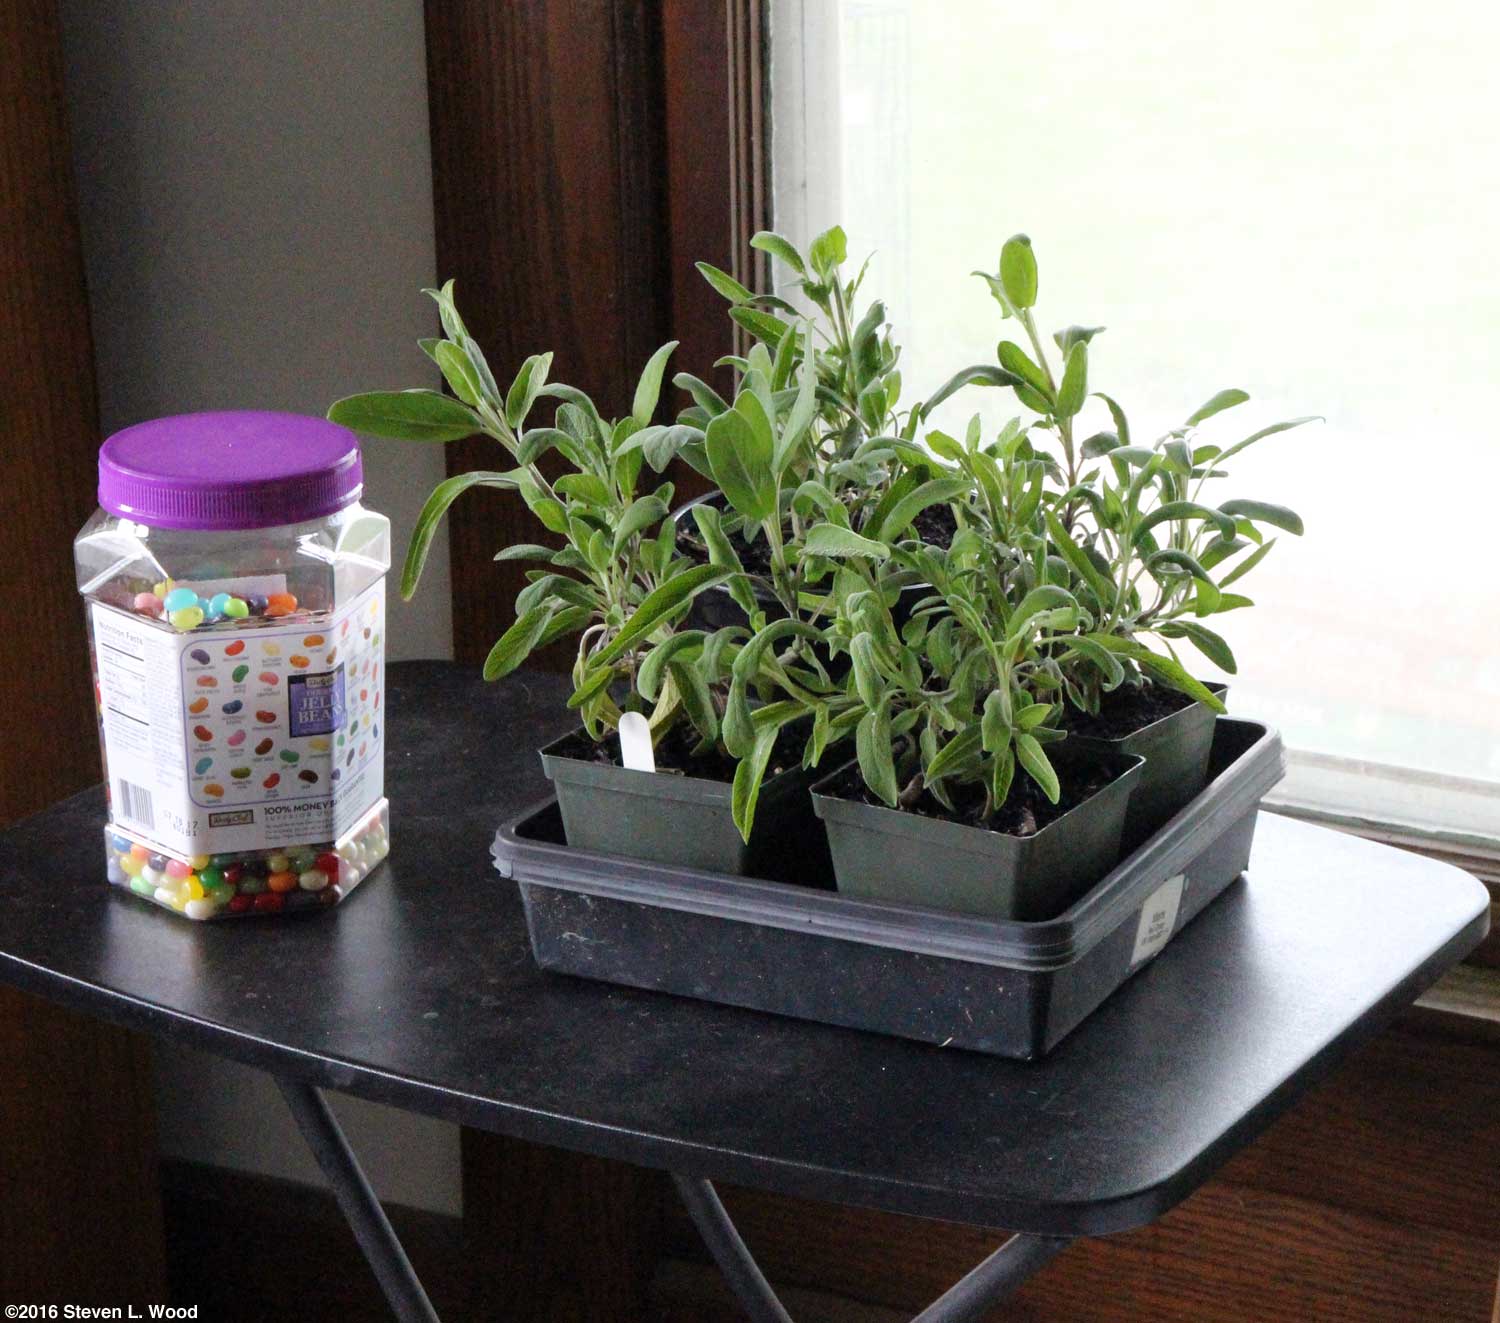
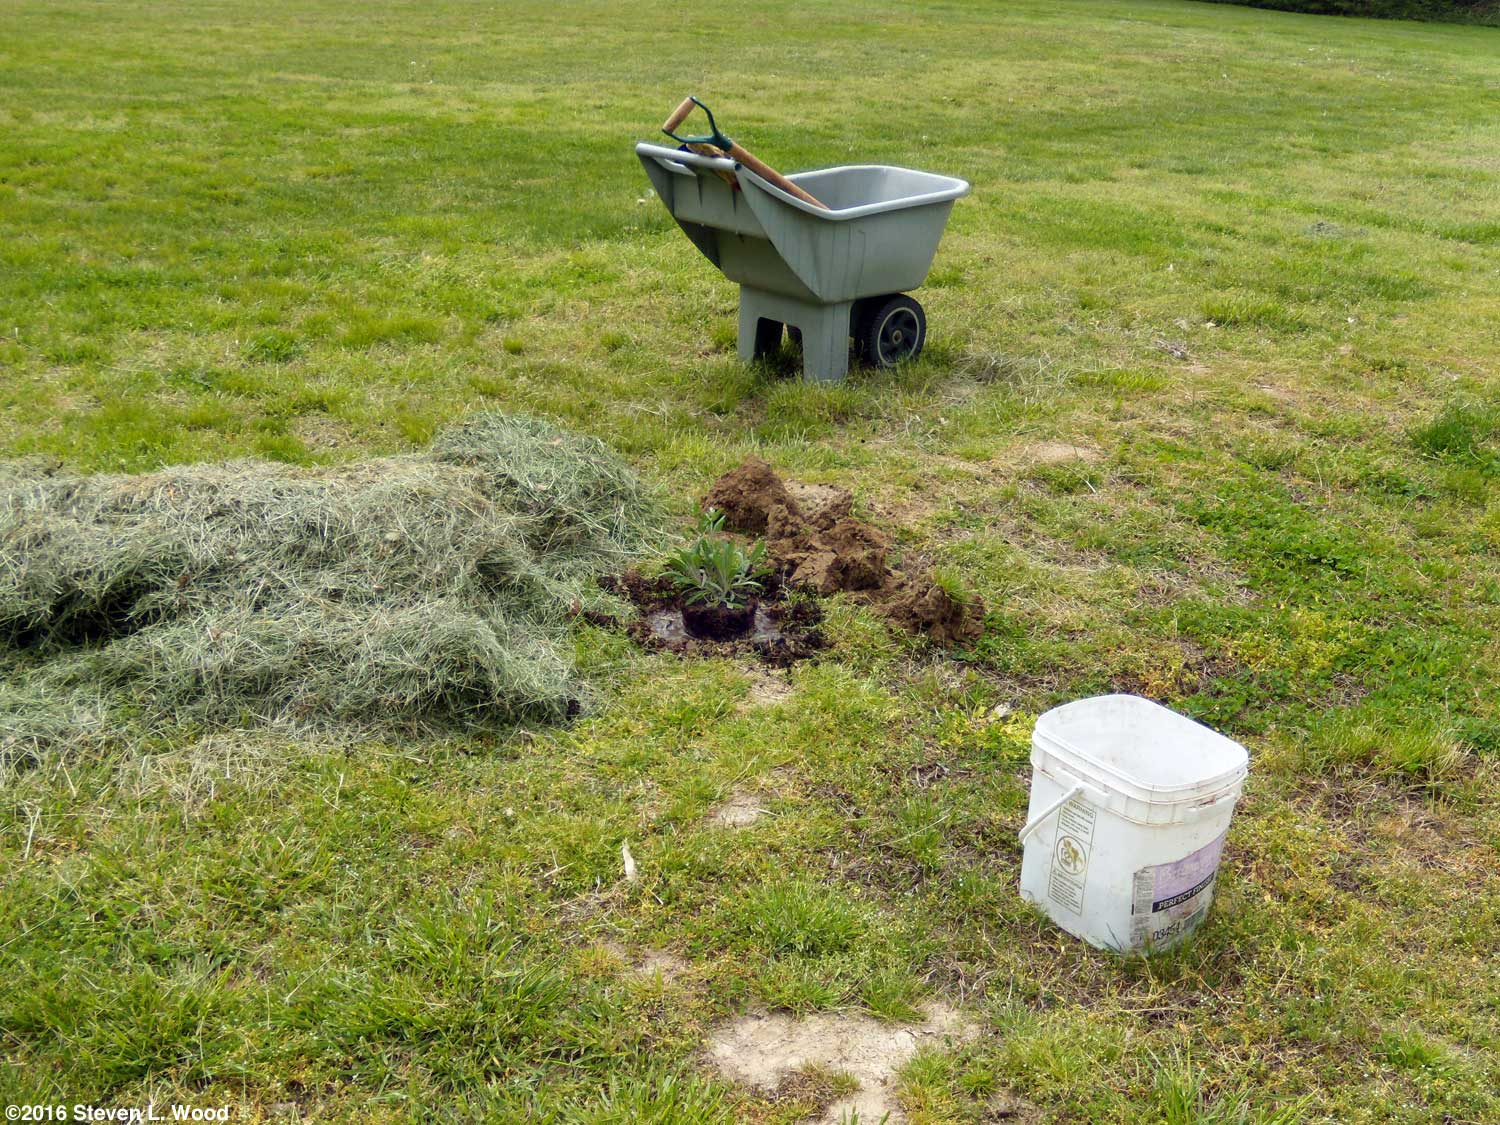
Rather than use our usual deluxe hole mix of peat moss plus native soil, I backfilled the twelve inch round and deep holes for the sage with compost. A heavy layer of grass clipping mulch around the plants should hold back weeds for a while as the plants get established. I'd started the sage last summer, but never got them transplanted. They overwintered nicely in our sunroom. If you've priced sage plants any time recently, you know plants like our larger ones retail for $5 or more each at garden centers. Ours came for the price of seed and some potting mix and a bit of our time caring for them. I had decided to use sage plants as semi-permanent markers of our East Garden plot several years ago. They are gorgeous when in bloom and may even help deter deer. I had several nice plants at some of the corners and midway points of the plot two years ago. When other folks were mowing the field last summer where the East Garden usually is, the existing sage plants all got mowed down, a small price to pay for volunteers mowing when I couldn't. I'm hopeful that all eight sage plants put in today will make it. If not, I still have four more plants in reserve, although I'd really like to use a couple of them by our shallow well cover as we did several years ago. We're still using up the dried and ground sage from that plant! A Health Note I did some things today that had been painful to impossible for me for a long time. I used our pull-type tiller, which requires pushing a lift petal at the end of each row tilled that takes over forty pounds of pressure to do, and I dug eight holes about a foot in diameter and slightly deeper for the sage. Both of those activities before my hip replacement caused extreme pain. As I write this last update for today (tonight), I'm not on any painkillers and am not in any real discomfort. While my recovery has taken nearly a year, it's definitely been worth it.
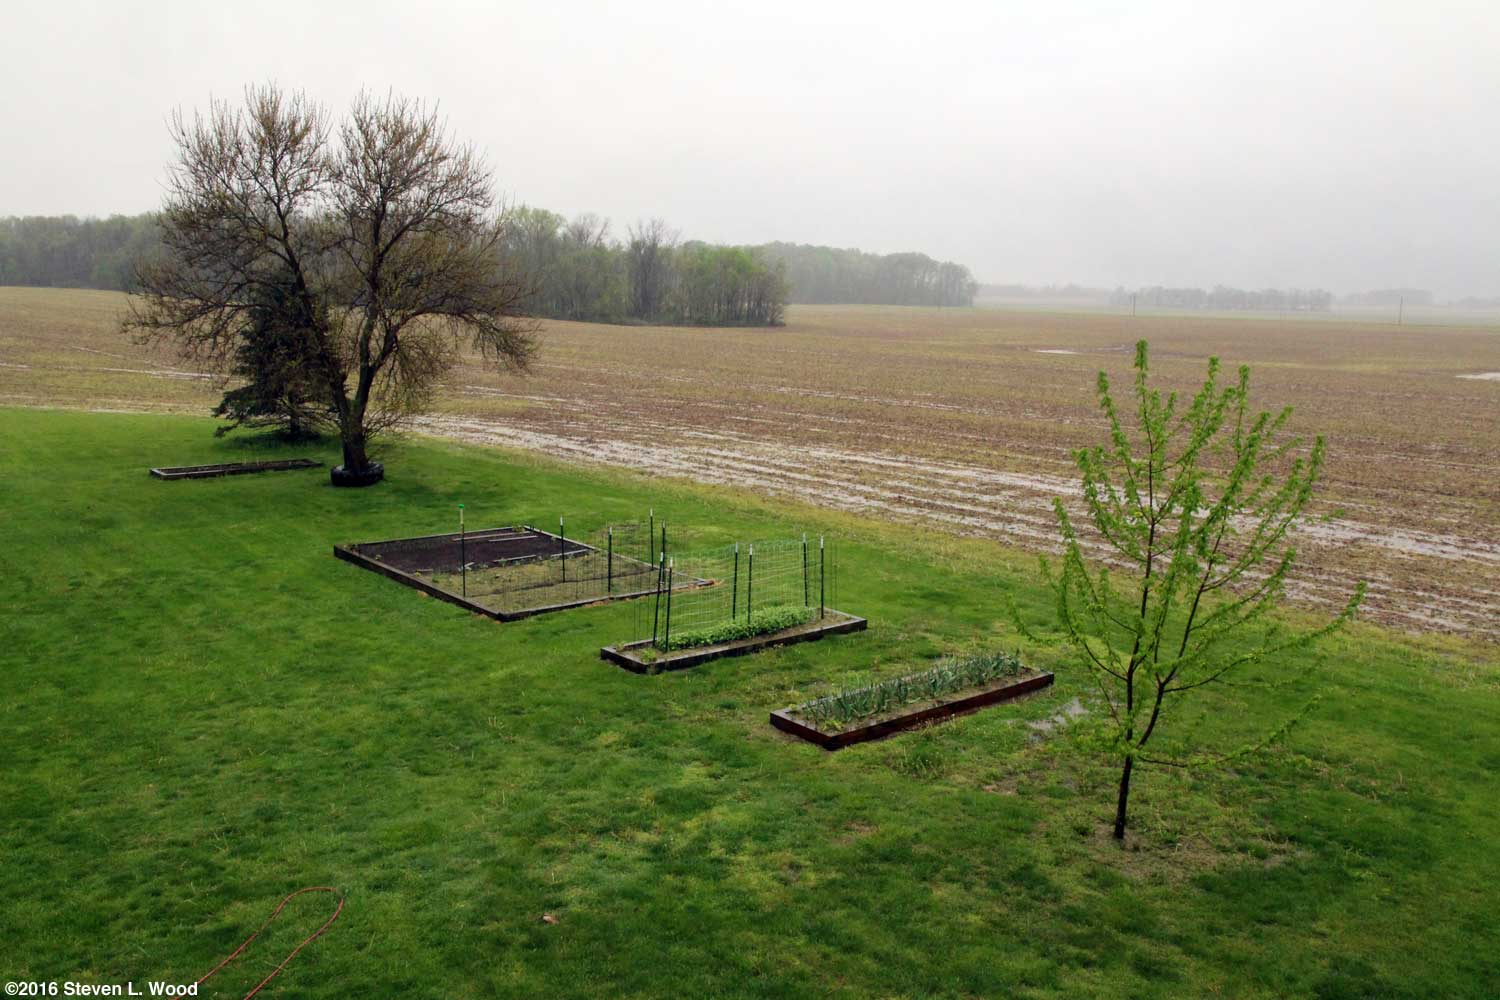
The rain will slow down our gardening progress, but will be a boon to our onion transplants that were having a tough time getting established, even with daily waterings. It should also help pop up our direct seeded spinach, peas, and beans. With our raised beds pretty well planted, our gardening focus will turn to our large East Garden plot. Getting it tilled yesterday before the rains began is a big plus. Once things dry out, it will need to be tilled at least once more before planting anything. I'm guessing that won't happen until early May.
The 40' x 80' section of the East Garden that we'll use this year will be a lot simpler than in the past. The other half of it was seeded to an alfalfa cover crop, although right now it appears to have more white Dutch clover growing in it than alfalfa. In years past, we've squeezed in extra brassicas, tomatoes, peppers, eggplant, peas, and whatever else I couldn't fit into our raised garden beds. This time around, I'll be limiting our East Garden plantings to squash, melons, sweet corn, and potatoes. Trying to grow too much or too many things can take the joy out of gardening.
I'm hoping to be able to work from outside our main raised garden bed later today to transplant some lettuce. We also have a couple of narrow, isolation plots that may be able to be planted soon by working from the edges of the three foot wide plots. Walking into our East Garden plot now would simply be an invitation for the mud to suck your shoes or boots right off your feet. Free Shipping Offers I received our second seed catalog from Twilley Seeds in Monday's mail. Twilley usually isn't bad about sending extra catalogs as some seed houses are. This one came in a plastic wrapper with an insert proclaiming that they are waiving "all shipping and handling charges" on orders until June 30! One does need to mention "no handling" when placing an order with them. I thought it might be nice to pass along the free shipping info to readers who may have been put off by Twilley's regular, high shipping rates. They're one of the "good guys" among seed vendors. Burpee When Burpee began their first, long-term, free shipping offer, I wondered if they might be experiencing some reduced sales. Since they've renewed the offer a couple of times now, it seems almost permanent. With Twilley's free shipping offer, I'm a little more convinced that seed houses are feeling some pressure over their shipping rates. Of course, the offers might just be some good advertising, but I really doubt it. It will be interesting to see if other seed houses follow suit in offering free shipping to improve sales. How Much Rain?
All the rain has popped up some spinach and a bunch of seedling weeds in our narrow raised bed that also has peas and tomatoes planted in it. Since the spinach seedlings are in a straight row, spaced an inch or two apart, they're pretty easy to distinguish from the weeds. I was especially pleased to see some of the Melody hybrid spinach emerging. I'd bought a couple of packets of Melody and Premium Crop broccoli from Reimer Seeds, since no one else seemed to be offering the varieties. I'm just guessing, but I think Reimer has bought up the remaining old seed still available from wholesalers. It appears that production of seed for both of the hybrids has been discontinued. Do note that Reimer's continues to get hammered on Dave's Garden Watchdog. While I'm rambling on a rainy day, I'll relate that I've had our new hummingbird feeders up since they arrived a week ago. We didn't see our first hummingbird last year until April 24, so we may soon begin to enjoy seeing the tiny birds once again. Ah, anticipation... Sunday, April 24, 2016 - Lettuce Transplanted
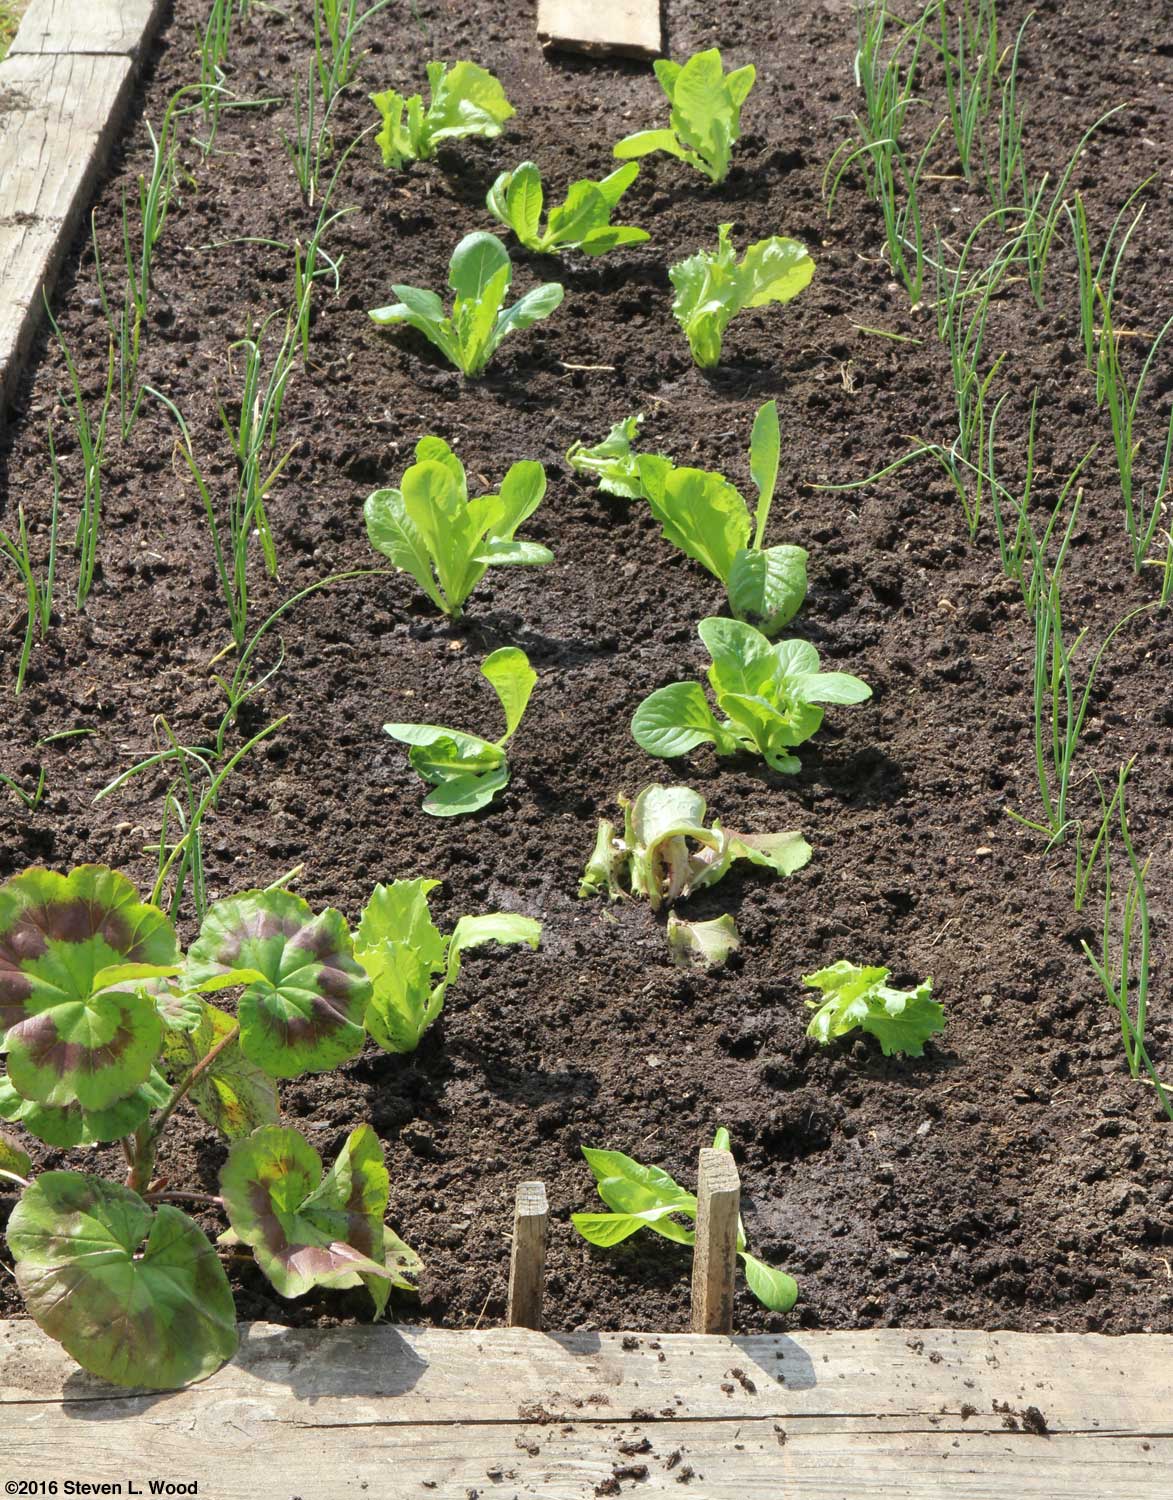
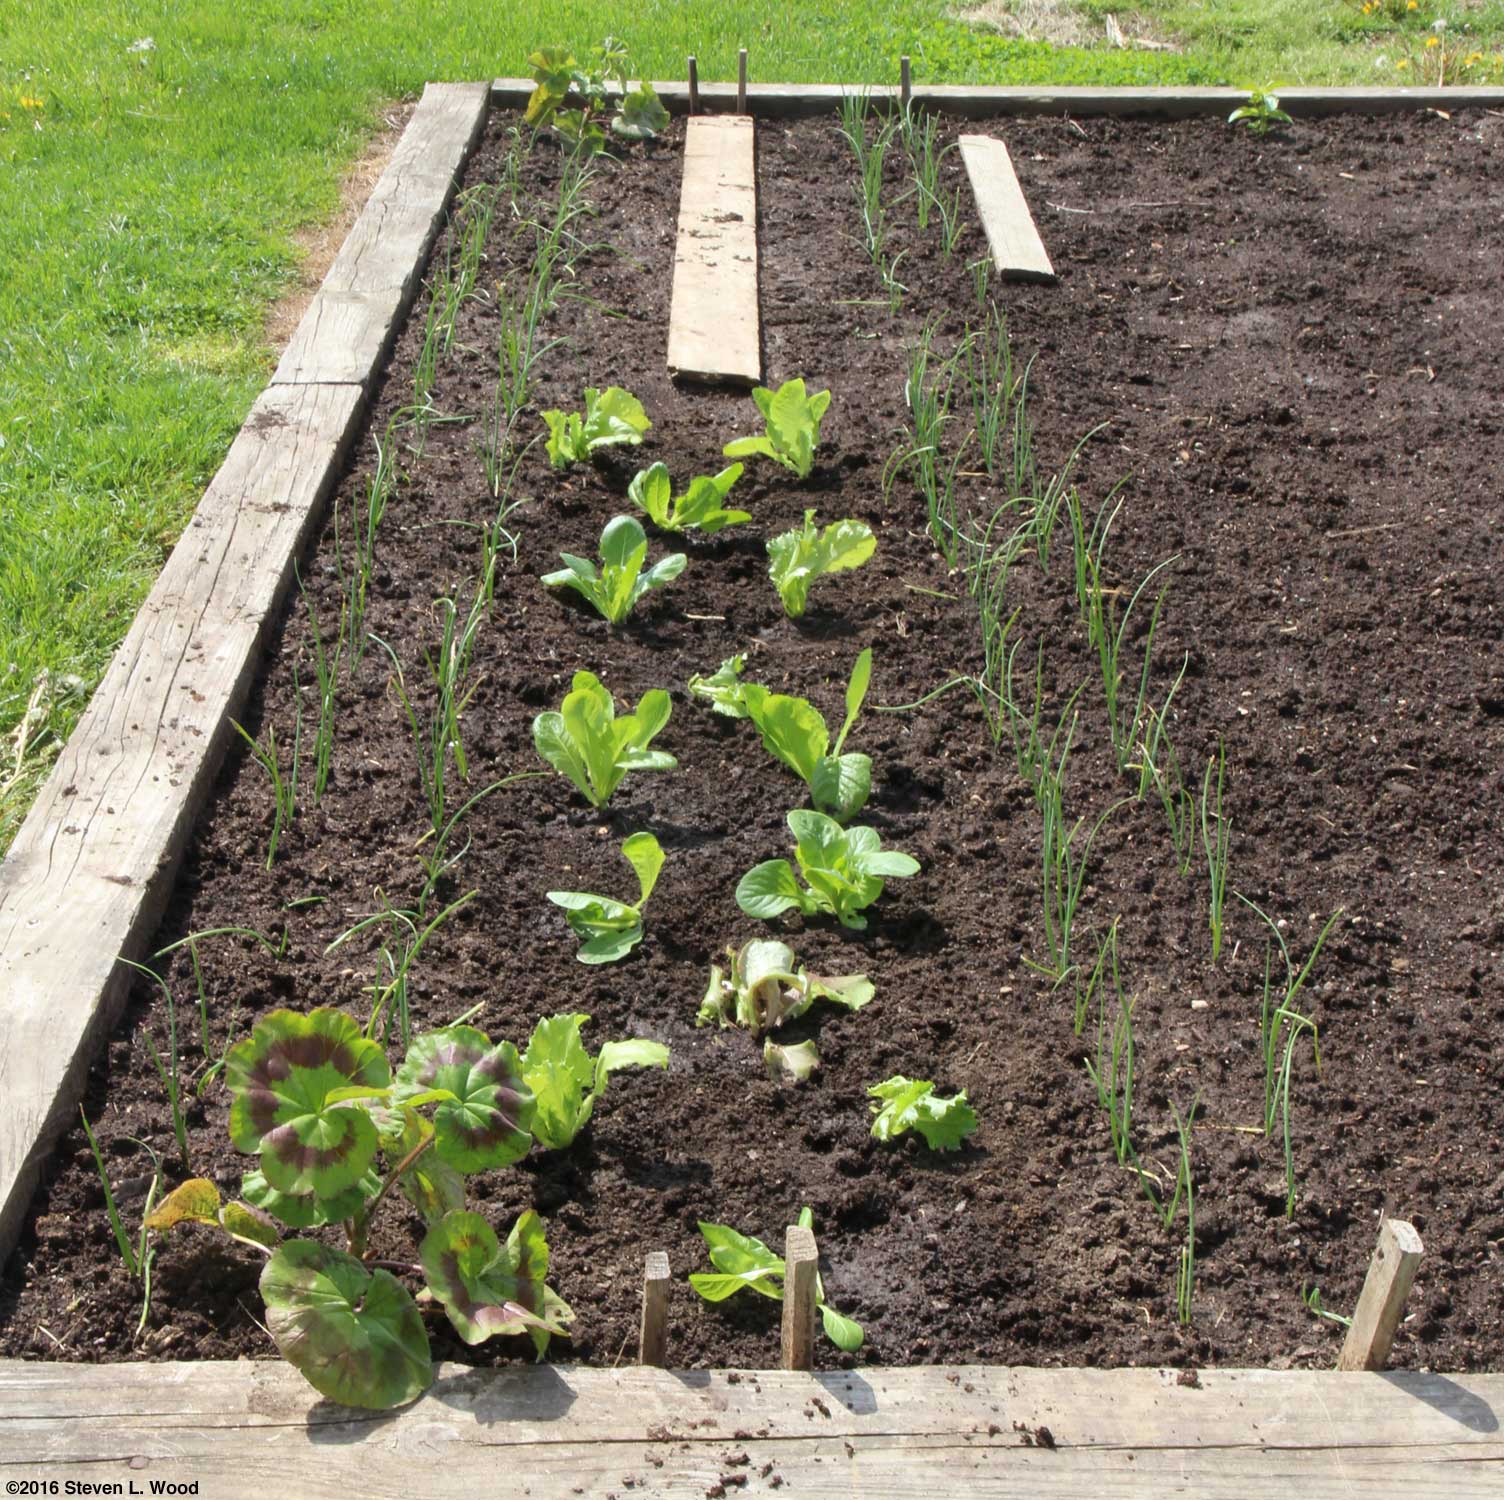
I didn't do anything unusual with the transplanting. I used our standard Quick Start and Maxicrop transplanting fertilizer. The plants did go in pretty close together, as I only allocated half of a softbed between onion rows for the lettuce. The varieties that I transplanted were: Crispino (2); Coastal Star; Defender (4); Ridgeline (2); Skyphos; Sun Devil (3); and Winter Density. I have lots of lettuce transplants remaining on the back porch. If weather conditions should be fairly cool, or if I harvest some of the lettuce early as baby lettuce, I may get to use some of the extras. But typically, our weather turns hot pretty quickly in May, ending our spring lettuce season. Playing in the Mud
Nevertheless, I put in and mulched two Quinte tomatoes and a bunch of Hungarian and Paprika Supreme peppers in one isolation plot. I surrounded the Paprika Supremes with the Hungarians in hopes that the two paprika pepper varieties may cross a bit. The Quinte tomatoes are for fresh use, canning, and seed production. In the other isolation plot, I put in all hybrids. There were Bella Rosa and Mountain Fresh tomatoes and some Red Knight and Mecate peppers. It appeared today that the deer hadn't yet found the plots, but I went ahead and sprinkled a little blood meal around each to discourage the deer. There's still space left in both isolation plots, so I'll probably fill it with parsley and basil. Today My time today was occupied with dropping the tiller off our lawn tractor and reinstalling its mower deck (after cleaning it and sharpening the blades). I did get to mow a bit, but will need to finish the yard tomorrow, as parts of our back yard were too wet to mow today.
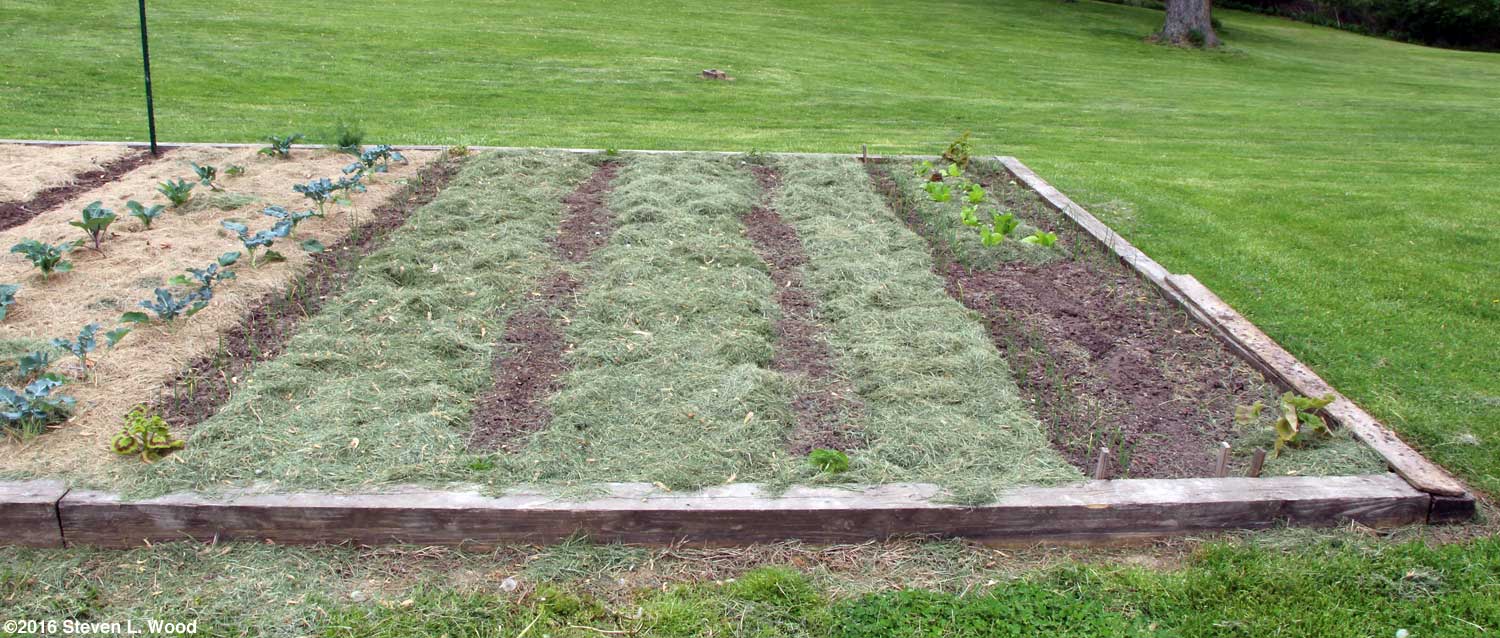
Mulching I got out early yesterday before the sun was on our main garden plot and began mulching between our rows of beans. I started at the edges of our onion rows and mulched up to the bean rows, leaving the emerging beans uncovered. I also mulched the lettuce plants I put in on Sunday. Once the onions are a little better established, I'll place mulch in between the rows of onions.
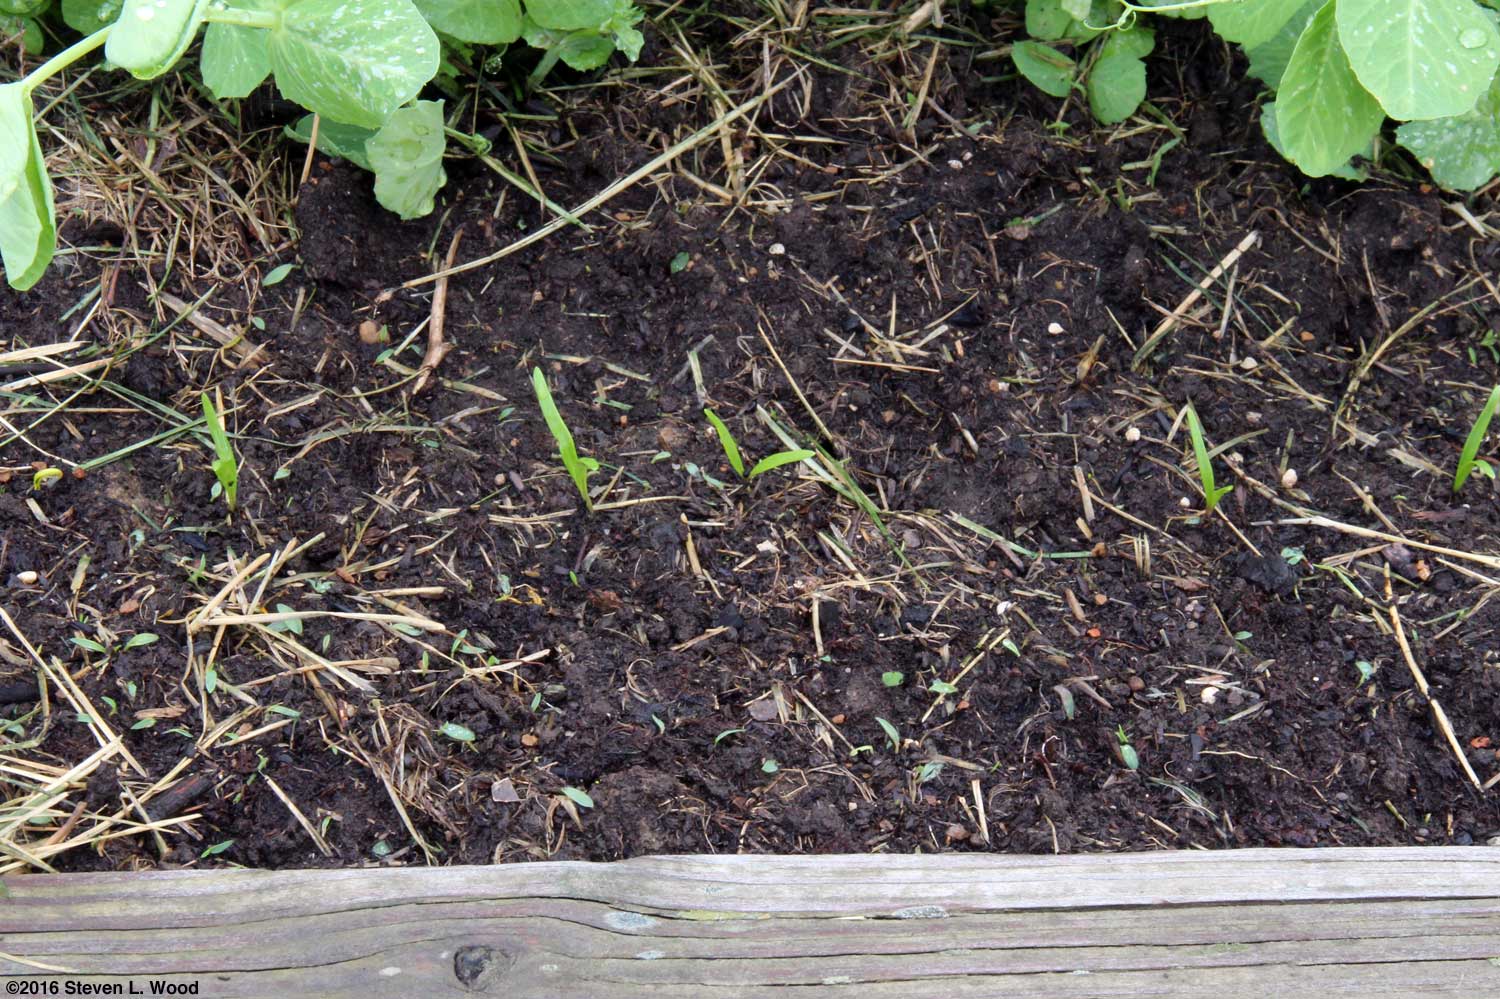
The beans, both green and kidney, are just beginning to crack the soil surface. Our row of short peas, planted the same day as the beans, is also beginning to come up. It probably will be several days before I know whether we have a good stand of the peas and beans. Mulching beans is always an iffy proposition. The mulch reduces weeding, holds in soil moisture, and keeps the mature beans cleaner. But one also has to put up with grass clippings in the picked beans. Not mulching eliminates the problem of mulch sticking to the picked beans, but you lose some beans that are low on the plants to rot. I usually choose to mulch, probably because I hate to have to hoe and weed. Our double row of carrots remains unmulched, as they're not coming up well. I may have to replant them. With the rain we had last night, I'm still hoping they'll come up. And...the Japanese Beetle larvae have been partying under the walking board I left over the carrot row, even though I'd liberally spread Milky Spore over the area. I'm guessing my bag of Milky Spore is too old and isn't effective anymore.
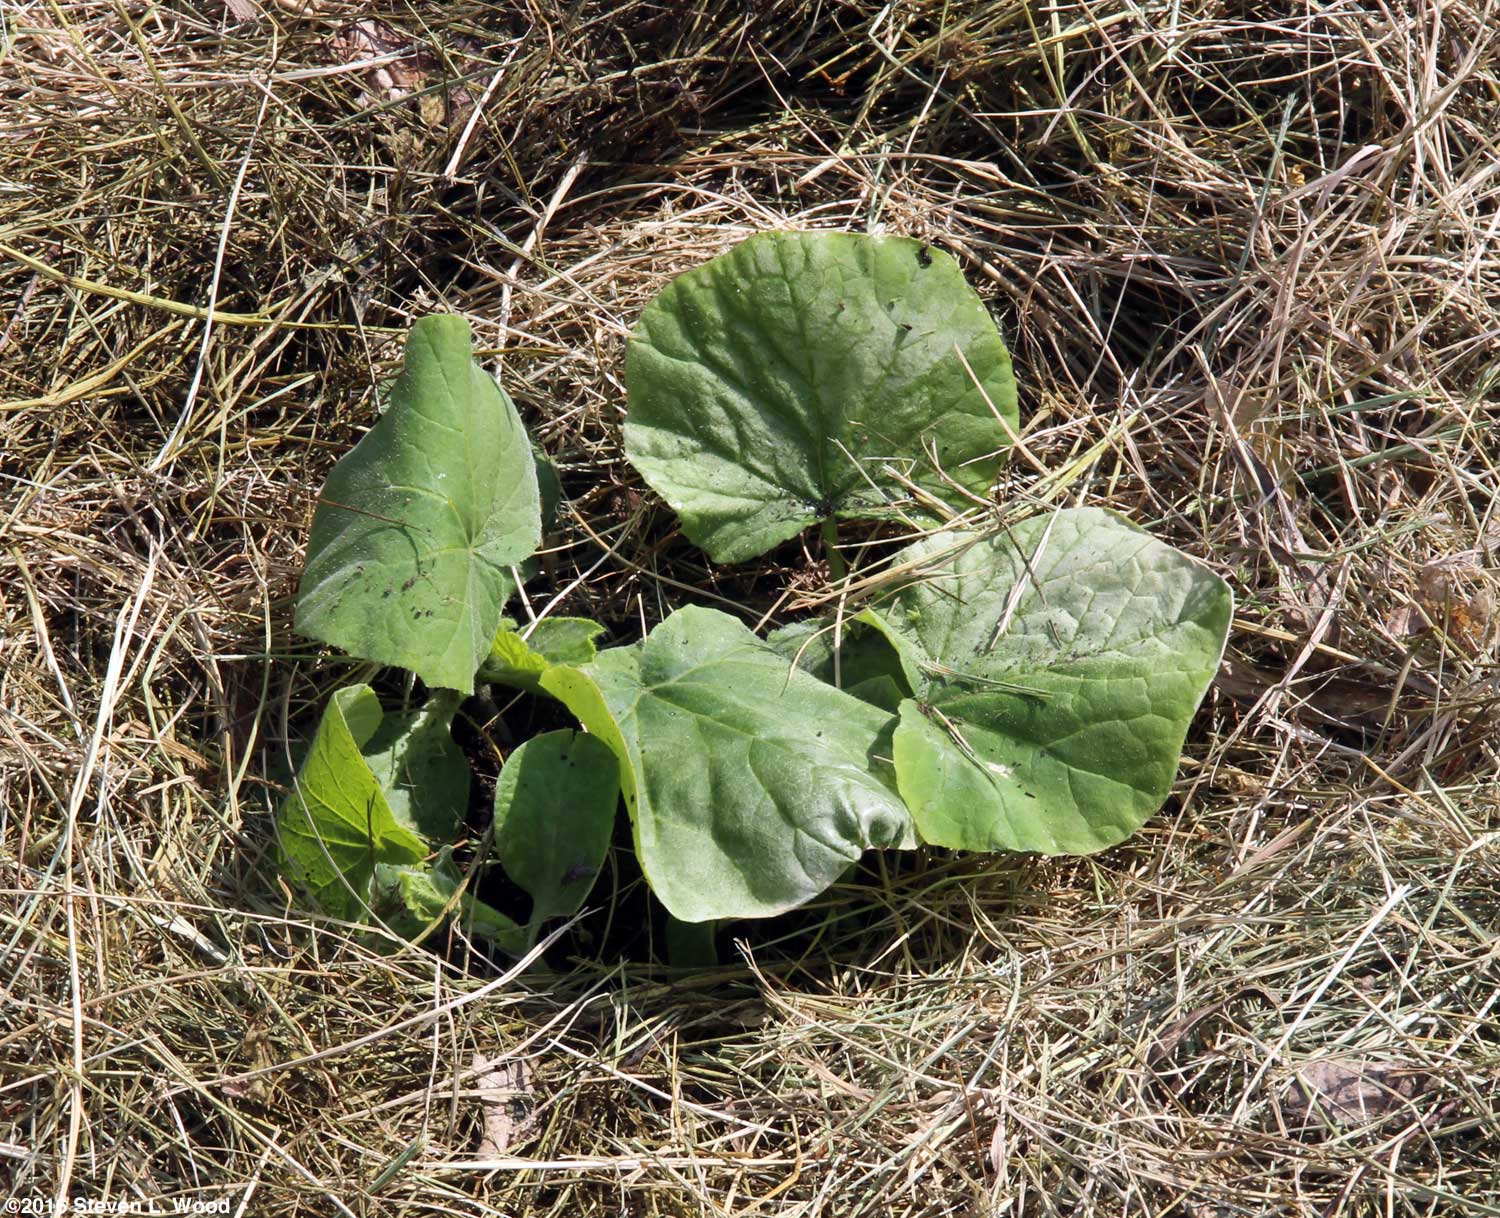
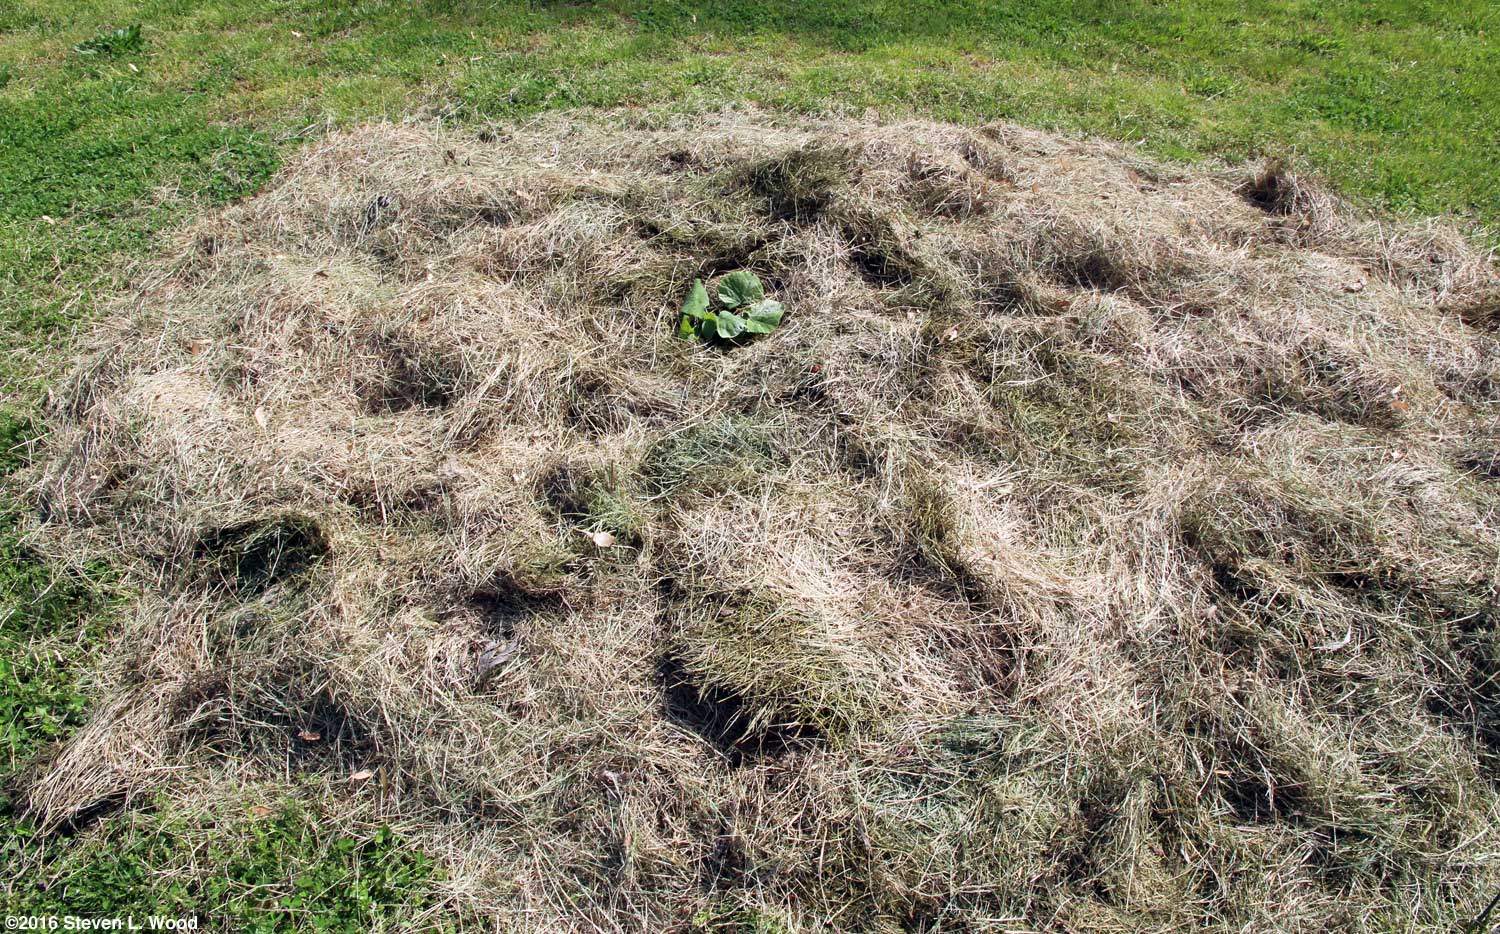
We don't use all that many butternuts. One hill will supply all we need for our Thanksgiving and Christmas mock sweet potato butternut yams and the few times we have baked butternut squash. I rarely have any trouble finding takers for our extra butternuts. Barn Isolation Plot Planted
Weather
I moved the last of our melon transplants under the cold frame yesterday afternoon. They actually went under it, as I closed the cold frame in case we had heavy rain or even hail (as areas north of us got). That puts us at least a week away from transplanting melons, as I'd like them to have that long to toughen up their stems. Another planting that should benefit from this weather is the clover and alfalfa in the resting half of our East Garden. We didn't get a complete stand of the legumes, but enough that they should benefit the soil when turned under next spring. The sage corner and halfway marker plants I put in a week ago appear to be getting established. Of course, they're growing in almost pure compost, so they should be doing well.
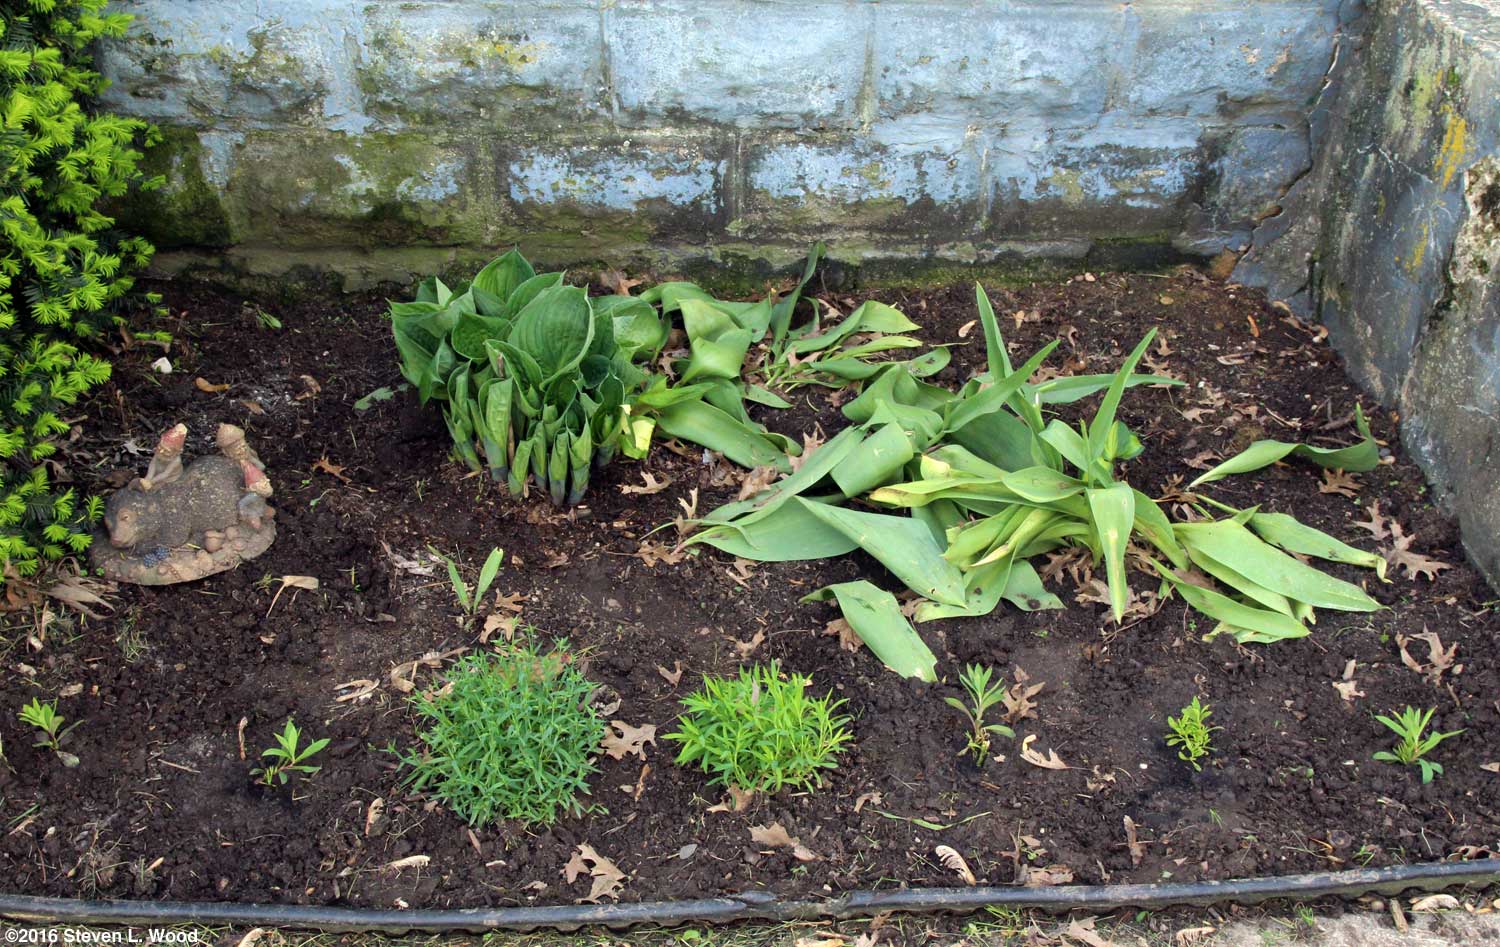
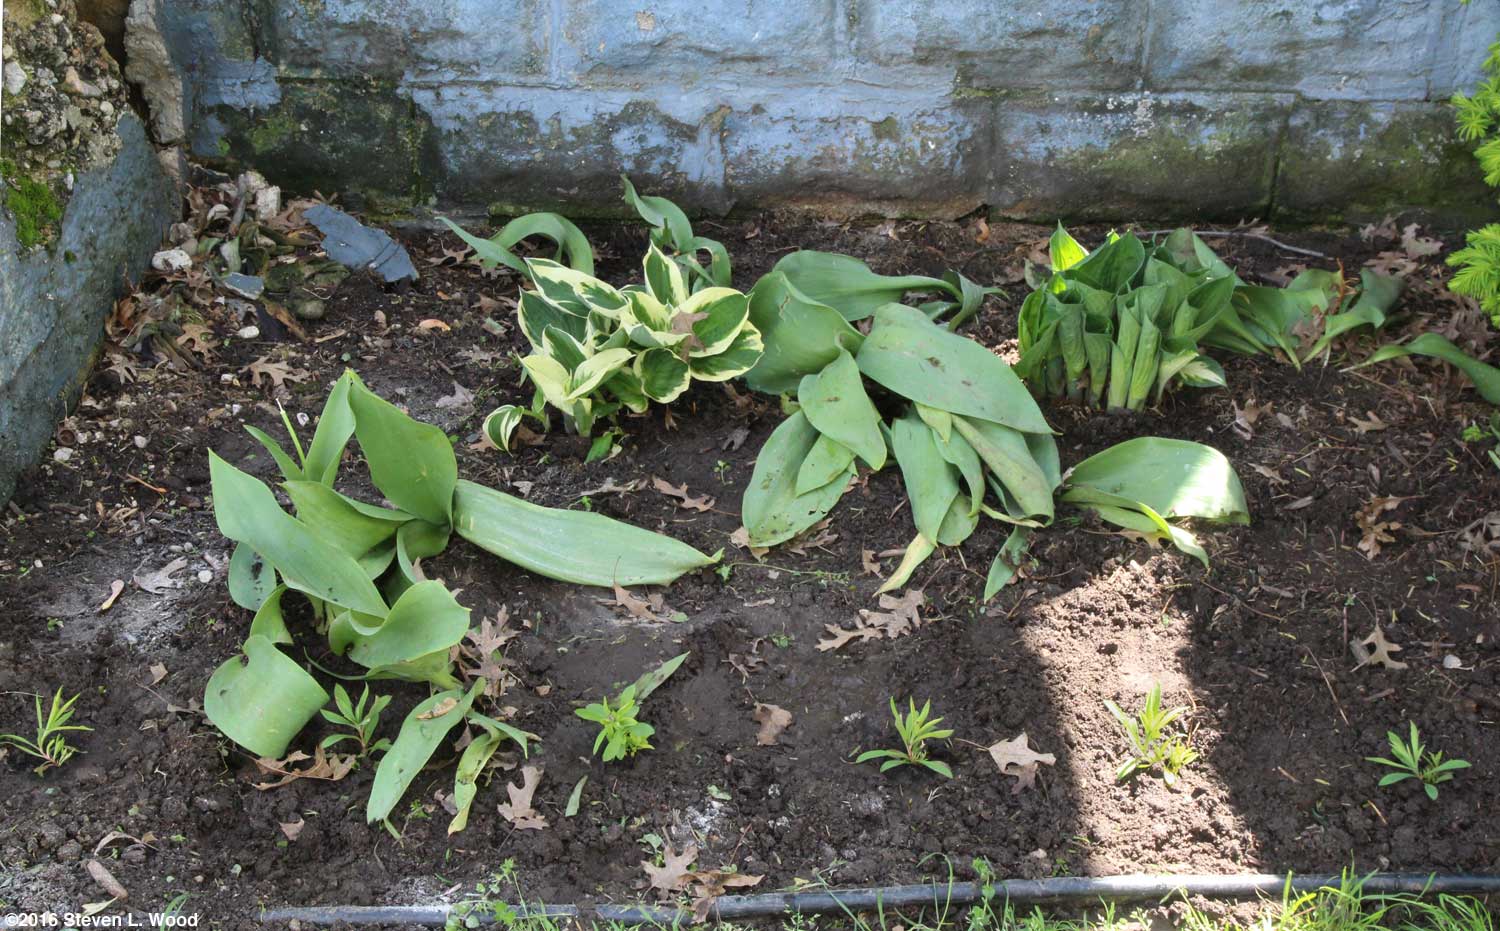
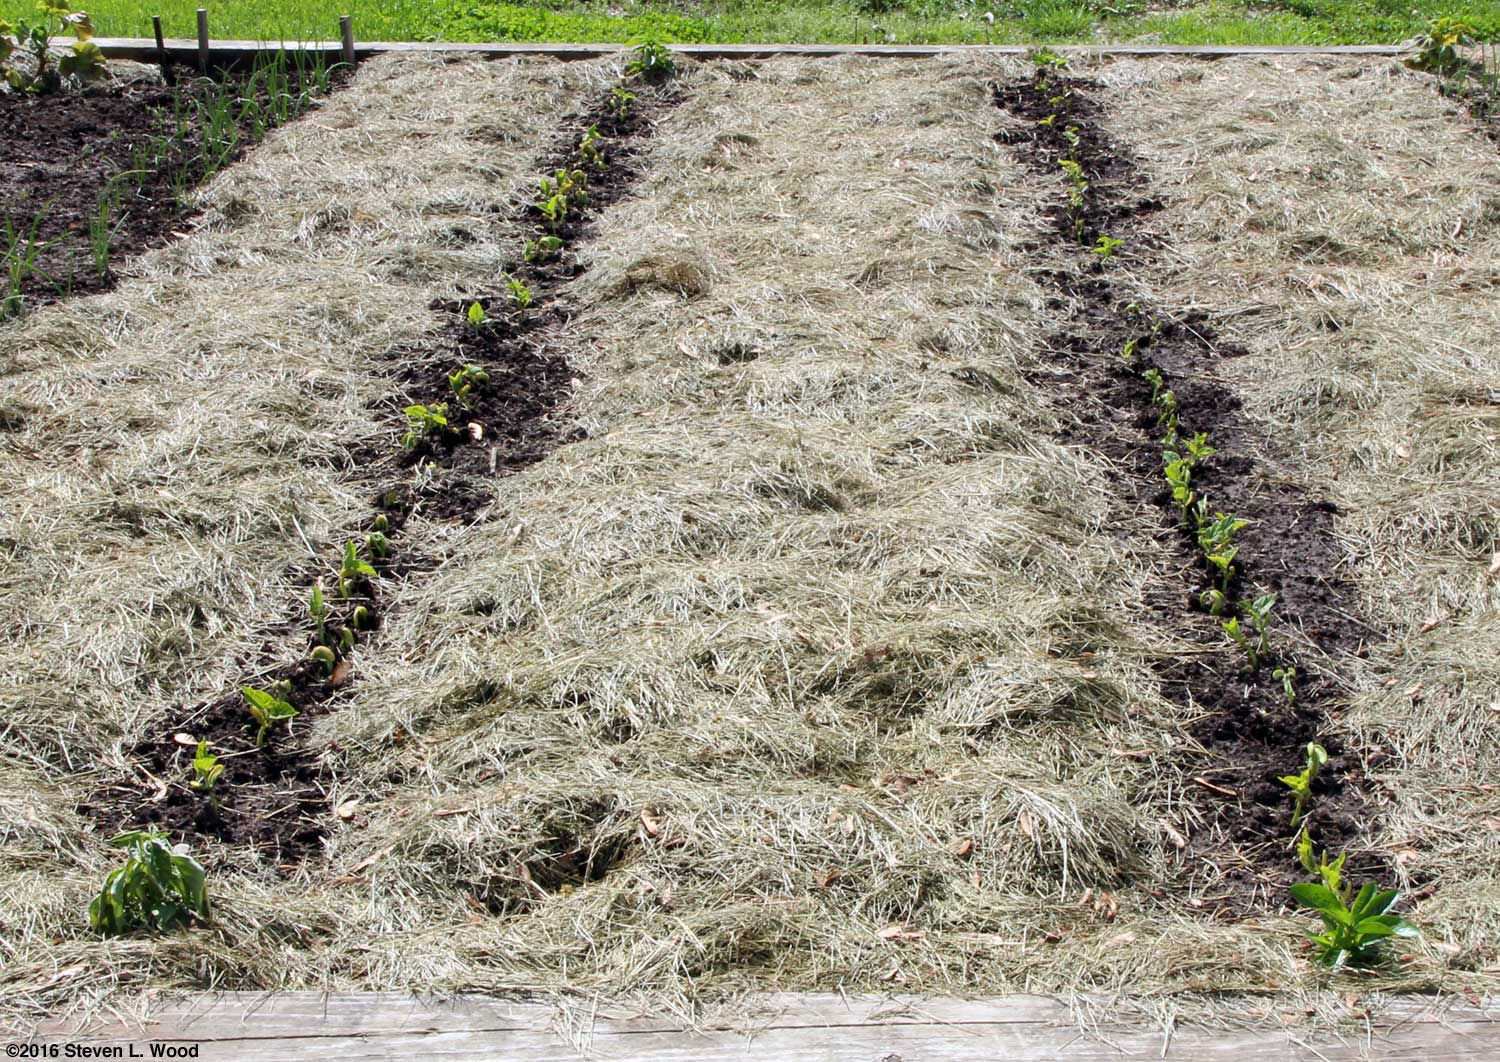
I didn't have much to plant into the beds today. We've had a line of dianthus along the front edge of the flowerbeds for years. Two of the biennial/almost perennial plants remained in one bed. Moles (and dogs digging for them) had taken out all the dianthus in the other bed. Fortunately, I had a nice bunch of dianthus transplants to put into the bed. Half of them were from saved seed with the rest being from a commercial packet of the Carpet Snowfire variety. Our saved seed is from the Carpet series, although most of the plants we grow from that seed have reverted to solid reds and pinks instead of their original bicolor flowers. In the past, we've filled in the beds with impatiens, dusty miller, and alyssum. Our impatiens haven't germinated yet, although we have some alyssum doing pretty well. With the hostas taking hold and covering more space, just the alyssum may be enough to attractively fill the bed. Beans Up It wasn't too wet out to take a picture of our rows of kidney and green beans. The rain really popped them up.
I marked our row of kidney beans with dwarf basil plants at either end. The closer plant above left looks like it isn't going to make it. The green bean row on the right got vinca as row markers. Asparagus
We should be able to pick for another two weeks or so. Then we'll weed the patches as best we can before giving them a good layer of compost. Using compost as our primary fertilizer on the patches, especially our raised bed of it, produces some interesting seedling weeds. Since our compost pile doesn't always heat up enough to kill all the seeds in it, we often pick tomato, squash, and melon seedlings out of the patches. Our raised bed of asparagus came from seed I started years ago, so it's not all male (preferred for maximum production of spears). Bonnie's Asparagus Patch appears to have originally been from all male roots, although I've spread seed across it a few times, resulting in a few female plants in that patch. The raised bed for the asparagus served as a prototype for our other two narrow raised beds. Since I put in the landscape timbers a couple of years after starting the asparagus patch, I made the bed wider than one would normally want a raised bed (four feet wide - interior measurement) to avoid damaging the existing asparagus roots. I still nicked some of them, setting the patch back a year or so from full production. But building that bed told me I wanted our later raised beds no wider than a three foot interior width so one can reach well into the beds from the sides. Friday, April 29, 2016 - pH Woes I've not been terribly happy with the growth of some of the transplants we've started lately. When our second round of egg carton petunias on the windowsill began to bleach out, I started looking for answers. My first try was fertilizer, which only seemed to make things worse. I'm also guessing that the whitening of some leaves on our butternut transplants was from the same cause.
Sphagnum peat moss has a pretty low soil pH. When using it, one needs to compensate by adding ground limestone to raise the soil pH to a level of 6.5-7.0. And with all the extra peat moss I was using, I hadn't increased the amount of lime added to the mix enough to neutralize the peat's acidity. Last night I tested what was left of our sterile starting mix with our pH meter. Fortunately, I didn't have to break out our ancient chemical soil test kit. The starting mix tested at 5.7 pH! So, when I mixed more starter mix to sterilize, I added a lot more ground limestone to it. An initial test of the mix was disappointing, the pH coming in at a still low 6.0. After sterilizing it and letting it sit and cool overnight, the mix tested at a more usable and nearly ideal 6.8. I'll need to keep testing, though, as ground limestone takes some time to sweeten soil, and it may not have all reacted yet. I don't want to go too far with the soil sweetening. The egg carton petunias got moved to fourpack inserts this week. Trying to save them, I made up a limewater solution and bottom watered them. The butternuts are already in the ground with a bit of lime mixed into the soil around them. I may go back and add a bit more lime to the soil surface. Gloxinias
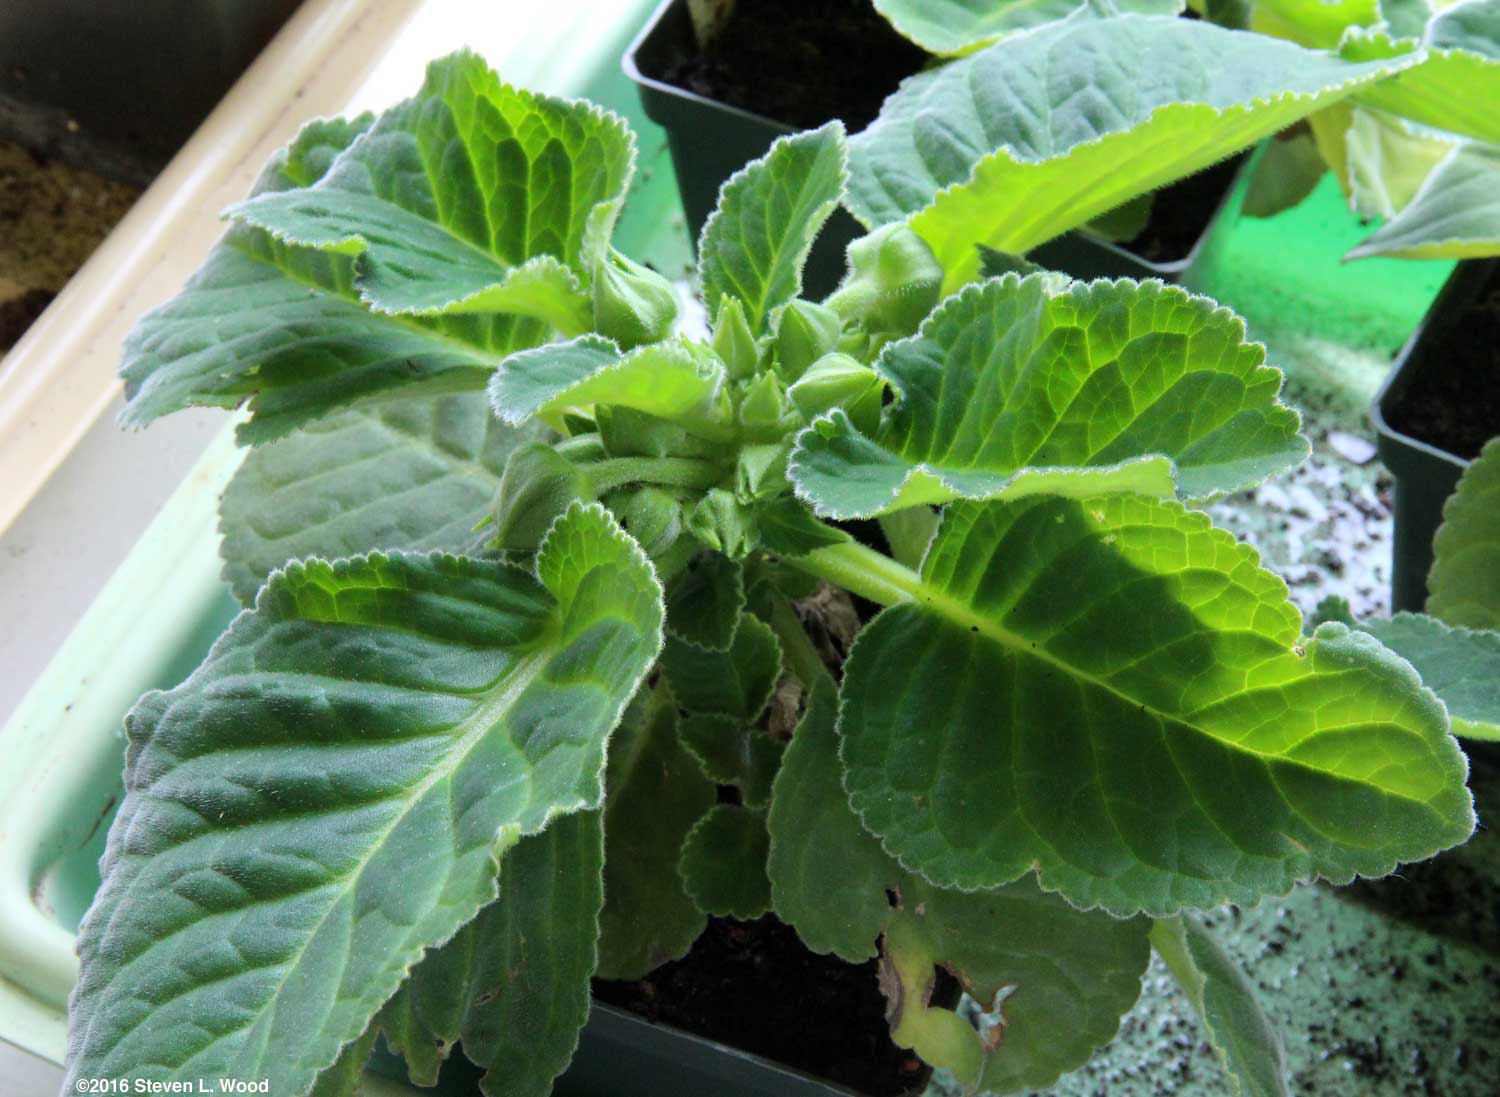
I've been checking our dormant plants about once a month and repotting those plants that show signs of new growth (in regular Miracle-Gro Potting Mix with an appropriate soil pH). I potted up eight such plants last evening. When I took them to the sunroom where I'm currently putting our gloxinias, I was pleased to see several plants with lots of buds on them. It's shouldn't be long before we have gloxinias in bloom once again. To make sure we have gloxinias in bloom next winter, I'll need to seed some more in June. But first, I'll have to give away some plants, as we have way too many plants to fit under our plant lights. And while the sunroom has actually proved to be a better growing environment for our gloxinias of late than under plant lights, the mostly unheated room gets way too cold in the winter. Tech Support I spent an hour or so this morning trading emails with a special educator in North Carolina and rummaging through some old, old computer files I'd created years ago. The teacher needed passwords to shareware files she'd purchased long ago and also was hoping I had finished a set of computer worksheets on long division. (Sadly, I hadn't.)
The MATH DITTOS 2 series of math worksheets is a fact supported approach to teaching computation. Each page in the series presents a limited number of problems with plenty of workspace. The facts necessary to complete each problem are always presented on the page in a fact reference and practice section. The series was developed when I was teaching students with special needs. Pleasantly, it also turned out to be useful for some regular education students as well, although the method takes a good deal longer than traditional methods of teaching computation. But for students who struggled to learn basic facts, the pages were magic.
I was finally able to send the teacher some templates for the unfinished division worksheets. I had done that workbook sorta backwards based on my students' needs. I'd completed a lot of pages with two and three digit divisors, but had done almost nothing with one digit divisor problems. I've been retired from teaching for twelve years, but I've kept up the domain registration and site for mathdittos2.com. I released the series as freewares several years ago, and wonder of wonders, some folks still find it useful. So if you have a child or grandchild who just can't seem to learn basic math facts, you might try some of the pages. They're free. Just don't ask for tech support! Wet It's still wet outside, and it's probably going to get a lot wetter soon. It appears that we won't get any rain today, but thunderstorms are forecast for both Saturday and Sunday. With it too wet to mow today, there should be plenty of grass clippings to rake up for mulch when it finally does dry out enough to mow. Saturday, April 30, 2016 - April Wrap-up
All of the rain we've had recently has made our lawn a deep green and our garden plots look healthy. We're at 3.71 inches of rain so far for April, with possibly up to another inch coming today. All in all, that's not a bad start to our gardening season. Saving the best news till last, our tenth grandchild, Nora Josephine, was born to our daughter, Julia, and her husband, Austin on April 25. All are doing well. Annie will soon be making the trip to Baton Rouge to help out. I get to stay home and tend the house, dogs, cats, and garden. While no one told me, I'm guessing fellow granddad and Austin's father, Gene, took the photos at right. Political Commentary I guess it had to eventually be our turn. It's tough to watch any local TV stations because of all of the negative political ads being aired. Our Indiana primary election is on Tuesday, and this time around, the nominees aren't already decided as they usually are most presidential primary years. I'm guessing if "none of the above" were an alternative (at least on one side), it might win in a landslide. That's about as close as I'll let politics get to Senior Gardening. I previously wrote a highly politicized blog, Educators' News, for years. One of my true joys of retirement is being able to dodge that stuff, at least on my current web site. Here, we're not Republican, Democrat, or Independent. We're all just gardeners doing our thing. Contact Steve Wood, the at Senior Gardening |
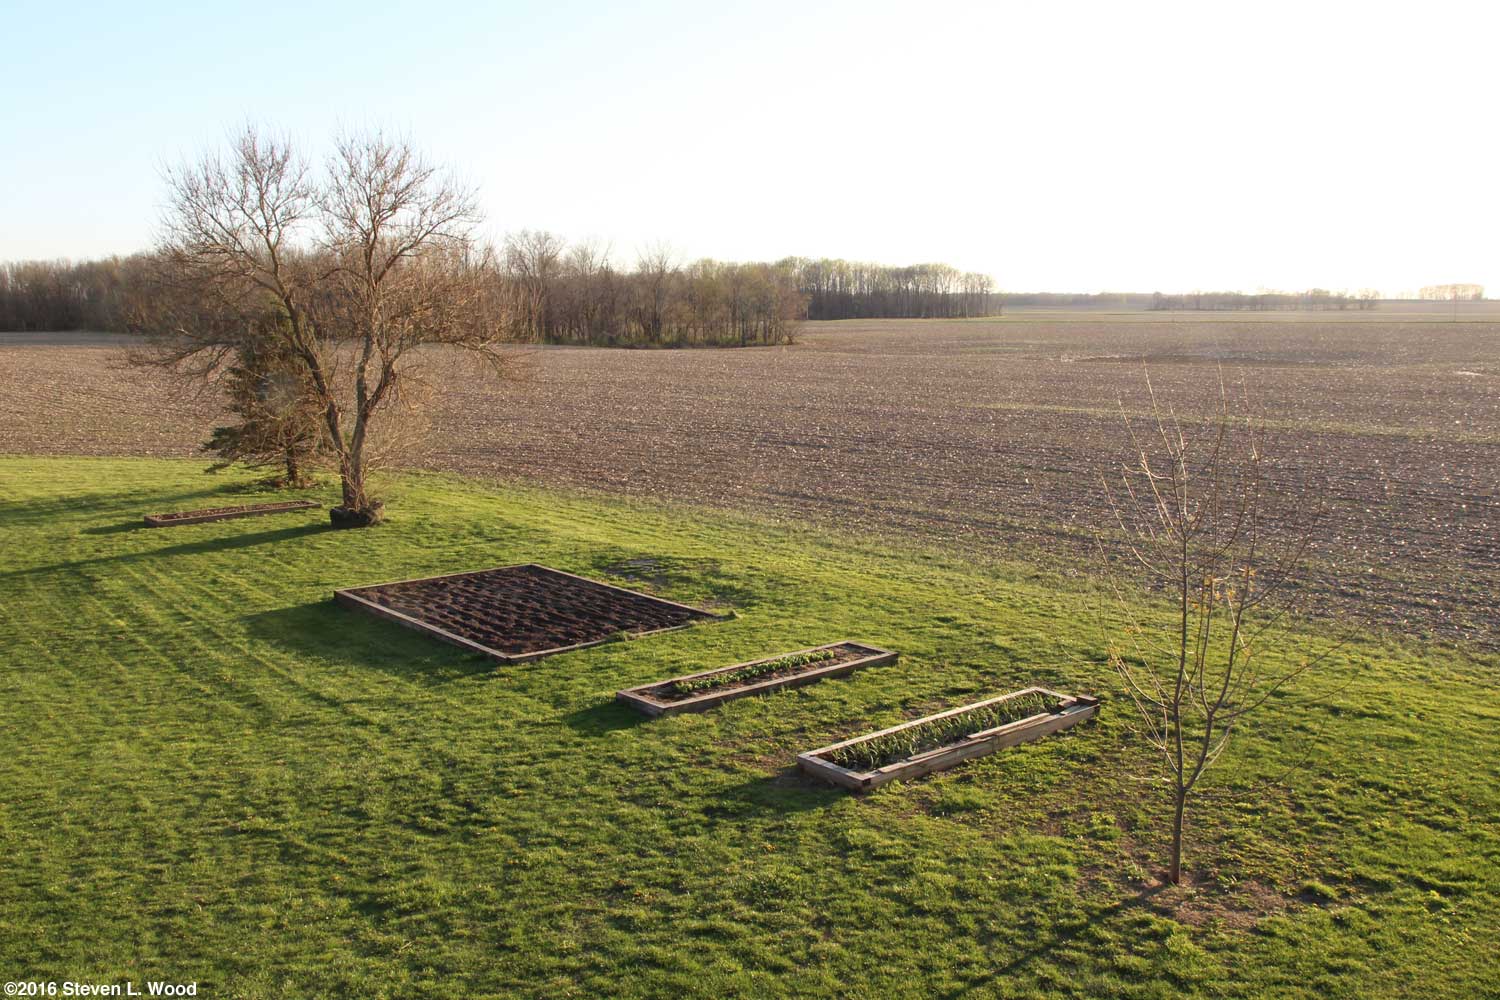

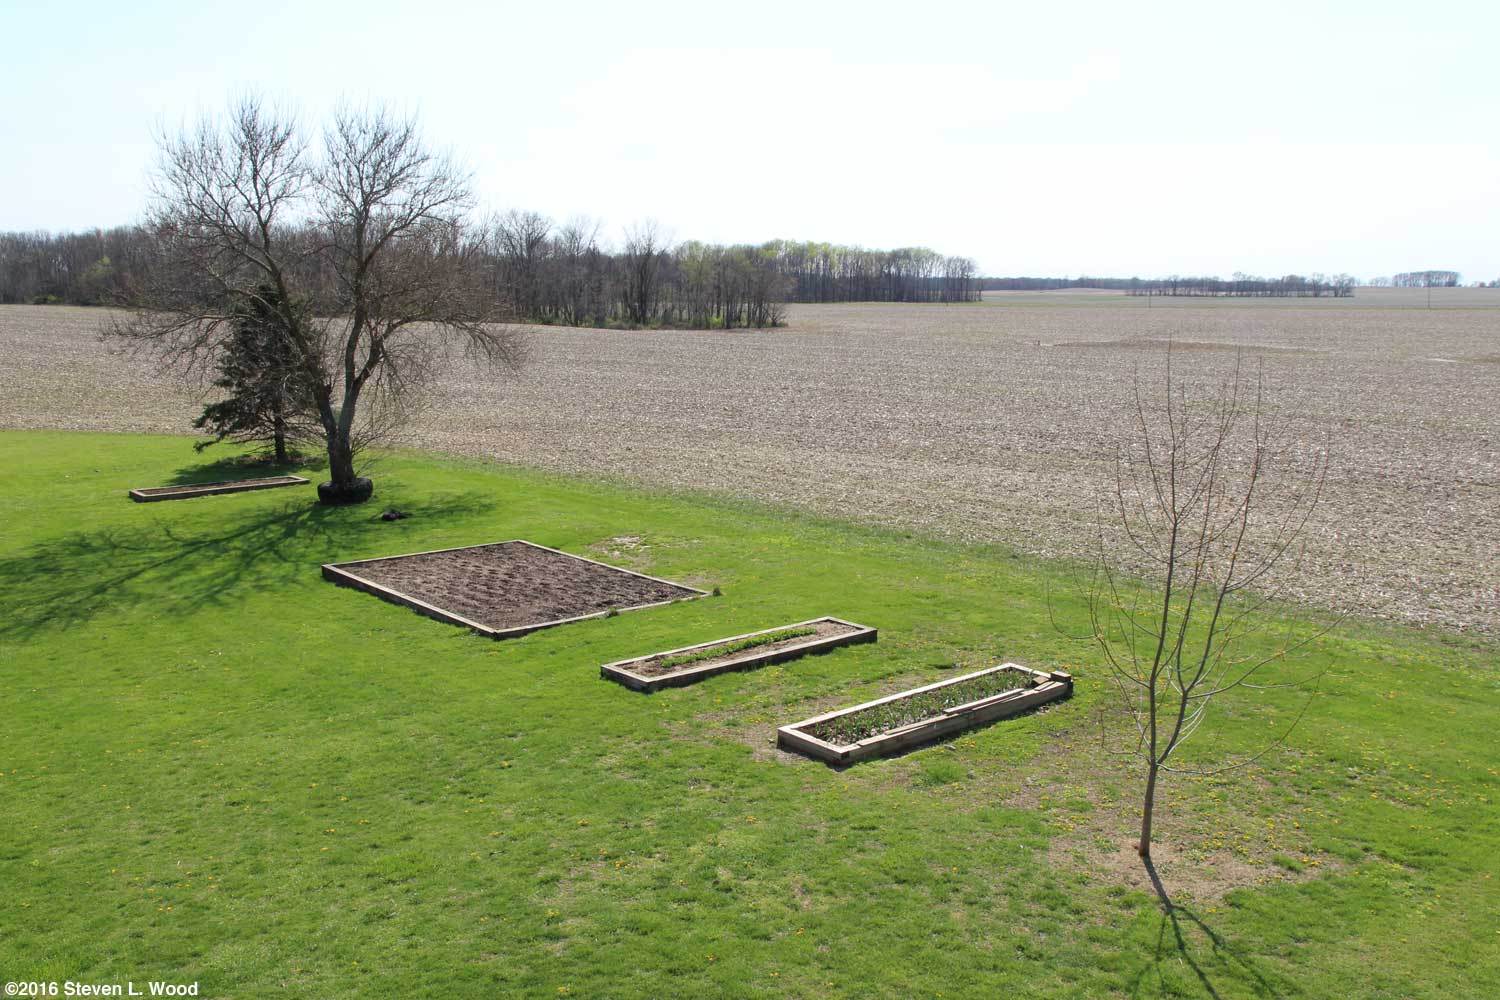


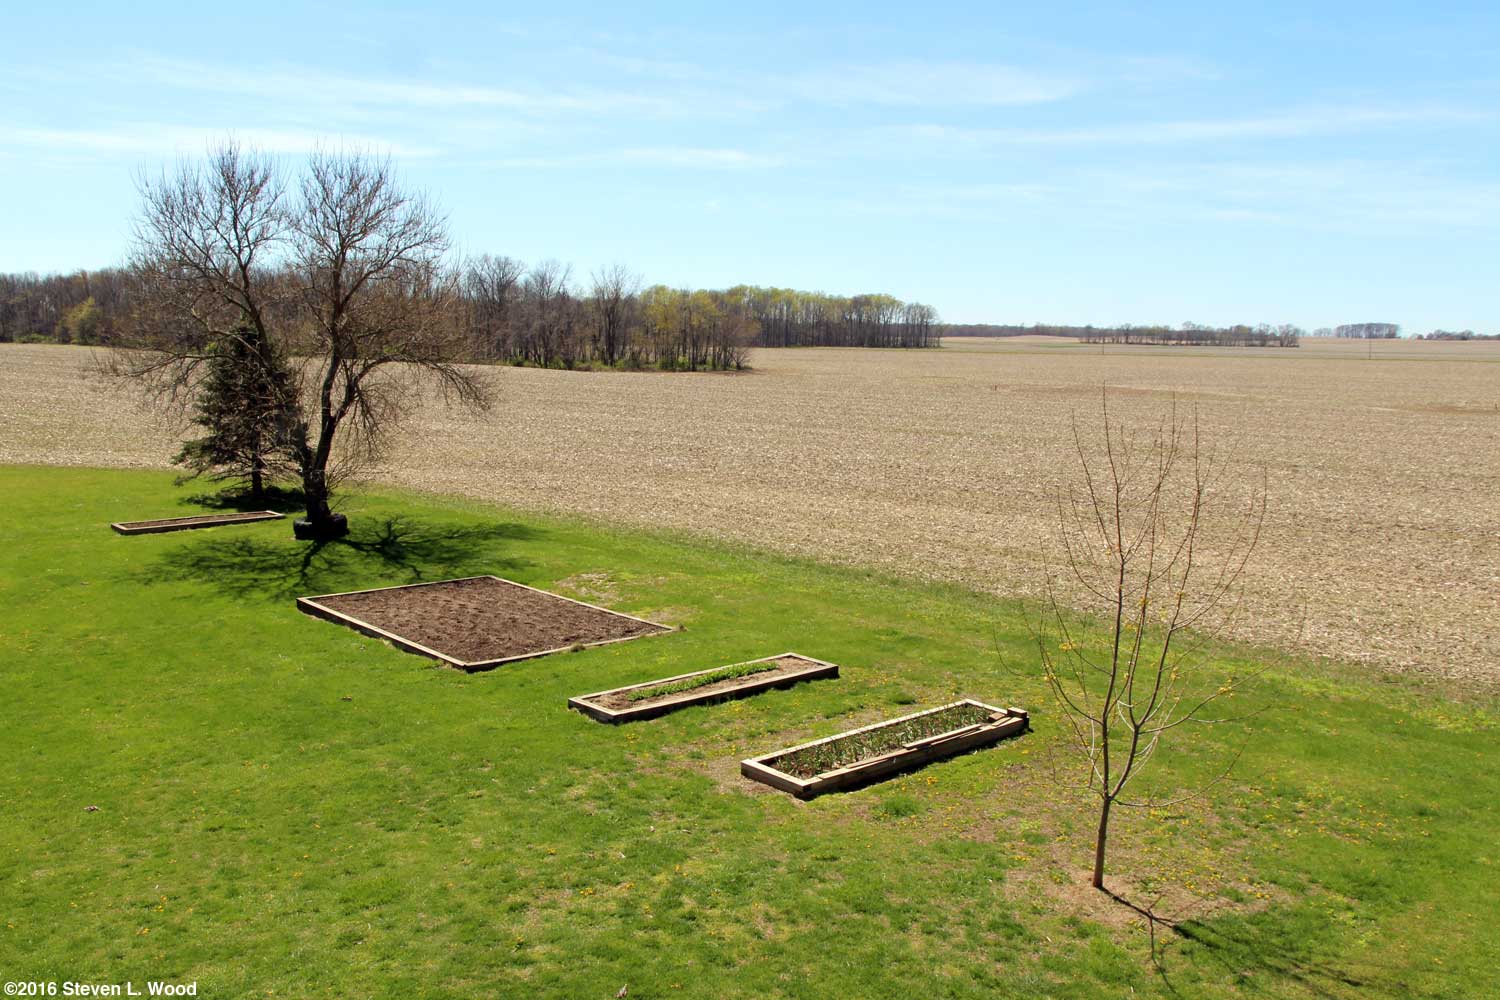


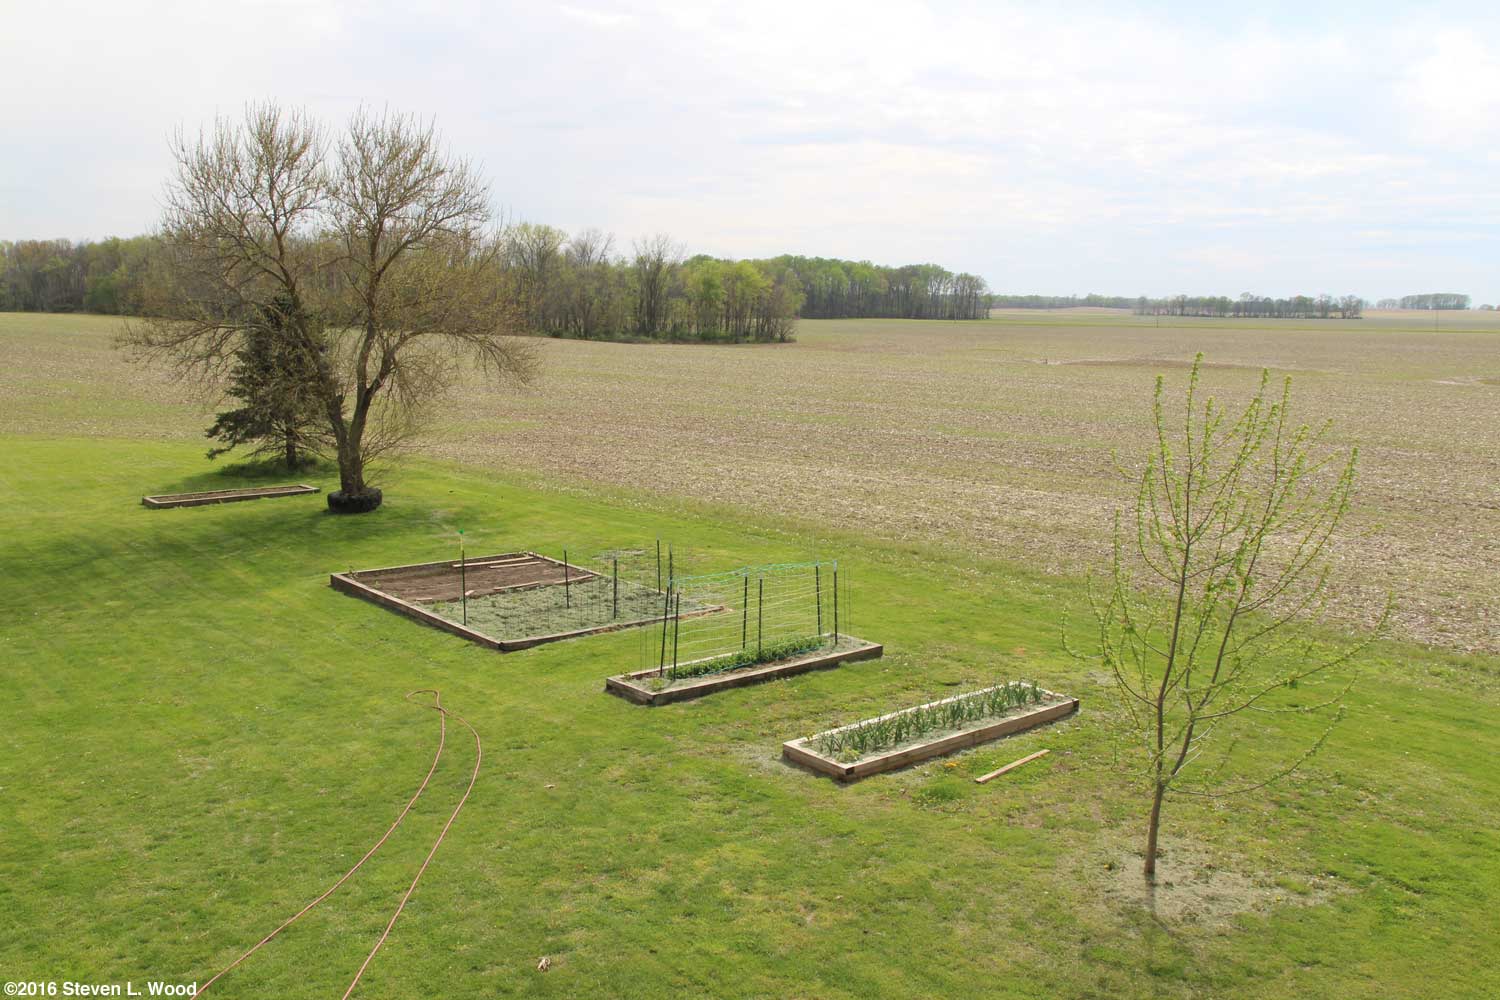


 My usual goals for April are to get our raised beds planted and mulched and our large East Garden tilled. We did all that this April, along with planting a couple of isolation plots. To top off a good start to planting, we've been feasting on asparagus for several weeks.
 | Affiliated Advertisers |
©2016 Senior-Gardening.com